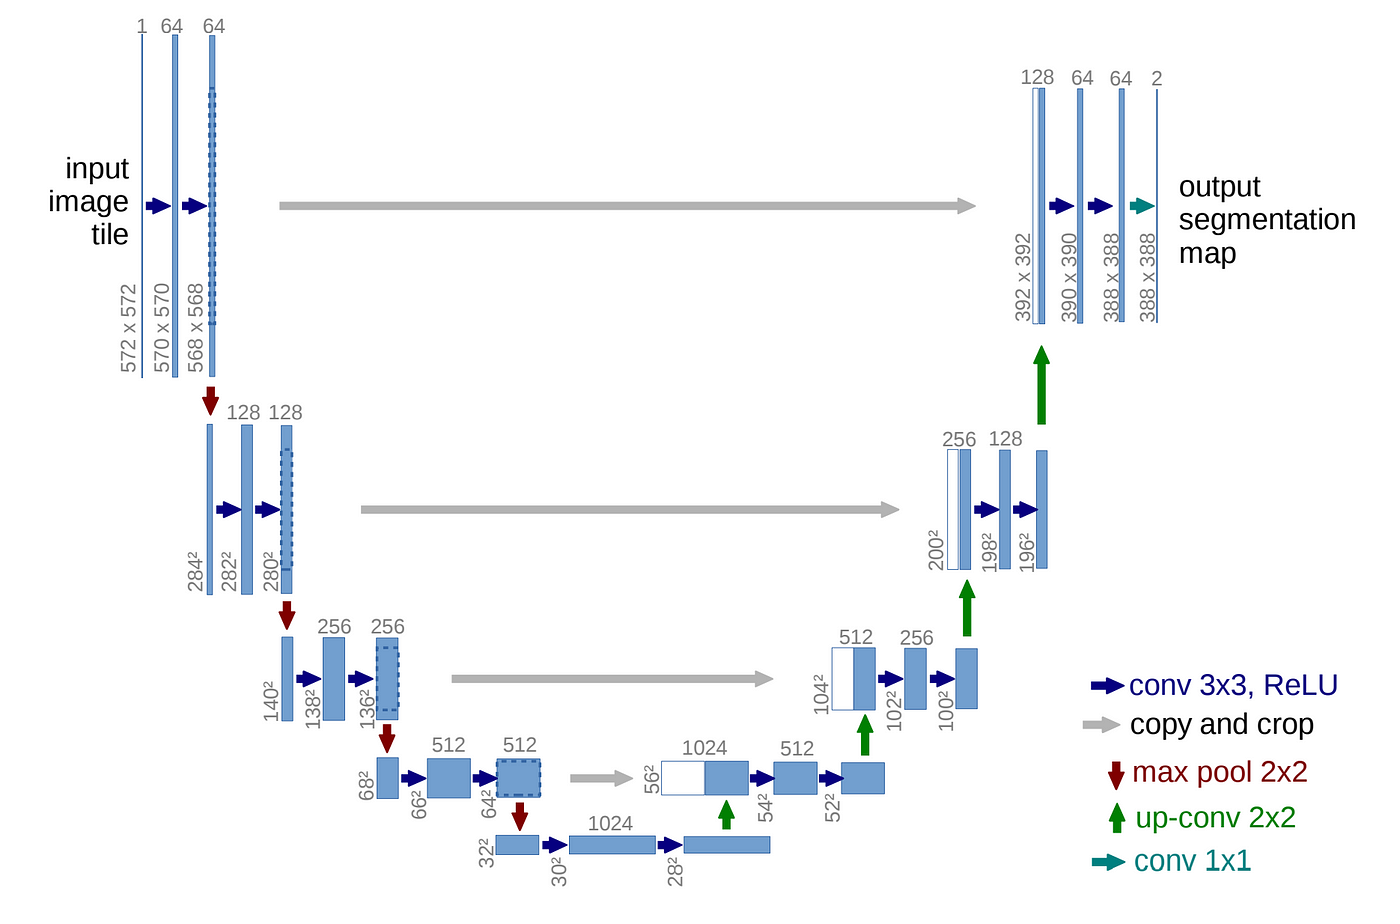
This repository contains an implementation of the U-Net architecture.
To set up the development environment and configure the sys.path:
-
Run the
init_dev_env.shscript:$ source init_dev_env.shThis script will create an IPython startup file that adds the project directory to
sys.path, allowing you to import modules from this project in Jupyter Notebook.The
init_dev_env.shscript includes a command to install PyTorch with CUDA 11.7 support:$ pip3 install torch torchvision torchaudio --index-url https://download.pytorch.org/whl/cu117This command installs PyTorch with CUDA 11.7 support, which is optimized for GPU acceleration.
Note: If your CUDA version is different from 11.7, you should modify this command in the
init_dev_env.shscript to match your CUDA version. You can find the appropriate command for your CUDA version on the official PyTorch website: https://pytorch.org/get-started/locally/ -
Restart Jupyter Notebook for the changes to take effect.
For usage examples and demonstrations of the UNet implementation, please refer to the unet-example.ipynb notebook in this repository.
The UNet implementation used in this project is based on the code shared in the following article:
We appreciate the author's contribution to the community by sharing their implementation.
Below is a visual representation of the UNet architecture:
This diagram illustrates the characteristic U-shaped structure of the UNet, showing the contracting path (left side), bottleneck (middle), and expansive path (right side). The skip connections between the contracting and expansive paths are also clearly visible.
