Welcome to the Muse Banking Application project! This application is designed to guide users through their financial journey with inspiration, wisdom, and harmony. Our goal is to provide a seamless and insightful banking experience that helps users manage their finances efficiently and effectively.
- Muse Backend
- Personalized Recommendations: Receive tailored advice based on your financial behavior and goals.
- Educational Resources: Access articles, tips, and tutorials to enhance your financial literacy.
- Intuitive Dashboard: Easily navigate through your financial information with a clean and simple interface.
- Easy Transactions: Perform transactions quickly and securely with a user-friendly design.
- Spending Analysis: Understand your spending patterns with detailed reports and visualizations.
- Goal Tracking: Set financial goals and track your progress with clear metrics.
- Robust Security Measures: Protect your financial data with advanced encryption and security protocols.
- Reliable Performance: Enjoy a smooth and dependable banking experience with minimal downtime.
- JWT Authentication: Implement secure user login and registration flows using JSON Web Tokens (JWT).
- Spring Boot Rest API: Leverage Spring Boot with Spring Security to build a secure and efficient RESTful API.
- Spring Security Configuration: Configure Spring Security to integrate seamlessly with JWT for authentication and authorization.
- Data Models & Associations: Define and manage data models and associations effectively for secure authentication and authorization.
- Database Interaction: Utilize Spring Data JPA for smooth and efficient interaction with PostgreSQL.
- API Documentation: Explore and interact with the API through Swagger UI.
- Health Check & Metrics: Monitor the application’s health and performance with Spring Boot Actuator
- Logging & Exception Handling: Implement logging and exception handling to ensure smooth operation and error tracking.
Inspired by the Greek Muses, goddesses of inspiration and wisdom, Muse represents our commitment to providing guidance and insight. Just as the Muses inspire creativity and knowledge, Muse aims to be a source of financial inspiration, helping users make informed decisions and achieve their financial goals.
- Java 8 or higher (The project is built with Java 11)
- Maven 3.6.0 or higher
- PostgreSQL
- IDE (VsCode, IntelliJ IDEA, Eclipse, etc.)
- Postman (optional) for testing the API endpoints. (Swagger UI is available at
localhost:8080/) - Git
- Clone the repository:
git clone <repository-url>- Create a PostgreSQL with Docker:
docker run --name muse -e POSTGRES_USER=muse -e POSTGRES_PASSWORD=muse -e POSTGRES_DB=muse -p 5432:5432 -d postgres- If the database not created, you can create it manually:
docker exec -it muse psql -U muse -d muse-- First, create the database
CREATE DATABASE muse;
-- Control the database created or not with \l or \list command
\ldocker-compose up -d- Install the dependencies:
mvn clean install- Open the project in your IDE.
- Configure the database connection in
application.properties. - Run the application with Maven:
mvn spring-boot:run- Access the API endpoints using Postman or any other REST client.
- Start developing!
- For more detailed instructions, refer to the Development Workflow document.
If you're interested in contributing or learning more about the Muse codebase please refer to the architecture document first for a high level overview of how the application is put together.
The database schema is defined in the DB_SCHEMA.md file.
In the Muse project, we follow a structured development workflow to ensure efficient collaboration and code management. This workflow includes the following key components: branching strategy, versioning, and commit message conventions. By following these guidelines, we aim to maintain a clean and organized codebase that is easy to manage and contribute to. For more information, please refer to the Development Workflow document.
The Postman collection for the Muse project can be found in the postman directory. It includes a set of API requests that can be used to interact with the application. You can import the collection into Postman by following these steps:
- Open Postman
- Click on the "Import" button in the top left corner
- Drag and drop the
Muse.postman_collection.jsonfile into the import window - The collection will be imported into Postman, and you can start using the API requests to interact with the application
-
Swagger UI is available at
localhost:8080/ -
You can access the Swagger UI by opening the following URL in your browser:
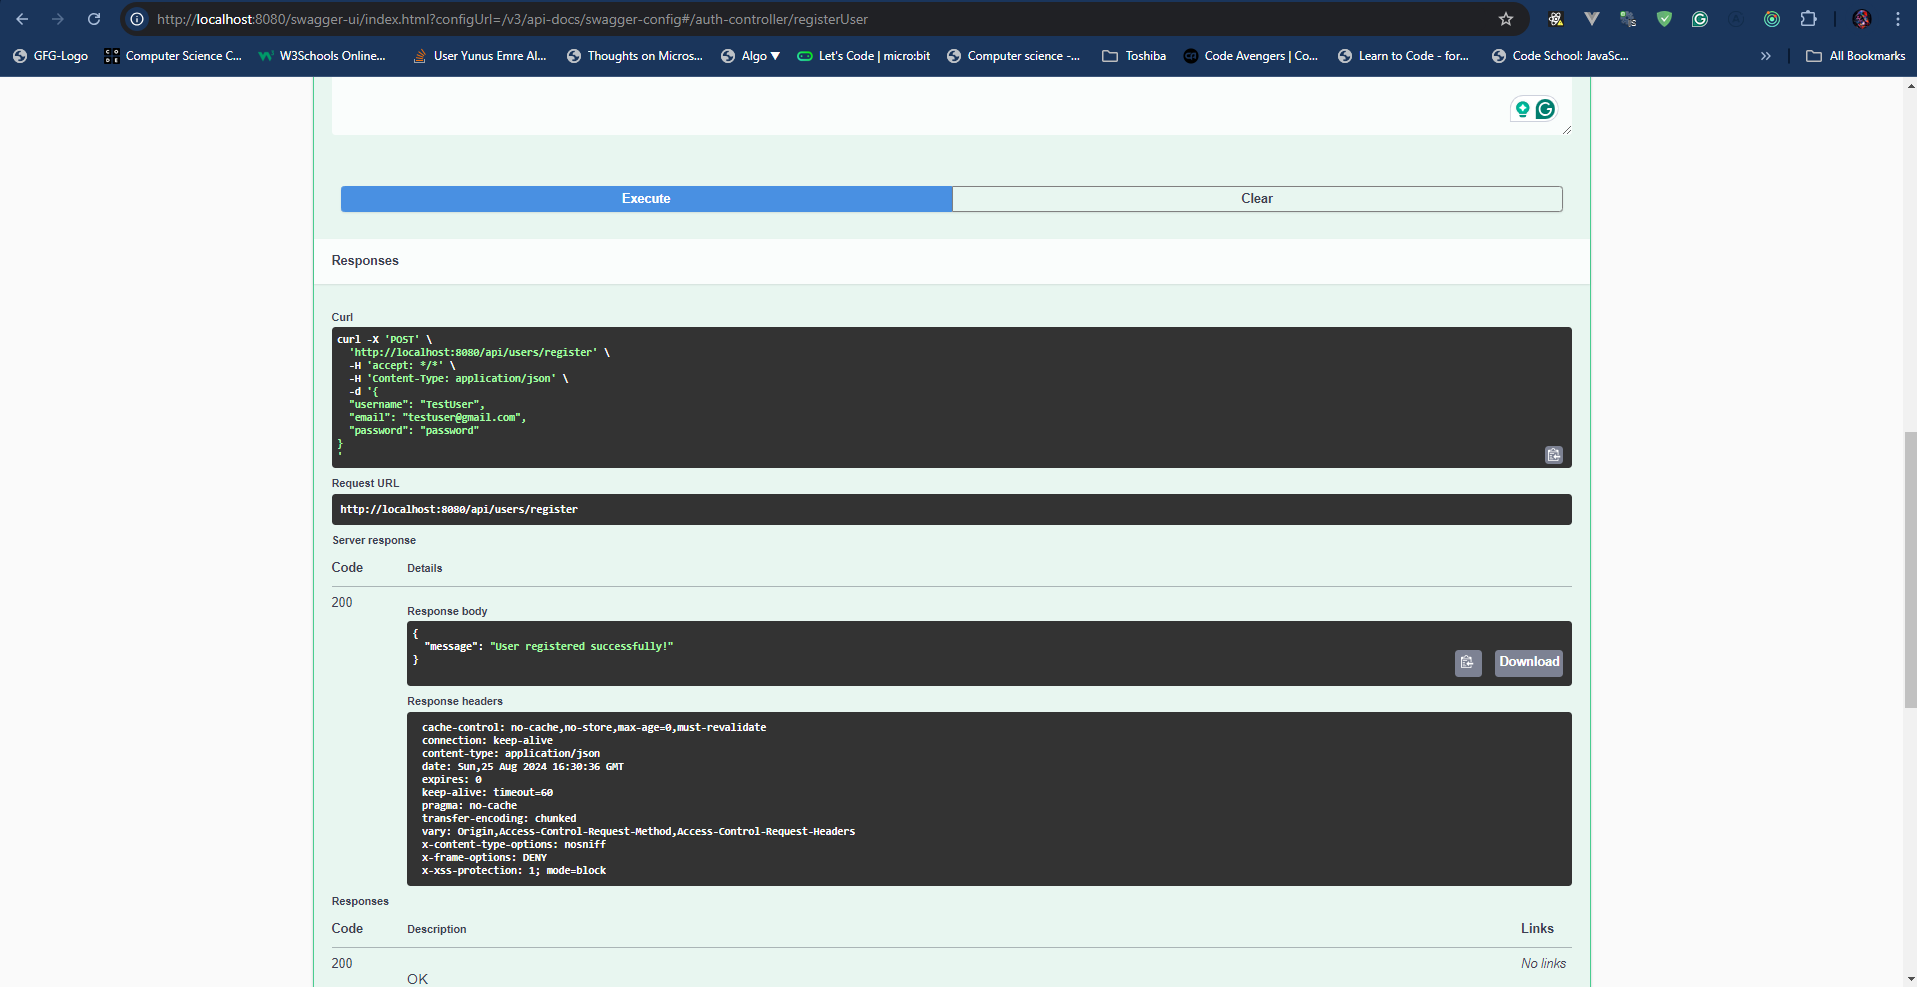
http://localhost:8080/swagger-ui/index.html?configUrl=/v3/api-docs/swagger-config- First you need to register to the application to access the endpoints. You can use the following credentials to register:
{
  "username": "TestUser",
  "email": "testuser@gmail.com",
  "password": "password"
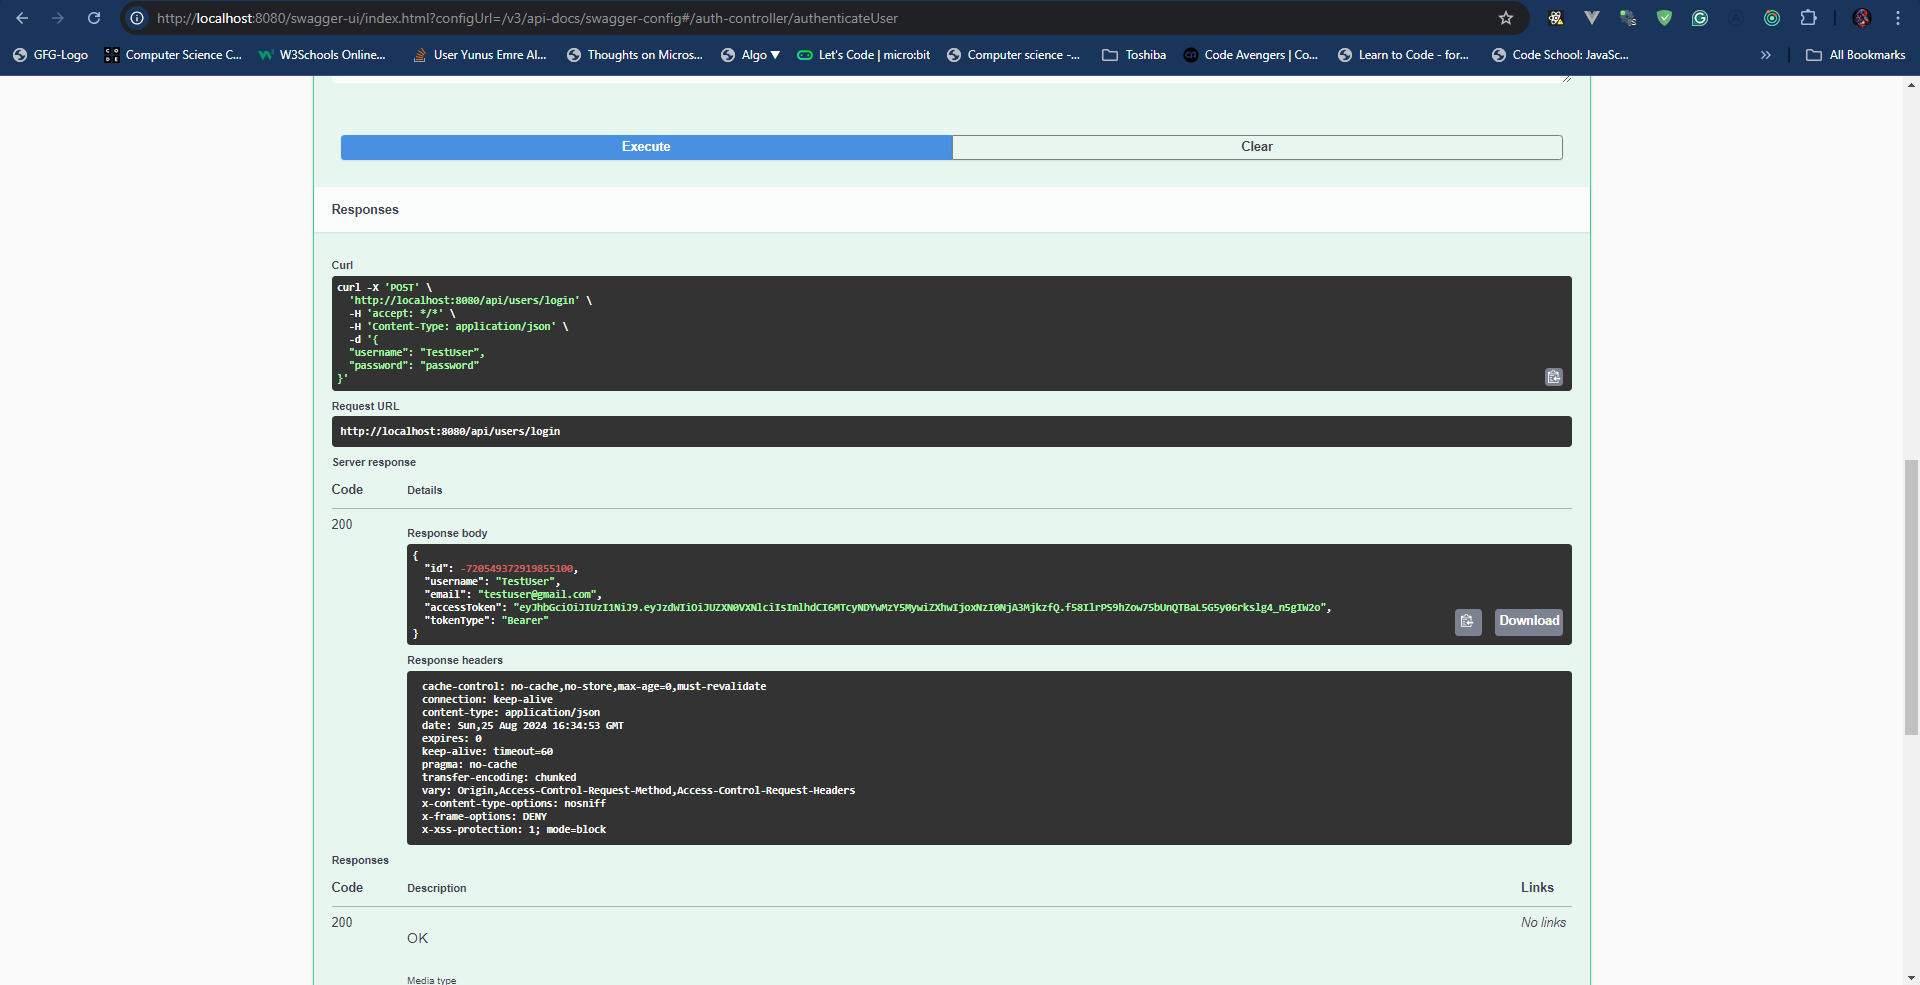
}- After you register, you can login with the following credentials:
{
  "username": "TestUser",
  "password": "password"
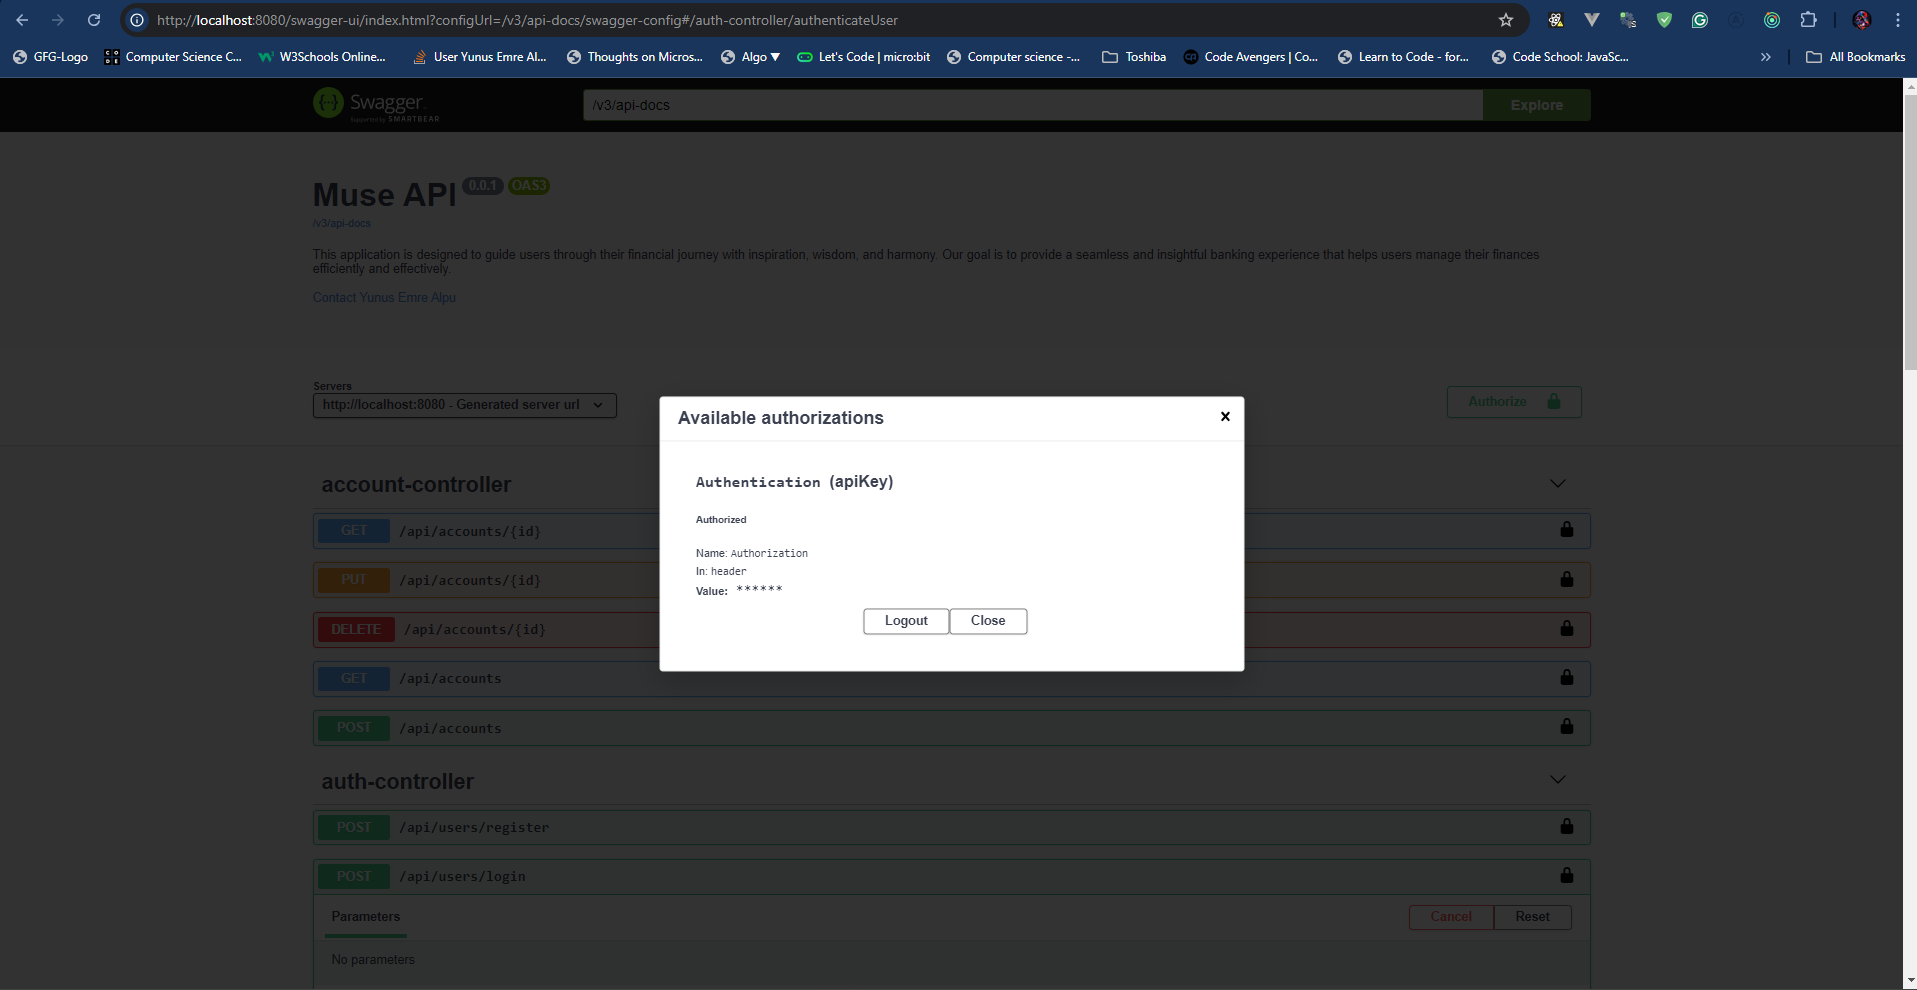
}- Finally, you can copy the token from the response and paste it to the
Authorizebutton at the top right corner of the Swagger UI. You can access the endpoints after you authorize with the prefixBearerand a space before the token.
- You can now access the endpoints and test them with the Swagger UI.
Please read the Code of Conduct before contributing to the project.
Please read the Security Policy before contributing to the project.
For any questions or support, please contact us at:
- Linkedin at Yunus Emre Alpu
Thank you for choosing Muse as your financial guide!


