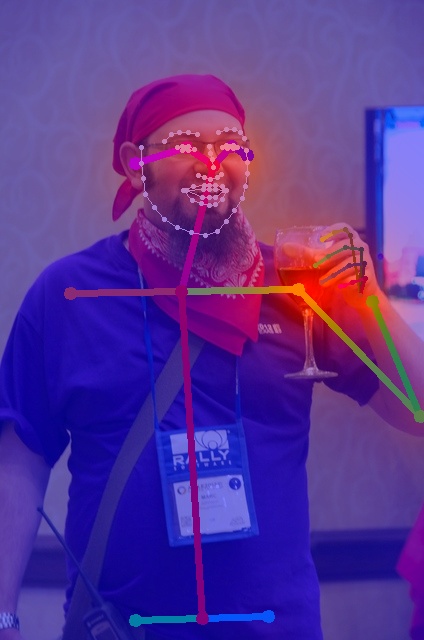
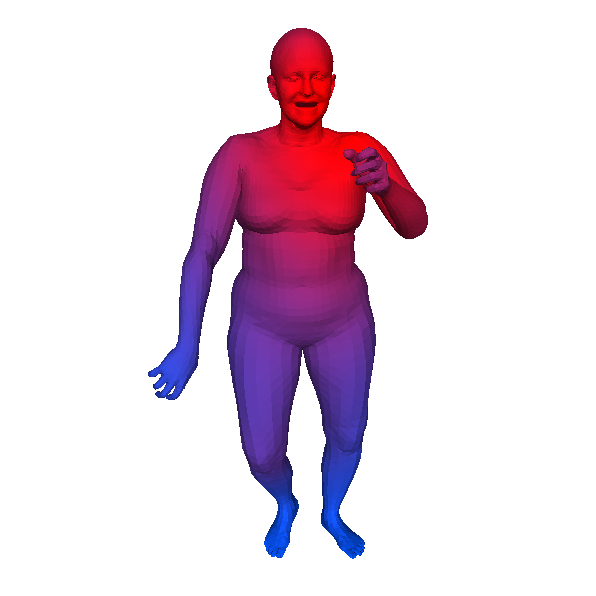
As a part of HAKE project (HAKE-3D). Code for our CVPR2020 paper "Detailed 2D-3D Joint Representation for Human-Object Interaction".
- Paper is here: arXiv
- Single-view human detailed shape reconstruction, 2D & 3D pose and detailed shape from OpenPose and SMPLify-X.
- Interacted object 3D location-size recovering as hollow sphere.
- 2D-3D joint human body part attention.
- Multi-modal representation for HOI detection.
This repo contains the code for the proposed Ambiguous-HOI dataset.
To collect the data set, run
bash script/Generate_Ambiguous_HOI.shAfter running this, the data and code related to Ambiguous-HOI would be organized as:
DJ-RN
├──Data
    ├── Ambiguous_HOI
        └── ...                  # The jpeg image files
    └── Test_ambiguous.pkl       # Person and object boudning boxes used by DJ-RN
└── -Results
    ├── gt_ambiguous_hoi_new.pkl # Annotation file
    └── Evaluate_HICO_DET.py     # Evaluation script
Run python ./-Results/Evaluate_ambiguous.py <your detection file> <path to save the result> to evaluate the performace. The detection file should be a pickle file with format of
{'xxx.jpg': # image file name
    [
        [x1, y1, x2, y2],        # Human bounding box
        [x1, y1, x2, y2],        # Object bounding box
        x,                       # Object category, 1~80
        np.array([xx, ..., xx]), # HOI detection score, np.array with size of (600,)
        x,                       # Human detection confidence
        x,                       # Object detection confidence
    ],
    ...
}Our results on HICO-DET dataset, using object detections from iCAN (COCO pre-trained detector)
| Method | Full(def) | Rare(def) | None-Rare(def) | Full(ko) | Rare(ko) | None-Rare(ko) |
|---|---|---|---|---|---|---|
| iCAN (BMVC2018) | 19.61 | 17.29 | 20.30 | 22.10 | 20.46 | 22.59 |
| TIN (CVPR2019) | 17.03 | 13.42 | 18.11 | 19.17 | 15.51 | 20.26 |
| Analogy (ICCV2019) | 19.40 | 14.60 | 20.90 | - | - | - |
| DJ-RN (CVPR2020) | 21.34 | 18.53 | 22.18 | 23.69 | 20.64 | 24.60 |
Our results on Ambiguous-HOI
| Method | mAP |
|---|---|
| iCAN (BMVC2018) | 8.14 |
| TIN (CVPR2019) | 8.22 |
| Analogy (ICCV2019, reproduced) | 9.72 |
| DJ-RN (CVPR2020) | 10.37 |
-
Clone this repository.
-
Download HICO-DET dataset and detection files. The detection results (person and object boudning boxes) are collected from: iCAN.
bash script/Download_HICO-DET.sh- Generate Ambiguous-HOI dataset.
bash script/Generate_Ambiguous_HOI.sh- Download SMPL-X model referring to this link, and unzip and organize the directory structure as follows:
models
├── smplx
    ├── SMPLX_FEMALE.npz
    ├── SMPLX_FEMALE.pkl
    ├── SMPLX_MALE.npz
    ├── SMPLX_MALE.pkl
    ├── SMPLX_NEUTRAL.npz
    └── SMPLX_NEUTRAL.pkl
models/smplx will be referred to as smplx_path in the following instruction.
- Download pretrained weight of our model. (Optional)
bash script/Download_weight.sh- Download inference results of our model. (Optional)
bash script/Download_result.sh-
Run OpenPose for the images in the dataset.
-
Create the environment used for this phase.
conda create --name DJR-data --file requirements_data.txt
conda activate DJR-data- Filter the OpenPose result.
python script/filter_pose.py --ori <path to your OpenPose result> --fil <path to save the filtered result>
-
Run SMPLify-X on the dataset with the filtered pose.
-
Assign the SMPLify-X results to the training and testing data.
python script/assign_pose_GT.py --pose <path to your pose used for SMPLify-X> --res <path to your SMPLify-X result>
python script/assign_pose_Neg.py --pose <path to your pose used for SMPLify-X> --res <path to your SMPLify-X result>
python script/assign_pose_test.py --pose <path to your pose used for SMPLify-X> --res <path to your SMPLify-X result>- Generate 3D spatial configuration.
python script/generate_3D_obj_GT.py --smplx_path <path of the smplx model> --res <path to your SMPLify-X result> --img_path <path to your HICO train image>  --save_obj_path <path to save your object mesh and pkl>
python script/generate_3D_obj_Neg.py --smplx_path <path of the smplx model> --res <path to your SMPLify-X result> --img_path <path to your HICO train image>  --save_obj_path <path to save your object mesh and pkl>
python script/generate_3D_obj_test.py --smplx_path <path of the smplx model> --res <path to your SMPLify-X result> --img_path <path to your HICO test image>  --save_obj_path <path to save your object mesh and pkl>
python script/rotate_sampling_GT.py --smplx_path <path of the smplx model> --res <path to your SMPLify-X result> --obj_path <path to your object vertexs>  --save_path <path to save the spatial configuration>
python script/rotate_sampling_Neg.py --smplx_path <path of the smplx model> --res <path to your SMPLify-X result> --obj_path <path to your object vertexs>  --save_path <path to save the spatial configuration>
python script/rotate_sampling_test.py --smplx_path <path of the smplx model> --res <path to your SMPLify-X result> --obj_path <path to your object vertexs> --save_path <path to save the spatial configuration>- Transfer the results to fit in Python 2.7
python script/transfer_py3-py2.py --res <Path to your SMPLify-X result>
We provide a Jupyter Notebook demo for quick start in script/Demo.ipynb.
- Clone the PointNet repo (https://github.com/charlesq34/pointnet.git), and copy the necessary files.
git clone https://github.com/charlesq34/pointnet.git
cp Feature_extraction/Feature_extraction.py pointnet/Feature_extraction.py
cp Feature_extraction/pointnet_hico.py pointnet/models/pointnet_hico.py-
Install PointNet following instruction.
-
Extract feature
cd pointnet
python script/Download_data.py 1l48pyX-9FWFMNuokdbBp6KshKSDBihAe Feature_extraction.tar
tar -xvf Feature_extraction.tar
python Feature_extraction.py --input_list script/vertex_path_GT.txt --model_path ../Feature_extraction/model_10000.ckpt
python Feature_extraction.py --input_list script/vertex_path_Neg.txt --model_path ../Feature_extraction/model_10000.ckpt
python Feature_extraction.py --input_list script/vertex_path_Test.txt --model_path ../Feature_extraction/model_10000.ckpt- Create the environment used for this phase.
conda create --name DJR --file requirements_DJR.txt
conda activate DJR- Train on HICO-DET
python tools/Train_HICO_DET_DJR.py --model <your model name> --num_iteration 400000
- Test and generate detection file on HICO-DET
python tools/Test_HICO_DET_DJR.py --model <your model name> --iteration 400000
python ./-Results/Generate_detection.py --model <your test output directory, under ./-Results by default>- To evaluate the performance of our model on HICO-DET, run
python ./-Results/Evaluate_HICO_DET.py --file ./-Results/Detection_400000_DJR.pkl
- Test and generate detection file on Anbiguous-HOI
python tools/Test_ambiguous_DJR.py --model <your model name> --iteration 400000
- To evaluate the performance of our model on Ambiguous-HOI, run
python ./-Results/Evaluate_ambiguous.py ./-Results/400000_DJR_ambiguous.pkl DJR_ambiguous/
- Ambiguous-HOI data and evaluation
- Full model
- 3D human-object generation and visualization
- Lite model
Some of the codes are built upon Interactiveness.
If you get any problems or if you find any bugs, don't hesitate to comment on GitHub or make a pull request!
DJ-RN is freely available for free non-commercial use, and may be redistributed under these conditions. For commercial queries, please drop an e-mail. We will send the detail agreement to you.


