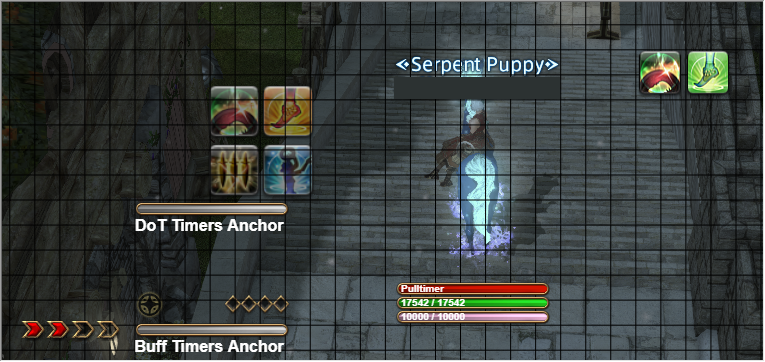
A FFXIV Overlay for OverlayPlugin using HTML and JS
ZeffUI is an ACT overlay that provides for Final Fantasy XIV. This project uses cactbot and ngld's OverlayPlugin which are plugins for Advanced Combat Tracker.
ZeffUI is currently pretty customizeable and I'm hoping it's only going to get better!
ZeffUI currently has these modules built in:
- Health and Manabars
- MP Ticker
- Pulltimer
- DoT Timers
- Buff Timers
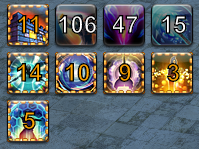
- Raidbuff Cooldowns
- Mitigation Cooldowns for Tanks
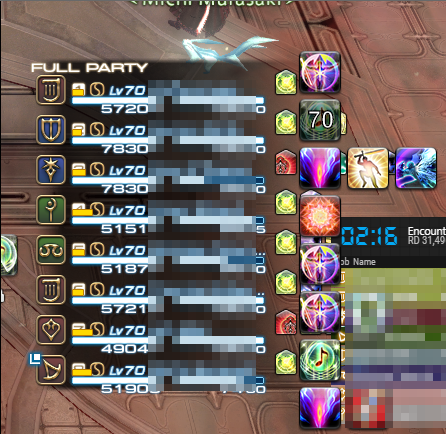
- Party Cooldowns
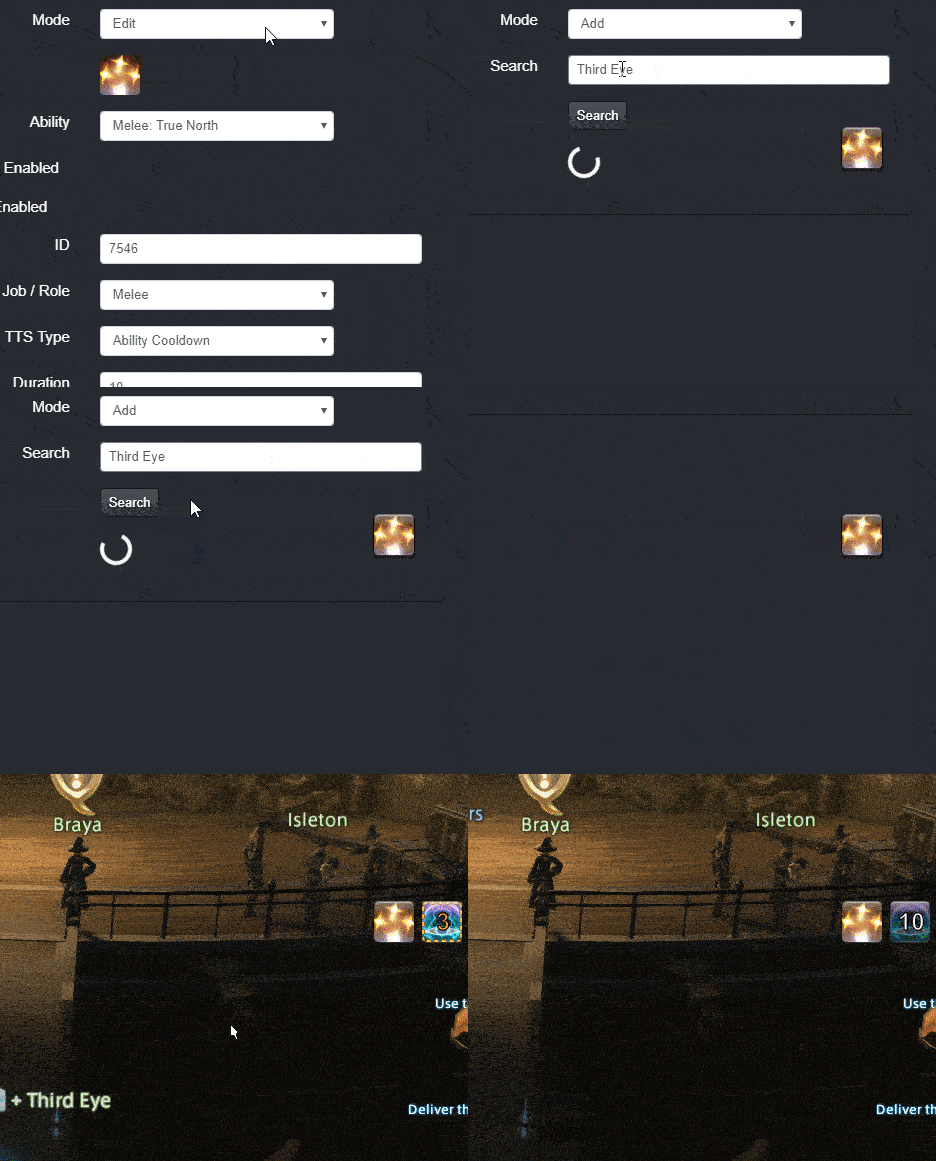
- Custom Cooldowns
- Stacks for certain classes (like Ruin IV stacks for SMN)
Install .NET Framework version 4.6.1 or above.
You must have DirectX 11 enabled for Final Fantasy XIV.
Install the 64-bit version of Advanced Combat Tracker, if you have not already.
If you have just installed ACT,
then you will be presented with a startup wizard.
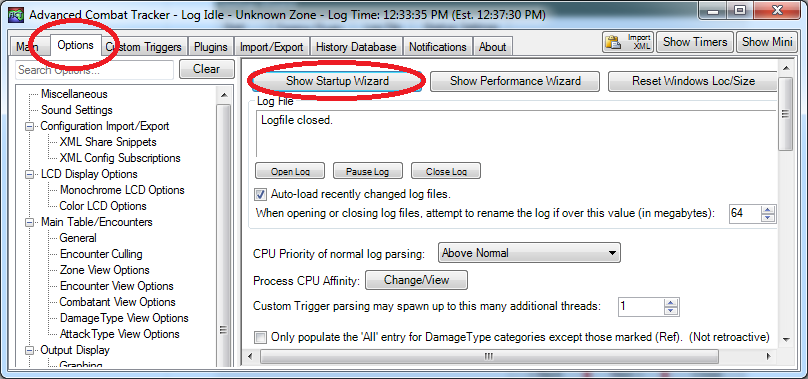
To get to the startup wizard otherwise,
click on Options and then click on Show Startup Wizard.
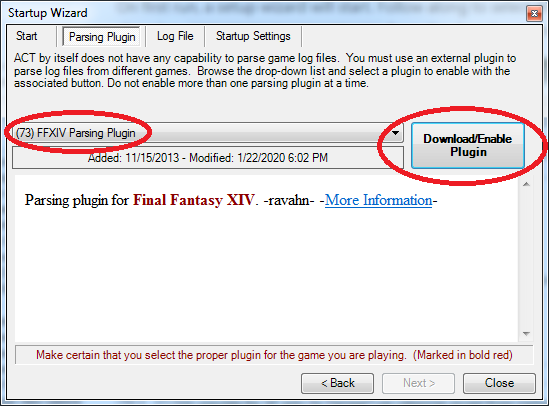
In the startup wizard,
select FFXIV Parsing Plugin and then click the Download/Enable Plugin button.
This will download %APPDATA%Advanced Combat Tracker\Plugins\FFXIV_ACT_Plugin.dll
and enable it in the list of plugins.
Additionally, you must enable parsing from the network and make sure that ACT is not firewalled.
Make sure the settings for the FFXIV plugin have the "Include HP for Triggers" button checked.
This is under Plugins ->FFXIV Settings -> Options.
Alternative FFXIV Plugin Guides:
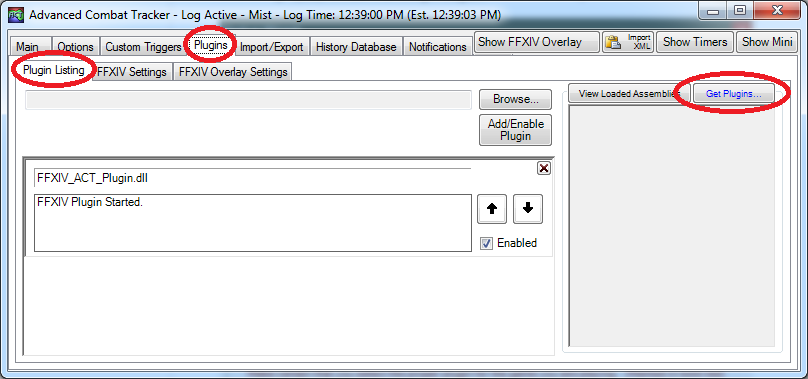
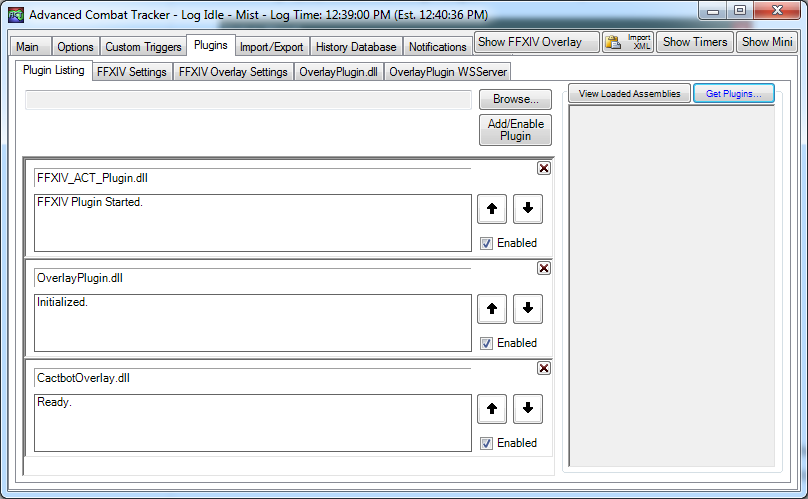
At this point, if you select the Plugins tab and go to the Plugin Listing,
your list of plugins should look something like this:
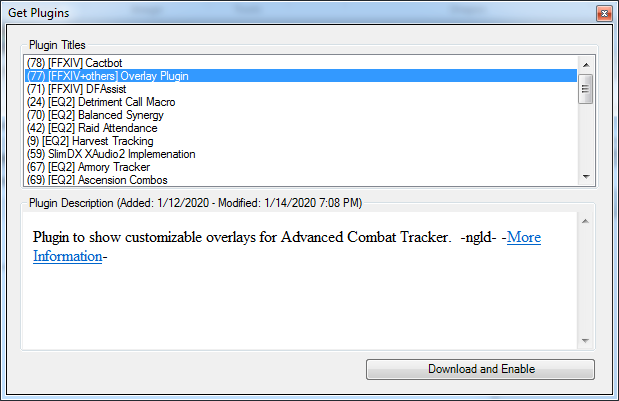
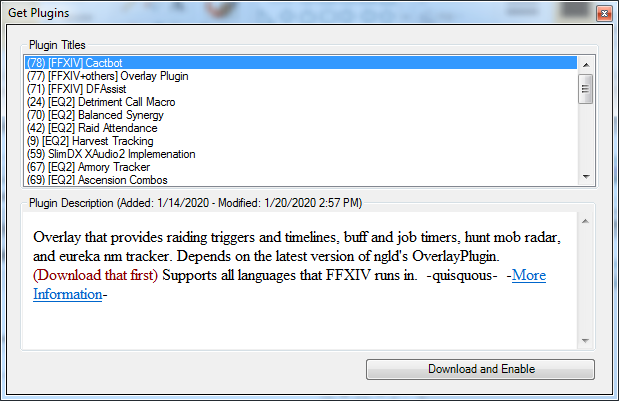
Click on Get Plugins to open up the ACT plugin installer.
Select Overlay Plugin and then click Download and Enable.
This will download the ngld OverlayPlugin into
%APPDATA%Advanced Combat Tracker\Plugins\OverlayPlugin
and enable OverlayPlugin.dll in the list of plugins.
As a note, you must use the ngld version of OverlayPlugin and not the original RainbowMage version or the hibiyasleep fork.
Again, go to the Plugins tab and go to the Plugin Listing,
and then select Get Plugins.
Select Cactbot and then click Download and Enable.
This will download the cactbot into
%APPDATA%Advanced Combat Tracker\Plugins\cactbot-version\cactbot
and enable CactbotOverlay.dll in the list of plugins.
Note: Due to a difference in how ACT expects archives to be
and how cactbot generates its zip files,
there will be something like a cactbot-0.15.2 folder
that corresponds to the initial version that you downloaded cactbot.
This folder name does not matter and is cosmetic.
Verify your plugins are in the correct order. The order should be: FFXIV Plugin first, then OverlayPlugin, then cactbot. If you have followed the above instructions, it should look like the following:
Finally, restart ACT.
Here's how you finally add ZeffUI
-
Open ACT.
-
Make sure you've restarted ACT after adding the cactbot plugin.
-
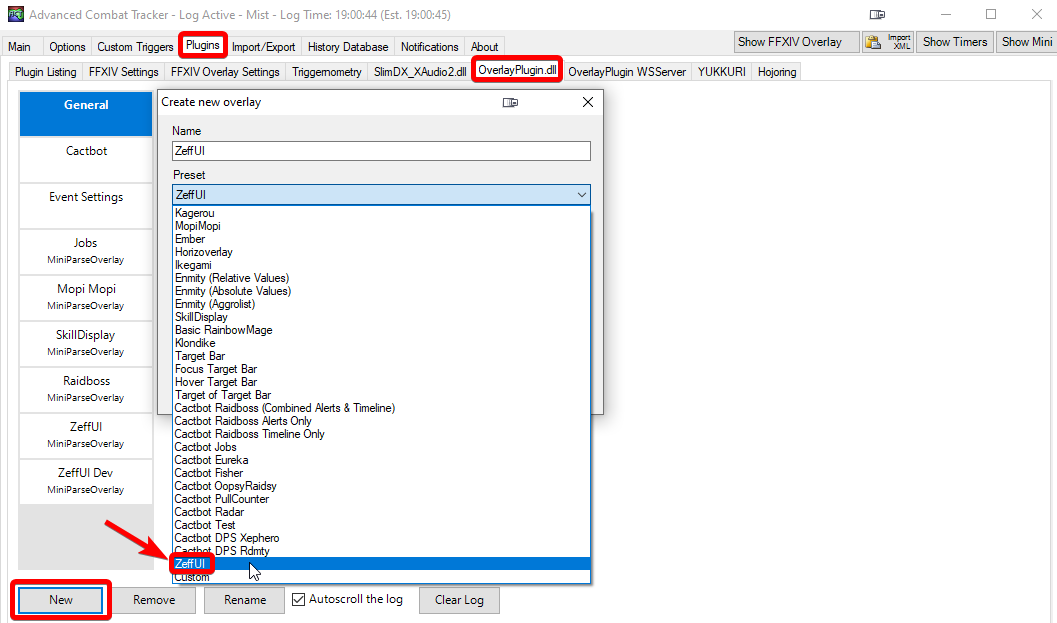
Navigate to the
Pluginstab of ACT and then theOverlayPlugin.dlltab inside it. -
Click the "New" button and then pick
ZeffUIin the Preset list. -
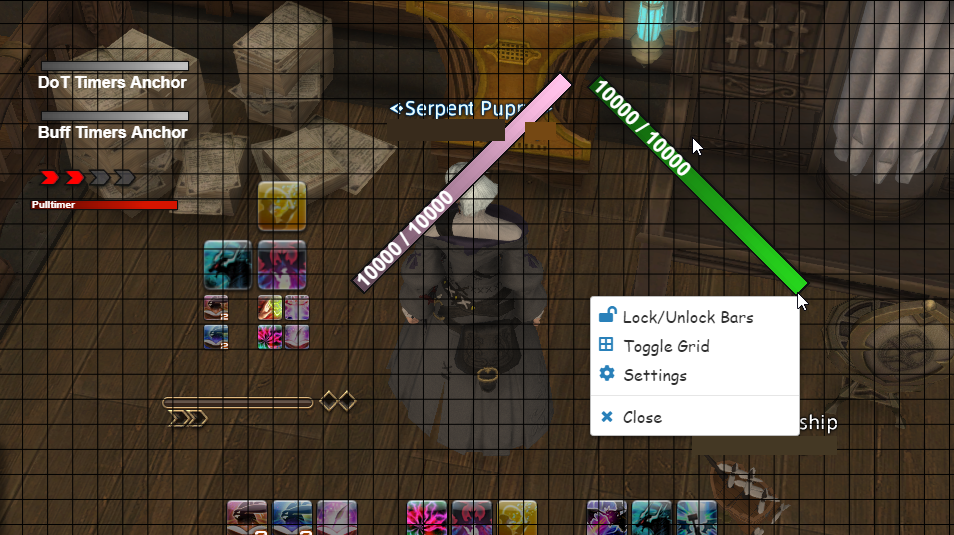
At this point you'll see health and manabars and a blue background to help with resizing and placing overlays on screen. The blue background will go away when the overlay is locked in the config panel for the overlay. You should always lock your overlay once you are done resizing and placing it.
 -
Type in any name you'd like as the name of this overlay, e.g.
ZeffUI. -
Click the
OKbutton to add this as an Overlay. It will now appear in the list of overlays in thePlugins->OverlayPlugin.dlltab. -
If for some reason the UI doesn't show up confirm that the following URL is populating the URL field: https://zeffuro.github.io/ZeffUI/
-
Drag and resize the overlay to the location that you want it in.
-
In the
Generaltab of theZeffUIoverlay, click theLock Overlaycheckbox. The blue background will disappear once the overlay has been locked. -
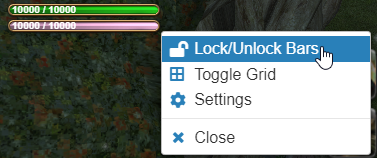
Rightclick either the Healthbar or Manabar element.
-
If you want you can also toggle the grid to give you an easier time aligning objects.
-
Start moving elements to where you want, note that the anchors for Raidbuffs and Mitigation will only show up on the appropriate classes.
-
After that either lock the bars again or head over to settings to customize your setup.
-
After that your setup should be complete.
If you need any help either raise an issue or find me on the ACT/Triggernometry Discord servers or DM me directly on Zeffuro#3033
You can customize ZeffUI further by using custom CSS and text format tags
If you need any help either raise an issue or join the DelvUI Discord (or find me on ACT/Triggernometry/goat Discord or DM me Zeffuro#3033)
ZeffUI is open source under the GNU AFFERO GENERAL PUBLIC LICENSE.
FINAL FANTASY is a registered trademark of Square Enix Holdings Co., Ltd.
Final Fantasy art and icons reused non-commercially under the FINAL FANTASY® XIV Materials Usage License.
See the LICENSE file for more details about other bundled projects.
