This project includes an Arduino-based weather station, an ASP.NET Core MVC data presentation page, and an ASP.NET Core WebAPI. The collected data is sent using ESP8266 and written to the SQL Server database via WebAPI. The weather station consists of the following parts:
- Arduino Nano
- Nano Shield
- BME280 - Temperature, Humidity & Pressure Sensor
AM2320 - Digital Temperature and Humidity SensorBMP280 - Barometric Pressure and Altitude SensorML8511 - UV sensor (Abandon)- GP2Y1010F45 - Optical Dust Sensor
- DS3231 - RTC
- ESP8266 - WIFI
- SD card module
- 18650 Li-ion and Charger (Optional)

Most of the referenced libraries come from Adafruit and Aduino Playground, and some I don't know who written it. AM2320 comes from thakshak.
| Name | Count | |
|---|---|---|
 |
Arduino Nano | x1 |
 |
Nano Shield | x1 |
 |
AM2320 | x1 |
 |
BMP280 | x1 |
 |
ML8511 | x1 |
 |
GP2Y1010F45 | x1 |
 |
DS3231 | x1 |
 |
ESP8266 | x1 |
 |
SD card module | x1 |
 |
18650 Li-ion and Charger (Optional) | x1 |
| Male/Female Jumper Wires | some |
| Name | |
|---|---|
 |
Arduino IDE |
 |
Microsoft Visual Studio 2017 |
| Microsoft SQL Server |
-
I2C Sensors
- VCC - 5V
- GND - GND
- SDA - A4
- SCL - A5
-
ML8511
- VIN - 3.3V
- OUT - A0
- GND - GND
- EN - 3.3V
- 3.3V - A1
-
GP2Y1010F45
- Sharp pin 1 (V-LED) - 5V (Series 150Ω resistor, pin 1 and resistance connected to 220 μF capacitor and grounded)
- Sharp pin 2 (LED-GND) - GND
- Sharp pin 3 (LED) - pin 4
- Sharp pin 4 (S-GND) - GND
- Sharp pin 5 (Vo) - A2
- Sharp pin 6 (Vcc) - 5V
-
ESP8266
- TX - pin 3
- RX - pin 2
- CH_PD - pin 5
- VCC - 3.3V
- GND - GND
-
SD Card
- MOSI - pin 11
- MISO - pin 12
- CLK - pin 13
- CS - pin 10
Connect sensors to Arduino.

-
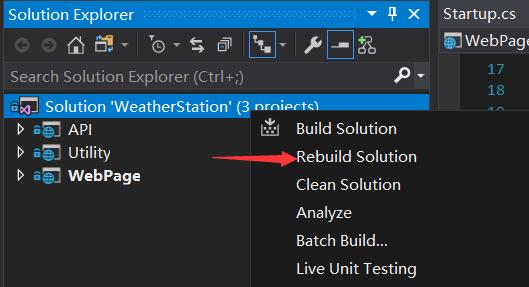
Open "WeatherStation.sln" and rebuild solution
-
In project Utility, open WeatherContext.cs, change connection string

-
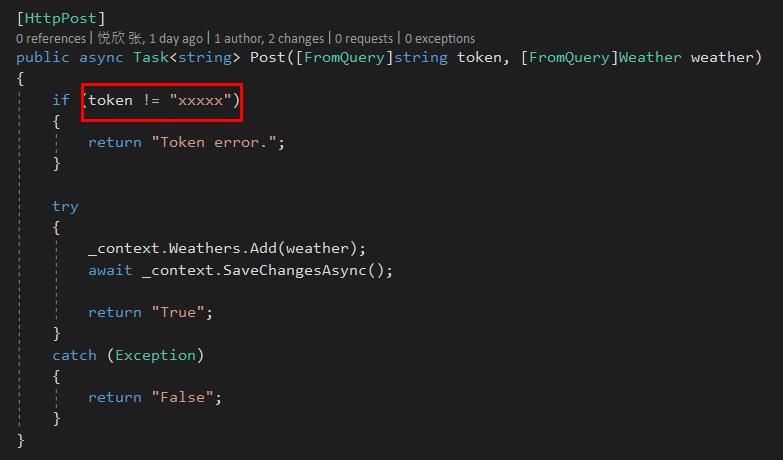
In project API, open Controllers - WeatherController.cs, change token
-
Open Tools - NuGet Package Manager - Package Manager Console, change Default project to Utility
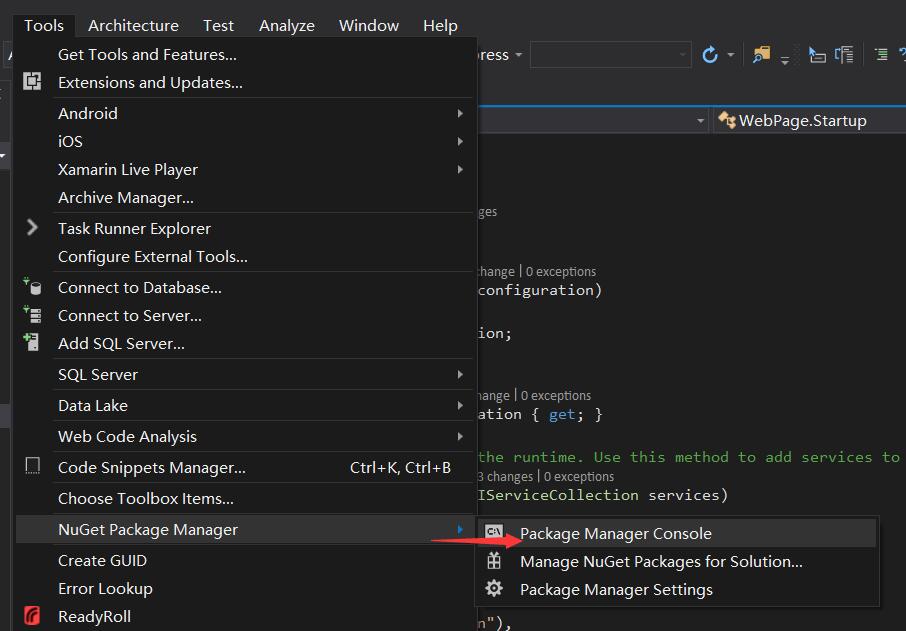

in PMC run this
PM> Add-Migration Initial
PM> Update-Database
or run this SQL (PostgreSQL script)
create database "WeatherStation";

create table weather (
    weather_id           SERIAL not null,
    date_time            TIMESTAMP            null,
    weather_name         VARCHAR(10)          null,
    temperature          NUMERIC(4,2)         null,
    humidity             NUMERIC(4,2)         null,
    pressure             NUMERIC(10,2)        null,
    dust                 NUMERIC(4)           null,
    uv                   DECIMAL(4,2)         null,
    constraint PK_WEATHER primary key (weather_id)
);

insert into "public"."weather" ("weather_id","date_time","weather_name","temperature","humidity","pressure","dust","uv") VALUES (1, '2019-01-01 21:00:00', NULL, -0.90, 25.80, 103662.72, 0, 0.01),(2, '2019-01-01 22:00:00', NULL, -1.50, 28.80, 103729.69, 0, 0.01),(3, '2019-01-01 23:00:00', NULL, -2.20, 29.60, 103632.05, 0, 0.01),(4, '2019-01-02 00:00:00', NULL, -2.90, 31.80, 103884.52, 0, 0.01),(5, '2019-01-02 01:00:00', NULL, -3.60, 33.80, 103603.38, 0, 0.01),(6, '2019-01-02 02:00:00', NULL, -3.50, 32.80, 103704.99, 0, 0.01),(7, '2019-01-02 03:00:00', NULL, -3.10, 31.20, 103872.41, 0, 0.01),(8, '2019-01-02 04:00:00', NULL, -2.70, 29.20, 103882.69, 0, 0.01);
-
Publish API, WebPage to your server


-
Copy libraries to x:\Program Files (x86)\Arduino\libraries
-
Open "WeatherStation.ino"
-
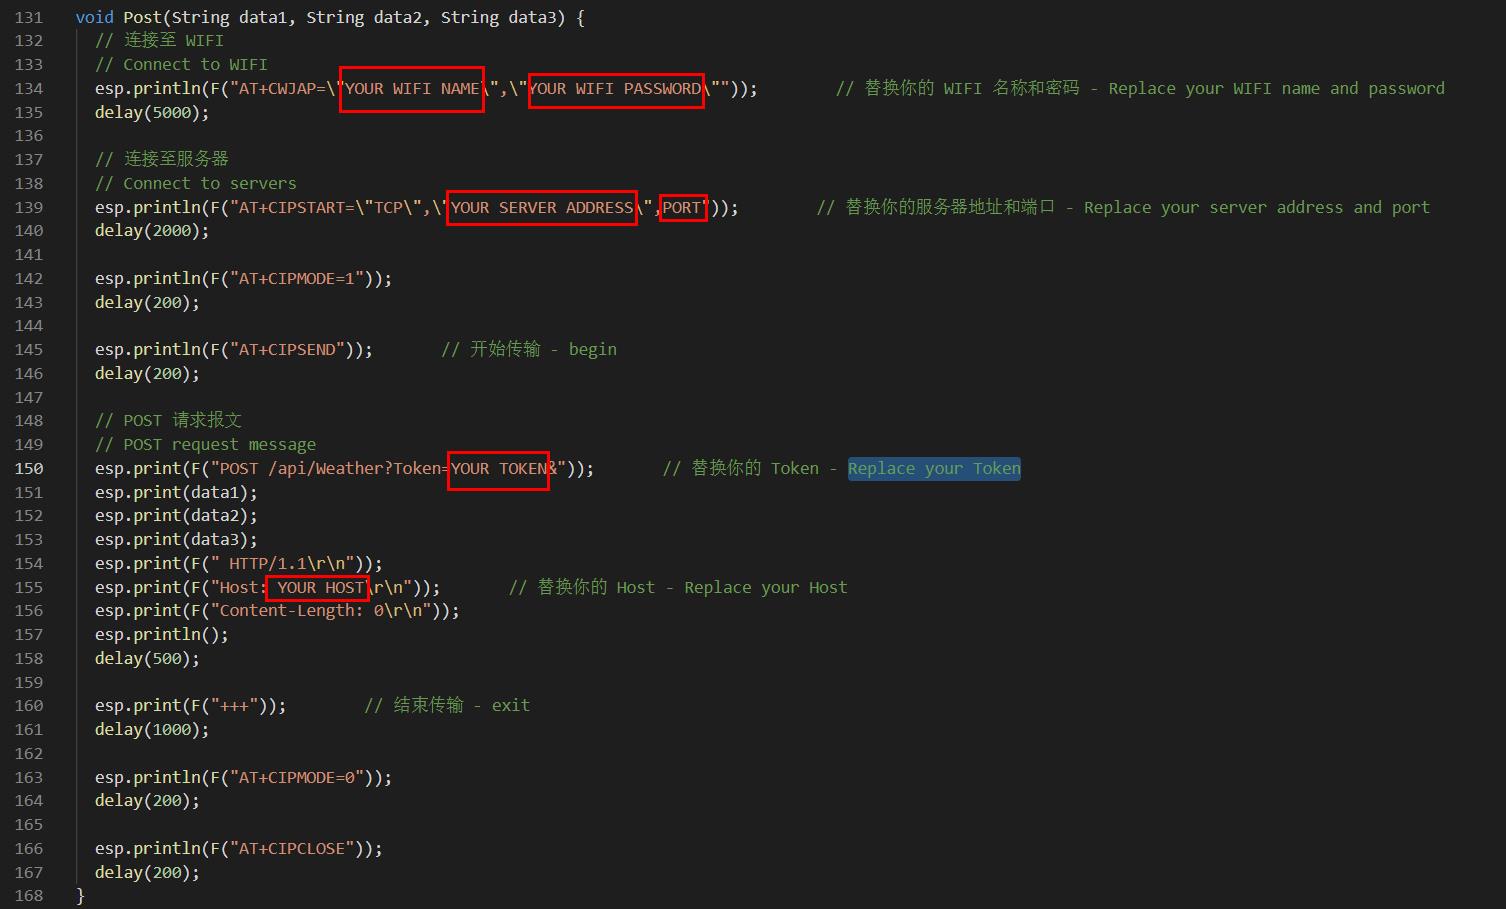
In Line 134, replace your WIFI name and password
-
In Line 139, replace your server address and port
-
In Line 150, replace your Token
-
In Line 155, replace your Host
-
Upload program to your Arduino

http://weatherstation.zhangyue.xin/
