Automated Docker build of PiAware 3.8.0 + dump1090-fa + lighttpd. For Raspberry Pi
Intended for use with Portainer, but not required.
- Raspberry Pi (1, Zero, Zero W)
- RTL-SDR Dongle (e.g.: https://www.rtl-sdr.com/buy-rtl-sdr-dvb-t-dongles/ )
TODO
TODO
TODO
- Connect using SSH and create the blacklist file:
echo 'blacklist dvb-usb-rtl28xxu' > /etc/modprobe.d/blacklist-rtl28xxu.conf
- Reboot
TODO
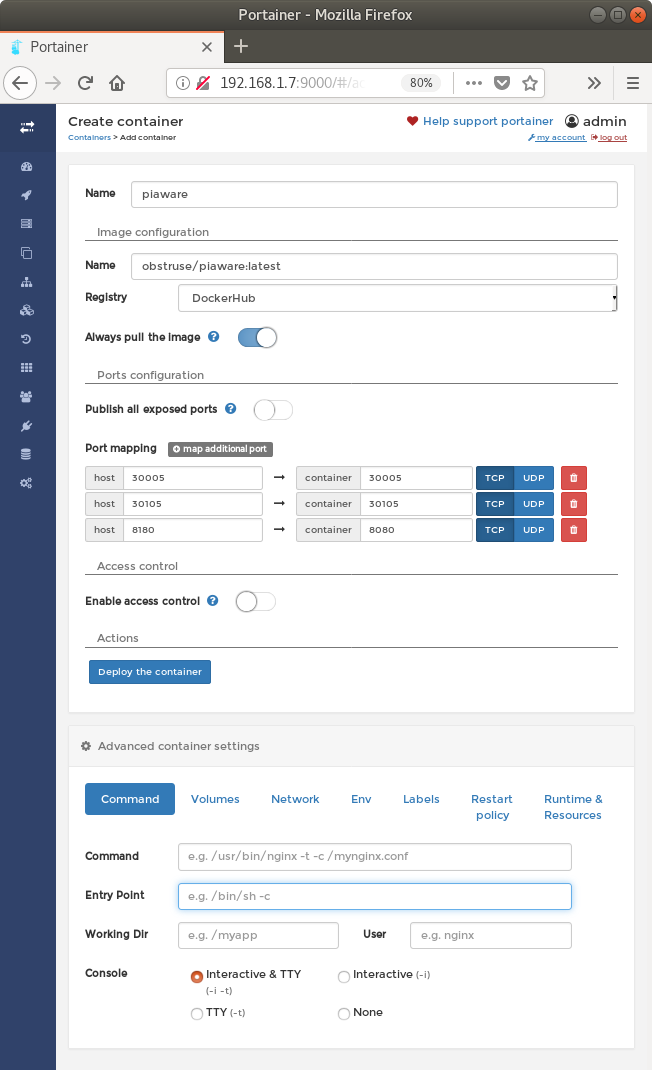
Access Portainer at: http://192.168.1.12:9000 (replace the IP with the address of your Raspberry Pi)
- Containers -> Add container
- Container name: Piaware
- Image configuration Name: obstruse/piaware
- Port mapping
- 8080 -> 8080
- 8081 -> 8081
- 30005 -> 30005 (data in Beast format)
- 30105 -> 30105 (MLAT data in Beast format)
- Disable Access control
- Console: Interactive & TTY
- Restart policy: Unless stopped
- Runtime & Resources: Privileged Mode
- Click Deploy the container
The PiAware Skyview web page will be available on port 8080 on your Raspberry Pi; the OpenLayers3 web page will be available on port 8081.
https://flightaware.com/adsb/piaware/claim
Go to your stats page:
https://flightaware.com/adsb/stats/user/yourusername
Click on the gear icon to the right of your site name, and configure location and height.
The feeder ID is assigned when the feeder first connects, and is stored in the PiAware instance. If you redeploy PiAware, a new feeder ID is assigned and will look like a new site on FlightAware. If you want to continue using the same site after redeploying, you need to manually reconfigure the feeder ID.
- Find the feeder ID that you want to use. Go to: https://flightaware.com/adsb/stats/user/yourusername. The feeder ID is labeled "Unique Identifier",
- Using Portainer, open a console on the PiAware instance and enter:
piaware-config feeder-id
- Paste the unique identifier.
- Restart piaware


