- Obtain our version of dataset, UCF_49 from our dataset link and the our train_test_split.
- Git clone this entire github repository.
- Unzip the UCF_49 and train_test_split in the same folder where the repository is cloned.
In the terminal, runpython extract_frames.py. Wait for about 2 hours to get all the frames.
Alternatively, download and unzip the frames that we have extracted. Make sure that the frames are in the same as the train_test_split. - Before running any model, make sure that you have UCF_49-frames, train_test_split and visual_component.ipynb in the same directory. Open the jupyter notebook, visual_component.ipynb, and run the codes accordingly for training and testing.
- Step 1-3 is the same as the Architecture 1. Ensure you have extracted the video frames as described in step 3.
- (Optional) To extract the audio features yourself, run
python audio_features_extraction.pyor simply use theaudio_features.picklefile provided - Open the jupyter notebook, visual_and_audio_component.ipynb, and run the codes accordingly for training and testing.
-
Navigate into the app folder. Download the model weights because the weights of the model are too large to be uploaded to github. Unzip and make sure that the app folder contains all of the files and folders as shown
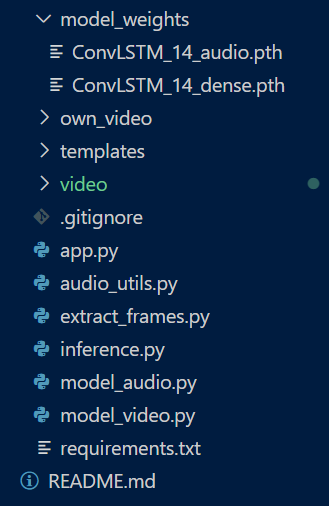 .
. -
Set-up for the UI locally.
a. Create a virtual environment using:
python -m venv venv
b. Activate the virtual environment:- Activate the virtualenv (OS X & Linux)
venv/bin/activate - Activate the virtualenv (Windows)
venv\Scripts\activate
c. Install the necessary libraries: - Navigate out to the app folder. In the app folder
pip install -r requirements.txt
- Activate the virtualenv (OS X & Linux)
-
Run the application using:
python app.py -
Choose a video clip with .avi format and upload, the result would be shown. The custom video used in the User Interface and Testing Results section can be found in the own_video folder.
