#Behavioral Cloning
Behavioral Cloning Project
The goals / steps of this project are the following:
- Use the simulator to collect data of good driving behavior
- Build a convolutional neural network in Keras that predicts steering angles from images
- Train and validate the model with a training and validation set
- Test that the model successfully drives around track one without leaving the road
- Summarize the results with a written report
###Here I will consider the rubric points individually and describe how I addressed each point in my implementation.
###Files Submitted & Code Quality
####1. Submission includes all required files and can be used to run the simulator in autonomous mode
My project includes the following files:
- train_config.py containing hyperparameters used to train and drive with the model
- model.py containing the script to create and train the model
- drive.py for driving the car in autonomous mode
- model.json containing the architecture of a convolutional neural network
- model.h5 containing trained convolutional neural network weights
- writeup_report.md (this file) summarizing the results
####2. Submssion includes functional code Using the Udacity provided simulator and my drive.py file, the car can be driven autonomously around the track by executing
python3 drive.py model.h5####3. Submssion code is usable and readable
The model.py file contains the code for training and saving the convolutional neural network. The file shows the pipeline I used for training and validating the model, and it contains comments to explain how the code works.
###Model Architecture and Training Strategy
####1. An appropriate model arcthiecture has been employed
My model consists of a convolutional neural network with 3x3 filter sizes and layer depths of 32 and 64 (train_config.py line 53).
The model includes ReLU layers to introduce nonlinearity (model.py lines 105, 123) and dense layers (model.py line 123) narrowing down to the number of predictions desired (model.py lines 125-130).
####2. Attempts to reduce overfitting in the model
The model contains dropout layers in order to reduce overfitting (model.py line 122).
The model was trained and validated on the Udacity-provided data set to ensure that the model was not overfitting (train_config.py line 9). The model was tested by running it through the simulator and ensuring that the vehicle could stay on the track. The model was then re-trained and re-tested on self-generated data.
####3. Model parameter tuning
The model used an adam optimizer, so the learning rate was not tuned manually (model.py line 133).
####4. Appropriate training data
Training data used was provided by Udacity. At first, I was unable to create good training data on my own (I had trouble staying in the center of the track while driving manually, even with a game controller). After testing multiple models driving at different speeds, I realized that I may have been going too fast when driving the car in training mode. I developed the model in order to understand this using the Udacity-provided training data. The description below details my development of the model using the Udacity-provided training data. After the realization that I was driving too fast in gathering my own data, I gathered a new set of data while driving around 15mph instead of trying to drive around 30mph. The weights included in this repository are the model trained with my own data as seen in train_config.py; however, again, the model architecture and augmentation techniques were developed using the Udacity-provided data.
###Model Architecture and Training Strategy
####1. Solution Design Approach
The overall strategy for deriving a model architecture was to abstract as many hyperparameters as possible, create a model that consisted of a large number of convolutional layers and then dense layers, experiment with the hyperparameters to get a model that can drive on the track, and then pare it down to the minimum possible size before the loss started going up. My initial, overly large, model had a loss of about 0.02; I pared it down until the loss came up to about 0.03, to prevent overfitting (along with a dropout value of 0.5).
My first step was to use a convolutional neural network model similar to the VGG architecture. I thought this model might be a good starting point because it was so deep, I believed it would be overkill. The idea is that each convolutional layer extracts a higher conceptual level of features; I thought only a few layers might be enough as the only thing that should be extracted is the curve of, and the position of the car on, the road.
I added several times more and wider (dense) / deeper (convolutional) layers than I thought would be necessary to ensure that the model would have enough degrees of freedom to learn the appropriate behavior. I added dropout layers before each dense layer (model.py line 123) to reduce overfitting. After each convolutional and dense layer, I added ReLU activations to add nonlinearity. Then I added a prediction Dense layer with a linear activation to output the appropriate number of predictions.
I added the ability to predict the throttle value (model.py lines 57-60, 83-84, and 125-130) with an option (train_config.py lines 41-42), and I added an optional Merge layer (model.py lines 109-117) that allows the current speed to be used as an input into the dense layer, merged with the flattened output of the last MaxPool layer. I also abstracted out the architecture of the neural net, allowing the specification of the depths/filter sizes of each convolutional layer (train_config.py lines 51-53), and the widths of each dense layer (train_config.py lines 55-56). I added multiple options for various types of augmentation to be done to the images and steering/throttle values (training_config.py).
The next step was to run the simulator to see how well the car was driving around track one. There were a few spots where the vehicle fell off the track. To improve the driving behavior in these cases, I changed the augmentation methods until the behavior modeled by the augmented data could teach the neural network the correct method of driving, focusing on steering-related augmentation. I tried all four combinations of predicting/not predicting the throttle and using/not using the speed as an input to the model. I realized that the ideal driving speed is about 15mph as that's fast enough to get through the track in a reasonable amount of time while not being so fast the car weaves left to right a lot. The car weaves more and more as the speed goes up because it gets farther off center before the model can realize it needs to compensate and then overcompensates, and 25mph is about the max speed it can go without running off the track.
Then I pared down the number and size of both the convolutional and the dense neural network layers until the training MSE started going up from a minimum of around 0.02 for the largest model to around 0.03 for the smallest model with which I ended up. I tested again to make sure that the network can still drive on the road.
At the end of the process, the vehicle is able to drive autonomously around the track without leaving the road.
####2. Final Model Architecture
The final model architecture consisted of a neural network with two convolutional layers (depth 32 and depth 64, each with filter size 3x3, ReLU activation, and MaxPool layer) and two dense layers (widths 64 and 16, each with ReLU activation) followed by a prediction layer (width 1, with linear activation).
####3. Creation of the Training Set & Training Process
At first, I attempted to capture good driving behavior by going through the track in training mode myself. However, I was unable to make the data that I captured create a good model of driving.
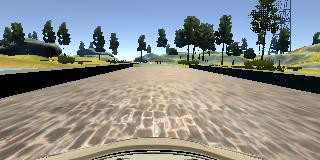
Then I used the recording provided by Udacity of several laps on track one attempting to drive in the center of the track. I used the center camera images to show appropriate steering while in the center of the track. Here is an example center camera image:
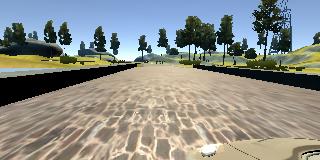
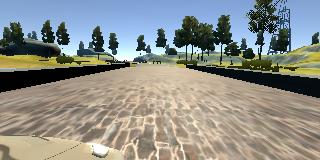
I used the left and right camera images as recovery images, teaching the neural network to stay away from the sides of the track by adding a positive steering adjustment to the left camera image and a negative steering adjustment to the right camera image:
To augment the data set, I randomly flipped images and steering angles thinking that this would balance the data and prevent overfitting to the general direction of the track. I also abstracted out options for randomly shifting the image left and right by a certain number of pixels with a steering angle adjustment, as well as randomly changing image brightness, and randomly shifting the image up or down. I also added an option for rotating the image randomly clockwise or counterclockwise with a steering angle adjustment, but because this wasn't GPU-accelerated, it made the training epochs up to 10x slower and I didn't experiment with it very much. I experimented with multiple values for all of the options and came up with a good set of augmentation parameters as shows in train_config.py.
After the collection process, I had 24,108 number of data points (8036 each of center, left, and right camera images). I randomly shuffled the data set and put 25% of the data into a validation set.
I preprocessed this data by adding static steering adjustments to the left and right images and augmenting it inside the generator with additional steering adjustments as described above. Inside the model, I also normalized the pixel values with a Lambda layer.
I used this training data for training the model. The validation set helped determine if the model was over or under fitting. The ideal number of epochs was around 15 as evidenced by the MSE no longer going down. I used an adam optimizer so that manually tuning the learning rate wasn't necessary.
When I got a working model and played running it at different speeds on the track, I found that it starts to swerve when going over about 15mph. I then recorded two laps around the track, staying in the center, at 15mph in training mode and used that data to re-train the model. The model worked correctly with the new, self-recorded data. The weights provided are trained on the self-recorded data; however, it's trivial to change line 9 in train_config.py to use the Udacity-provided data instead.


