A Rainmeter skin inspired by the UI of Tom Clancys the Division. Requires Rainmeter to be installed.
Network Monitor
Measures the upload and download speed at the current computer. Mesurement will show in kbps as well in percentage. Also displays the external IP address of your network.
Disk Memory Displays the used space relative to the total space on the available on the drive(s). Can be customized to use different drives or file folders.
RAM Meter Dynamic display of the random access memory usage on the system.
CPU Meter Dynamic display of the central proccesing unit usage on the system. Can also be configured to display GPU statistics.
Launcher / Services (Active/Inactive)
Custom application launcher, set to \Ubisoft\games\Tom Clancys The Division\TheDivision.exe directory by default. Uses the Uplay services PID to change OFFLINE to ONLINE.
Clock Displays the time in 24-hour format, including seconds. Includes the day of the week, day of the month, month and year. Can be configured to standard time format.
There are two ways of installing Rainmeter skins downloaded from the internet:
-
Automatically : If the skin is in the .rmskin format. In short : Double-click the .rmskin file, click Install.
-
Manually : If the file is a .zip/.rar/.7z archive. In short : Unzip the archive to the Rainmeter Skins folder. Refresh Rainmeter.
Skins in the Rainmeter Skin Packager (.rmskin) format can be easily and automatically installed with the Rainmeter Skin Installer. During a normal Rainmeter installation, the .rmskin extension is associated in Windows with the Skin Installer program, and simply double-clicking the file will install it in Rainmeter.

This dialog lists each component that will be installed. These may include:
- Skins : At least one skin will always be included and installed in the Rainmeter\Skins folder. The author of the package may indicate that one or more skins will automatically be loaded when the installation is complete.
- Layouts : If the author has added a layout to the package it will be installed in the Rainmeter\Layouts folder. If Apply included layout is selected, the layout will be applied to Rainmeter following installation.
- Plugins : If the author has added custom plugins to the package the appropriate 32bit/64bit architecture version of the plugin .dll files will be installed to the Rainmeter\Plugins folder.
If a skin comes in an archive, such as a ZIP, RAR or 7Z file, software is needed to "extract" them. 7-Zip is one of the popular choices, since it can handle almost any archive type. After installing the software, right-click the archive in Explorer to extract it.
The archive may include a readme.txt file with further instructions. If not, look for a folder with the same name as the skin - it might be inside another folder that is actually called "Skins". Move the folder to the Rainmeter "Skins" folder:
C:\Users\YourName\Documents\Rainmeter\Skins 1
- "YourName" is an example.
Finally, right-click the Rainmeter Windows Notification area icon and select Refresh all. The new skins will now be available to load from the Manage window or context menus.
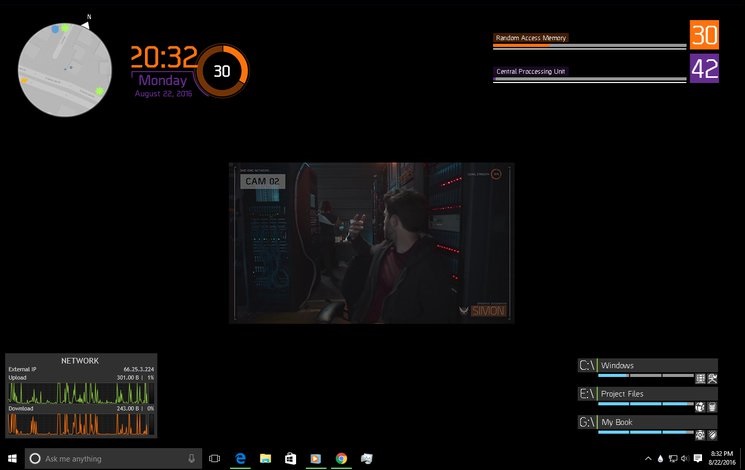
Desktop Example [Wide Client]
Desktop Example [Thin Client]