It's a Krita 4.x Python Plugin for revision control your Artwork and a bit more.
- python 3.x
- Krita 4.x
- Qt5.x
- git
- git-lfs
Download the zip file and copy the durra folder and the durra.desktop file into the following location:
~/.local/share/krita/pykrita
Enable plugin: Settings > Configure Krita... > Python Plugin Manager > durra
Download the zip file and copy the durra folder and the durra.desktop file into Krita's Python Resource Folder /pykrita (Settings > Manage Resources > Open Resource Folder). It's usually a folder somewhere in the hidden AppData folder. (eg. C:\Users\MyUsername\AppData\Roaming\krita\pykrita)
Enable the plugin: Settings > Configure Krita... > Python Plugin Manager > durra
You may need to restart Krita
I use a bit custom directory structure for my Artwork. (But of cause you can use your own :) )
My artwork directory structure:
 - Artwork/
    - 2018/
        - 001 - MyArtwork/
            - work/
                - myartwork.kra
            - <generated files goes here>
or something like this:
 - Artwork/
    - 2018/
        - 001 - MyArtwork/
            - myartwork.kra
            - <generated files goes here>
Why do I have this work/-directory? Simple, so I can export different fileformats like .psd, .sai, ... or for multiple version of this work myartwork_alt_version.kra.
I also numbered my directories to keep it in order
Importing is, your
.krafile need its own directory. And Don't forget to Setup your Author-Settings
https://docs.krita.org/Author_Settings
Before you can version control your art, you must install git and git-lfs.
install git on Linux/Ubuntu
$ sudo apt install git-all

$ curl -s https://packagecloud.io/install/repositories/github/git-lfs/script.deb.sh | sudo bash
$ sudo apt-get install git-lfs
$ git lfs install
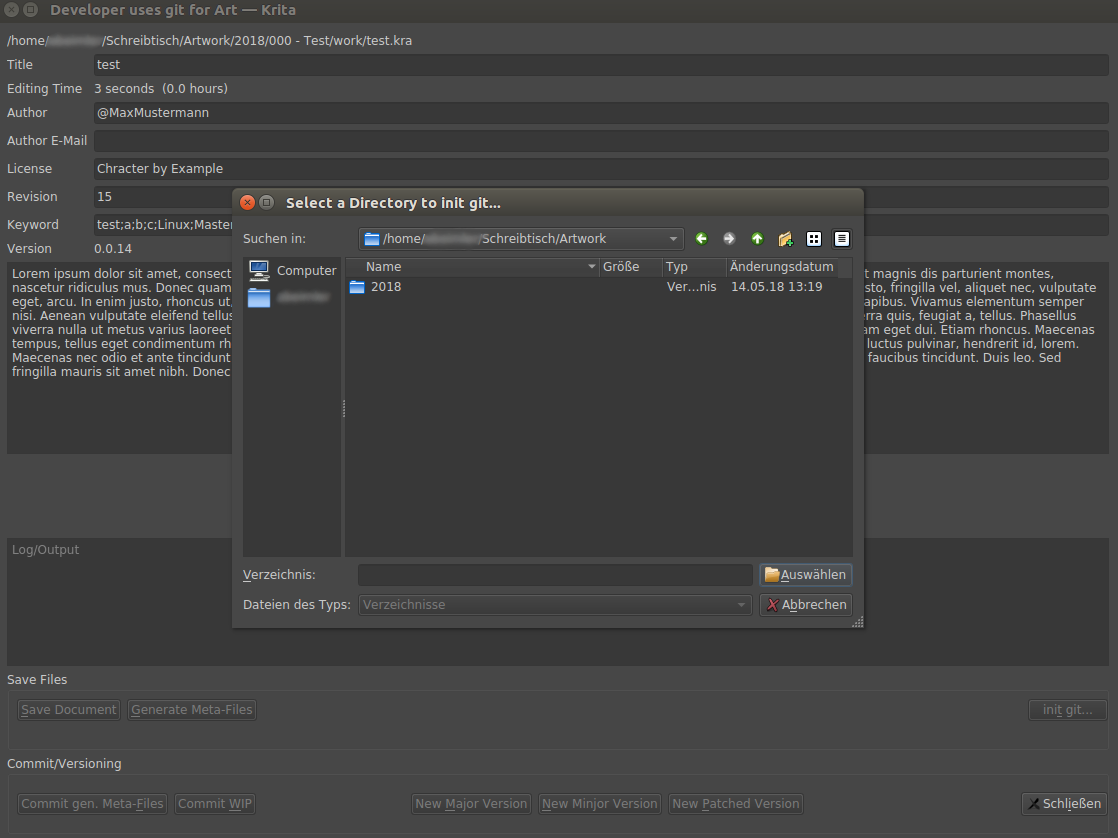
You can use the UI to
git init
or via terminal
$ cd YourArtWorkFolder
$ git init
$ git lfs install
$ git lfs track "*.kra"
$ git lfs track "*.psd"
See git - Setup Manuelly for more details.
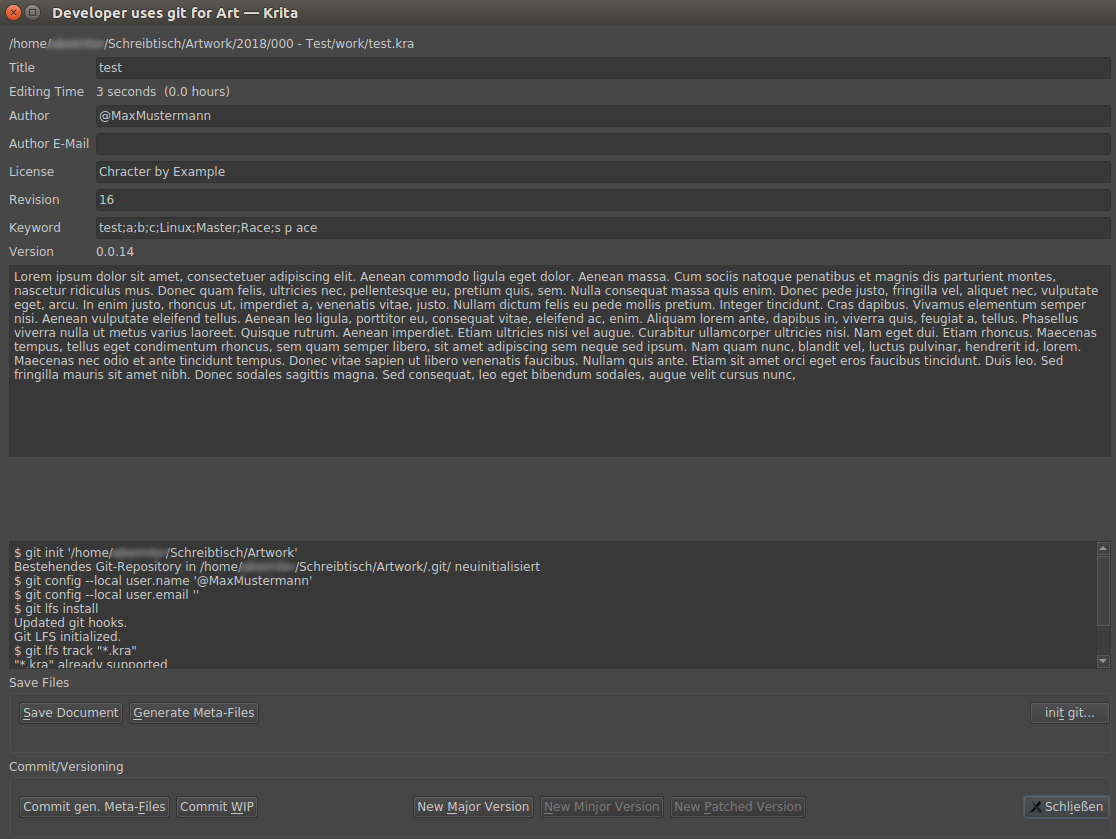
Goto Tools > Scripting > DURRA
- filename filename of active Document
- Title Title
- Editing Time Total editing (format: "X hours Y seconds")
- Author Author Nickname
- License License/Rights
- Revision Document current Revision number
- Keyword Keywords (Use ';' (Example: Linux;Master;Race))
- Version current Version (see VERSION-File)
- Description Description
You can edit this Document Information in: File > Document Information
Use these 2 Buttons for the simple version controll workflow:
-
If you're in your WIP-Phase, use the Commit WIP-Button.
-
If you're done and want to "publish" your work/commission, use the New Major Version-Button.
After your first "release" (version1.0.0) you can use the other New ... Version-Buttons, see Versioning for more detils.
The Versioning should be very simple, based on the Semantic Versioning.
At the beginning you're in the WIP(Work in Progress)-Phase and only save your files with in the version 0.1.x.
Every "step"/commit/revision change the 0.1.x version.
If you finished your work, you simply make an update to the MAJOR-Version 1.0.0, after this step, you can only update the MAJOR, MINJOR or PATCH-Version.
- MAJOR-Version: Totally new Version with Major changes like changing the Foundation in total.
- MINJOR-Version: Additional changes like adding new stuff/characters and add/remove "features".
- PATCH-Version: Just quick fixes.
finished/final-version means you published your work or the commission is done.
Before you can version control your art, you must install git.
and git-lfs, then initial it.
install git and git-lfs on Linux/Ubuntu
$ sudo apt install git-all

$ curl -s https://packagecloud.io/install/repositories/github/git-lfs/script.deb.sh | sudo bash
$ sudo apt-get install git-lfs
$ git lfs install
setup your (git) user-info (optional)
You don't need to set this up if you are using the DocumentInfo Author-Settings, every commit includes the author.
https://git-scm.com/book/en/v2/Getting-Started-First-Time-Git-Setup
$ git config --global user.name "John Doe"
$ git config --global user.email johndoe@example.com
After installation, you need to initialize git in your Project-directory(
001 - MyArtwork/) or (better) in your Artwork-directory(Artwork/).
$ cd Artwork/
$ git init
$ git lfs track "*.kra"
$ git lfs track "_preview.png"
For more information about git lfs, see Configuring Git Large File Storage
TODO
One of the features of this Plugin is, it generates meta-files.
Those files are just txt-files, so you can easily search for keywords or other project information in your repository.
My artwork directory with generated files:
 - Artwork/
    - 2018/
        - 001 - MyArtwork/
            - work/
                - myartwork.kra
            - _preview.png
            - MyArtwork.png
            - MyArtwork_v1.0.1.png
            - TITLE
            - DESCRIPTION.md
            - DESCRIPTION.html
            - DESCRIPTION.bbcode
            - KEYWORD
            - LICENSE
            - README.md
- VERSIONProject-directory of your Artwork.
The number is not only to keep it in order, it's also for "tagging" your work. (later in the commit)
Workspace of your Artwork.
If you us a work/-directory, the files get generated in the directory above.
You can also save .psd-files as a mirror of your work here.
exported png file of your current Artwork.
Good for preview your work later in your repository or later for a comparison.
final/patched version of your Artwork.
Document Info: Title.
Example:
My Artwork TitleDocument Info: Description.
The description is saved in different formats (markdown, bbcode and html), it's really annoying if different Sites, uses different formats, so you can't copy&past the description.
Example (markdown):
### TestArt

An h1 header
============

Paragraphs are separated by a blank line.

2nd paragraph. *Italic*, **bold**, and `monospace`. Itemized lists
look like:

  * this one
  * that one
  * the other one

Note that --- not considering the asterisk --- the actual text
content starts at 4-columns in.

> Block quotes are
> written like so.
>
> They can span multiple paragraphs,
> if you like.

Use 3 dashes for an em-dash. Use 2 dashes for ranges (ex., "it's all
in chapters 12--14"). Three dots ... will be converted to an ellipsis.
Unicode is supported. ☺
Example (bbcode):
[b]TestArt[/b]
[size=200][b]An h1 header[/b][/size]
Paragraphs are separated by a blank line.

2nd paragraph. [i]Italic[/i], [b]bold[/b], and monospace. Itemized lists
look like:

  * this one
  * that one
  * the other one

Note that --- not considering the asterisk --- the actual text
content starts at 4-columns in.

[quote]Block quotes are
written like so.[/quote]
>
[quote]They can span multiple paragraphs,
if you like.[/quote]

Use 3 dashes for an em-dash. Use 2 dashes for ranges (ex., "it's all
in chapters 12--14"). Three dots ... will be converted to an ellipsis.
Unicode is supported. ☺
Example (html):
<h3>TestArt</h3>

<h1>An h1 header</h1>

<p>Paragraphs are separated by a blank line.</p>

<p>2nd paragraph. <em>Italic</em>, <strong>bold</strong>, and <code>monospace</code>. Itemized lists
look like:</p>

<ul>
<li>this one</li>
<li>that one</li>
<li>the other one</li>
</ul>

<p>Note that --- not considering the asterisk --- the actual text
content starts at 4-columns in.</p>

<blockquote>
  <p>Block quotes are
  written like so.</p>

  <p>They can span multiple paragraphs,
  if you like.</p>
</blockquote>

<p>Use 3 dashes for an em-dash. Use 2 dashes for ranges (ex., "it's all
in chapters 12--14"). Three dots ... will be converted to an ellipsis.
Unicode is supported. ☺</p>Document Info: Keyword.
Example:
art drawing fanart kritaDocument Info: License/Rights.
Example:
Character by ThisOtherPerson
Art by @Mecurrent Artwork Version.
Example:
1.0.1Summary of Document Info and some more Informations.
Example:
# TestArt test {0 hours} #a #b #c #d

## Description


### TestArt

An h1 header
============

Paragraphs are separated by a blank line.

2nd paragraph. *Italic*, **bold**, and `monospace`. Itemized lists
look like:

  * this one
  * that one
  * the other one

Note that --- not considering the asterisk --- the actual text
content starts at 4-columns in.

> Block quotes are
> written like so.
>
> They can span multiple paragraphs,
> if you like.

Use 3 dashes for an em-dash. Use 2 dashes for ranges (ex., "it's all
in chapters 12--14"). Three dots ... will be converted to an ellipsis.
Unicode is supported. ☺


## More Infos

Date: 30.03.2019
Duration: 17 minutes 55 seconds (0 hours)


## Credits

Art by Me


## Keywords
a b c d


## Keywords (Hashtags)
#a #b #c #d
- can't edit DocumentInfo
- can't edit Version-Number (directly)
- editing-cycles/revision counts messed up (?)
- works only with git
With this meta-files and export images, you can upload your Art to Sites like DeviantaArt and Mastodon via API, search in the Description and search for tags etc. Just human- and maschine-readable stuff.
- https://github.com/spaceottercode/kritatoot
- https://github.com/juancarlospaco/krita-plugin-bashactions#krita-plugin-bashactions
- https://kritascripting.wordpress.com/2018/03/22/bbds-krita-script-starter/
- https://www.youtube.com/watch?v=thhm4AOujW4 (Draw with Jazza - How to Organize your Files and Folders)
- MIT license
- Copyright 2018 © abeimler.


