The author of this article makes any warranties about the completeness, reliability and accuracy of this information. Any action you take upon the information of this website is strictly at your own risk, and the author will not be liable for any losses and damages in connection with the use of the website and the information provided. None of the items included in this repository form a part of the Heroku Services.
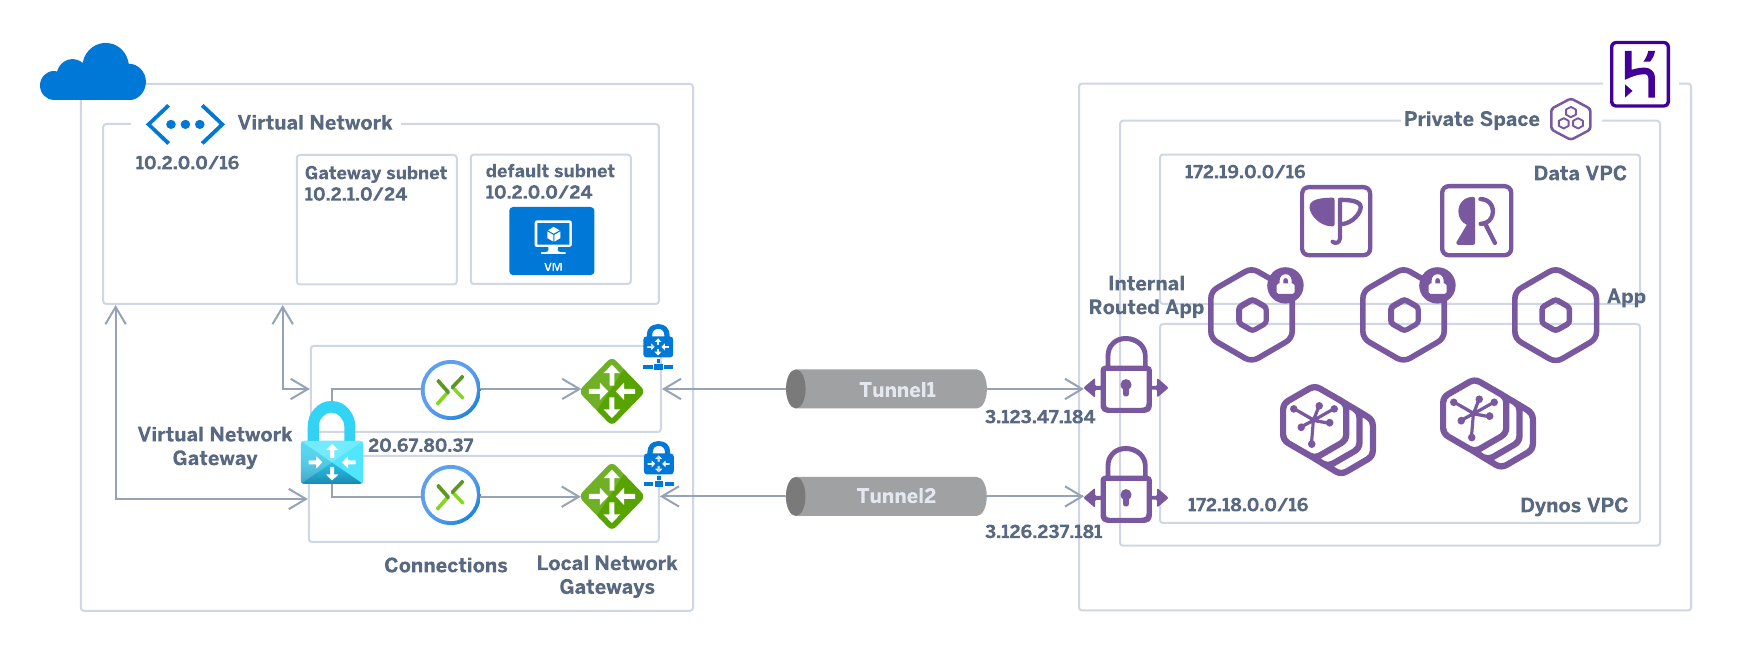
Heroku Private Space VPN connections can be used with Azure VPN, Azure's managed VPN feature. This makes it easy to establish a secure site-to-site VPN connection between your Private Space and Azure infrastructure.
You can connect your Private Space with Azure manually, or use Power Shell or Terraform to automate either a portion or the whole configuration steps.
-
If you already have a Heroku Private Space check that your Azure Virtual Network's internal CIDR range doesn't conflict with that of your space (typically
10.0.0.0/16or172.17.0.0/16). If you're creating your Heroku Private Space and Azure Virtual Network from scratch make sure their respective CIDR ranges don’t overlap (e.g. Heroku CIDR is172.18.0.0/16, Azure CIDR is10.2.0.0/16). -
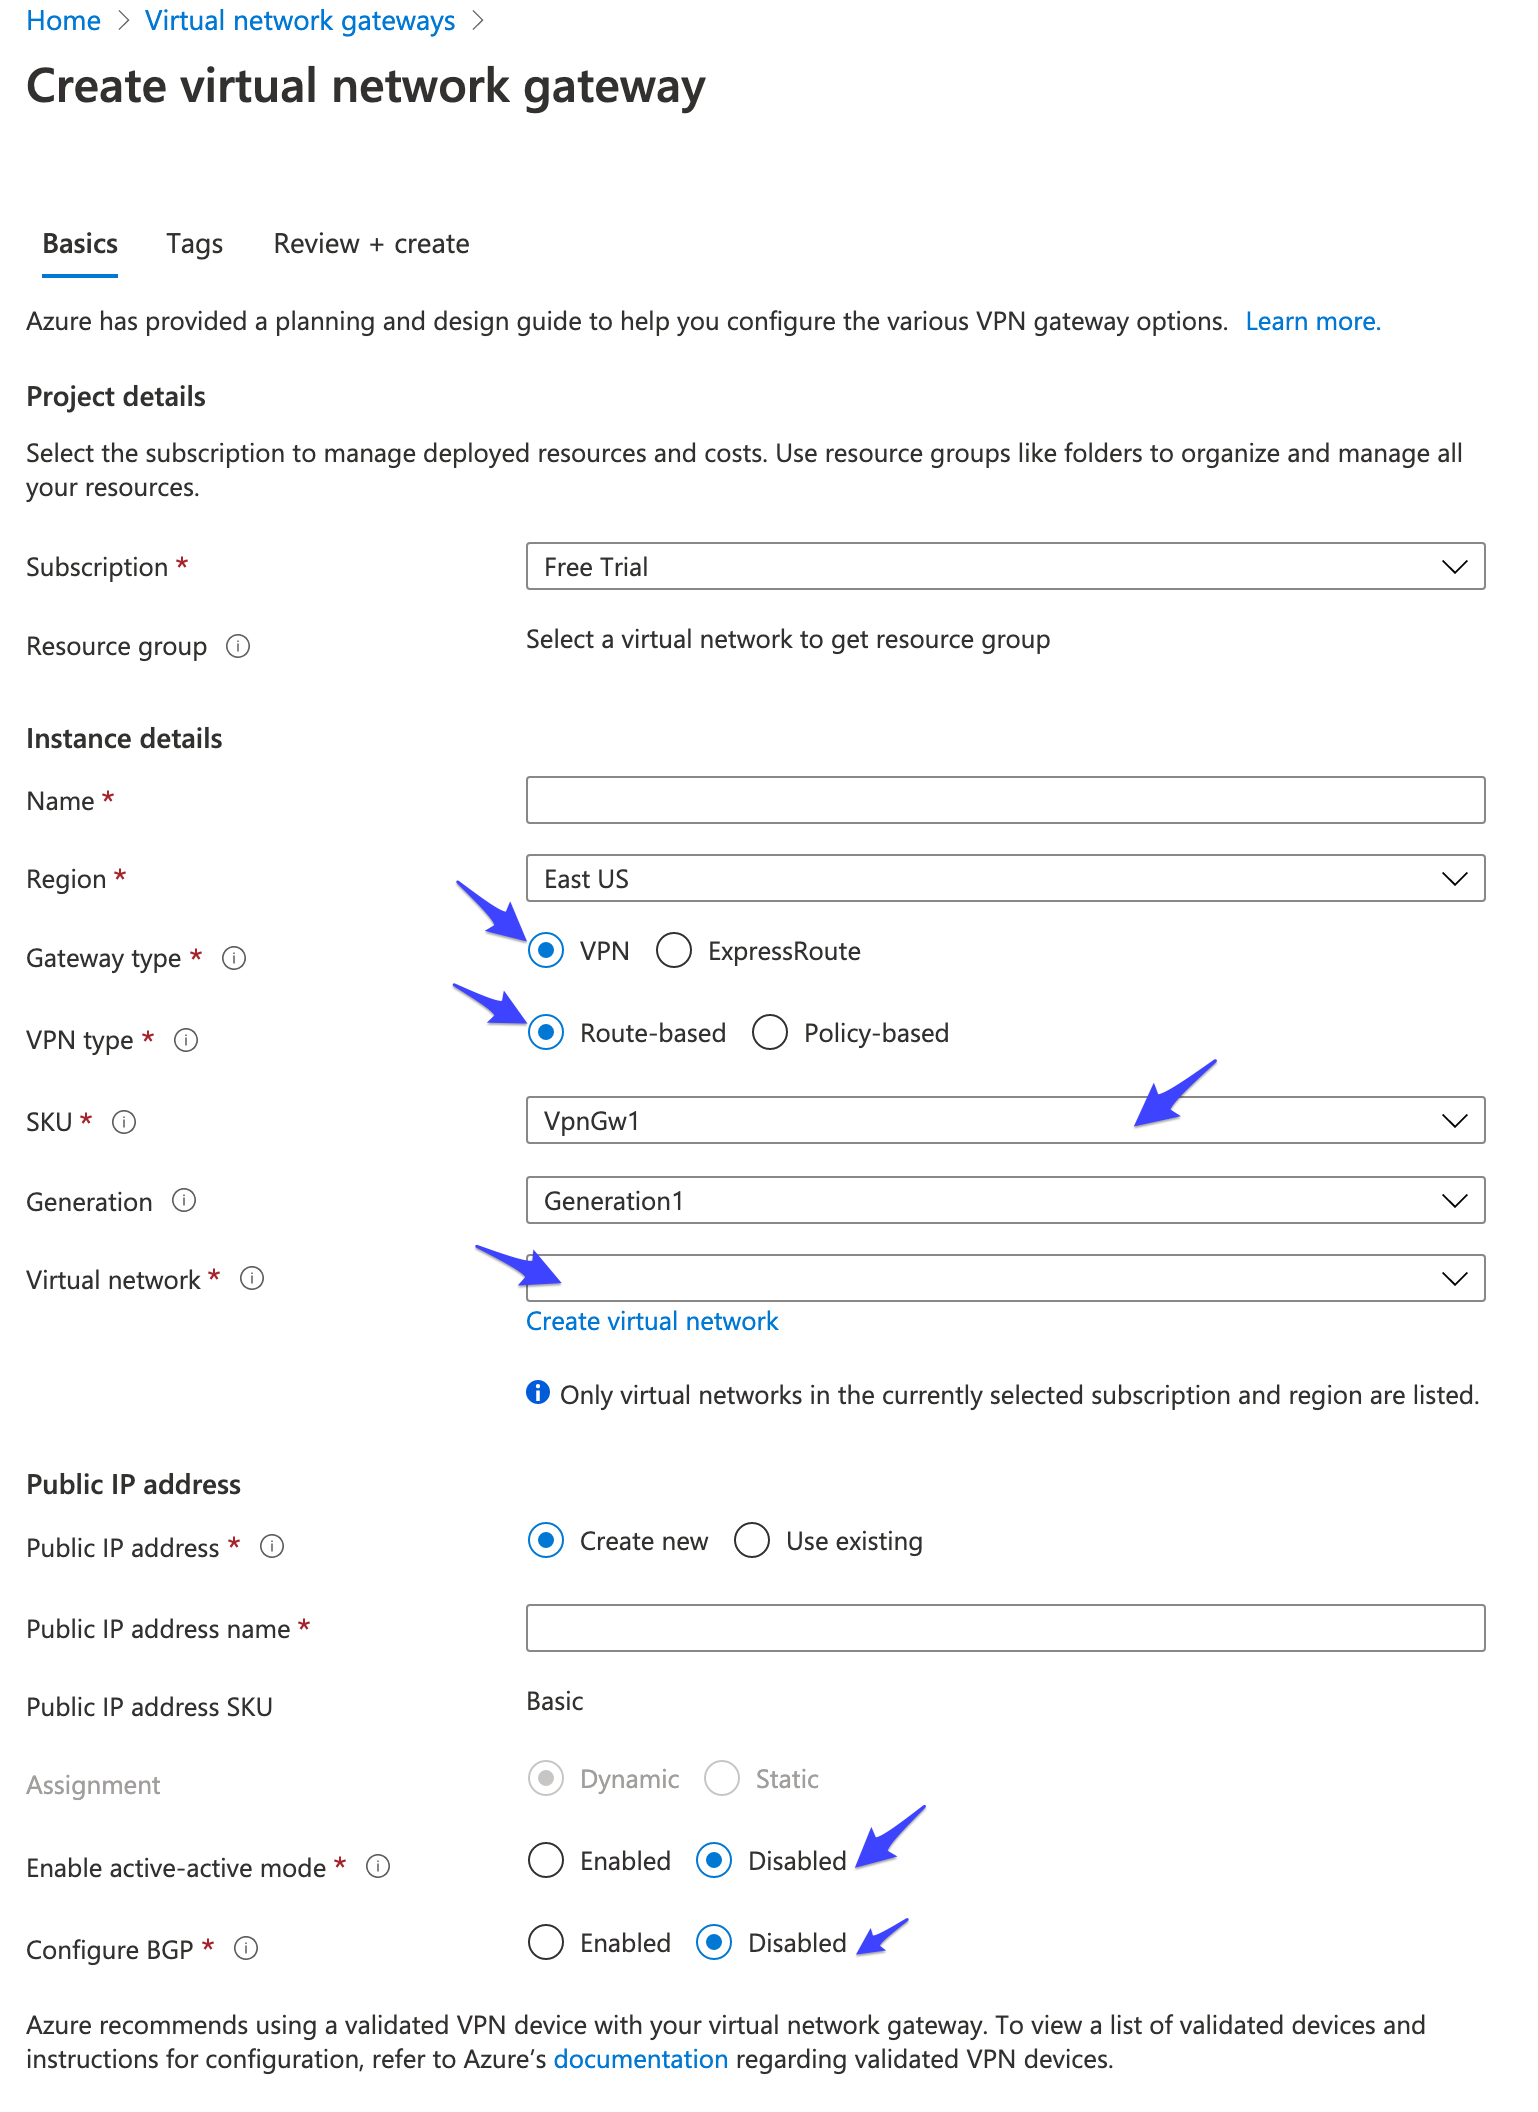
Create an Azure Virtual Network Gateway using the following settings:
- Gateway type: VPN
- VPN type: Route-based
- SKU: select only one of the SKUs that supports IKEv1 connections (e.g.
VpnGw1). As per this FAQ "IKEv1 connections can be created on all RouteBased VPN type SKUs, except the Basic SKU, Standard SKU, and other legacy SKUs." - Virtual Network: select your Azure Virtual Network. Once selected a subnet (GatewaySubnet) is automatically configured for the virtual network.
- Enable active-active mode: Disabled
- Configure BGP: Disabled
-
Once the the Network Gateway is created, note its public IP (e.g.
20.67.80.37) and use it, along with the Azure CIDR, to provision the Heroku VPN connection as follows.$ heroku spaces:vpn:connect --name vpn-connection-name --ip 20.67.80.37 --cidrs 10.2.0.0/16 --space space-name -
Wait for provisioning to complete and print the connection info:
$ heroku spaces:vpn:wait --name vpn-connection-name -s your-space Waiting for VPN Connection vpn-connection-name to allocate... done === vpn-connection-name VPN Tunnels VPN Tunnel Customer Gateway VPN Gateway Pre-shared Key Routable Subnets IKE Version ────────── ──────────────── ────────────── ──────────────────────────────── ──────────────── ─────────── Tunnel 1 20.67.80.37 3.123.47.184 sY0sjBWR7YVeJI8x41Go5.ZRq.ohQOLu 172.18.0.0/16 1 Tunnel 2 20.67.80.37 3.126.237.181 MmesiNxUH0OfcghtYrVSrTDhXj48qPmn 172.18.0.0/16 1 -
When provisioning is complete, get the public IPs for the Heroku VPN gateway, as well as the pre-shared IKEv1 keys.
-
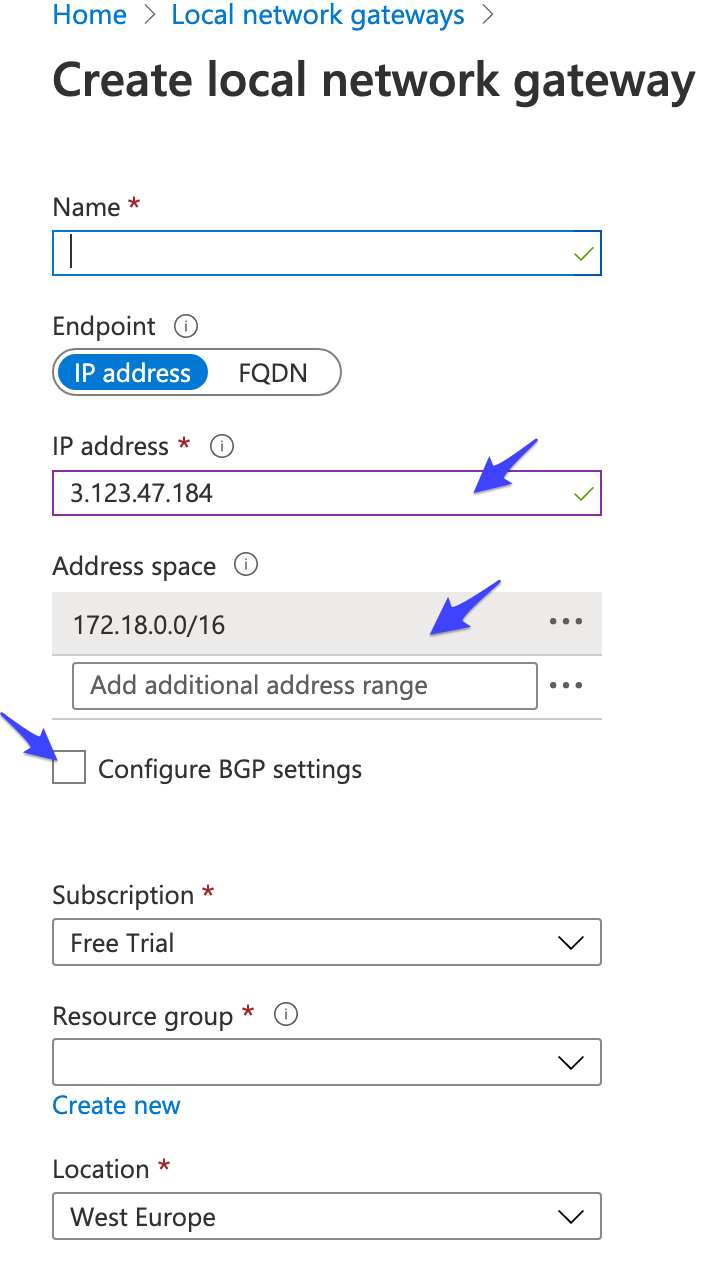
Use the above information to create two Azure Local Network Gateway, one for each of the available Tunnels:
- fill the IP address field with the Heroku VPN Gateway (e.g.
3.123.47.184) - fill the Address space field with the Heroku Routable Subnets (e.g.
172.18.0.0/16) - leave unchecked the Configure BGP settings
- fill the IP address field with the Heroku VPN Gateway (e.g.
-
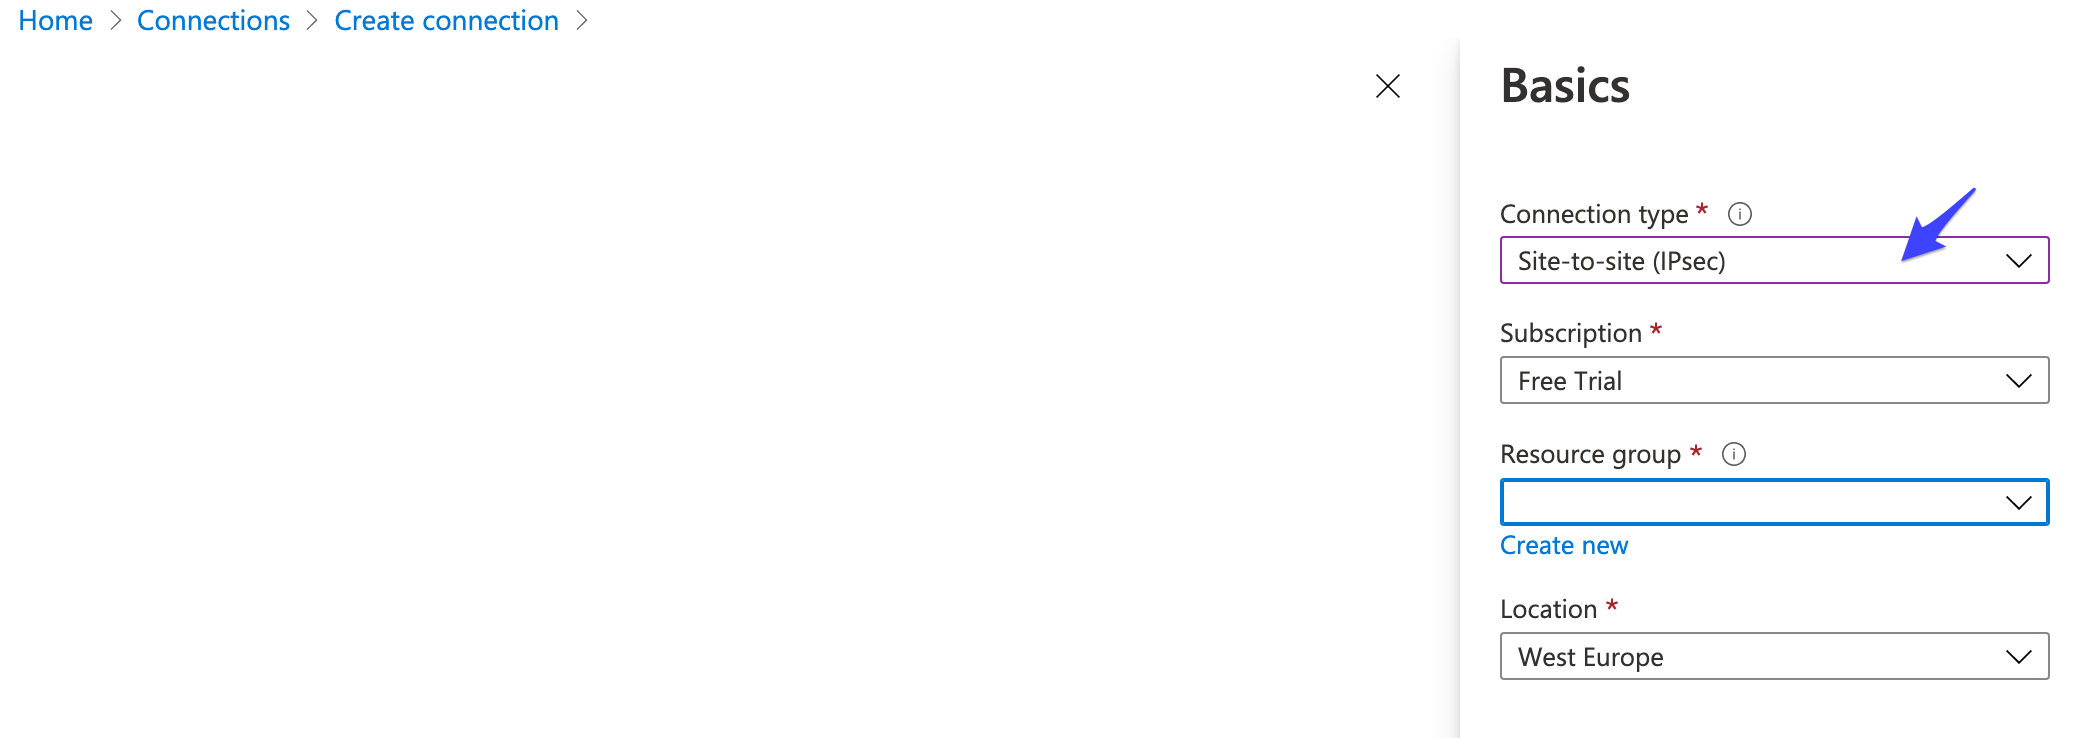
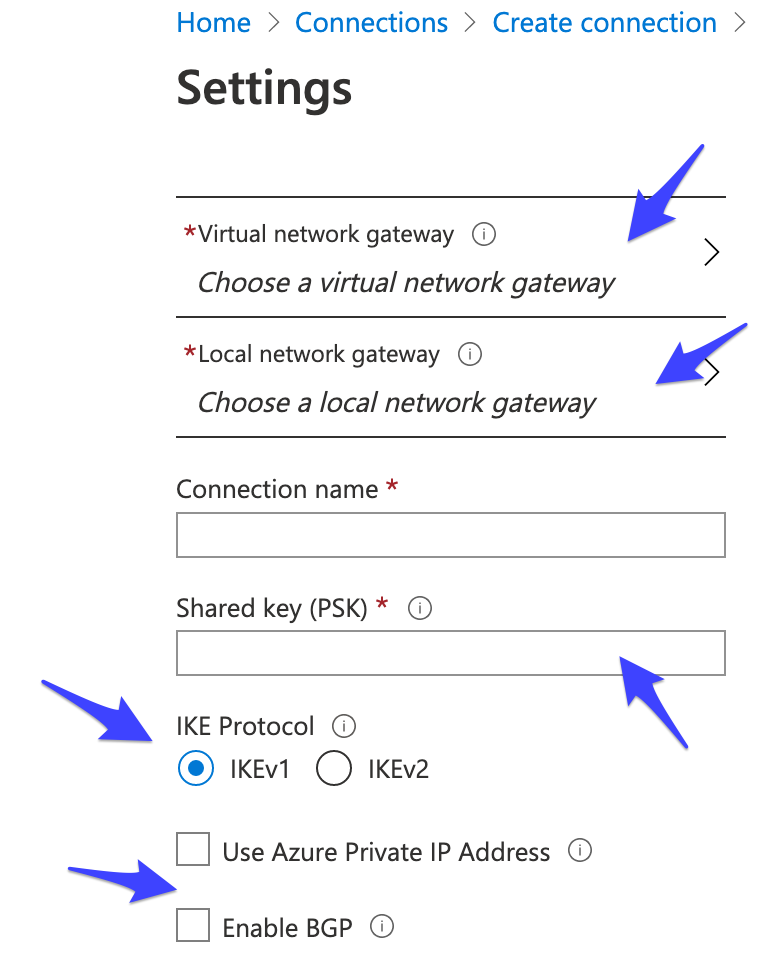
Create two Azure Virtual Network Gateway Connections to link each Azure Local Network Gateway with the corresponding Heroku VPN Gateway, using the following settings:
- Connection type: Site-to-Site(IPSec)
- Virtual network gateway: select the Virtual Network Gateway created on step (2)
- Local network gateway: select one of the Local Network Gateways created on step (6)
- Shared key (PSK): use one of the Pre-shared IKEv1 keys collected on step (4)
- IKE Protocol: IKEv1
- Leave unchecked both Use Azure Private IP Address and Enable BGP
-
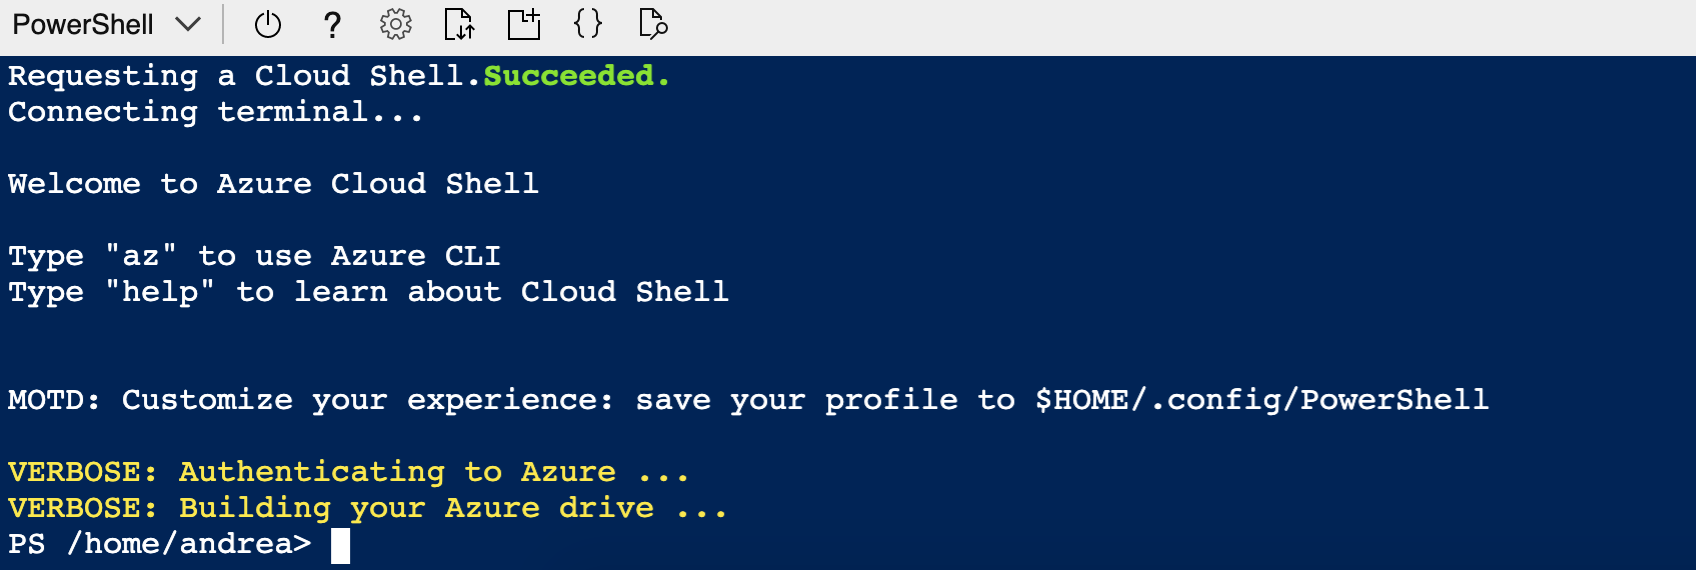
Using the Azure Portal to create Azure Virtual Network Gateway Connections doesn't support specifying a non-default IPsec/IKE policy, and the default is not compatible with the settings required by the Heroku VPN. For this reason it's necessary to use PowerShell to modify the policy. This is easily done using the Azure Portal Cloud Shell:
From the Cloud Shell terminal, execute the following commands, replacing the Connection and Resource Group names used to create the Azure Virtual Network Gateway Connections on the previous step.
$ipsecPolicy = New-AzIpsecPolicy -SALifeTimeSeconds 3600 -IpsecEncryption "AES256" -IpsecIntegrity "SHA256" -IkeEncryption "AES256" -IkeIntegrity "SHA256" -DhGroup "DHGroup2" -PfsGroup "PFS2"

$conn1 = Get-AzVirtualNetworkGatewayConnection -Name <Connection1 name> -ResourceGroupName <Connection1 Resource Group name>
Set-AzVirtualNetworkGatewayConnection -VirtualNetworkGatewayConnection $conn1 -IpsecPolicies $ipsecPolicy

$conn2 = Get-AzVirtualNetworkGatewayConnection -Name <Connection2 name> -ResourceGroupName <Connection2 Resource Group name>
Set-AzVirtualNetworkGatewayConnection -VirtualNetworkGatewayConnection $conn2 -IpsecPolicies $ipsecPolicy
-
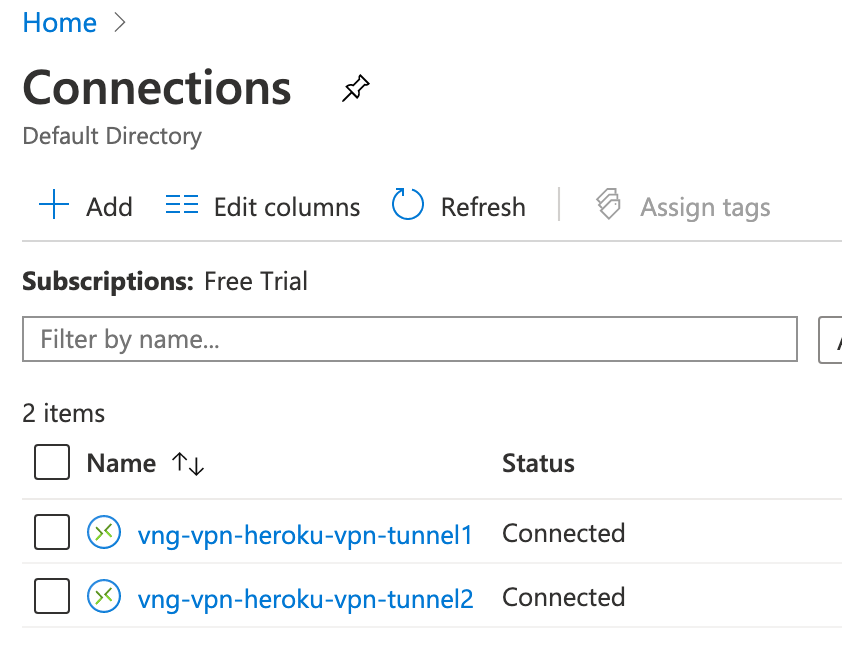
After a few minutes check that the VPN connections are ready both on Azure (the Connection status is Connected) and Heroku (the connection status is Active and the Tunnels are UP).
$ heroku spaces:vpn:connections --space space-name
=== space-name VPN Connections
Name                  Status  Tunnels
────────────────────  ──────  ───────
vpn-connection-name   active   UP/UP
