Learn MLE & MLOps for free by designing, building, deploying and monitoring an end-to-end ML batch system | source code + 2.5 hours of reading & video materials on Medium
This repository contains a 7-lesson course that will walk you step-by-step through how to design, implement, deploy, and monitor an ML batch system using MLOps good practices. During the course, you will build a production-ready model forecasting energy consumption levels for the next 24 hours across multiple consumer types from Denmark.
More concretely, you will learn how to build, train, serve, and monitor an ML model using a batch architecture. Also, you will learn how to integrate an experiment tracker, a model registry, a feature store, Docker, Airflow, GitHub Actions and more!
This course targets mid/advanced ML engineers who want to level up their skills by building their own end-to-end projects or SWE who want to transition to ML engineering.
Following the documentation on GitHub and the lessons on Medium, you have 2.5 hours of reading & video materials, which will help you understand every piece of the code!
At the end of the course, you will know how to build everything from the diagram below 👇
Don't worry if something doesn't make sense to you. We will explain everything in detail in the Medium lessons.
You can safely use this code as you like, as long as you respect the terms and agreement of the MIT License.
<<< Using all the tools suggested in the course will be free of charge, except the ones from Lesson 7, where you will be deploying your application to GCP which will cost you ~20$. >>>
- What You Will Learn
- Lessons & Tutorials
- Data
- Code Structure
- Set Up Additional Tools
- Usage
- Installation & Usage for Development
- Licensing & Contributing
At the end of this 7 lessons course, you will know how to:
- design a batch-serving architecture
- use Hopsworks as a feature store
- design a feature engineering pipeline that reads data from an API
- build a training pipeline with hyper-parameter tunning
- use W&B as an ML Platform to track your experiments, models, and metadata
- implement a batch prediction pipeline
- use Poetry to build your own Python packages
- deploy your own private PyPi server
- orchestrate everything with Airflow
- use the predictions to code a web app using FastAPI and Streamlit
- use Docker to containerize your code
- use Great Expectations to ensure data validation and integrity
- monitor the performance of the predictions over time
- deploy everything to GCP
- build a CI/CD pipeline using GitHub Actions
If that sounds like a lot, don't worry. After you cover this course, you will understand everything we said before. Most importantly, you will know WHY we used all these tools and how they work together as a system.
The course consists of 7 lessons hosted on Medium Towards Data Science publication. We also provide a bonus lesson where we openly discuss potential improvements that could be made to the current architecture and trade-offs we had to take during the course. The course adds up to 2.5 hours of reading and video materials.
We recommend running the code along the articles to get the best out of this course, as we provide detailed instructions to set everything up.
👇 Access the step-by-step lessons on Medium 👇
- Batch Serving. Feature Stores. Feature Engineering Pipelines.
- Training Pipelines. ML Platforms. Hyperparameter Tuning.
- Batch Prediction Pipeline. Package Python Modules with Poetry.
- Private PyPi Server. Orchestrate Everything with Airflow.
- Data Validation for Quality and Integrity using GE. Model Performance Continuous Monitoring.
- Consume and Visualize your Model's Predictions using FastAPI and Streamlit. Dockerize Everything.
- Deploy All the ML Components to GCP. Build a CI/CD Pipeline Using Github Actions.
- [Bonus] Behind the Scenes of an ‘Imperfect’ ML Project — Lessons and Insights.
We used an open API that provides hourly energy consumption values for all the energy consumer types within Denmark.
They provide an intuitive interface where you can easily query and visualize the data. You can access the data here.
The data has 4 main attributes:
- Hour UTC: the UTC datetime when the data point was observed.
- Price Area: Denmark is divided into two price areas: DK1 and DK2 - divided by the Great Belt. DK1 is west of the Great Belt, and DK2 is east of the Great Belt.
- Consumer Type: The consumer type is the Industry Code DE35, owned and maintained by Danish Energy.
- Total Consumption: Total electricity consumption in kWh
Note: The observations have a lag of 15 days! But for our demo use case, that is not a problem, as we can simulate the same steps as it would be in real time.
The data points have an hourly resolution. For example: "2023–04–15 21:00Z", "2023–04–15 20:00Z", "2023–04–15 19:00Z", etc.
We will model the data as multiple time series. Each unique price area and consumer type tuple represents its unique time series.
Thus, we will build a model that independently forecasts the energy consumption for the next 24 hours for every time series.
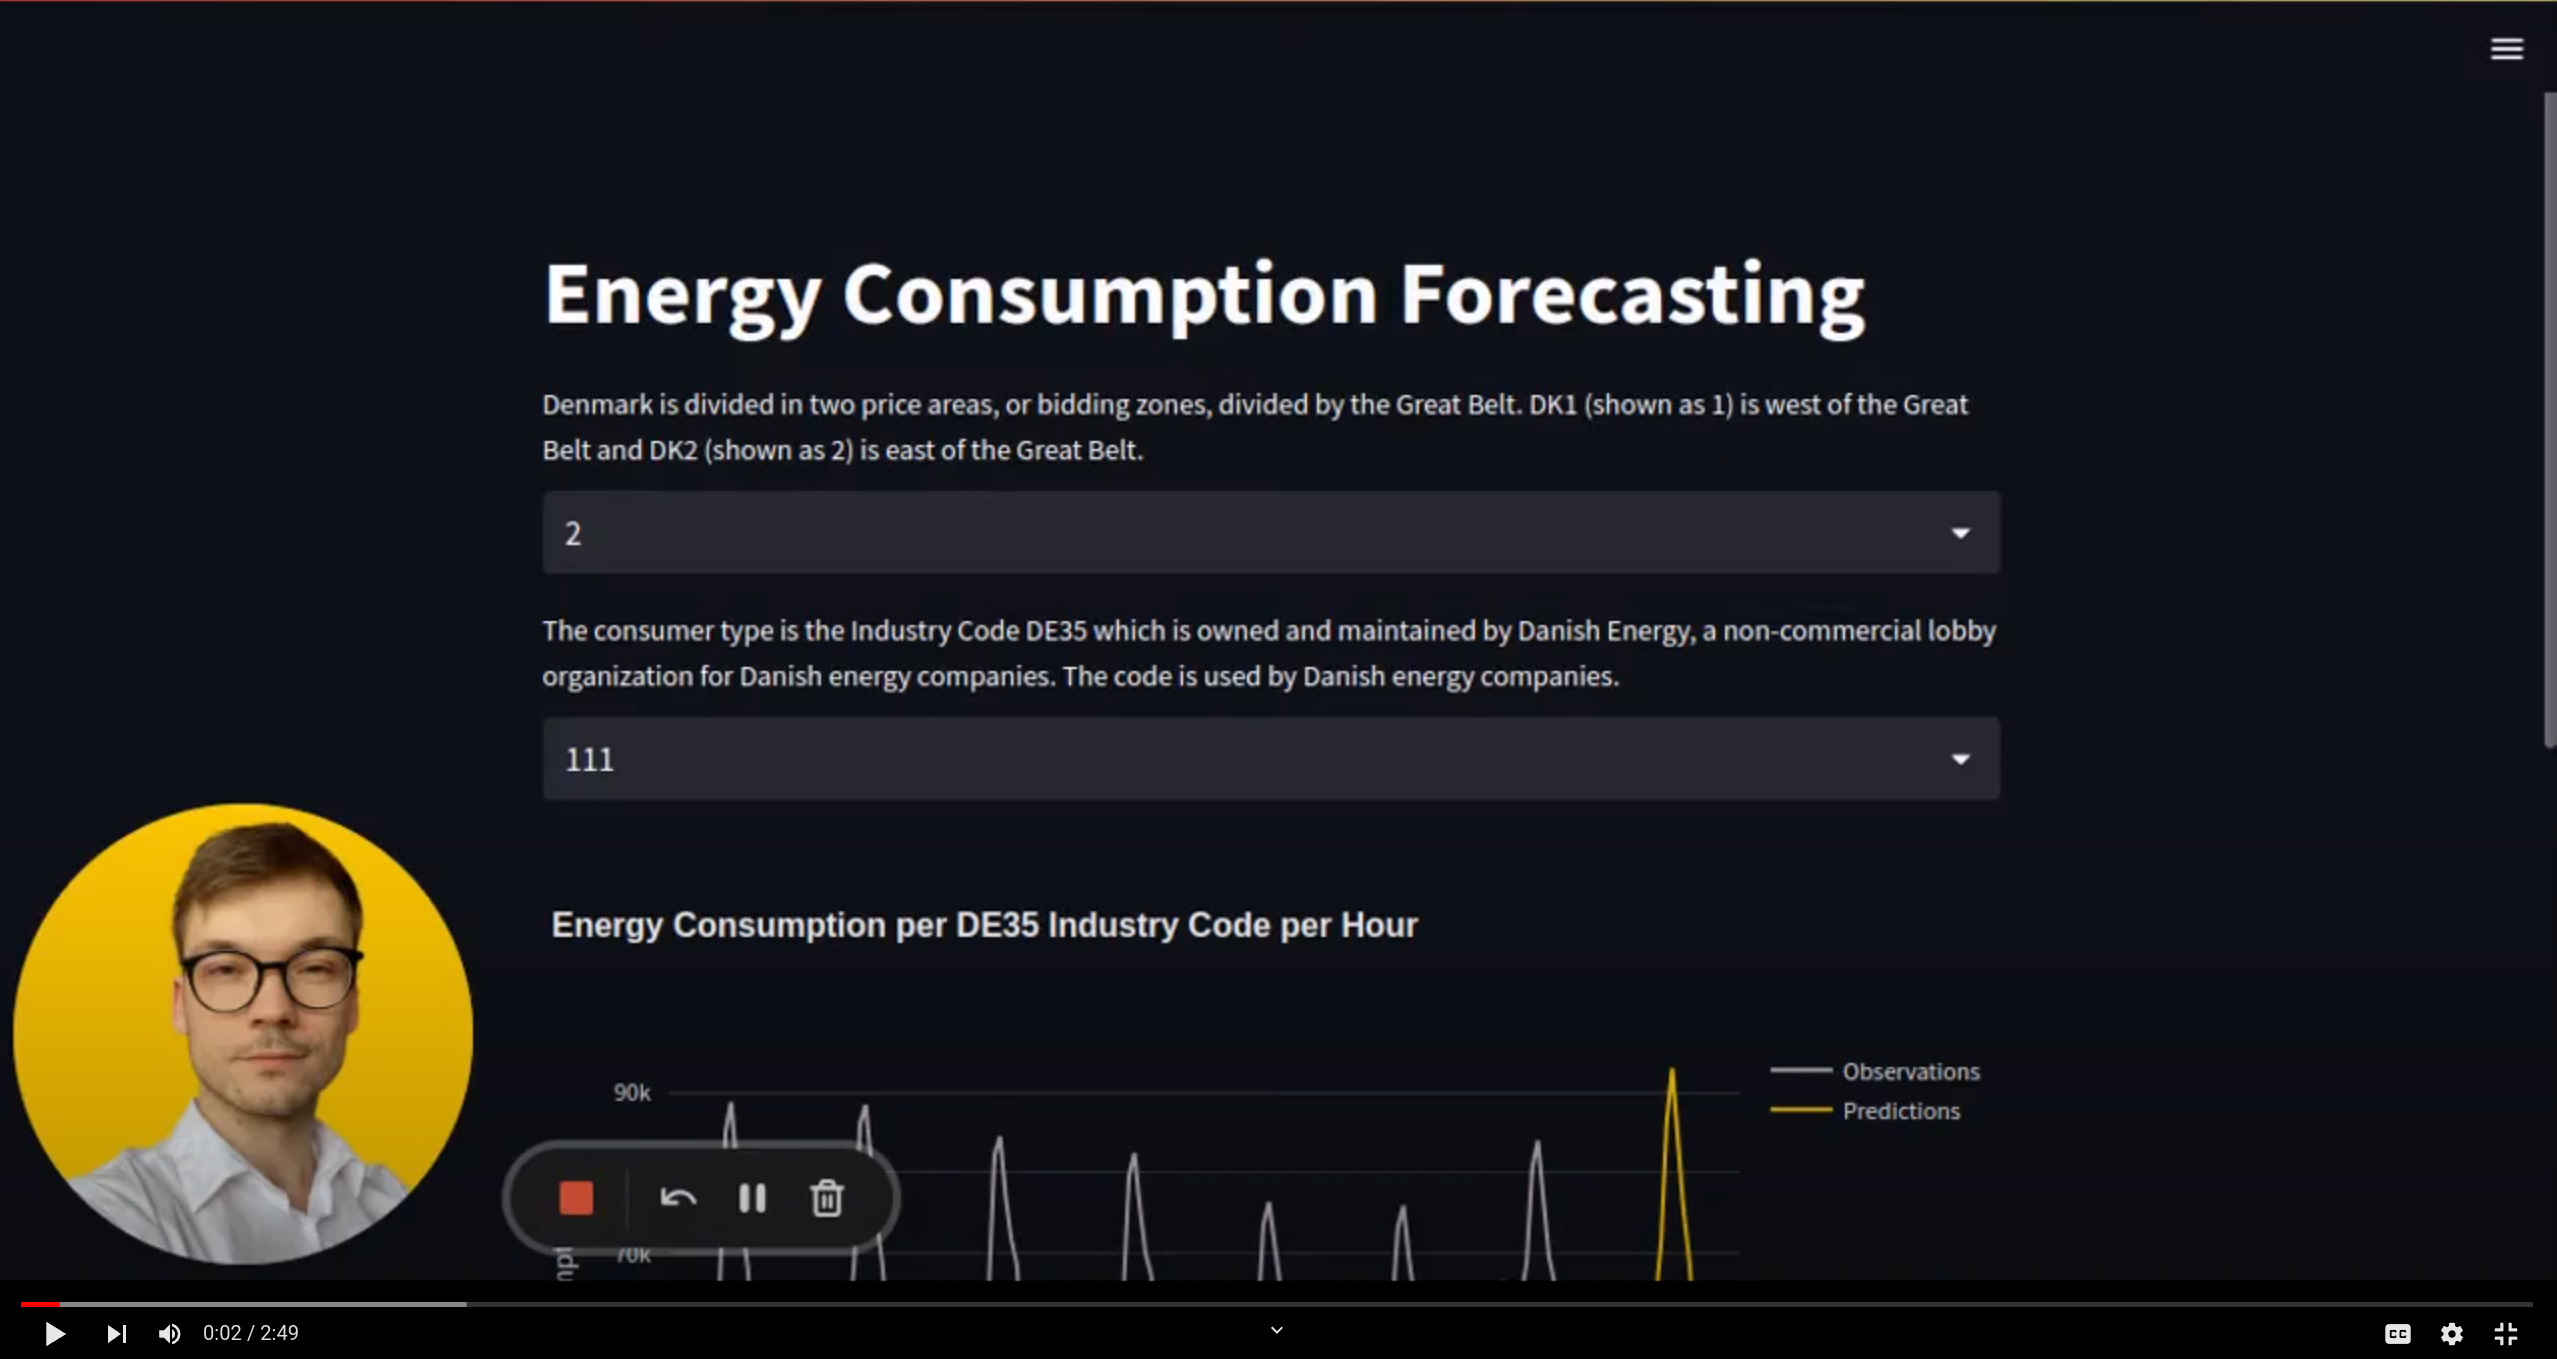
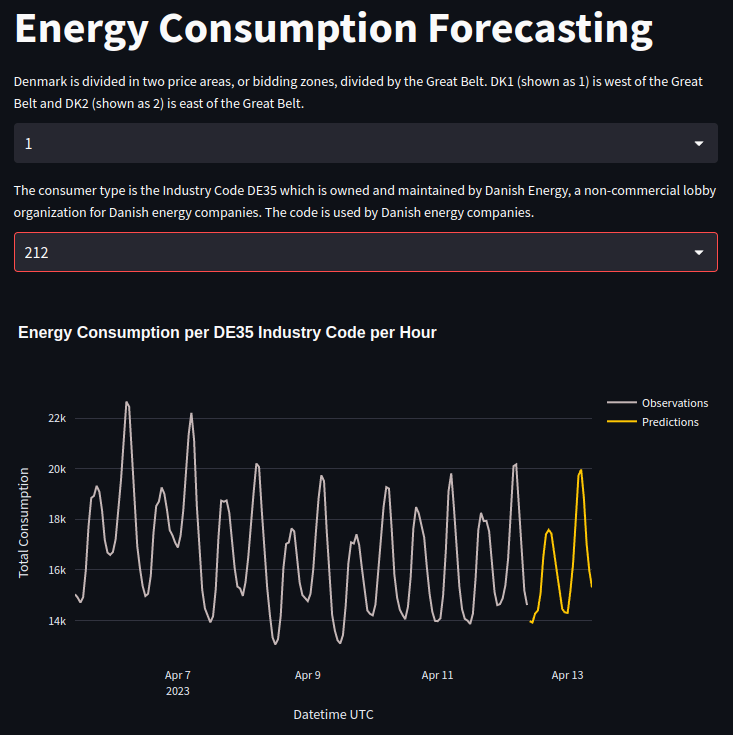
Check out this video to better understand what the data looks like.
The code is split into two main components: the pipeline and the web app.
The pipeline consists of 3 modules:
feature-pipelinetraining-pipelinebatch-prediction-pipeline
The web app consists of other 3 modules:
app-apiapp-frontendapp-monitoring
Also, we have the following folders:
airflow: Airflow files | Orchestration.github: GitHub Actions files | CI/CDdeploy: Build & Deploy
To follow the structure in its natural flow, read the folders in the following order:
feature-pipelinetraining-pipelinebatch-prediction-pipelineairflowapp-apiapp-frontend&app-monitoring.github
Read the Medium articles listed in the Lessons & Tutorials section for the whole experience.
The code is tested only on Ubuntu 20.04 and 22.04 using Python 3.9.
If you have problems during the setup, please leave us an issue, and we will respond to you and update the README for future readers.
Also, if you have any questions, you can contact me directly on LinkedIn.
Install Python system dependencies:
sudo apt-get install -y python3-distutilsDownload and install Poetry:
curl -sSL https://install.python-poetry.org | python3 -Open the .bashrc file to add the Poetry PATH:
nano ~/.bashrcAdd export PATH=~/.local/bin:$PATH
to ~/.bashrc
Check if Poetry is installed:
source ~/.bashrc
poetry --version
Official Poetry installation instructions.
We will run the private PyPi server using Docker down the line. But it will already expect the credentials configured.
Create credentials using passlib:
# Install dependencies.
sudo apt install -y apache2-utils
pip install passlib

# Create the credentials under the energy-forecasting name.
mkdir ~/.htpasswd
htpasswd -sc ~/.htpasswd/htpasswd.txt energy-forecasting
Set poetry to use the credentials:
poetry config repositories.my-pypi http://localhost
poetry config http-basic.my-pypi energy-forecasting <password>
Check that the credentials are set correctly in your poetry auth.toml file:
cat ~/.config/pypoetry/auth.tomlYou will use Hopsworks as your serverless feature store. Thus, you have to create an account and a project on Hopsworks. We will show you how to configure the code to use your Hopsworks project later.
We explained on Medium in Lesson 1 how to create a Hopsworks API Key. But long story short, you can go to your Hopsworks account settings and create the API Key from there.
If you want everything to work with the default settings, use the following naming conventions:
- create a
projectcalledenergy_consumption
Click here to start with Hopsworks.
Note: Our course will use only the Hopsworks freemium plan, making it free of charge to replicate the code within the series.
You will use Weights & Biases as your serverless ML platform. Thus, you must create an account and a project on Weights & Biases. We will show you how to configure the code to use your W&B project later.
On Medium, we explained in Lesson 2 how to create an API Key on W&B. But long story short, you can go to your W&B user settings and create the API Key from there.
If you want everything to work with the default settings, use the following naming conventions:
- create an
entitycalledteaching-mlops - create a
projectcalledenergy_consumption
Click here to start with Weights & Biases.
Note: Our course will use only the W&B freemium plan, making it free of charge to replicate the code within the series.
First, you must install the gcloud GCP CLI on your machine.
Follow this tutorial to install it.
If you only want to run the code locally, go straight to the "Storage" section.
As before, you have to create an account and a project on GCP. Using solely the bucket as storage will be free of charge.
When we were writing this documentation, GCS was free until 5GB.
If you want everything to work with the default settings, use the following naming conventions:
- create a
projectcalledenergy_consumption
At this step, you have to do 5 things:
- create a project
- create a non-public bucket
- create a service account that has admin permissions to the newly created bucket
- create a service account that has read-only permissions to the newly created bucket
- download a JSON key for the newly created service accounts.
Your bucket admin service account should have assigned the following role: Storage Object Admin
Your bucket read-only service account should have assigned the following role: Storage Object Viewer
- Docs for creating a bucket on GCP.
- Docs for creating a service account on GCP.
- Docs for creating a JSON key for a GCP service account.
NOTE: When we were writing this documentation, GCS was free until 5GB.
If you want everything to work with the default settings, use the following naming conventions:
- create a
projectcalledenergy_consumption - create a
non-public bucketcalledhourly-batch-predictions(Pick any region, but just be aware of it.) - rename your downloaded
adminJSON service key toadmin-buckets.json - rename your downloaded
read-onlyJSON service key toread-buckets.json
This step must only be finished if you want to deploy the code on GCP VMs and build the CI/CD with GitHub Actions.
Note that this step might result in a few costs on GCP. It won't be much. While developing this course, we spent only ~20$.
Also, you can get some free credits if you create a new GCP account (we created a new account and received 300$ in GCP credits). Just be sure to delete the resources after you finish the course.
See this document for detailed instructions.
The code is tested only on Ubuntu 20.04 and 22.04 using Python 3.9.
If you have problems during the usage instructions, please leave us an issue, and we will respond to you and update the README for future readers.
Also, if you have any questions, you can contact me directly on LinkedIn.
Check out Lesson 4 on Medium to better understand how everything is orchestrated using Airflow.
You will run the pipeline using Airflow (free usage). Don't be scared. Docker makes everything very simple to set up.
Note: We also hooked the private PyPi server in the same docker-compose.yaml file with Airflow. Thus, everything will start with one command.
Important: If you plan to run the pipeline outside Airflow, be sure to check the 🧑💻 7. Installation & Usage for Development section.
# Move to the airflow directory.
cd airflow

# Make expected directories and environment variables
mkdir -p ./logs ./plugins
sudo chmod 777 ./logs ./plugins

# It will be used by Airflow to identify your user.
echo -e "AIRFLOW_UID=$(id -u)" > .env
# This shows where our project root directory is located.
echo "ML_PIPELINE_ROOT_DIR=/opt/airflow/dags" >> .env
Now move to the DAGS directory:
cd ./dags

# Make a copy of the env default file.
cp .env.default .env
# Open the .env file and complete the WANDB_API_KEY and FS_API_KEY credentials

# Create the folder where the program expects its GCP credentials.
mkdir -p credentials/gcp/energy_consumption
# Copy the GCP service credetials that gives you admin access to GCS.
cp -r /path/to/admin/gcs/credentials/admin-buckets.json credentials/gcp/energy_consumption
# NOTE that if you want everything to work outside the box your JSON file should be called admin-buckets.json.
# Otherwise, you have to manually configure the GOOGLE_CLOUD_SERVICE_ACCOUNT_JSON_PATH variable from the .env file.

# Initialize the Airflow database
docker compose up airflow-init

# Start up all services
# Note: You should set up the private PyPi server credentials before running this command.
docker compose --env-file .env up --build -dWait a while for the containers to build and run. After access 127.0.0.1:8080 to login into Airflow.
Use the following default credentials to log in:
- username:
airflow - password:
airflow
Before starting the pipeline DAG, you must deploy the modules to the private PyPi server. Go back to the root folder of the energy-forecasting repository and run the following to build and deploy the pipeline modules to your private PyPi server:
# Set the experimental installer of Poetry to False. For us, it crashed when it was on True.
poetry config experimental.new-installer false
# Build & deploy the pipelines modules.
sh deploy/ml-pipeline.sh
Airflow will know how to install the packages from the private PyPi server.
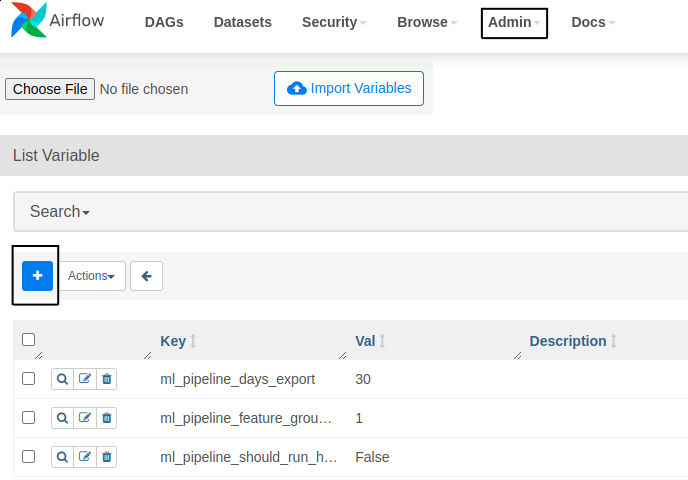
One final step is to configure the parameters used to run the pipeline. Go to the Admin tab, then hit Variables. There you can click on the blue + button to add a new variable.
These are the three parameters you can configure with our suggested values:
ml_pipeline_days_export = 30ml_pipeline_feature_group_version = 5ml_pipeline_should_run_hyperparameter_tuning = False
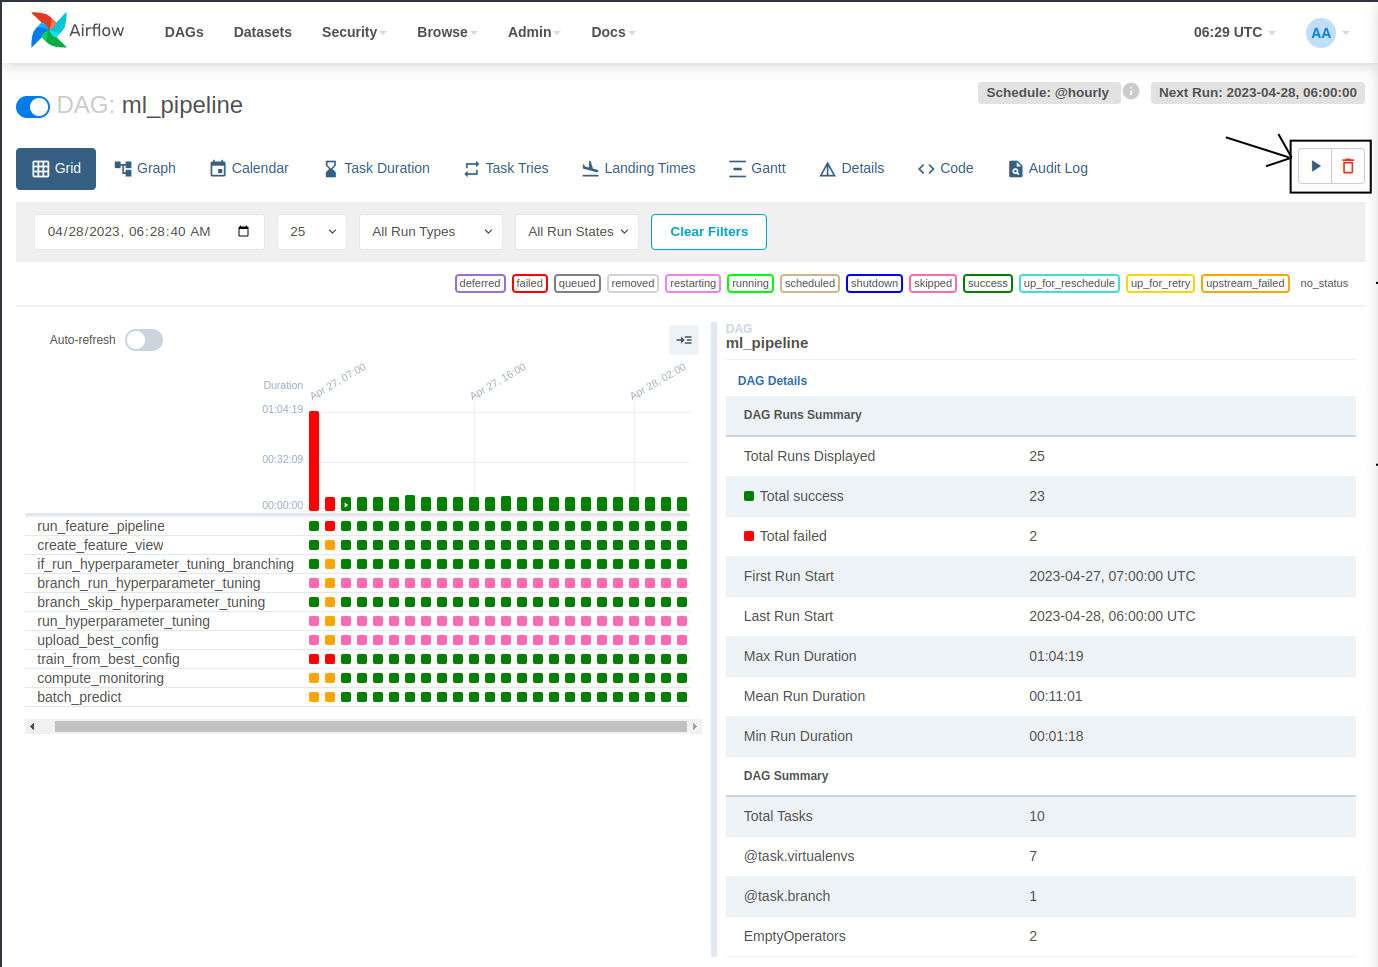
Now, go to the DAGS/All section and search for the ml_pipeline DAG. Toggle the activation button. It should automatically start in a few seconds. Also, you can manually run it by hitting the play button from the top-right side of the ml_pipeline window.
That is it. You can run the entire pipeline with a single button if all the credentials are set up correctly. How cool is that?
Here is what the DAG should look like 👇
docker compose down --volumes --rmi allFind your airflow-webserver docker container ID:
docker psStart a shell inside the airflow-webserver container and run airflow dags backfill as follows (in this example, we did a backfill between 2023/04/11 00:00:00 and 2023/04/13 23:59:59):
docker exec -it <container-id-of-airflow-webserver> sh
airflow dags backfill --start-date "2023/04/11 00:00:00" --end-date "2023/04/13 23:59:59" ml_pipeline
If you want to clear the tasks and run them again, run these commands:
docker exec -it <container-id-of-airflow-webserver> sh
airflow tasks clear --start-date "2023/04/11 00:00:00" --end-date "2023/04/13 23:59:59" ml_pipelineThe private PyPi server is already hooked to the airflow docker compose file. But if you want to run it separately for whatever reason, you can run this command instead:
docker run -p 80:8080 -v ~/.htpasswd:/data/.htpasswd pypiserver/pypiserver:latest run -P .htpasswd/htpasswd.txt --overwriteCheck out Lesson 6 on Medium to better understand how the web app components work together.
Fortunately, everything is a lot simpler when setting up the web app. This time, we need to configure only a few credentials.
Important: If you plan to run the web app components without docker-compose, check the 🧑💻 7. Installation & Usage for Development section.
Copy the bucket read-only GCP credentials to the root directory of your energy-forecasting project:
# Create the folder where the program expects its GCP credentials.
mkdir -p credentials/gcp/energy_consumption
# Copy the GCP service credetials that gives you read-only access to GCS.
cp -r /path/to/admin/gcs/credentials/read-buckets.json credentials/gcp/energy_consumption
# NOTE that if you want everything to work outside the box your JSON file should be called read-buckets.json.
# Otherwise, you have to manually configure the APP_API_GCP_SERVICE_ACCOUNT_JSON_PATH variable from the .env file of the API.
Go to the API folder and make a copy of the .env.default file:
cd ./app-api
cp .env.default .env
NOTE: You shouldn't change anything else if you respect all the naming conventions suggested in this README.
That is it!
Go back to the root directory of your energy-forecasting project and run the following docker command, which will build and run all the docker containers of the web app:
docker compose -f deploy/app-docker-compose.yml --project-directory . up --buildIf you want to run it in development mode, run the following command:
docker compose -f deploy/app-docker-compose.yml -f deploy/app-docker-compose.local.yml --project-directory . up --buildNow you can see the apps running at:
All the modules support Poetry. Thus the installation is straightforward.
NOTE: Just ensure you have installed Python 3.9, not Python 3.8 or Python 3.10.
We support Docker to run the whole pipeline. Check out the Usage section if you only want to run it as a whole.
If Poetry is not using Python 3.9, you can follow the next steps:
- Install Python 3.9 on your machine.
cd /path/to/project, for example,cd ./feature-pipeline- run
which python3.9to find where Python3.9 is located - run
poetry env use /path/to/python3.9
See here how to install every project individually:
Important: Before installing and running every module individually, one key step is to set the ML_PIPELINE_ROOT_DIR variable to your root directory of the energy-forecasting project (or any other directory - just make sure to set it):
Export it to your ~/.bashrc file:
gedit ~/.bashrc
export ML_PIPELINE_ROOT_DIR=/path/to/root/directory/repository/energy-forecasting/
Or run every Python script proceeded by the ML_PIPELINE_ROOT_DIR variables. For example:
ML_PIPELINE_ROOT_DIR=/path/to/root/directory/repository/energy-forecasting/ python -m feature_pipeline.pipelineBy doing so, all the 3 pipeline projects (feature, training, batch) will load and save the following files from the same location:
.envconfiguration;- JSON metadata files;
- logs & plots.
NOTE: This step is critical as every pipeline component needs to access the JSON metadata from other pipeline processes. By setting up the ML_PIPELINE_ROOT_DIR variable, all the metadata JSON files will be saved and accessed from the same location between different processes. For example, the batch prediction pipeline will read the model version it needs to use to make predictions from a JSON file generated by the training pipeline. Without settings the ML_PIPELINE_ROOT_DIR, the training and batch processes won't share the same output directory. Thus, they won't know how to talk to each other. When running the project inside Airflow, it is defaulted to /opt/airflow/dags; thus, you must set this variable only when running it outside Airflow.
We support Docker to run the web app. Check out the Usage section if you only want to run it as a whole.
See here how to install every project individually:
You can also run the whole web app in development mode using Docker:
docker compose -f deploy/app-docker-compose.yml -f deploy/app-docker-compose.local.yml --project-directory . up --buildThe code is under the MIT License. Thus, as long as you keep distributing the License, feel free to share, clone, or change the code as you like.
Also, if you find any bugs or missing pieces in the documentation, I encourage you to add an issue on GitHub or a PR. Based on your support, I will adapt the code and docs for future readers.
Furthermore, you can contact me directly on LinkedIn if you have any questions.
I also want to thank Kurtis Pykes for being an awesome copilot and helping me make this course happen.
I post almost daily AI content on 👇🏼
Subscribe to my ML engineering weekly newsletter.
🎨 Creating content takes me a lot of time. If you enjoyed my work, you could support me by:
- joining Medium through my referral link, you can support me without any extra cost while enjoying limitless access to Medium’s rich collection of stories;
- buying me a coffee.
Thank you ✌🏼 !


