sample-web-components
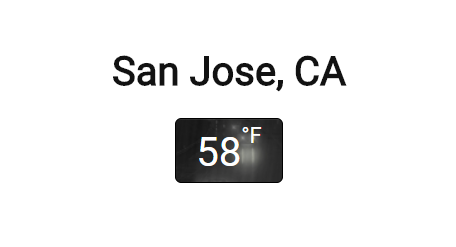
This repository contains a weather sample web component to showcase how to implement custom components within Acoustic Content (formerly Watson Content Hub). Note: this sample works correctly for Chrome as-is, extra steps documented below are necessary for other browsers to render the web component sample.
Prerequisites
- A WCH tenant in Trial or Standard Tier
- Latest Oslo sample site
- wchtools-cli v2.1.3 or above
- Node.js v6.11.1 or above
Structure
- The
content-artifactsdirectory contains assets, layouts, and layout mappings required for the sample component. These files will be pushed to your WCH tenant. - The
site-application-filesdirectory contains the component and layout files for the sample component.
Install and deploy the sample
Configure your Wchtools
- Get your WCH tenant API URL. Open the Hub information dialog from the "About" flyout menu in the left navigation pane of the Watson Content Hub user interface. Copy the API URL.
- From a command line, run
wchtools initto setup the WCH tools CLI. Enter your username and API URL to configure wchtools. If you are using a Windows operating system, you will need to use Git Shell (or a similar Git bash shell) for the command line for these instructions.
Clone and install the sample content-artifacts and site-application-files
- Change the command line directory to site application's root directory (i.e. wch-site-application). If you haven't already done so, perform all of the required installation steps for the site application repo.
- Using the Git URL to the sample-web-components repository, run this command to copy the needed sample site-application-files and update the layout settings for the new component.
npm run install-layouts-from-git https://github.com/ibm-wch/sample-web-components.git
Build and Deploy the sample component
- From the command line, run
npm run buildto compile the project. Verify that there are no errors during the build process. - From the command line, run
npm run deployto push the sample component to the WCH tenant.
Compose new content using the sample component in WCH
- Navigate in WCH to Content -> All content and assets. Click on the Compose drop down and choose the Web component type to get started.
- Click in the Import link field and in the Link settings dialog, enter this string:
forecast-webcomponent/forecast/forecast.html
- In the Link text field, enter in
Forecast component
- Click Apply to save the Link settings
- Edit the Tag name field and set it to this value
temp-component
- Edit the Attributes list by entering in two attributes. First enter
latitude="37.2"
and then in the next Attributes field that appears enter
longitude="-121.7863"
- Change the default name of the web component content item to
Forecast web component. - When finished, click the Publish button and then Close.
- Add the Forecast web component to a Standard page and then publish it.
View the sample web component live
- View the Hub information dialog again by clicking on the User drop down.
- Select the "Live site" URL. You should see a temperature displayed on the page where the web component was added when it loads.
Additional browser support
- See the webcomponents site for the latest information on browser compatibility and information on downloading and using the webcomponent polyfill .js files.
- Polyfills are needed for certain features with some browsers. Your site's index.html file can be modified to include any required polyfill .js file.
- To modify your site, pull all of the assets from your site into a temp directory with this command:
wchtools pull -I -v --dir temp
- Locate and edit
index.htmlin your temp/assets directory. The following line is an example of how to include a polyfill .js file. This line should be inserted before the closing body tag of the site's index.html:
<script type="application/javascript" src="webcomponents-hi-sd-ce.js"></script>
- Copy the required polyfill .js files into your temp/assets directory. In this example you would copy
webcomponents-hi-sd-ce.jsinto the directory. - Push the modified files to your site by then running this command:
wchtools push -v --dir temp
The polyfill .js files should now be delivered when pages in your site are loaded so that the web component will function correctly with the browser.
License
See the included license file License . .
