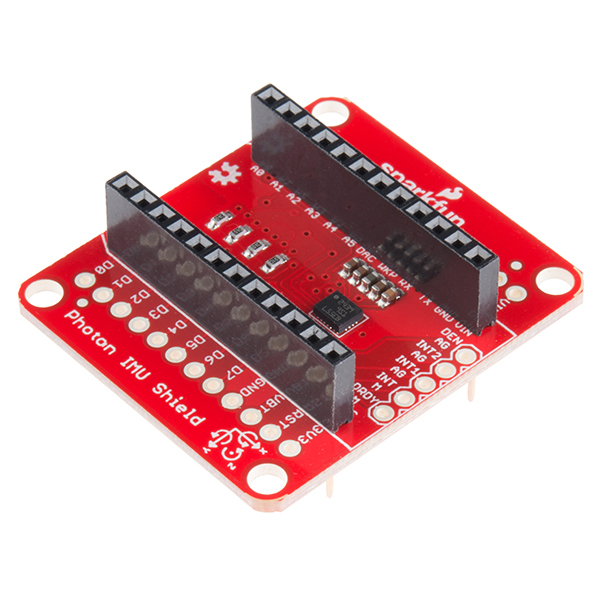
Firmware library SparkFun's Photon IMU Shield and the LSM9DS1 Breakout.
This is a firmware library for SparkFun's Photon IMU Shield.
The Photon IMU Shield connects the Photon WiFi development board up to an ST LSM9DS1 9DOF IMU - providing it access to an accelerometer, gyroscope, and magnetometer.
- /doc - Additional documentation for the user. These files are ignored by the IDE.
- /firmware - Source files for the library (.cpp, .h).
- /firmware/examples - Example sketches for the library (.cpp). Run these from the Particle IDE.
- spark.json - General library properties for the Particel library manager.
Include the library, declare an IMU object, and set it up with these snippets of code:
#include "SparkFunLSM9DS1/SparkFunLSM9DS1.h"

// Use the LSM9DS1 class to create an object. [imu] can be
// named anything, we'll refer to that throught the sketch.
LSM9DS1 imu;

// SDO_XM and SDO_G are both pulled high, so our addresses are:
#define LSM9DS1_M	0x1E // Would be 0x1C if SDO_M is LOW
#define LSM9DS1_AG	0x6B // Would be 0x6A if SDO_AG is LOW

void setup()
{
  Serial.begin(115200);

  // Before initializing the IMU, there are a few settings
  // we may need to adjust. Use the settings struct to set
  // the device's communication mode and addresses:
  imu.settings.device.commInterface = IMU_MODE_I2C;
  imu.settings.device.mAddress = LSM9DS1_M;
  imu.settings.device.agAddress = LSM9DS1_AG;
  // The above lines will only take effect AFTER calling
  // imu.begin(), which verifies communication with the IMU
  // and turns it on.
  if (!imu.begin())
  {
	Serial.println("Failed to communicate with LSM9DS1.");
	Serial.println("Double-check wiring.");
	Serial.println("Default settings in this sketch will " \
				  "work for an out of the box LSM9DS1 " \
				  "Breakout, but may need to be modified " \
				  "if the board jumpers are.");
	while (1)
	  ;
  }
}
To get data out of the IMU, call imu.readAccel(), imu.readGyro(), and imu.readMag(). Those functions will update the objects member variables: imu.ax, imu.ay, imu.az, imu.gx, imu.gy, imu.gz, imu.mx, imu.my, andimu.mz. Here, some example functions can probably make it more clear:
void printAccel()
{
  // To read from the accelerometer, you must first call the
  // readAccel() function. When this exits, it'll update the
  // ax, ay, and az variables with the most current data.
  imu.readAccel();

  // Now we can use the ax, ay, and az variables as we please.
  Serial.print("A: ");
  Serial.print(imu.ax);
  Serial.print(", ");
  Serial.print(imu.ay);
  Serial.print(", ");
  Serial.println(imu.az);
}

void printGyro()
{
  // To read from the gyroscope, you must first call the
  // readGyro() function. When this exits, it'll update the
  // gx, gy, and gz variables with the most current data.
  imu.readGyro();

  // Now we can use the gx, gy, and gz variables as we please.
  Serial.print("G: ");
  Serial.print(imu.gx);
  Serial.print(", ");
  Serial.print(imu.gy);
  Serial.print(", ");
  Serial.println(imu.gz);
}

void printMag()
{
  // To read from the magnetometer, you must first call the
  // readMag() function. When this exits, it'll update the
  // mx, my, and mz variables with the most current data.
  imu.readMag();

  // Now we can use the mx, my, and mz variables as we please.
  Serial.print("M: ");
  Serial.print(imu.mx);
  Serial.print(", ");
  Serial.print(imu.my);
  Serial.print(", ");
  Serial.println(imu.mz);
}
Check out the example files in the examples directory for more guidance.
This product is open source!
Please review the LICENSE.md file for license information.
If you have any questions or concerns on licensing, please contact techsupport@sparkfun.com.
Distributed as-is; no warranty is given.
- Your friends at SparkFun.
