Just one line to create DataSource and Delegate for UITableView.
中文文档 (Document in Chinese)
CBTableViewDataSource is a lightweight Framework which was used to create DataSource and Delegate for UITableView quickly. It provides a simple API to create logical and easily maintained code.
The most lazy way to create DataSource like this:
[_tableView cb_makeSectionWithData:self.viewModel.data andCellClass:[CustomCell class]];Of course, you must follow some convention in this way. At the same time, I also provides others flexible way to create DataSource.
Details as document below.
We always spend a lot of time and energy to create DataSource and Delegate for UITableView when we develop an App. While those code tend to repetitive and hard maintenance, because them located in each position of each delegate method. We must found them from corner to corner, and modified them when we maintain program.
However, CBTableViewDataSource changed all this, and provides a simple API to help us create logical and easily maintained code.
In order to make everyone notice advantages of this framework, let's do a compare.
Native way below:
// Native vision

// define a enum to split section

typedef NS_ENUM(NSInteger, SectionNameDefine) {
    SECTION_ONE,
    SECTION_TWO,
    SECTION_THREE,
    SECTION_FOUR,
    //...
    COUNT_OF_STORE_SECTION
};

// define identifier for section

#define IDENTIFIER_ONE  @"IDENTIFIER_ONE"
#define IDENTIFIER_TWO  @"IDENTIFIER_TWO"
#define IDENTIFIER_THREE  @"IDENTIFIER_THREE"
#define IDENTIFIER_FOUR @"IDENTIFIER_FOUR"
//...


// register cell class for section

[self.tableView registerClass:[OneCell class] forCellWithReuseIdentifier:IDENTIFIER_ONE];
[self.tableView registerClass:[TwoCell class] forCellWithReuseIdentifier:IDENTIFIER_TWO];
[self.tableView registerClass:[ThreeCell class] forCellWithReuseIdentifier:IDENTIFIER_THREE];
[self.tableView registerClass:[FourCell class] forCellWithReuseIdentifier:IDENTIFIER_FOUR];


// implementation datasource protocol

- (NSInteger)numberOfSectionsInTableView:(UITableView *)tableView {
    return COUNT_OF_STORE_SECTION;
}

- (NSInteger)tableView:(UITableView *)tableView numberOfRowsInSection:(NSInteger)section {
    return ((NSArray*)self.data[section]).count;
}

- (UITableViewCell *)tableView:(UITableView *)tableView cellForRowAtIndexPath:(NSIndexPath *)indexPath {
    NSUInteger section = (NSUInteger) indexPath.section;
    NSUInteger index = (NSUInteger) indexPath.row;
    switch(section) {
        case SECTION_ONE:
        // to do something
            return cell;
        case SECTION_TWO:
        // to do something
            return cell;
        case SECTION_THREE:
        // to do something
            return cell;

            //...
    }

    return cell;
}
// ...
It is cumbersome and hard maintenance in this way.
While using CBTableViewDataSource:
[_tableView cb_makeDataSource:^(CBTableViewDataSourceMaker * make) {
    // section one
    [make makeSection:^(CBTableViewSectionMaker *section) {
        section.cell([OneCell class])
            .data(self.viewModel.oneDate)
            .adapter(^(OneCell * cell,id data,NSUInteger index){
                [cell configure:data];
            })
            .autoHeight();
    }];
    // section two
    [make makeSection:^(CBTableViewSectionMaker *section) {
        section.cell([TwoCell class])
            .data(self.viewModel.twoData)
            .adapter(^(FeedCell * cell,id data,NSUInteger index){
                [cell configure:data];
            })
            .autoHeight();
    }];

    // ... so on
}];
It has been concise and layered. Most important is that it make codes accord with the man's thought better.
using cocoapods:
pod 'CBTableViewDataSource'#import <CBTableViewDataSource/CBTableViewDataSource.h>[_tableView cb_makeDataSource:^(CBTableViewDataSourceMaker * make) {
// section one
[make makeSection:^(CBTableViewSectionMaker *section) {
section.cell([OneCell class])
.data(self.viewModel.oneDate)
.adapter(^(OneCell * cell,id data,NSUInteger index){
[cell configure:data];
})
.autoHeight();
}];
// section two
[make makeSection:^(CBTableViewSectionMaker *section) {
section.cell([TwoCell class])
.data(self.viewModel.twoData)
.adapter(^(FeedCell * cell,id data,NSUInteger index){
[cell configure:data];
})
.autoHeight();
}];
// ... so on
}];UITableView tableView = [UITableView new];
[tableView cb_makeSectionWithData:data];It will use default UITalbeViewCell as Cell Class in this way.
The data must follow convention as follows:
-
data is a NSArray (NSArray < NSDictionary * >*).
-
The key of dictionary as follows:
textuse to set text forUITableViewCell's textLabeldetailuse to set text forUITableViewCell's detailTextLabelvalueuse to set text forUITableViewCell's detailTextLabelimageuse to set image forUITableViewCell's imageViewaccessoryTypeuse to set accessory type forUITableViewCell
valueanddetailboth be used to set text forUITableViewCell's detailTextLabel. If usedetailas key, thedetailTextLabelwill show at the bottom oftextLabel. If usevalueas key, thedetailTextLabelwill show at the right oftextLabel. Do not use both of them in the same time,and the first appear in array priority.
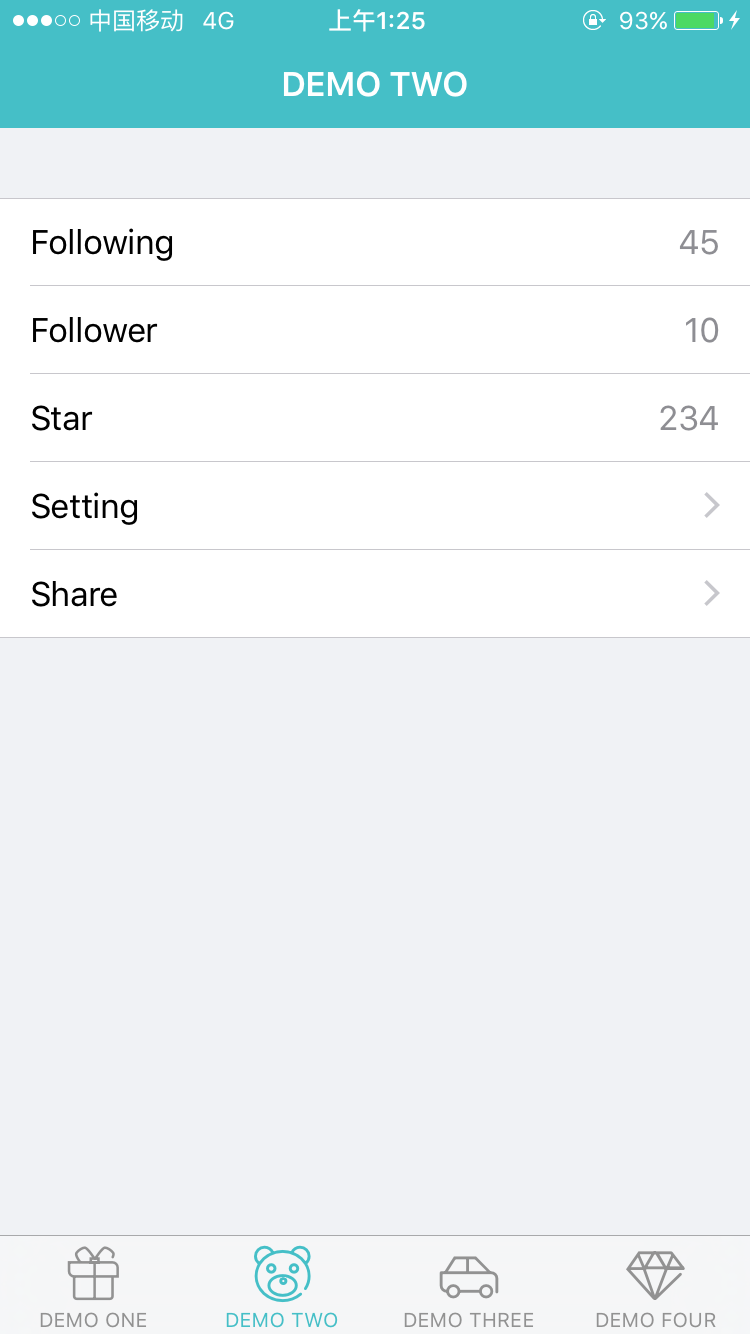
For example:
_data = @[
    @{@"text":@"Following",@"value":@"45"},
    @{@"text":@"Follower",@"value":@"10"},
    @{@"text":@"Star",@"value":@"234"},
    @{@"text":@"Setting",@"accessoryType":@(UITableViewCellAccessoryDisclosureIndicator)},
    @{@"text":@"Share",@"accessoryType":@(UITableViewCellAccessoryDisclosureIndicator)}];
UI as follows:
Check detail on file named DemoTwoViewController.h and DemoTwoViewController.m.
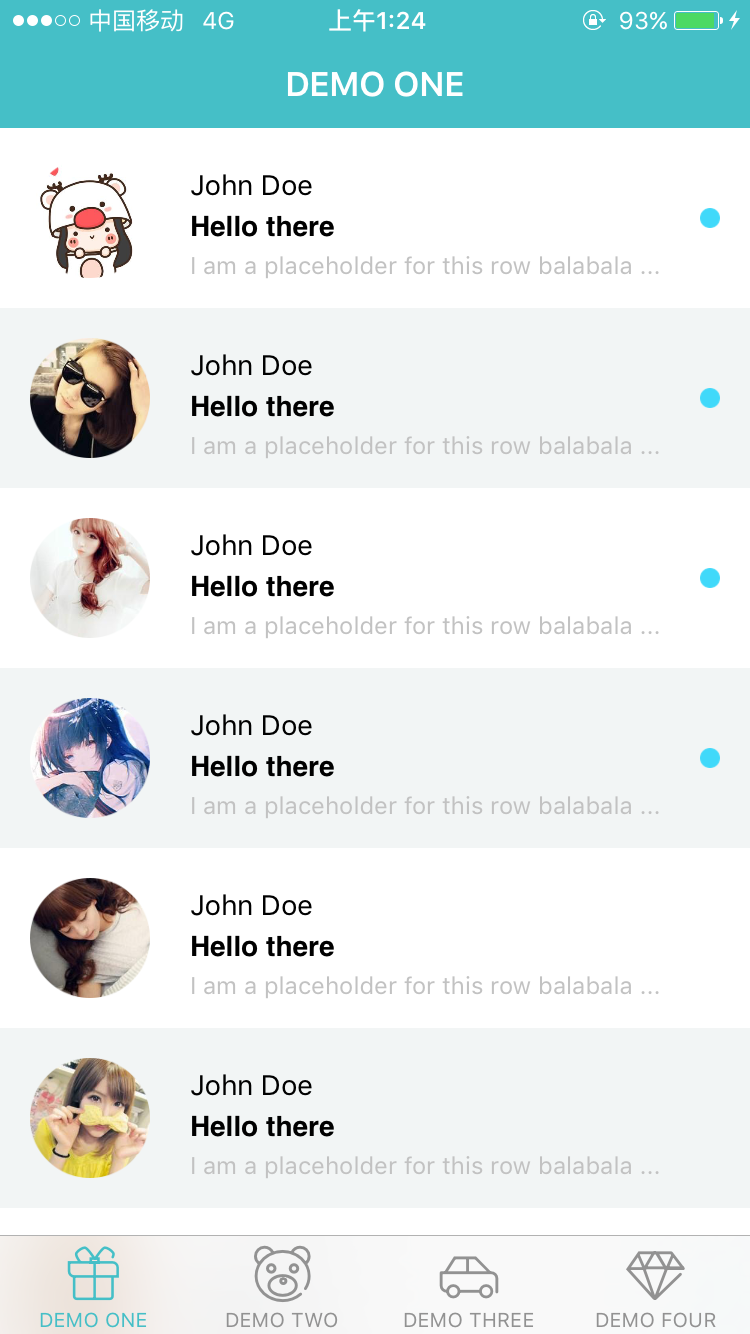
[tableView cb_makeSectionWithData:data andCellClass:[CustomCell class]];CustomCell must provides a Configuer: method or Configuer:index: method to adapt data.
For example:
- (void)configure:(NSDictionary *)row index:(NSNumber * )index {
    if (row[@"avatar"]) {
        [self.avatarView setImage:[UIImage imageNamed:row[@"avatar"]]];
    } else {
        [self.avatarView setImage:nil];
    }
    [self.nameLabel setText:row[@"name"]];
    [self.titleLabel setText:row[@"title"]];
    [self.detailLabel setText:row[@"detail"]];
    self.circleView.hidden = row[@"unread"] == nil;

    if([index intValue] &1) {
        self.contentView.backgroundColor = [UIColor colorWithRed:0.95 green:0.96 blue:0.96 alpha:1.00];
    } else {
        self.contentView.backgroundColor = [UIColor whiteColor];
    }
}
Check detail on file named CustomCell.h and CustomCell.m
UI as follows:
Check detail on file named DemoOneViewController.h and DemoOneViewController.m.
[tableView cb_makeSection:^(CBTableViewSectionMaker * section) {
	section.data(@[]);
	section.cell([CustomCell class]);
	section.adapter(^(CustomCell cell,id row,NSUInteger index) {
		cell.configure(row);
	});
	section.event(^() {
		// do something
	})
	// other setting
}];
Here show the case of single section.
CBTableViewSectionMaker was used to setting some attribute for section.
Available attribute as follows :
Setting the data be used show in UITableView,argument was required a NSArray.
For example:
section.data(@[@(goods1),@(goods2),...]);Setting the Cell Class which was used to show data.
The identifier of cell will be register automatically.
For example:
section.cell([CustomCell class]);Was used to adapt cell and date.
For example:
section.adapter(^(CustomCell * cell,id row,NSUInteger index) {
    [cell configure:row];
    // ...
});
Was used to setting event when cell be touch, for example:
section.event(^(NSUInteger index,id row) {
    CustomViewController * controller = [CustomViewController new];
    controller.viewModel.data = row;
    [self.navigationController pushViewController:controller animated:YES];
});Used to setting height for cell. Is required a static value.
This height just vail for current section.
section.height(100);Used to setting dynamic calculate height for cell.
section.autoHeight();If has setting autoHeight,the height will be invalid.
Used to setting header title for section. For example:
section.headerTitle("title");Used to setting footer title for section. ditto.
Used to setting header view for section. For example
section.headerView(^(){
    UIView * headerView = [UIView alloc]initWithFrame:CGRectMake(0,0,320,40);
    // ...
    return headerView;
})
If has setting headerView,headerTitle will be invalid.
Used to setting footer view for section. ditto.
[tableView cb_makeDataSource:^(CBTableViewDataSourceMaker * make) {
	[make headerView:^{
		return [HeaderView new];
	}];
	[make makeSection: ^(CBTableViewSectionMaker * section) {
		section.data(@[]);
		section.cell();
		section.adapter();
		section.event();
		// ... so on
	}];
	[make makeSection: ^(CBTableViewSectionMaker * section) {
		section.data(@[]);
		section.cell();
		section.adapter();
		section.event();
		// ... so on
	}];
	[make makeSection: ^(CBTableViewSectionMaker * section) {
		section.data(@[]);
		section.cell();
		section.adapter();
		section.event();
		// ... so on
	}];
	// .. so on
	[make footView:^{
		return [FooterView new];
	}];
}]
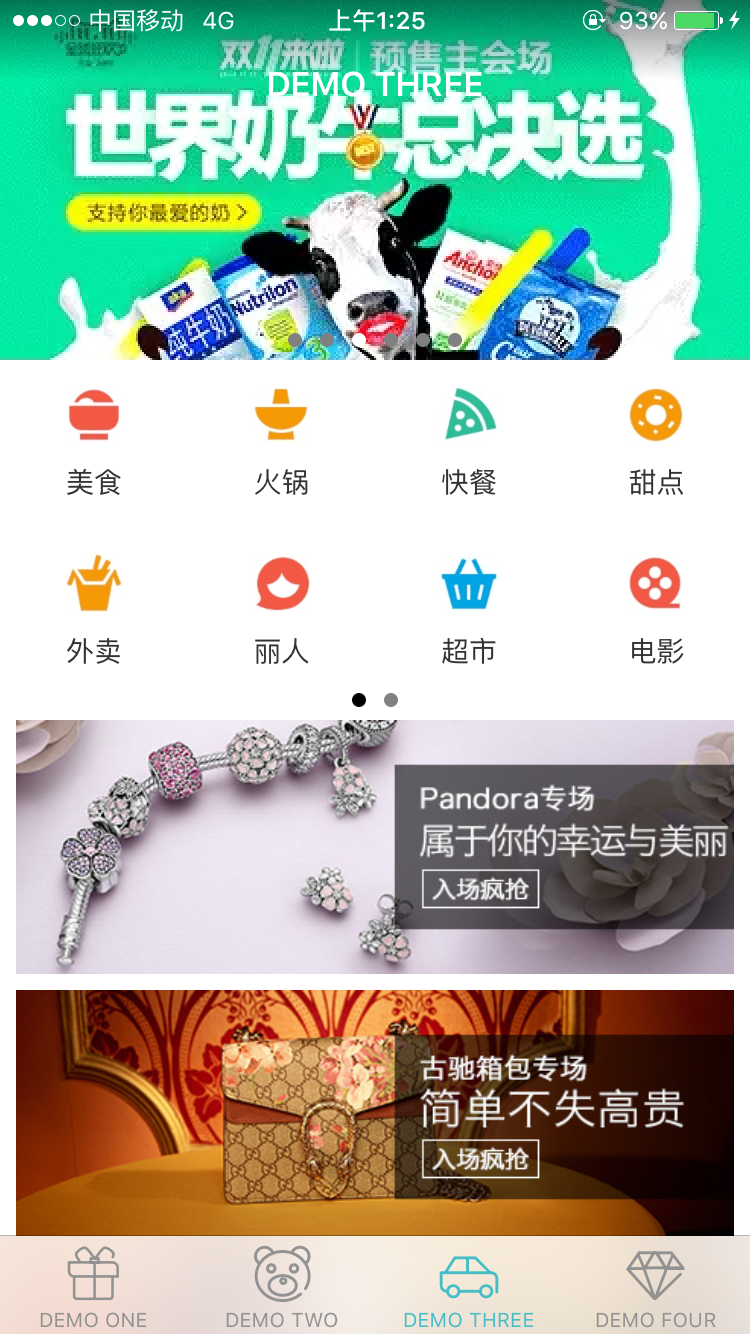
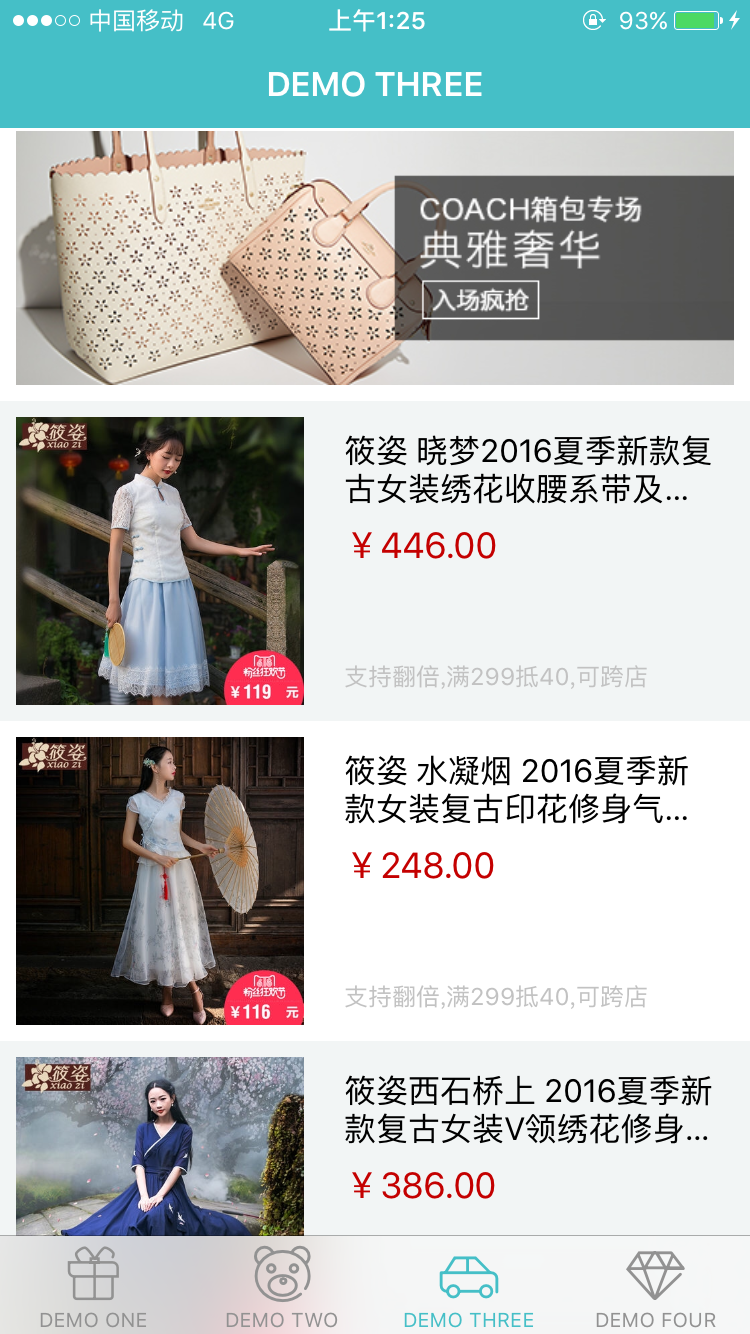
UI as follows:
Check detail on file named DemoThreeViewController.h and DemoThreeViewController.m.
CBTableViewDataSourceMaker was used to setting some attribute for UITableView.
Available attribute as follows :
Used to add a section for UITableView.For example:
[tableView cb_makeDataSource:^(CBTableViewDataSourceMaker * make) {
	[make makeSection: ^(CBTableViewSectionMaker * section) {
	   // ...
	}
}]Used to setting default height for UITableView
make.height(100);If you had setting height or autoHeight for section, the height of here will invalid. Default is 40.
Used to setting tableHeaderView for UITableView.Notice the difference between tableHeaderView and section‘s headerView.
For example:
make.headerView(^(){
    UIView * headerView = [[UIView alloc]init];
    // ...
    return headerView;
});Used to setting tableFooterView for UITableView. ditto.
Used to setting commitEditing method for UITableViewDelegate.
 [make commitEditing:^(UITableView * tableView, UITableViewCellEditingStyle * editingStyle, NSIndexPath * indexPath) {
    // do somethings.
}];Used to setting scrollViewDidScroll method for UITableViewDelegate
[make scrollViewDidScroll:^(UIScrollView * scrollView) {
    // do somethings
}];Thank you for using and supporting. Welcome to issue and pull request. I will deal with at first time.
I refer to many masters in this framework. For example, I refer to famous autolayout framework Masonary when I design API. The way to dynamic calculate cell height is refer to @forkingdog's UITableView-FDTemplateLayoutCell.
Thinks them for bring inspiration to me.
Contact me by email :460469837@qq.com


