The faustgen2~ object is a Faust external for Pd a.k.a. Pure Data, Miller Puckette's interactive multimedia programming environment. Yann Orlarey's Faust is a functional programming language developed by Grame, which is tailored for real-time signal processing and synthesis.
faustgen2~ is a fork of Pierre Guillot's faustgen~, which in turn was inspired by Grame's faustgen~ object for Max/MSP. faustgen2~, by Albert Gräf (JGU Mainz, IKM, Music-Informatics), is an extensive update which offers plenty of new functionality, bringing it up to par with both Grame's faustgen~ and the author's pd-faust external. It also adds some of its own features, such as the integrated loader extension and a novel approach to polyphonic synth implementation. "Old-style" Faust polyphony via the nvoices option, as described in the Faust manual, is also supported, so faustgen2~ should be able to run most existing Faust programs without much ado.
Like faustgen~, faustgen2~ uses Faust's LLVM-based just-in-time (JIT) compiler to load, compile and play Faust programs on the fly. The Faust JIT compiler brings together the convenience of an interpreted environment with the efficiency of a compiled language, which fosters creative exploration of the Faust language and enables live-coding techniques.
Ready-made binary packages for Mac, Windows, and Ubuntu can be found at https://github.com/agraef/pd-faustgen/releases; use these if you can. For recent Debian/Ubuntu and Fedora versions, you can find proper package repositories at the OBS. For Arch Linux users, we have PKGBUILDs available on the AUR. If you want or need to compile faustgen2~ yourself, please refer to the instructions below.
To compile faustgen2~ you'll need LLVM, Faust, Pd, and CMake. The sources for Faust and Pd are included in the faustgen2~ source, so you don't have to install these beforehand, but of course you'll want to install Pd (or one of its flavors, such as Purr Data) to use faustgen2~. If you already have an installation of the Faust compiler (including libfaust), you can use that version instead of the included Faust source, which will make the installation much easier and faster. Make sure that you have Faust 2.27.2 or later (older versions may or may not work with faustgen2~, use at your own risk), and LLVM 9.0.0 or later.
If you're running Linux, recent versions of LLVM and cmake should be readily available in your distribution's package repositories. On the Mac, they are available in MacPorts or Homebrew, and there's a binary LLVM package available on http://llvm.org.
You can install either from a released source tarball available at https://github.com/agraef/pd-faustgen, or from the Git sources. The latter can be obtained as follows:
git clone --recurse-submodules https://github.com/agraef/pd-faustgen.gitNote that the --recurse-submodules option will check out various required sources from other locations which are included in faustgen2~ as git submodules. The distributed tarballs are self-contained and already include all the submodule sources.
faustgen2~ uses cmake as its build system. Having installed all the dependencies and unpacked the sources, you can build faustgen2~ starting from its source directory as follows:
mkdir build && cd build
cmake ..
cmake --build .
This should work on Linux and Mac, where you can also just run make instead of cmake --build. The above will compile the included Faust source and use that to build the external. This may take a while. To use an installed Faust library, you can run cmake as follows:
cmake .. -DINSTALLED_FAUST=ONThis will be much faster than using the included Faust source. By default, this will link libfaust statically. You can also link against the shared library if you have it, as follows:
cmake .. -DINSTALLED_FAUST=ON -DSTATIC_FAUST=OFFIf you have Faust installed in a custom location, so that cmake fails to find the installed Faust library, you can point cmake to the library file (libfaust.a or libfaust.so on Linux, libfaust.a or libfaust.dylib on the Mac, faust.lib or faust.dll on Windows), e.g., like this:
cmake .. -DFAUST_LIBRARY=/some/path/to/libfaust.acmake should then be able to find the other required files (include and dsp library files) on its own. If all else fails, just use the included Faust source, this should always work.
As of Pd 0.51-0 you can compile a "Double precision" Pd. If you intend to use faustgen2~ in such an environment, you must also compile it for double precision with the following option:
cmake .. -DPD_FLOATSIZE64=ONIn principle, on Windows you can do the same using MSVC (MSYS/MSYS2 doesn't work at present). But this usually requires a lot of fiddling, and it also doesn't help that the LLVM Windows binaries which are available from llvm.org or as part of Visual Studio lack the development tools and libraries needed to do any serious LLVM development. So I really recommend that you use the builds that we provide on GitHub. If you still want to give it a go, check the Windows build in the makefile.yml file in this repository, it will tell you exactly what to do. You'll also need the LLVM binaries we provide on GitHub, or compile LLVM yourself (instructions can be found in the original CICM README).
Once the compilation finishes, you can install the external by running make install or cmake --install . from the build directory. It's also possible (and recommended) to do a "staged install" first. You can do that in a platform-independent way as follows:
cmake --install . --prefix stagingThis will leave the installed files in the staging subdirectory of your build directory. On Linux and other Unix-like systems, you can also run:
make install DESTDIR=stagingThis has the advantage that it keeps the CMAKE_INSTALL_PREFIX intact, and thus the staging directory will contain the entire directory hierarchy, as make install would create it.
The staged installation allows you to see beforehand what exactly gets installed and where. You can then still make up your mind, or just grab the faustgen2~ folder and install it manually wherever you want it to go. To do this, you have to copy the faustgen2~ folder from the staging area to a directory where Pd looks for externals. Please consult your local Pd documentation or check the Pd FAQ for some options on different platforms. Alternatively, you can also just place a local copy of the external into any directory containing patches in which it is to be used.
After finishing the installation, you also want to add faustgen2~ to Pd's startup libraries. This isn't necessary to run the faustgen2~ external under its name, but loading the external at startup enables its included loader extension which hooks into Pd's loader. This allows you to create Faust dsps by just typing their names (without the faustgen2~ prefix), just as if the dsp files themselves were Pd externals (which effectively they are, although they're loaded through the faustgen2~ object rather than Pd's built-in loader).
If you do not want to add faustgen2~ to the startup libraries for some reason, there are other ways to activate the loader when you need it. The most portable of these is Pd's declare. To these ends, place declare -lib faustgen2~ first into each patch which requires the loader. Note that the -lib option will search the patch directory first, so it will also work if you use a local copy of faustgen2~. If the external has been installed on Pd's search path, then using -stdlib in lieu of -lib will also do the job.
You can try the external without installing it first, by running it directly from the staging area (see "Staged Installation" above), or you can give it a go after finishing installation. The faustgen2~ help patch is a good place to start, as it describes the many features in quite some detail (make sure you explore all of the subpatches to get a good overview). If you installed faustgen2~ in a folder which is searched by Pd for externals, the help patch should also be shown in Pd's help browser.
To start using faustgen2~ in your own projects, you will have to finish the installation as described in the preceding section. Start from an empty patch and a Faust dsp file, both in the same directory. You can then just create an object like faustgen2~ amp and connect its inlets and outlets to some audio sources and sinks such as osc~, adc~, and dac~. If everything has been set up properly, you should be able to hear the output from the dsp.
The faustgen2~ prefix actually isn't needed, if you add faustgen2~ to your startup libraries in Pd in order to enable its loader extension, as described under "Faust Loader" above. faustgen2~ then lets you type just the dsp name (e.g., amp~ or amp) and be done with it. The trailing tilde is optional (and ignored when searching for the dsp file) but customary to denote dsp objects in Pd, so faustgen2~ supports this notation.
Let's try a little example. Here's the mynoise.dsp program:
random  = +(12345)~*(1103515245);
noise   = random/2147483647.0;
process = noise * hslider("vol", 0.5, 0, 1, 0.01);
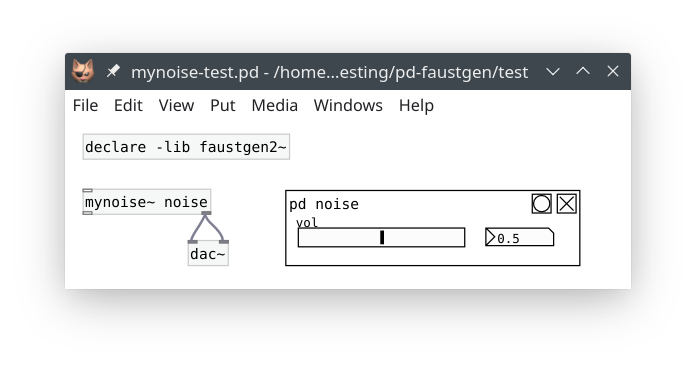
Create an empty patch in the same directory as mynoise.dsp and add the declare -lib faustgen2~ object to it, so that the loader extension is activated (or make sure that you have faustgen2~ in your startup libraries, then you don't need this). Next add the mynoise~ object to the patch. In Pd's console you should see a message like "faustgen2~ mynoise (0/1)" which indicates that the dsp was loaded successfully and that it has zero inputs and one output. The single output will be available as an outlet on the right (the leftmost inlet/outlet pair is for control input and output only). Connect that outlet to a dac~ object, make sure that dsp processing is on, and you should now be able to hear some white noise. It's as simple as that.
Note that the Faust dsp also has a control variable "vol" which we can use to change the output volume. We could change that control by sending messages to mynoise~'s left control inlet, but faustgen2~ can also create a Pd GUI in the form of a GOP subpatch for us. To these ends, add a new one-off subpatch named "noise" (create a pd noise object). Just leave the subpatch empty and close its window. Next edit the mynoise~ object so that it becomes mynoise~ noise (this refers to the noise subpatch we just created). You should now see the subpatch being populated with a horizontal slider and a number entry, and once you're out of edit mode you can change the volume using either of these. Try it! The resulting patch will look like this:
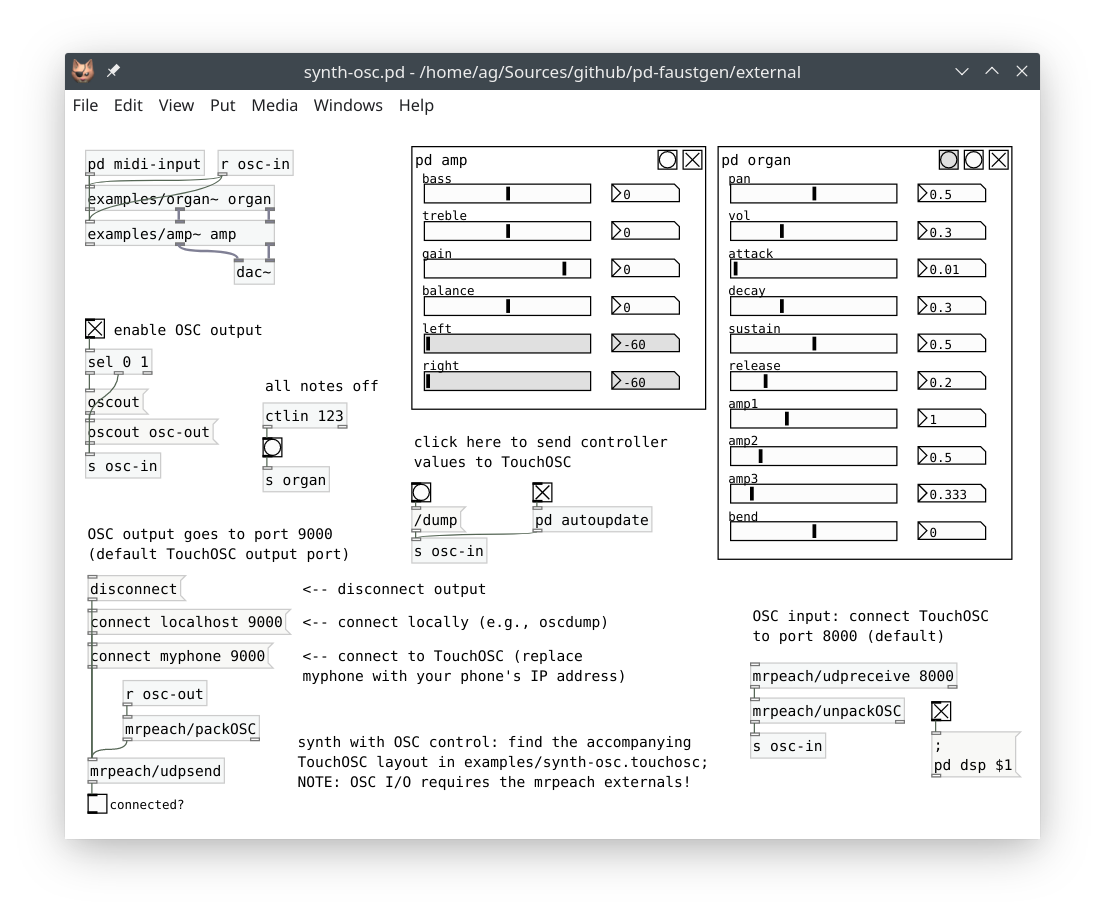
faustgen2~ offers many other possibilities, such as MIDI input and output (including monophonic and polyphonic synths, using the author's SMMF format for representing MIDI messages), and communication with OSC (Open Sound Control) devices and applications such as TouchOSC. These are all explained in the help patch. Running Faust dsps in Pd has never been easier!
Code generated from dsp files by the LLVM JIT crashes the 32 bit version of the external on Windows. The 64 bit version works fine, though. Other projects using the Faust LLVM JIT have similar issues, so this is most likely a Win32-specific bug in Faust's LLVM backend or LLVM itself. What this means is that you can't use faustgen2~ in 32 bit Pd versions on Windows right now, you'll have to run the 64 bit version instead.
Many thanks are due to Pierre Guillot, then at CICM (Paris 8), for his faustgen~ external which faustgen2~ is based on. Without Pierre's pioneering work the present version simply wouldn't exist. I'd also like to say thanks for his artwork which I shamelessly pilfered for this updated version of the README.

