This project started as I wanted a simple "microservice" to use when trying out frameworks such as Docker, Docker Compose and Kubernetes.
It has developed a little further such that it is starting to provide some functionality that may actually be useful.
So welcome to the "Cloudy Bookclub" microservice!
Note
Now uplifted to the latest Spring Boot 3.x and Java 21.
The main functionality included in the microservice includes
- being based on latest Spring Boot 3.x and Java 21
- Oauth2 based logon using
- the oauth2 logon data is transmogrified into locally stored users - with associated roles - and into a JWT token - making the web application entirely free of http session state (see later for whether using JWTs as session tokens is a good idea)
- Spring Security for role based method level authorisation
- Mongo based persistence with the use of Spring Data MongoRepository
- next to no persistence code
- except for some Mongo aggregation queries added to the Repository implementation
- accessing the Google Books API with the Spring RestTemplate and, a work in progress, the reactive Spring WebClient
- and Docker images and a Docker Compose file that runs all the tiers of the application with one
docker compose up -dcommand
This project runs live under Docker Compose with a React / Typescript client application available at https://cloudybookclub.com/
The checked in default Spring profile is "mongo-java-server-no-auuth". This uses an in memory fake Mongo instance - mongo-java-server - so there is no need to run MongoDb locally. It also auto logs you on with a dummy user so there is no need to set up OAuth config to explore the application. So you should be able to just check out the code and run and test the application for development purposes with no other dependencies.
To develop Mongo related code you should switch to the "dev" profile which does expect to be able to connect to a real MongoDb instance.
Please check the console log when running the application. Any key constraints/warnings related to the Spring profile being used will be output to the console.
All tests should run fine "out of the box" i.e. with a clean checkout of the code you should be able to successfully run
mvn clean compile test package and all tests should pass.
By default, the tests run against mongo-java-server so there is no need to install MongDb to test most of the application. Functionality not supported by mogo-java-server such as full text indexes results in some tests being skipped when running with the mongo-java-server Spring profile.
When running the CI builds with Github Actions, all tests run against a real Mongo instance.
Some of the integration tests make use of WireMock - see the /src/test/resources/mappings and __files directories for the configuration details.
The tests are probably about 50/50 between unit and integration tests...
To support a simple load test, there is a Maven plugin configured that runs a basic Gatling load test. After starting the Spring Boot application (i.e. mvn spring-boot:run or via your IDE) run the command:
mvn gatling:test
The source code of this test in at test/java/com/aidanwhiteley/books/loadtest/StressTestSimulation.java. The checked in config ensures that, by default, the number of request per second is low enough not to stress an average PC.
There is support for mutation testing using the Pitest library.
To try it out use something similar to
mvn -Ppitest -DwithHistory=true -DtargetClasses="com.aidanwhiteley.books.service.*" test
Be warned, the first run will take a long time (many minutes) - especially if the glob for targetClasses is wide. Subsequent runs should be much quicker.
Unfortunately, this mutation support wasn't in place when the tests were originally written meaning that the
current test suite have some tests that survive too many mutations! The mutation test code is there for any new code.
This project makes use of the excellent Lombok project. So to build in your favourite IDE, if necessary head on over to Lombok and click the appropriate "Install" link (tested with IntelliJ and Eclipse).
In preparation for playing with recent Java features such as virtual threads and pattern matching, the build or this project now requires JDK21.
With appropriate versions of the JDK, Maven and a (optionally) Mongo installed, start with
mvn clean compile test
and then try
mvn spring-boot:run
To run a client application to access the microservice, head on over to https://github.com/aidanwhiteley/books-react or see the section below on using Docker.
There are Spring profile files for a range of development and test scenarios.
- uses an in memory mongo-java-server rather than a real MongoDb
- configured such that all request have admin access. No oauth set up required and no logon
- configured to allow CORS access to APIs
- clears down the DB and reloads test data on every restart
- uses an in memory mongo-java-server rather than a real MongoDb
- requires oauth configured correctly for access to update operations
- doesn't support CORS access to APIs
- clears down the DB and reloads test data on every restart
- uses a real MongoDb
- configured such that all request have admin access. No oauth set up required and no logon
- doesn't support CORS access to APIs
- clears down the DB and reloads test data on every restart
- uses a real MongoDb
- requires oauth configured correctly for access to update operations
- configured to allow CORS access to APIs
- clears down DB and reloads test data on every restart
- uses a real MongoDb
- configured to allow CORS access to APIs
- clears down the DB and reloads test data on every restart
- requires the use of "docker-compose up" to start Docker containers - see later
- uses a real MongoDb
- configured such that all request have admin access and oauth config is not required
- does not allow CORS access to APIs
- clears down the Mongo DB and reloads test data on every restart of the Docker containers
"Out of the box" the code runs with the "mongo-java-server-no-auth" Spring profile - see the first line of application.yml. None of the checked in available Spring profiles are intended for production use. You will need to decide the required functionality for your environment and configure your Spring profile accordingly.
For instance, you WILL want to set/change the secretKey used for the JWT token signing (see books:jwt:secretKey in the yml files). Please see the code in com.aidanwhiteley.books.controller.jwt.JwtUtils::createRandomBase64EncodedSecretKey which will allow you to generate a random SecretKey rather than using the default one supplied in the non-propduction properties files.
You will also need access to a Mongo instance. The connection URL (in the yml files) will result in the automatic creation of a Mongo database and the two required collections (dependant on the security config of your Mongo install).
Check the console log when running in production - you should see NO warning messages!
A lot of the functionality is normally protected behind oauth2 authentication (via Google and Facebook). To use this, you must set up credentials (oauth2 client ids) on Google and/or Facebook. You must then make the client-id and client-secret available to the running code. There are "placeholders" for these in /src/main/resources/application.yml i.e. replace the existing "NotInSCMx" (Not In Source Code Management!) values with your own.
You should also set the redirect-uri to an appropriate value (and one that you have configured on Google and/or Facebook).
There is some sample data provided to make initial understanding of the functionality a bit easier. It is in the /src/main/resources/sample_data. See the #README.txt in that directory. See the details above for the available Spring profiles to see when this sample data is auto loaded.
The Mongo indexes required by the application are not "auto created" (except when running in Docker containers). You can manually apply the indexes defined in /src/main/resources/indexes. In particular, the application's Search functionality won't work unless you run the command to build the weighted full text index across various fields of the Book collection. The rest of the application will run without indexes - just more slowly as the data volumes increase!
There is functionality to send an email to an admin when a new user has logged on. This is intended to prompt the admin to give the new user the ROLE_EDITOR role (or delete the user!). This functionality must be enabled - see the books.users.registrationAdminEmail entries in application.yml (where it is disabled by default).
The code supports five access levels
- anonymous (never logged in)
- ROLE_USER (logged in but no more permissions than anonymous)
- ROLE_EDITOR (logged in with permission to create book reviews and comment on other people's book reviews)
- ROLE_ADMIN (logged in with full admin access)
- ROLE_ACTUATOR (logged in but with no permissions except to access Actuator endpoints)
The application-.yml files can be edited to automatically give a logged on user admin access by specifying their email on Google / Facebook. See the books:users:default:admin:email setting.
This demo application stores a JWT token in a secure and "httpOnly" cookie. So that hopefully blocks some XSS exploits (as the rogue JavaScript can't read the httpOnly cookie containing the JWT logon token).
To mitigate XSRF exploits, the application uses an XSRF filter to set an XSRF token in a (non httpOnly) cookie that must be re-sent to the server for state changing (non GET) requests as an X-XSRF-TOKEN request header. The application will check that the two values are the same.
This works well (or seems to!) when the API and the HTML is on the same domain. When CORS is needed to call the API, this doesn't currently work. So only use this application with CORS configured (i.e. with no "front proxy") in development. Don't use this application with CORS in production - it will leave you open to XSRF based attacks.
The public read only part of the application's REST API is automatically documented using the springdoc-openapi tool to auto create OpenAPI 3 JSON. The API documentation can be explored and tested using the Swagger UI available here.
A lot of the time developing this microservice was spent in making it entirely independent of HTTP session state - based around issuing a JWT after the user has authenticated via Google / Facebook.
This turned out to be suprisingly difficult - with the cause of the difficulty mainly being in the Spring Boot OAuth2 implementation in Spring Boot 1.x. The Google/Facebook re-direct back to the microservice needed to hit the same session / JVM as I think that the Oauth2ClientContext was storing some state in http session.
The current version of this application has moved to the Oauth2 functionality in Spring Security 5+. While this greatly reduces the "boilerplate" code needed to logon via Google or Facebook it still, by default, stores data in the HTTP session (to validate the data in the redirect back from Google / Facebook). However, it does allow configuration of your own AuthorizationRequestRepository meaning that it is possible to implement a cookie based version. So, finally, this application is completely free of any HTTP session state! Which was the point of originally starting to write this microservice...
This demo app uses JWTs as the user's session token. In most cases this is now considered an anti-pattern (pros and cons discussion). For my own usage (where I'm extremely unlikely to need to quickly revoke users) it's fine but I wouldn't use this solution for user session management again in the future.
Warning
There was an bug in versions of this project prior to those using Spring Boot 3 i.e. prior to 0.30.0-SNAPSHOT in that random plaintext was being passed to the JWT signing function rather than a SecretKey. Please see this StackOverflow discussion for more details.
Docker images are available for the various tiers that make up the full application.
An nginx based Docker image (aidanwhiteley/books-web-react) is available that hosts the React/Typescript single page app and acts as the reverse proxy through to the API tier (this application). See https://github.com/aidanwhiteley/books-react for more details. The checked in docker-compose.yml specifies the use of aidanwhiteley/books-web-react-gateway which routes Ajax calls to the APIs via a Spring Cloud Gateway based API gateway.
A Spring Cloud Gateway based API gateway image is available to route web traffic on port 8000 through to (a cluster of) Spring Boot based books microservices. Also provides basic throttling and load balancing amongst the available books microservices. Requires a Service Registry to register with and find running books microservices.
A Spring / Netflix Eureka service registry in which instances of the books microservice register themselves and in which the API gateway finds available instances of the books microservice.
There is Google Jib created image (aidanwhiteley/books-api-java) for this application. The image can be recreated by running "mvn compile jib:dockerBuild". Registers with Service Registry (dependant on the Spring profile used).
A MongoDB based Docker image (aidanwhiteley/books-db-mongodb or aidanwhiteley/books-db-mongodb-demodata) is available to provide data tier required by this application. Use the aidanwhiteley/books-db-mongodb-demodata to have sample data reloaded into the MongoDB every time the container is restarted. See the src/main/resources/mongo-docker directory for Docker build of the data tier.
There is a docker-compose.yml file in the root of this application. This starts Docker containers for all the above tiers of the overall application.
The docker-compose file expects there to be a .env file in the same directory to define the environment variables expected by the various Docker images. There is an example .env file with comments checked in. This SHOULD be edited according to the instructions in the file (noting that the containers will start and run OK with the checked in values if you are just trying things out).
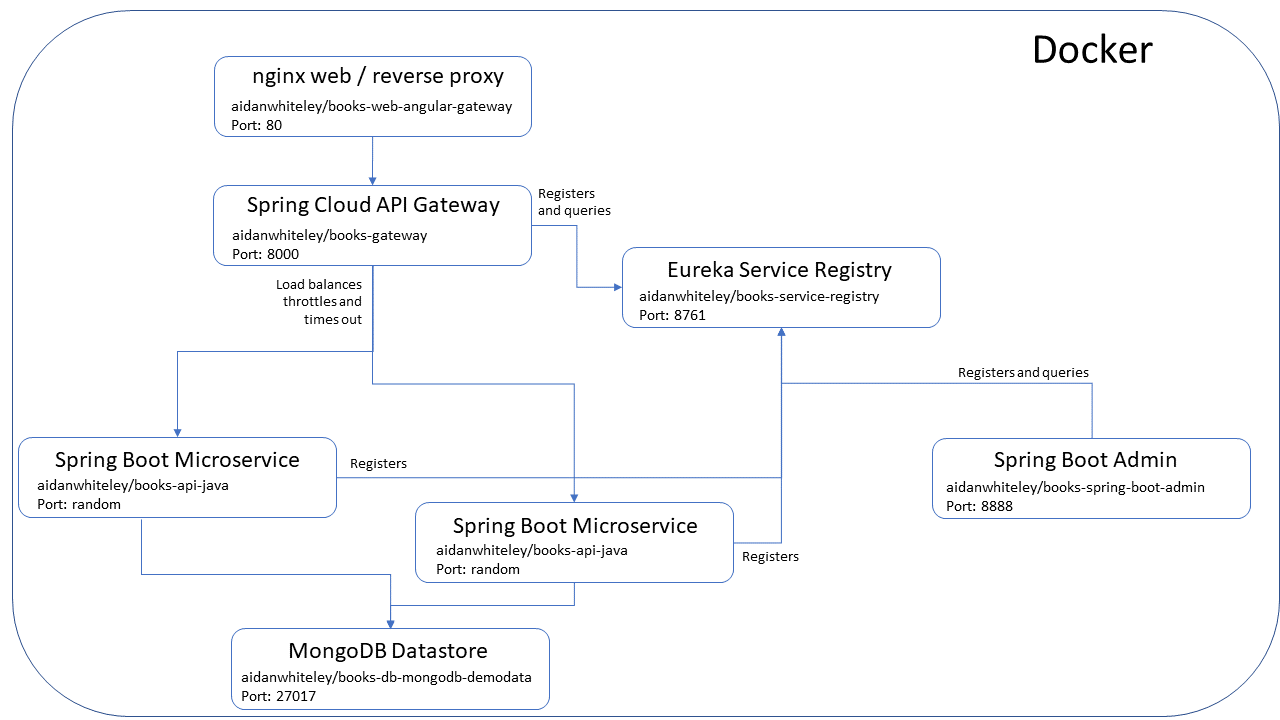
The checked in docker-compose.yaml and .env file should result in a deployment as shown on the following diagram.
If you have a recentish Docker available, from the root of this project type:
docker compose pull
docker compose up -d --scale api-tier-java=2
Then try accessing http://localhost/
You may get 503 errors for a short period while the whole stack is starting up.
Note: If you want to persist data in Mongo between restarts of the container, rename the file docker-compose.override.yaml.persistent-data to docker-compose.override.yaml If you do this and are running on Windows, make sure to read the Caveats section of https://hub.docker.com/_/mongo/
| Tier | URL | Notes and screen grab |
|---|---|---|
| Website | http://localhost/ | Accessing this URL, if you left the docker-compose.yaml as is, you will be auto "logged on" as an admin user. Try the "ADD A BOOK" link and, after you have completed the "Title", you should see a list of matching books from Google Books. |
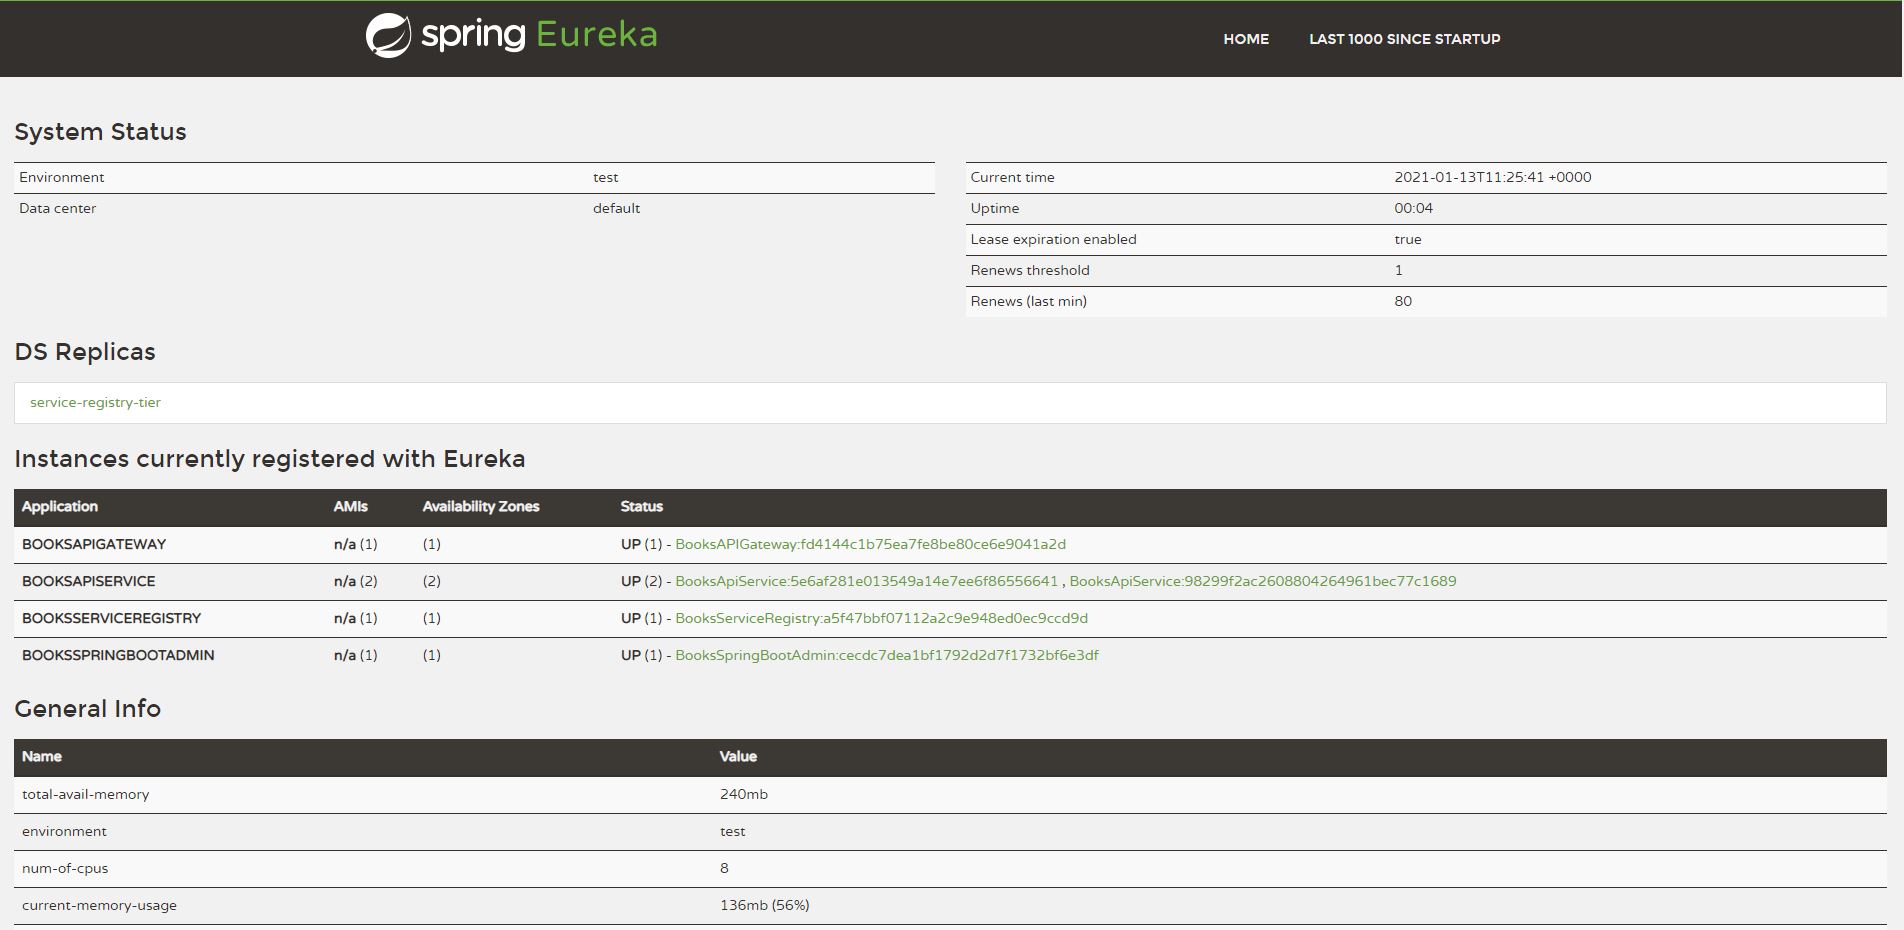
| Service registry | http://localhost:8761/ | The service registry isn't behind logon. You should see registered the API gateway, the service registry itself, two instances of the Books microservice and a Spring Boot Admin instance. |
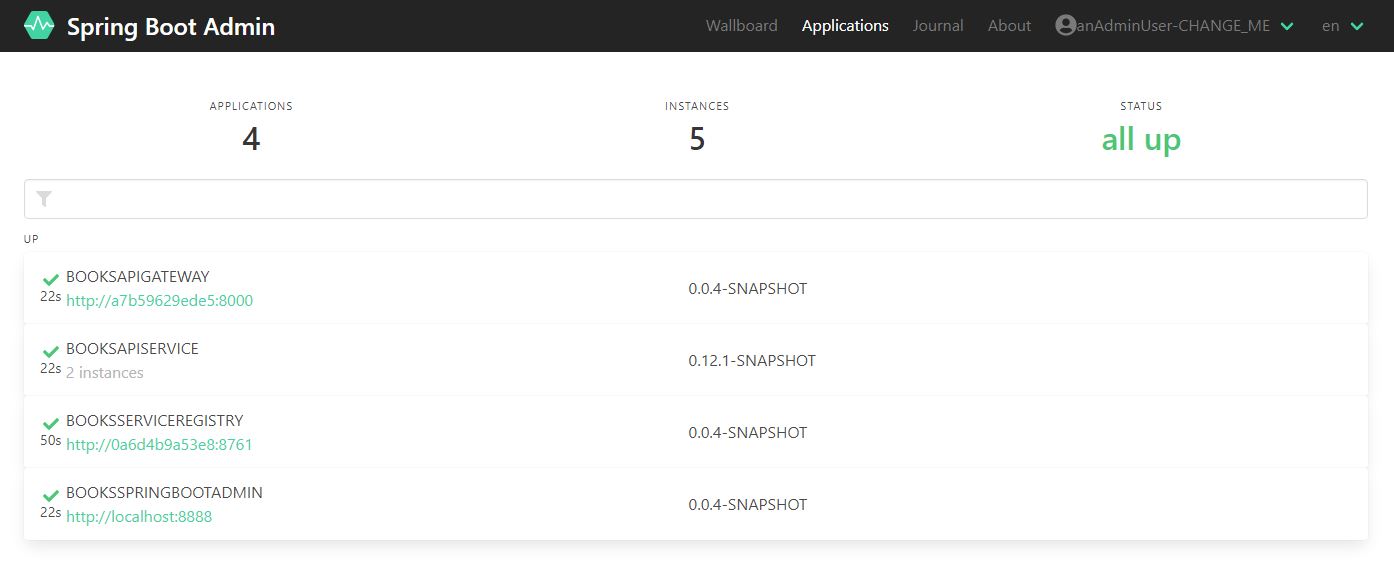
| Spring Boot Admin | http://localhost:8888/ | If you haven't changed the .env file, logon with anAdminUser-CHANGE_ME / aPassword-CHANGE_ME  |
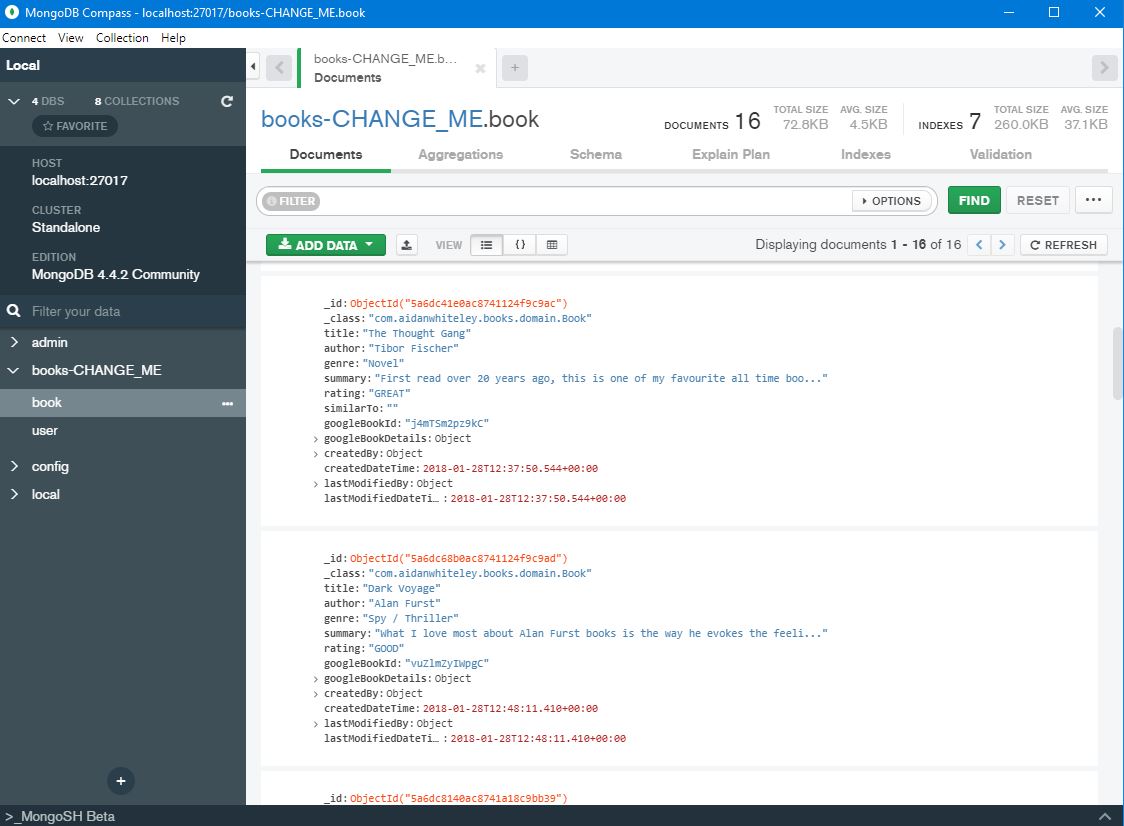
| Mongo data tier | http://localhost:27017/ | With the default docker-compose.yml this isn't exposed. Look for the comments in the file around about line 136 if you want to access the database directly (userids and passwords being in the .env file)  |
The application supports exposing Actuator endpoints to be consumed by Spring Boot Admin. We need security applied to the Actuator end points but don't want to introduce another security layer into the application - we want to stick with the JWT based implemetation we already have. So we need Spring Boot Admin to be able to supply a suitable JWT token when calling the Actuator end points.
To do this, set books.allow.actuator.user.creation to true and run the application. A JWT will be printed to the application logs for a user that only jas the Actuator role. Plug this JWT token into a Spring Boot Admin application that is configured to send the above JWT token with each request to the Actuator endpoints in this application. A extract of the required configuration of a class that implements de.codecentric.boot.admin.server.web.client.HttpHeadersProvider is listed below with a fully working example project being available at https://github.com/aidanwhiteley/books-springbootadmin
@Component
public class JwtHeaderProvider implements HttpHeadersProvider {

    @Override
    public HttpHeaders getHeaders(Instance instance) {
        HttpHeaders headers = new HttpHeaders();
        headers.add(HttpHeaders.COOKIE, JWT_COOKIE_NAME + "=" + jwtTokenActuatorUser);
        return headers;
    }
}- Set HTTP basic username/password values required when the client application registers with the Spring Boot Admin instance
- in the client application (i.e. this application) by setting the spring.boot.admin.client.username/password values
- configure the Spring Boot admin application with the same values by setting spring.security.user.name/password
Why "The Cloudy BookClub"? Well - it's gong to run in the cloud innit. And I couldn't think of any other domain names that weren't already taken.
There is a React/Typescript based front end application that consumes the microservice available at https://github.com/aidanwhiteley/books-react
The running application can be seen at https://cloudybookclub.com/

