This is a new React Native project, bootstrapped using @react-native-community/cli.
Note: This repository it's been created to show how to configure a testing environment for React Native using Jest and React Native Testing Library.
- Fork this repository
- Check the available components in the
Last added componentssection above 👆 - Read the Card Information from the project, to get an idea of the business rules (each component would have attached the link to it's own card)
- Develop your test cases for the component(s)
- Test cases for each component must be inside the
__tests__folder following the same structure that is inside ofsrc/components - Create a
branchfor each test use case within the following formatgithub_username/component_nameex:aiherrera/button,aiherrera/link, etc - Raise a PR to the develop branch with your changes
First, you will need to start Metro, the JavaScript bundler that ships with React Native.
To start Metro, run the following command from the root of your React Native project:
# using npm
npm start

# OR using Yarn
yarn startLet Metro Bundler run in its own terminal. Open a new terminal from the root of your React Native project. Run the following command to start your Android or iOS app:
# using npm
npm run android

# OR using Yarn
yarn android# using npm
npm run ios
# OR using Yarn
yarn iosIf everything is set up correctly, you should see your new app running in your Android Emulator or iOS Simulator shortly provided you have set up your emulator/simulator correctly.
This is one way to run your app — you can also run it directly from within Android Studio and Xcode respectively.
These are the steps followed to configure the testing environment:
yarn add --dev jest @testing-library/react-native @testing-library/jest-nativeyarn add --dev @types/jestmodule.exports = {
preset: 'react-native',
+ setupFilesAfterEnv: ['@testing-library/jest-native/extend-expect'],
}// src/components/button.tsx
import React, { FC } from 'react'
import { TouchableOpacity, Text } from 'react-native'
interface MyButtonProps {
text?: string;
}
const MyButton: FC<MyButtonProps> = ({ text = 'Press Me' }) => {
return (
<TouchableOpacity>
<Text>{text}</Text>
</TouchableOpacity>
)
}
export default MyButton// __tests__/components/button.test.tsx
import 'react-native'
import React from 'react'
import { render } from '@testing-library/react-native'
import MyButton from '../../src/components/button'
describe('<MyButton />', () => {
it('should render the button text', () => {
const { getByText } = render(<MyButton text="Press Me" />)
const label = getByText('Press Me')
expect(label).toBeTruthy()
})
})"scripts": {
"test": "jest",
"test:watch": "jest --watch",
"test:coverage": "jest --coverage"
},testwill run all the tests oncetest:watchwill run all the tests and will watch for changestest:coveragewill run all the tests and will show the coverage
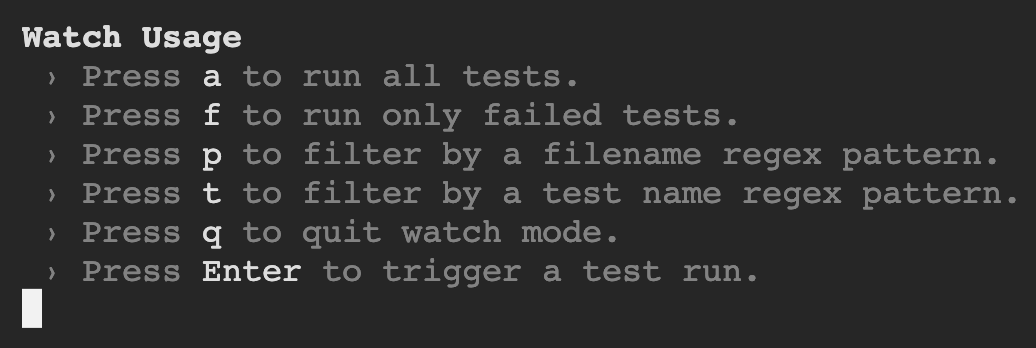
💡 Remember that when using the --watch flag, you are provided with several options to interact within the test runner:
To learn more about React Native, take a look at the following resources:
-
React Native Website - learn more about React Native.
-
Jest - learn more about Jest.
-
React Native Testing Library - learn more about React Native Testing Library.
