These instructions show how to deploy a very simple web application that uses a data backend using redis. You don't need to install any software, just point your browser at the kubernetes playground and follow along with the steps.
-
In a browser, open the kubernetes playground and log in using either a Docker Hub id or a GitHub id. Then click on Start.
-
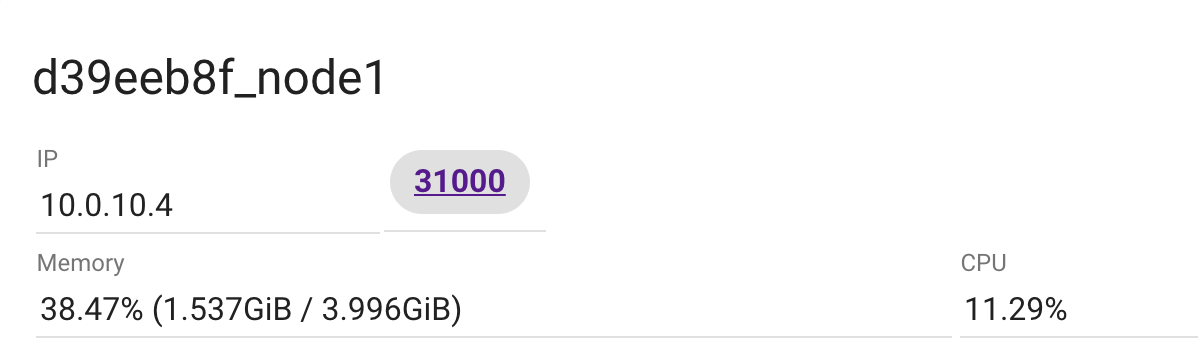
Click on ADD NEW INSTANCE to set up your first node. Make a note of the IP address shown when it starts. Replace
10.0.10.4in the command examples using curl with your node1 IP address. -
Bring up up kubernetes on the node
kubeadm init --apiserver-advertise-address $(hostname -i)copy the example output of commands to add another node to cluster e.g.
kubeadm join --token 90208e.bf692e94cd3ab9bc 10.0.10.4:6443(your token will be different) -
Set up networking
kubectl apply -n kube-system -f \ "https://cloud.weave.works/k8s/net?k8s-version=$(kubectl version | base64 | tr -d '\n')" -
Check status, repeat until the master shows "Ready"
kubectl get nodes NAME STATUS ROLES AGE VERSION node1 Ready master 1m v1.8.4 -
Add another node
-
click ADD NEW INSTANCE
-
click into node2 and then run the command you recorded for adding new nodes from step 2:
kubeadm join --token 90208e.bf692e94cd3ab9bc 10.0.10.4:6443
-
-
Return to the master (node1) and check on status with kubectl, wait until node2 shows ready:
kubectl get nodes
NNAME      STATUS    ROLES     AGE       VERSION
node1     Ready     master    2m        v1.8.4
node2     Ready     <none>    38s       v1.8.4
-
Deploy a pod
cat > webpod.yaml
// paste in pod yaml from web/webpod.yaml
ctrl-D
kubectl create -f webpod.yaml
pod "web" created
The source code and Dockerfile for the pod are located in the
webfolder. -
Check on status of the pod, wait until it shows "Running"
kubectl get pod web NAME READY STATUS RESTARTS AGE web 1/1 Running 0 22s -
Get onto the webpod
kubectl exec -it web bash root@web:/usr/src/app# -
Check on the app locally using curl (this will take a little while for the tcp timeout)
curl 127.0.0.1:5000
// a lot of html output ending with:
ConnectionError: Error -2 connecting to redis:6379. Name or service not known.
leave the bash shell on the web pod using exit.
-
Let's make the application available within the cluster using a service
cat > websvc.yaml
// paste in service yaml from web/websvc.yaml
ctrl-D
kubectl create -f websvc.yaml
service "web" created
note the highlighted port on the browser page that appears - that's exposing access to the NodePort to the browser session.
-
Check on the status of the Service
kubectl get svc web NAME CLUSTER-IP EXTERNAL-IP PORT(S) AGE web 10.109.9.17 <nodes> 5000:31000/TCP 2m -
Use curl from the node to reach one of the cluster node 10. or 192. IP addresses (or click on the port 31000 button shown in the browser )
node1 $ curl 10.0.10.4:31000
// a lot of html output ending within
ConnectionError: Error -2 connecting to redis:6379. Name or service not known.
and there is a similar response in the browser tab
-
Add redis as a pod. First create the yaml for the pod, then use kubectl to create the pod.
cat > dbpod.yaml // paste in service yaml from db/dbpod.yaml ctrl-D kubectl create -f dbpod.yaml pod "redis" created -
Check on pods status, get a little more detail with the
-o wideoptionkubectl get pods -o wide NAME READY STATUS RESTARTS AGE IP NODE redis 1/1 Running 0 56s 10.44.0.2 node2 web 1/1 Running 0 31m 10.44.0.1 node2 -
Test out the redis pod
kubectl exec -it redis bash
root@redis:/data# redis-cli ping
PONG
root@redis:/data# redis-cli
127.0.0.1:6379> set my-key "test-only"
OK
127.0.0.1:6379> get my-key
"test-only"
Exit out of the redis-cli and back out of the pod to return to the node prompt.
-
Add a service for redis
cat > dbsvc.yaml // paste in service yaml from db/dbsvc.yaml ctrl-D kubectl create -f dbsvc.yaml service "redis" created -
Check on the services
kubectl get svc
NAME         CLUSTER-IP      EXTERNAL-IP   PORT(S)          AGE
kubernetes   10.96.0.1       <none>        443/TCP          56m
redis        10.104.50.233   <none>        6379/TCP         6s
web          10.109.9.17     <nodes>       5000:31000/TCP   24m
Notice how when the redis service was added, another port button did not appear in the browser? That's because the service for the db did not have a NodePort. This service is only available within the cluster.
-
Check on the endpoints for each service within the CLUSTER
kubectl get endpoints NAME ENDPOINTS AGE kubernetes 10.0.10.4:6443 58m redis 10.44.0.2:6379 2m web 10.44.0.1:5000 26m -
The endpoint corresponds to a name available within the cluster DNS namespace. You can go on the web node and confirm this with ping. The command will resolve the endpoint IP address and try sending an echo request packet. You can use ctrl-C to stop the ping process instead of waiting.
kubectl exec -it web bash
root@web:/usr/src/app# ping -c 1 redis
PING redis.default.svc.cluster.local (10.104.50.233): 56 data bytes
--- redis.default.svc.cluster.local ping statistics ---
1 packets transmitted, 0 packets received, 100% packet loss
The
resolv.conffiles on the pods include search domains that work within the cluster. In the DNS, each resource gets a name of the form .. The redis pod is added to the default namespace.Exit from the pod shell
-
Try it out - use the web port icon or curl:
node1 $ curl 10.0.10.4:31000 Hello Container World from web! I have been seen 1 times. -
Clean up by removing the web pod only
kubectl delete pod web pod "web" deleted -
Scale up the web by going from a pod to a deployment
cat > webdep.yaml // paste in pod yaml from webdep.yaml ctrl-D kubectl create -f webdep.yaml deployment "web" created -
Check on the status of the deployment and pods
kubectl get deploy
NAME      DESIRED   CURRENT   UP-TO-DATE   AVAILABLE   AGE
web       2         2         2            2           2m
kubectl get pods -o wide
NAME                  READY     STATUS    RESTARTS   AGE       IP          NODE
redis                 1/1       Running   0          46m       10.44.0.2   node2
web-829031562-52q56   1/1       Running   0          3m        10.44.0.1   node2
web-829031562-wx281   1/1       Running   0          3m        10.44.0.3   node2
Both web pods are running on node2. The first node (aka the cluster master) is running a number of containers to support the pod. To keep node 1 from running out of resources, it is marked with a node role of "NoSchedule" which limits further pod deployments.
-
Test it out again, trying multiple times.
kubectl get endpoints
...
web          10.44.0.1:5000,10.44.0.3:5000   1h
curl 10.0.10.4:31000 Hello Container World from web-829031562-wx281! I have been seen 3 times. curl 10.0.10.4:31000 Hello Container World from web-829031562-52q56! I have been seen 4 times.Traffic to the web pods is being distributed in a relatively arbitrary fashion from the service NodePort.

-
Edit the number of replicas in webapp.yaml to change to 10. Do this either in the terminal in the browser or edit on the workstation and update the file contents. Then apply the changes.
kubectl apply -f webdep.yaml -
Check the endpoint status again.
kubectl get endpoints ... web 10.44.0.1:5000,10.44.0.10:5000,10.44.0.11:5000 + 7 more... 1h -
Now there's a lot of pods, show the list.
kubectl get pods -l app=web NAME READY STATUS RESTARTS AGE web-829031562-52q56 1/1 Running 0 20m web-829031562-6jn20 1/1 Running 0 3m web-829031562-ccxc0 1/1 Running 0 3m web-829031562-d8lqh 1/1 Running 0 3m web-829031562-jhxp9 1/1 Running 0 3m web-829031562-kscw8 1/1 Running 0 3m web-829031562-mnfqm 1/1 Running 0 3m web-829031562-mv8ff 1/1 Running 0 3m web-829031562-tj7cr 1/1 Running 0 1m web-829031562-wx281 1/1 Running 0 20m -
See them all in action
watch -n 0.2 curl 10.0.10.4:31000 ctrl-C -
Set up the node2 terminal with access to kubectl
On node1:
cat $HOME/.kube/config
// select all of the output and copy w/ browser
On node2:
cat > $HOME/.kube/config // paste copied content ctrl-D kubectl get pods NAME READY STATUS RESTARTS AGE redis 1/1 Running 0 1h web-829031562-52q56 1/1 Running 0 35m web-829031562-6jn20 1/1 Running 0 18m web-829031562-ccxc0 1/1 Running 0 18m web-829031562-d8lqh 1/1 Running 0 18m web-829031562-jhxp9 1/1 Running 0 18m web-829031562-kscw8 1/1 Running 0 18m web-829031562-mnfqm 1/1 Running 0 18m web-829031562-mv8ff 1/1 Running 0 18m web-829031562-tj7cr 1/1 Running 0 16m web-829031562-wx281 1/1 Running 0 35m -
On node2, start up a continuous view of the status of the nodes
kubectl get pods -l app=web --watch -
Switch back to node1 and kill some pods, then follow status on node2
On node1:
kubectl delete pod <pod-names>Display on node2 of pods stopping and replacements coming in:
web-829031562-52q56 1/1 Terminating 0 52m web-829031562-6jn20 1/1 Terminating 0 35m web-829031562-9kndj 0/1 Pending 0 0s web-829031562-9kndj 0/1 Pending 0 0s web-829031562-9kndj 0/1 ContainerCreating 0 0s web-829031562-fd6nq 0/1 Pending 0 0s web-829031562-fd6nq 0/1 Pending 0 0s web-829031562-fd6nq 0/1 ContainerCreating 0 0s web-829031562-52q56 0/1 Terminating 0 52m web-829031562-6jn20 0/1 Terminating 0 35m web-829031562-9kndj 1/1 Running 0 1s web-829031562-6jn20 0/1 Terminating 0 35m web-829031562-6jn20 0/1 Terminating 0 35m web-829031562-52q56 0/1 Terminating 0 52m web-829031562-52q56 0/1 Terminating 0 52m web-829031562-fd6nq 1/1 Running 0 4s -
Kill all of the pods from node1, and then watch status:
kubectl delete pods -l app=web kubectl get pods -l app=web NAME READY STATUS RESTARTS AGE web-829031562-ccxc0 1/1 Terminating 0 41m web-829031562-cd1n5 0/1 ContainerCreating 0 12s web-829031562-cnqzf 0/1 ContainerCreating 0 12s web-829031562-crqvv 0/1 ContainerCreating 0 11s web-829031562-dkv0s 0/1 Pending 0 11s web-829031562-kscw8 1/1 Terminating 0 41m web-829031562-mnfqm 1/1 Terminating 0 41m web-829031562-mqvtq 0/1 Pending 0 11s web-829031562-mt93n 0/1 ContainerCreating 0 12s web-829031562-mtwd6 0/1 ContainerCreating 0 12s web-829031562-pfkzn 0/1 Pending 0 12s web-829031562-th20q 0/1 ContainerCreating 0 12s web-829031562-tj7cr 1/1 Terminating 0 39m web-829031562-vw3v7 0/1 Pending 0 10s web-829031562-wx281 1/1 Terminating 0 58m -
To scale back, edit the webdep.yaml file changing back to 2 or 3 replicas and then re-apply.
kubectl apply -f webdep.yamlCheck the watch on node2 to see the pods terminating. When the output is quiet, check the status on node1.
kubectl get pods NAME READY STATUS RESTARTS AGE redis 1/1 Running 0 1h web-829031562-mt93n 1/1 Running 0 4m web-829031562-mtwd6 1/1 Running 0 4m -
Final cleanup, remove all items with labels web and db
kubectl delete all -l 'app in (web,db)'
pod "redis" deleted
pod "web-829031562-mt93n" deleted
pod "web-829031562-mtwd6" deleted
service "redis" deleted
service "web" deleted
deployment "web" deleted
You have seen how to create an application on Kubernetes using pods and services and how to manage a collection of pods, like a web front-end using a deployment.
Interested in learning more? Check out the Container Orchestration Code Patterns from the IBM Code website.