Follow these steps to quickly set up and start working on this project:
-
Fork the Repository:
- Begin by forking this repository to your GitHub account.
-
Clone the Repository:
-
Clone your forked repository to your local machine:
git clone https://github.com/YOUR_USERNAME/docs-templates.git
cd docs-templates
-
-
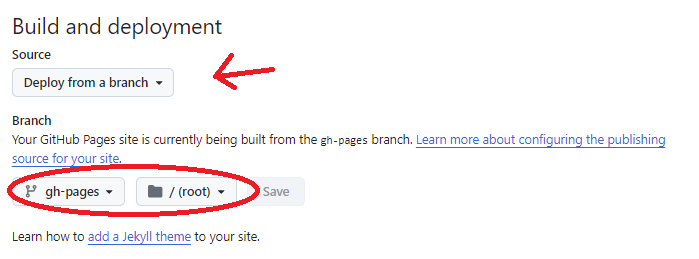
Configure GitHub Pages:
-
In your
docs-templatesrepository settings, go to Actions -> Pages. -
Set the Build and Deployment source to
Deploy from a branch. -
Choose the
gh-pagesbranch and set the folder to /(root). -
Save your changes.
-
-
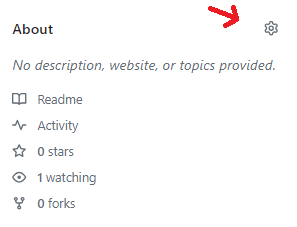
Configure Gist:
-
In the repository's About section, click the Settings gear icon.
-
Enable the
Use your GitHub Pages Websiteoption and Save the changes.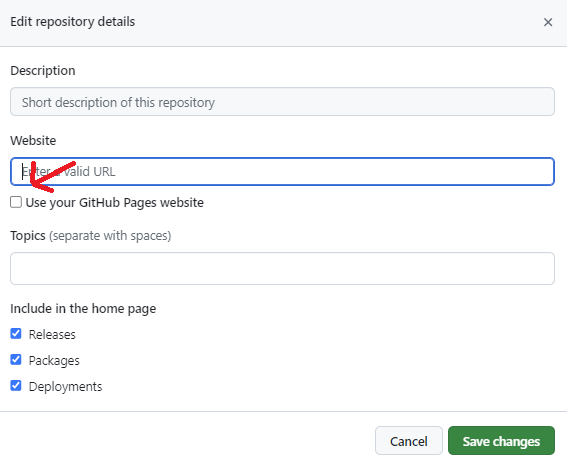
-
-
Customize Markdown Files:
-
The
actionsandpagesin this template are set up to build your gist based on the structure defined inmkdocs.ymlunder thenavsection.nav: - Home: - page-0.md - Section 1: - page-1.md - Section 2: - page-2.md
-
The
navsection is where you define the structure of your documentation site. You can create nested pages to organize your content into sections and subsections, providing a clear hierarchy for users to navigate. For example, to add nested subsections within a section, yournavmight look like this:nav: - Home: page-0.md - Section 1: page-1.md - Section 2: page-2.md - Section 3: - Overview: section-3/overview.md - Details: - Subsection 1: section-3/details/subsection-1.md - Subsection 2: section-3/details/subsection-2.md
-
In this example:
Section 3contains anOverviewpage and aDetailssection with two subsections.- Each entry under
navcorresponds to a markdown file that you have created in thedocs/directory. - You can rename sections, subsections, and pages as needed to match your documentation structure.
-
Rename sections and corresponding markdown files as needed. Ensure the
naventries inmkdocs.ymlmatch your markdown file names. -
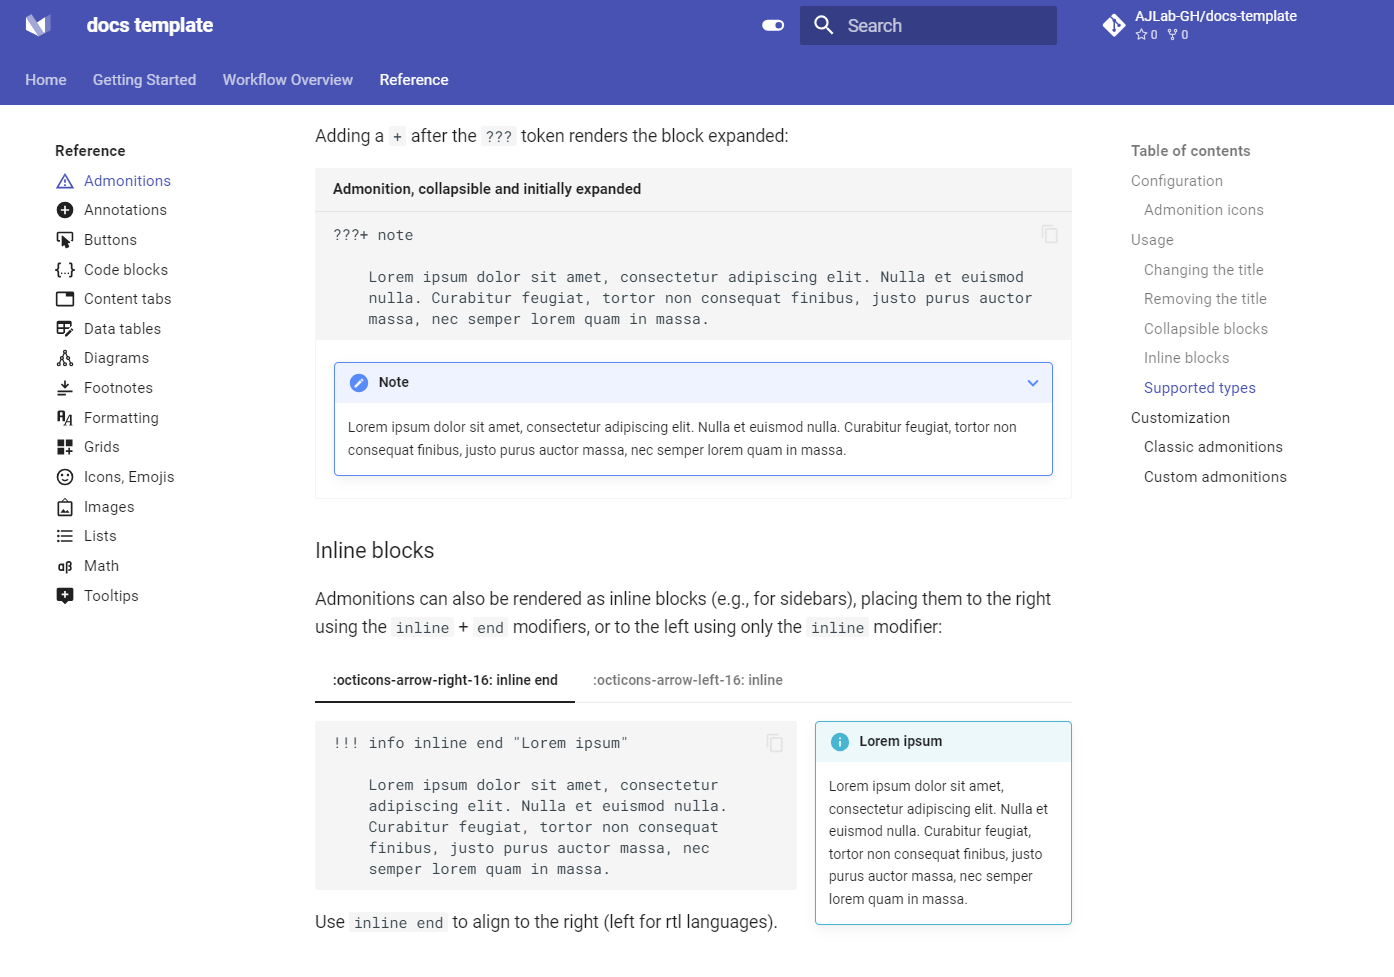
If you would like to augment your markdown with mkdocs specific features, a reference section can be found in the Gist.
-
After editing or adding markdown files, commit and push your changes:
git add .
git commit -m "<describe your changes>"
git push origin main
-
Navigate to your Gist and see your finished product!
-
The workflow includes the following stages:
- Checkout Repository: Retrieves the latest version of the repository using the
actions/checkoutaction. - Configure GitHub Pages: Sets up GitHub Pages to deploy the documentation.
- Install Python and MkDocs: Installs Python 3.x and required MkDocs plugins.
- Build Docs: Runs
mkdocs gh-deployto build and deploy the documentation to GitHub Pages. - Triggering the Workflow: Automatically triggers when changes are pushed to the
mainbranch or when a pull request is created, ensuring the documentation is always current.
GitHub Actions' concurrency feature is used to ensure only one build runs at a time. If multiple pushes occur, subsequent builds will wait until the previous one finishes.
The workflow has write permissions for contents, pages, and id-token, allowing it to create and update files as needed.
Using GitHub Actions to automate the documentation process ensures it is always up-to-date, reliable, and easily accessible.