Launchpad is an in-browser GraphQL server playground. You can write a GraphQL schema example in JavaScript, and instantly create a serverless, publicly-accessible GraphQL endpoint. We call these code snippets that live on Launchpad “pads”.
Read the announcement post to understand the goals of the project.
Read the documentation to learn the ins and outs of Launchpad!
This is a list of great pads deployed at Launchpad.
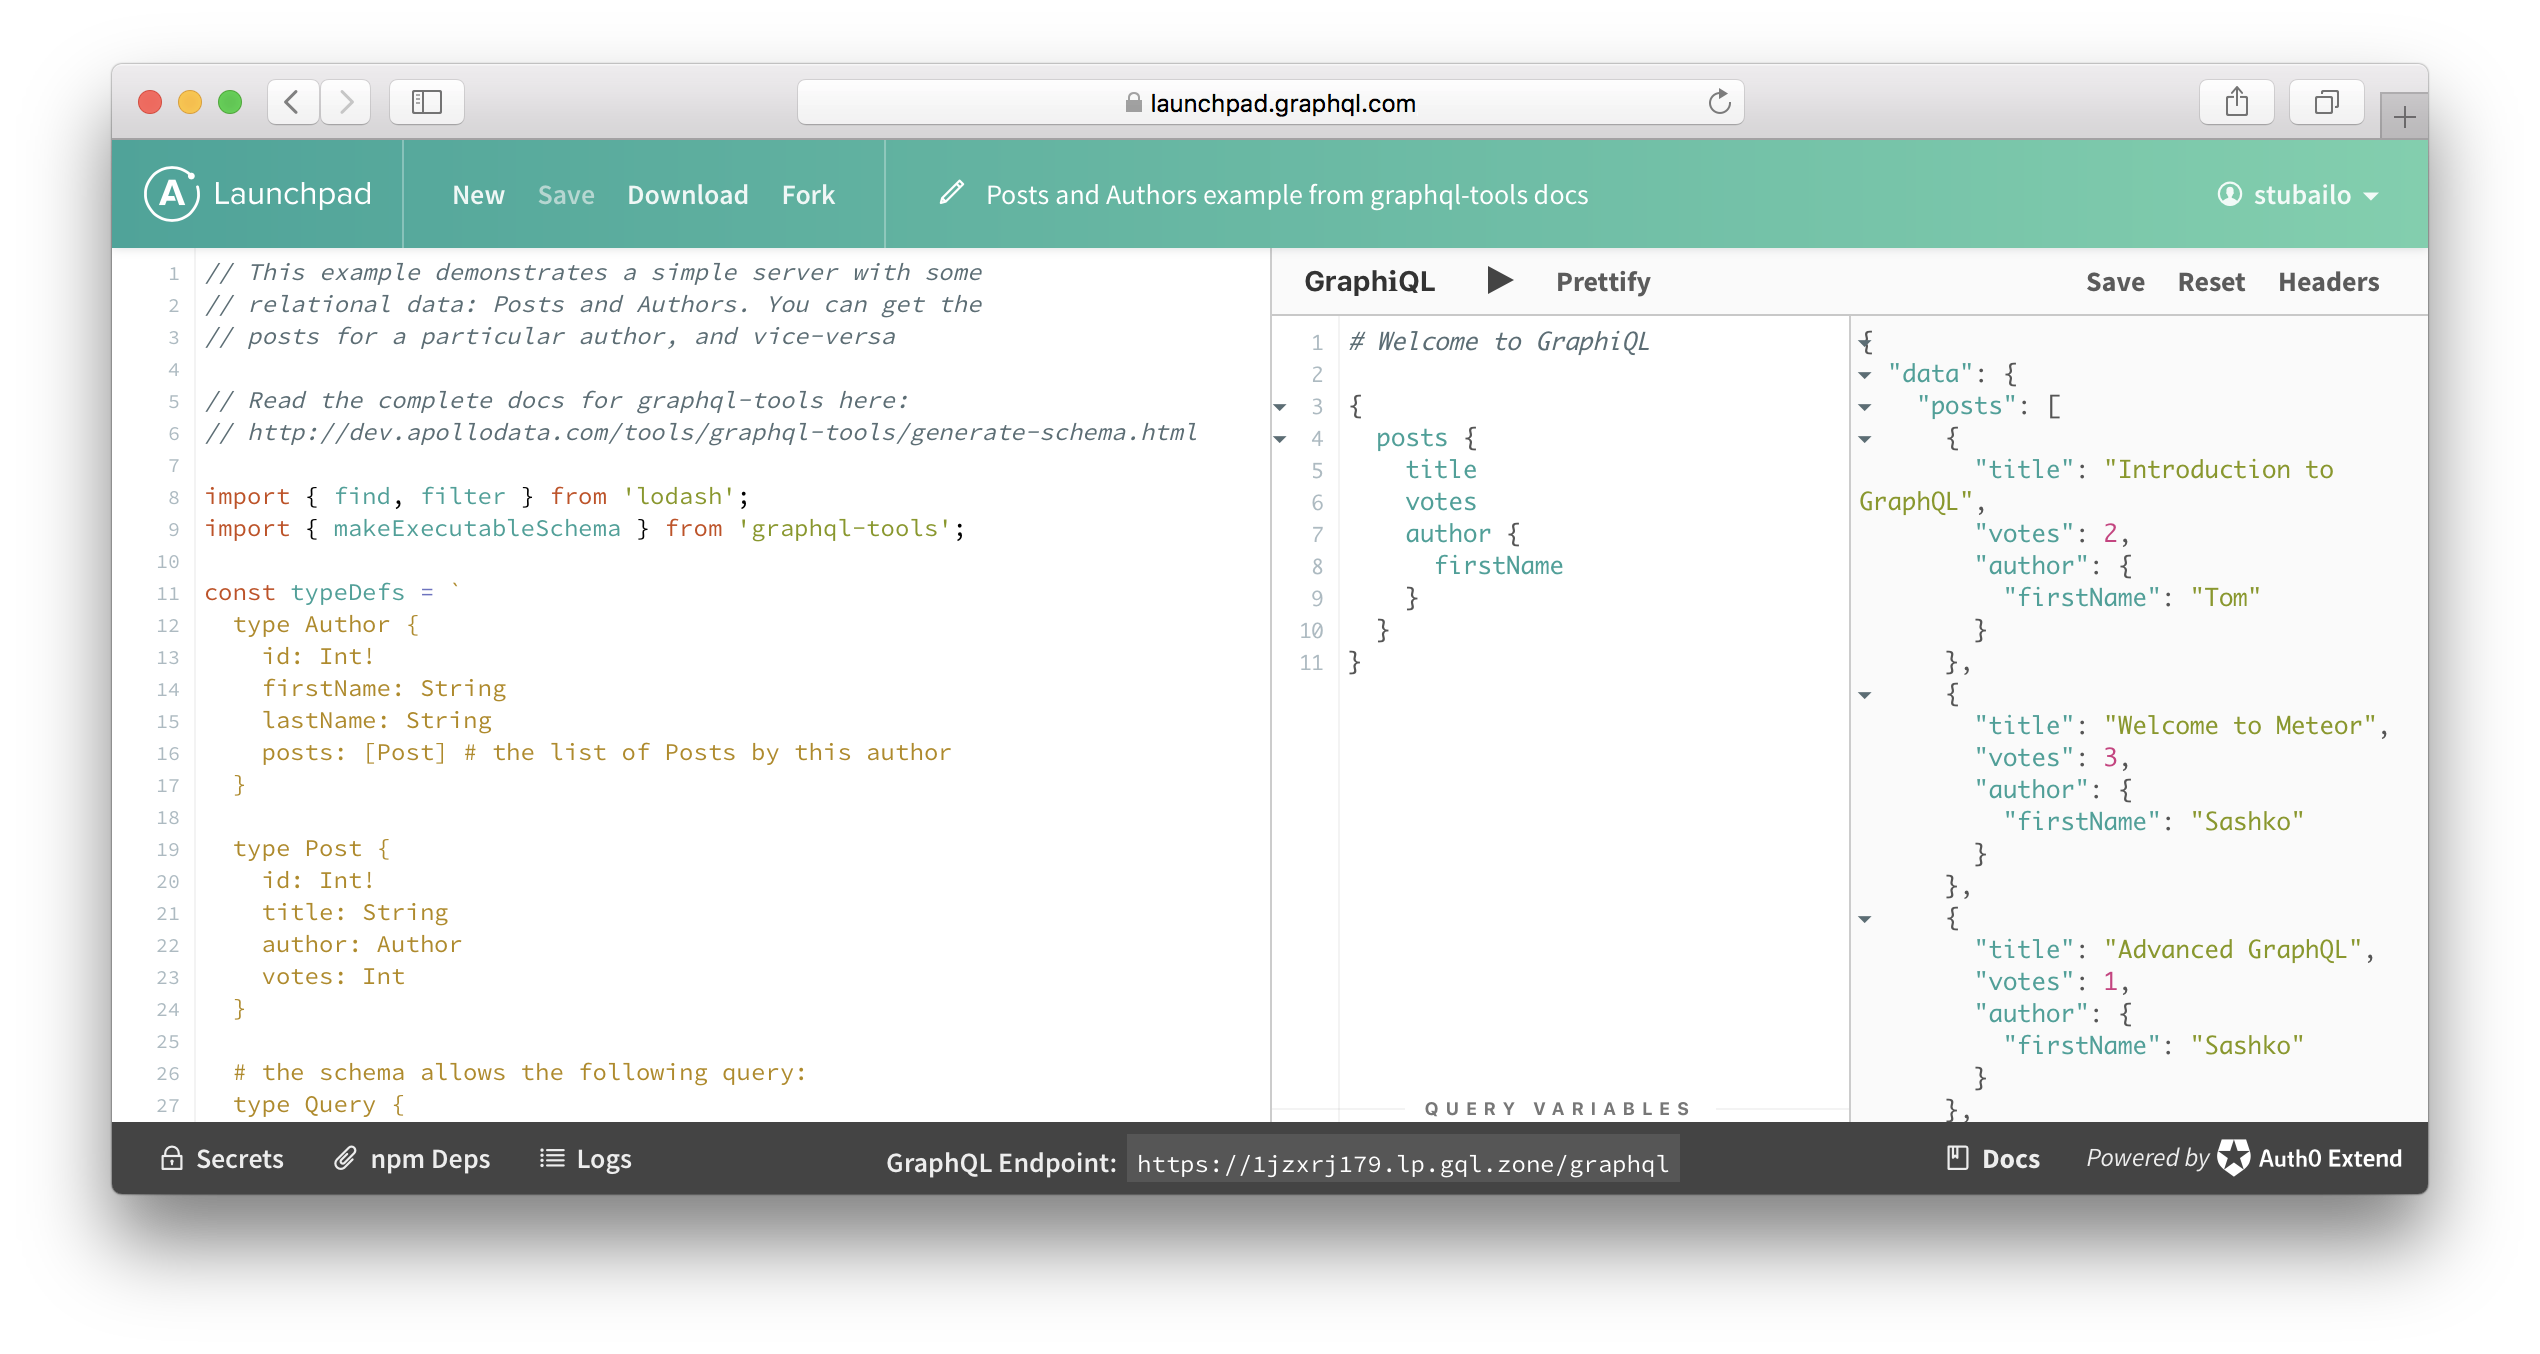
- Hello World! - a super simple schema with one field, that just returns
"Hello, world!" - Relational data: Authors and posts - a more complex schema that has related objects that can be fetched in a nested query.
- Simple Mocking with graphql-tools - a simple example of using the default mocking in graphql-tools to create realistic mocked data in seconds.
- Loading from a MongoDB database - an example of reading from a remote data source, in this case MongoDB.
- MongoDB with Mongoose example - an example of reading from a remote data source, in this case MongoDB with mongoose
- Social Login with Auth0 - Authentication via JWT and social login
- Star Wars API - the Star Wars API you know and love from GraphQL.org.
- graphql-relay-tools - Relay-compliant Star Wars API created using a package that makes it easy to create a relay-compliant schema together with
graphql-tools. - graphql-iso-date - example code for a package that makes encoding dates in different ways easy.
- Full-stack GraphQL + React tutorial server - the result of step 2 of the excellent Full-stack GraphQL + React tutorial
- GraphQL.js code sample with mutation - the basic code sample of a mutation from this page on GraphQL.org
- DataLoader - an example illustrating the use of DataLoader to perform batching and caching in GraphQL.
- Movie Recommendations with Neo4j - a simple movie schema with recommendations, backed by Neo4j graph database
- Current Weather at any location - Get the current weather at any location through Google Maps API geocoding and the Dark Sky weather API!
- One To Many And One To One Relationships - example showing how to implement one to many and one to one relationships the easy way
- Singlish GraphQL - Search word from singlish vocabulary
- Spotify API with Expo Snack UI - how to fetch from the Spotify REST API with GraphQL, and then display it in a React Native UI.
- RSVP management for events - Shows multiple query mutations per Mutation type, as well as querying deeply nested data.
- GRPC - Example using GRPC
- Fetching artists and events from Ticketmaster API - Fetch information about artists and events from the Ticketmaster REST API. Follow along with a workshop here.
- Returning Query type from fields and mutations - Read the writeup here.
Something is missing? Create an issue!
Help Launchpad by creating more pads! Examples of the pads are available in issues under corresponding label
For an overview of how Apollo Launchpad is built, check out the post detailing the original effort. This is a visualization of that effort:

There are two ways to run Launchpad - against the staging server or against your own server. Running against staging server is simpler, but naturally you can't control the server. Note that running against staging server is only possible on localhost and is meant for development purposes.
Both server and the client locally use .env file to set up settings. You
just need one .env file in the root of the project with all of the variables
which are read by the client and/or server.
For running against staging server, the config should be like following (you
can also copy .env.staging.template to your .env):
REACT_APP_LAUNCHPAD_API_URL=https://launchpad-api-staged.herokuapp.com/
REACT_APP_AUTH0_DOMAIN=meteor.auth0.com
REACT_APP_AUTH0_CLIENT_ID=kUtxJjyapGN72Rs7tt5jXMgQ7axDgJLa

#If you want to use engine staging
#ENGINE_STAGING=""
Then the client can be run locally:
npm install # npm 5 recommended
npm start
To test:
npm install
npm test
Limitation - currently logs are not accessible on staging (or by running single tenant server yourself).
Running the server is more complicated. You need MongoDB, Auth0 account and
Auth0 Extend account (currently it requires enterprise account). Once you get
those, you can set the server and client up with the following .env file.
REACT_APP_LAUNCHPAD_API_URL=http://localhost:8000
REACT_APP_AUTH0_DOMAIN={YOUR AUTH0 DOMAIN}
REACT_APP_AUTH0_CLIENT_ID={YOUR AUTH0 CLIENTID}
WT_TOKEN={YOUR MASTER AUTH0 EXTEND TOKEN}
WT_API={YOUR AUTH0 EXTEND OR OTHER WEBTASK PROVIDER API URL}
WT_SINGLE_TENANT_CONTAINER={Container name if running single tenant webtask/extend}
WT_NO_PROXY=true
MONGODB_URL={YOUR MONGODB URL}
AUTH0_SECRET={YOUR AUTH0 SECRET}
To obtain an Auth0 client id, you must create an application. Inside of that application, found under Auth0 clients, make sure that you have added http://localhost:3000 to your Allowed Origins(CORS), shown below. This ensures that your browser will accept the response from Auth0's servers that indicates a user is logged in.

Then you can run server
npm install
npm run dev-server
To test your server implementation, ensure that you have a mongodb instance running at MONGO_URL and then run:
npm run test-server
To log the information produced by a backing webtask in testing, create a profile, then run the log command.
npm install wt-cli -g
wt init -p "lp-test" \
     --url https://launchpad.auth0-extend.com \
     --token $WT_TOKEN \
     --container launchpad-test
wt logs -p "lp-test"
Running against staging webtask service, so you don't need your own webtask or Auth0 Extend account.
REACT_APP_LAUNCHPAD_API_URL=http://localhost:8000
REACT_APP_AUTH0_DOMAIN={YOUR AUTH0 DOMAIN}
REACT_APP_AUTH0_CLIENT_ID={YOUR AUTH0 CLIENTID}
MONGODB_URL={YOUR MONGODB URL}
AUTH0_SECRET={YOUR AUTH0 SECRET}
WT_SINGLE_TENANT_CONTAINER=launchpad-staging
WT_NO_PROXY=true
WT_TOKEN=eyJhbGciOiJIUzI1NiIsImtpZCI6ImxhdW5jaHBhZC0xIn0.eyJqdGkiOiJiOGQ4OWE2OWUxN2Y0NWNhODIxM2M4ZGVjZDVlYjY4MyIsImlhdCI6MTQ5NzYwMjk0NiwiY2EiOlsiZmYxNDczNDYzNzY5NDNmMWEwN2JkMmQyNDkyYmUzZTkiXSwiZGQiOjIsInRlbiI6ImxhdW5jaHBhZC1zdGFnaW5nIn0.jT31-pdmCG8QyrZnwMYO5Mgi6GUe5D9tfTFT8X1XiBw
WT_API=https://launchpad.auth0-extend.com/api
Then you can run server
npm install
npm run dev-server
Building frontend production bundle:
npm run build
Build backend.
npm run build-server
Run compiled backend
npm run start-server
See CONTRIBUTING.md.