OwnPage is an open-source blogging engine that puts data ownership first.
This project is very much at its earliest stage of development and not ready for production adoption.
The main focus of the implementation so far has been around validating the idea of a blogging engine that promotes data ownership. The authentication and authorization model implemented by this project uses OAuth2 to facilitate this.
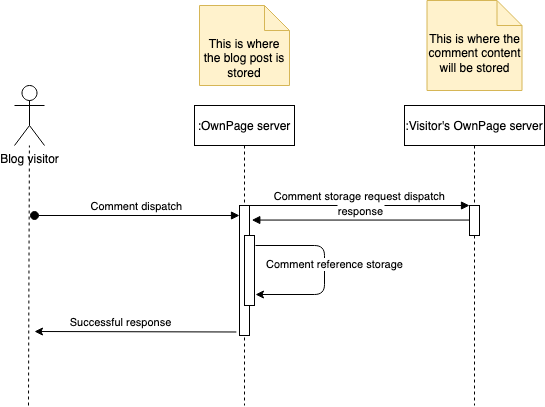
The key aspect of OwnPage is that any owner of an OwnPage blog can log in to another OwnPage blog and perform activity such as reading posts and leaving comments. Any data-generating activity like leaving a comment will happen as follows:
-
the content of the comment will be stored in the OwnPage server of the author of the comment
-
a reference to the comment will be stored in the OwnPage server of the author of the post to which the comment is made
-
all the comments left to a post will be shown as long as they are accessible from the servers they are stored in
-
each comment will present indication of the author of the comment
By default, any user can log into an OwnPage blog as guest provided they have their own OwnPage server. OwnPage leverages the OAuth2 Authorization Code flow to allow any OwnPage owner to log in as guest on any other OwnPage. This facilitates ownership of the data that we produce when we interact with other OwnPage owners.
This project is at its earliest stage of development. In this section you can find an overview of the project structure and information on how to run it and contribute to it.
OwnPage is composed by an API backend and a Front-End React UI.
This is a monorepo that includes both the UI and API projects.
.
├── LICENCE
├── README.asciidoc
├── TODO
├── api
├── assets
├── docker-compose.dev.yml
├── scripts
└── uiAll the relevant code is available under the api/ folder.
The API is a Kotlin Spring Boot application that uses Gradle as build tool.
All the relevant code is available under the ui/ folder.
The UI is a Create React App application enhanced by Material UI.
While developing this project it is often useful running two instances of it at the same time. This guide assumes this use case.
For convenience, we will prefix the first instance with own (e.g. ownpage, owndb, ownui, ownproxy) and the second one with other
(e.g. otherpage, otherdb, otherui, otherproxy).
The first set of dependencies can be spun up using Docker Compose as follows:
$ docker-compoose -f docker-compose.dev.yml up -dPlease refer to the Docker Compose documentation for more information.
The docker-compose.dev.yml files defines, for each instance:
-
a Postgres database instance
-
an NGINX proxy
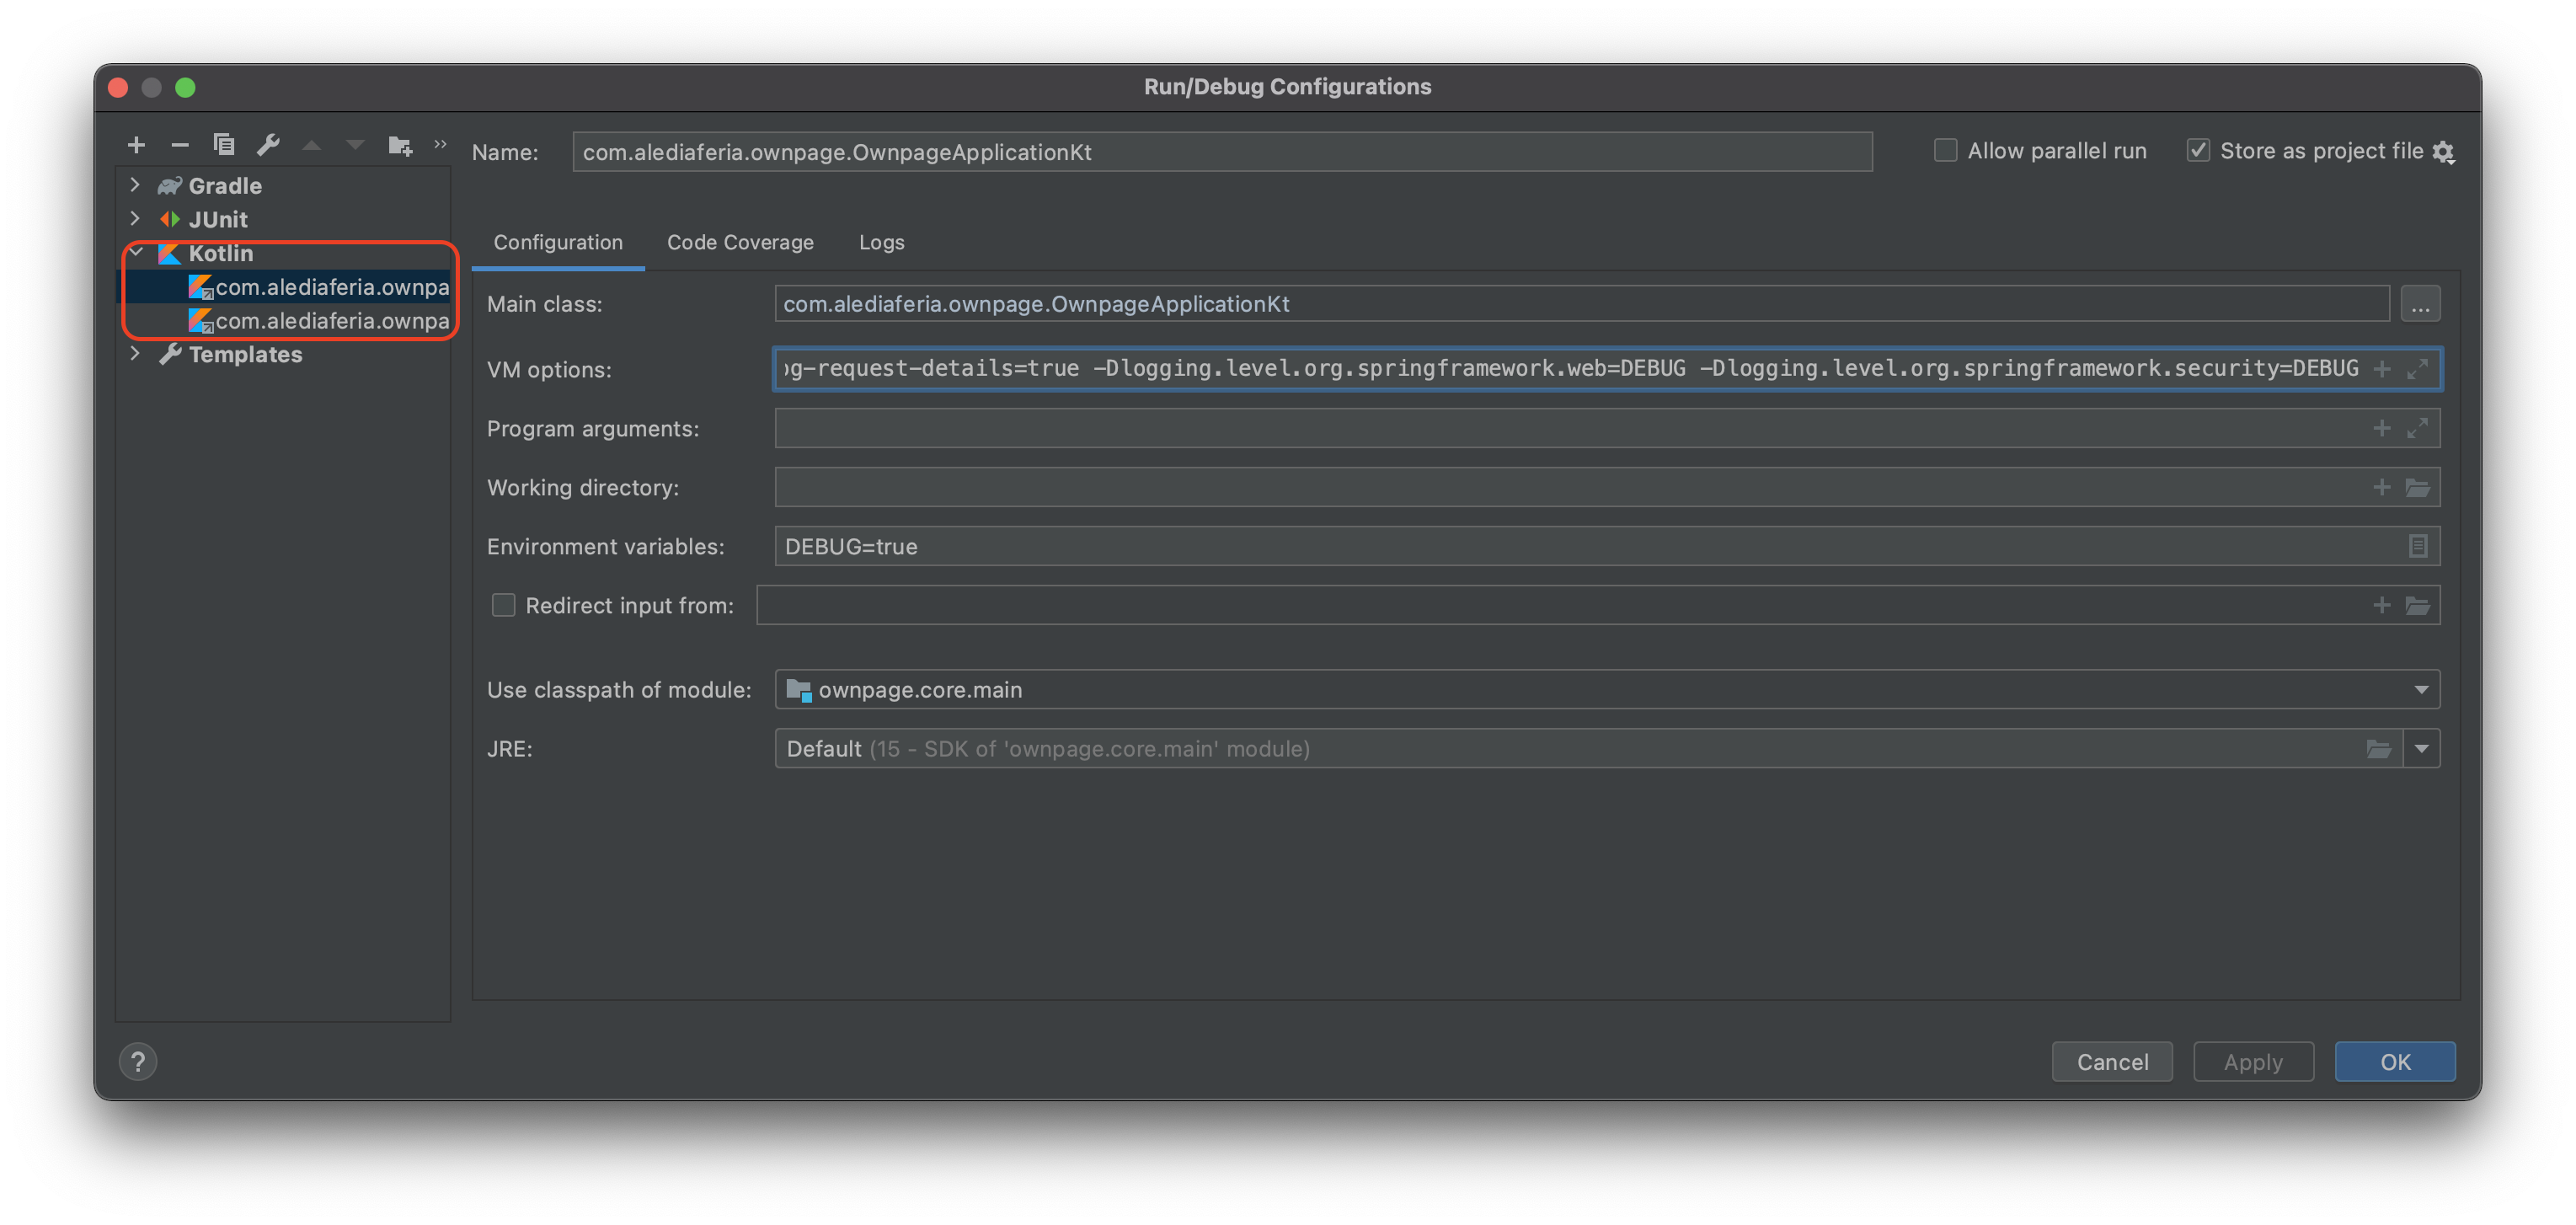
This project assumes IntelliJ IDEA as IDE for the API. The api/.idea folder of this repository includes 2 Run Configurations
the work with the database and proxy spun up through Docker Compose.
The 2 run configurations are configured as follows.
| OwnPage | OtherPage | |
|---|---|---|
Server Port |
|
|
DB Port |
|
|
DB Name |
|
|
|
Add the following line to your /etc/hosts
127.0.0.1 otherpage.local ownpage.localSet up the UI project as follows
$ cd ui
$ npm install
The proxy servers configured in the docker-compose.dev.yml file expect ports 3000 and 3001 to be used by the front-end apps.
$ npm start # defaults to 3000
$ PORT=3001 npm startAn admin account is expected to be configured on each instance before any interaction can happen. An owner setup password is configured
in each api application to be able to invoke the relevant API to create the admin account. The default owner is configured
here under the owner.setup-password property.
this-is-a-complex-setup-password!You can use the setup.sh script to register an admin account as follows:
$ OWNER_SETUPPASSWORD="this-is-a-complex-setup-password\!" ADMIN_PASSWORD="an-admin-pass-of-your-choice" PORT=8456 ./scripts/setup.sh
$ OWNER_SETUPPASSWORD="this-is-a-complex-setup-password\!" ADMIN_PASSWORD="an-admin-pass-of-your-choice" PORT=8457 ./scripts/setup.sh # otherpage

