This project introduces a new network to the GAN architecture, called the "Reverser" (R). The Reverser receives images generated by the Generator (G) and tries to reproduce the noise vectors that were initially fed into G. This seems to have some potential for Unsupervised Learning, as well as fixing errors in the images generated by G.
Classic architecture of GANs:
Changed architecture of GANs with a Reverser (R):
R is a standard convolutional neural network, similar to D.
The following images are generated in grayscale mode to reduce computational complexity. The results should be similar for RGB images.
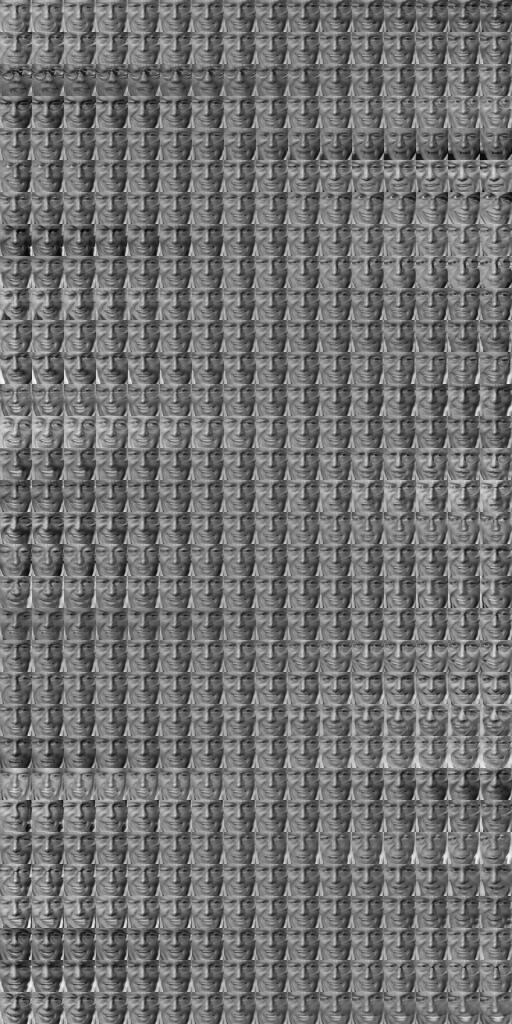
The following image shows roughly the low dimensional representation of faces learned by G (R is not yet used here).
To generate the images, a random noise vector of 32 normal distributed (mean 0, var 1.0) components was first generated.
Then each component of the noise vector was picked (one by one) and set to values between -3.0 and +3.0 (in 16 equally spaced steps).
That led to 32*16 = 512 noise vectors. For each noise vector one face was generated.
Apparently G does not connect single features with single components (e.g. one component for the gender, one for the size of the nose...). Instead, changing single components morphs the whole face. Note that adding components to the noise vectors (100 and 256 instead of 32) did not seem to change this behavior.
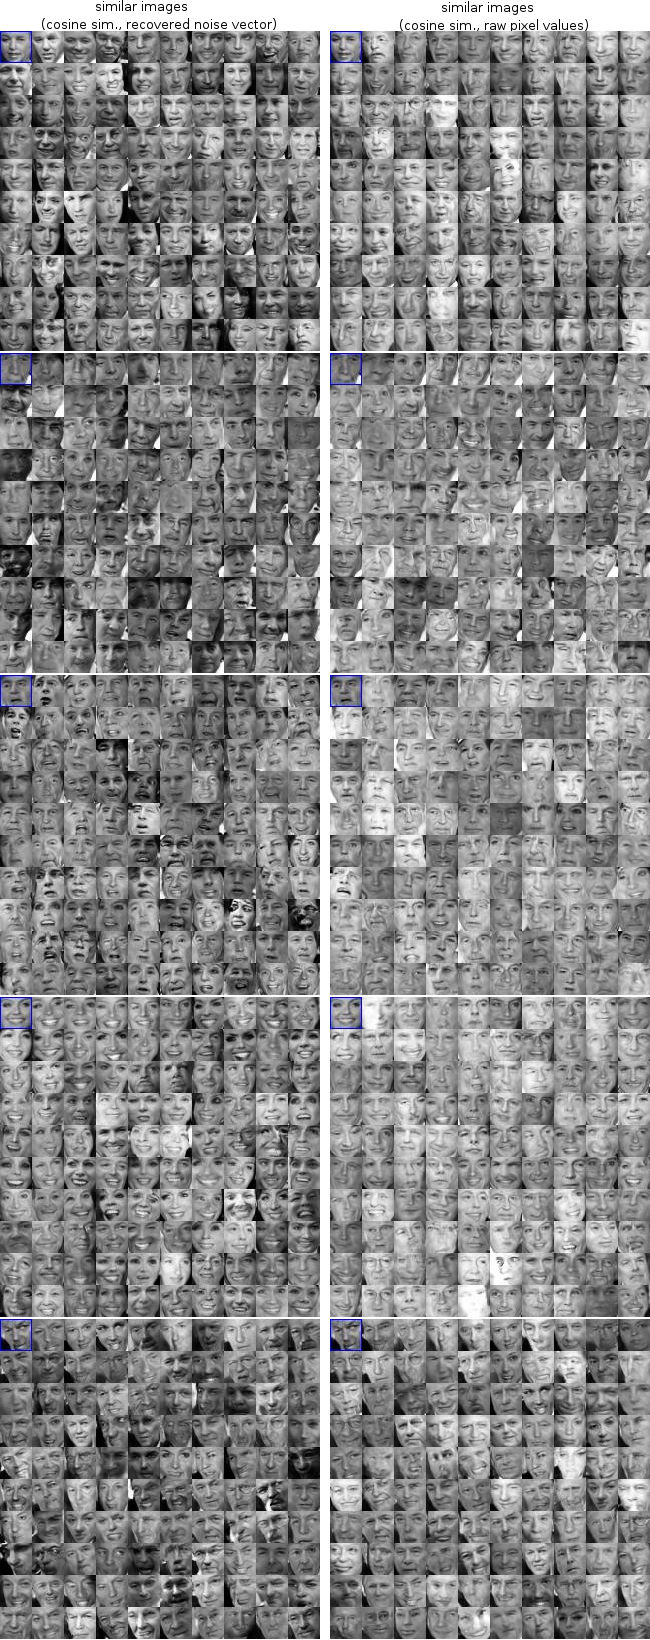
The following images show some of 10,000 faces that were randomly generated with G. All faces were reversed to noise vectors using R, resulting in one noise vector per face. Then 4 faces were selected as search examples. These face's recovered noise vectors were compared to all other recovered noise vectors using cosine similarity and the most similar faces were added to the result. The same process was repeated using cosine similarity on the raw pixel values instead of the recovered noise vectors (i.e. left columns shows "with R", right column shows "without R").
The images indicate that R's features are on a higher level than the raw pixel values. The pair of G and R might have some potential for unsupervised learning.
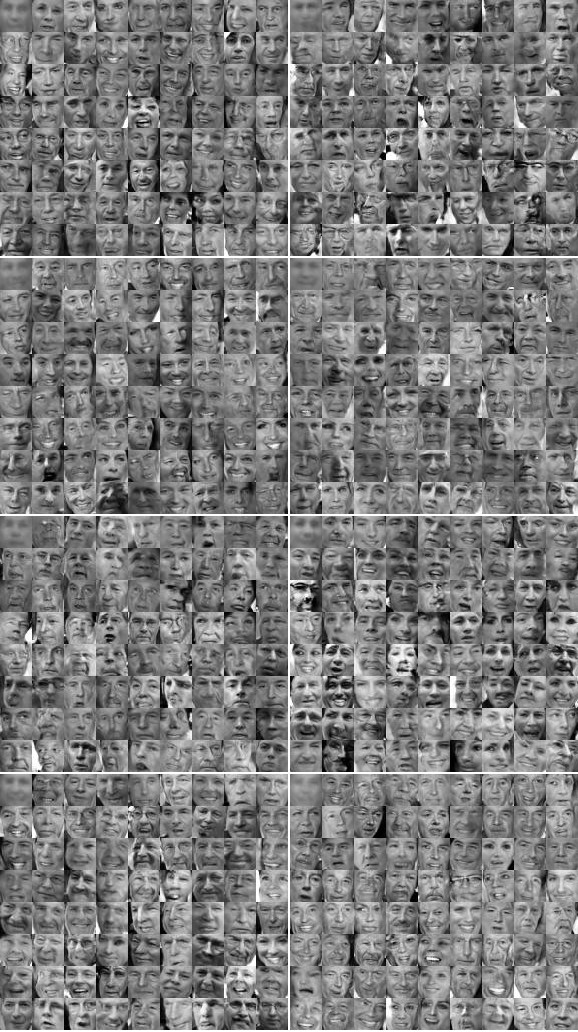
Just like in the previous section ("Sorting by similarity"), 10000 faces were generated with G. For each face the noise vector was recovered using R. These 10,000 noise vectors were then grouped into 20 clusters using kmeans. For each cluster, the 71 images closest to that cluster's centroid were picked (resulting in one block in the below image). Additionally, for each cluster the average of all 71 faces was calculated (add pixel values, divide by 71) and added at the start of the block.
The clusters do contain faces that have some similarity. However, the similarity is rather low and seems to be on a broader level than desired. Maybe other clustering methods would produce better results.
R can be used to fix errors/artifacts in images generated by G. The method is straight-forward:
- Generate an image using a random noise vector,
- apply R to the image to recover the noise vector,
- feed the recovered noise vector back into G to generate a new image.
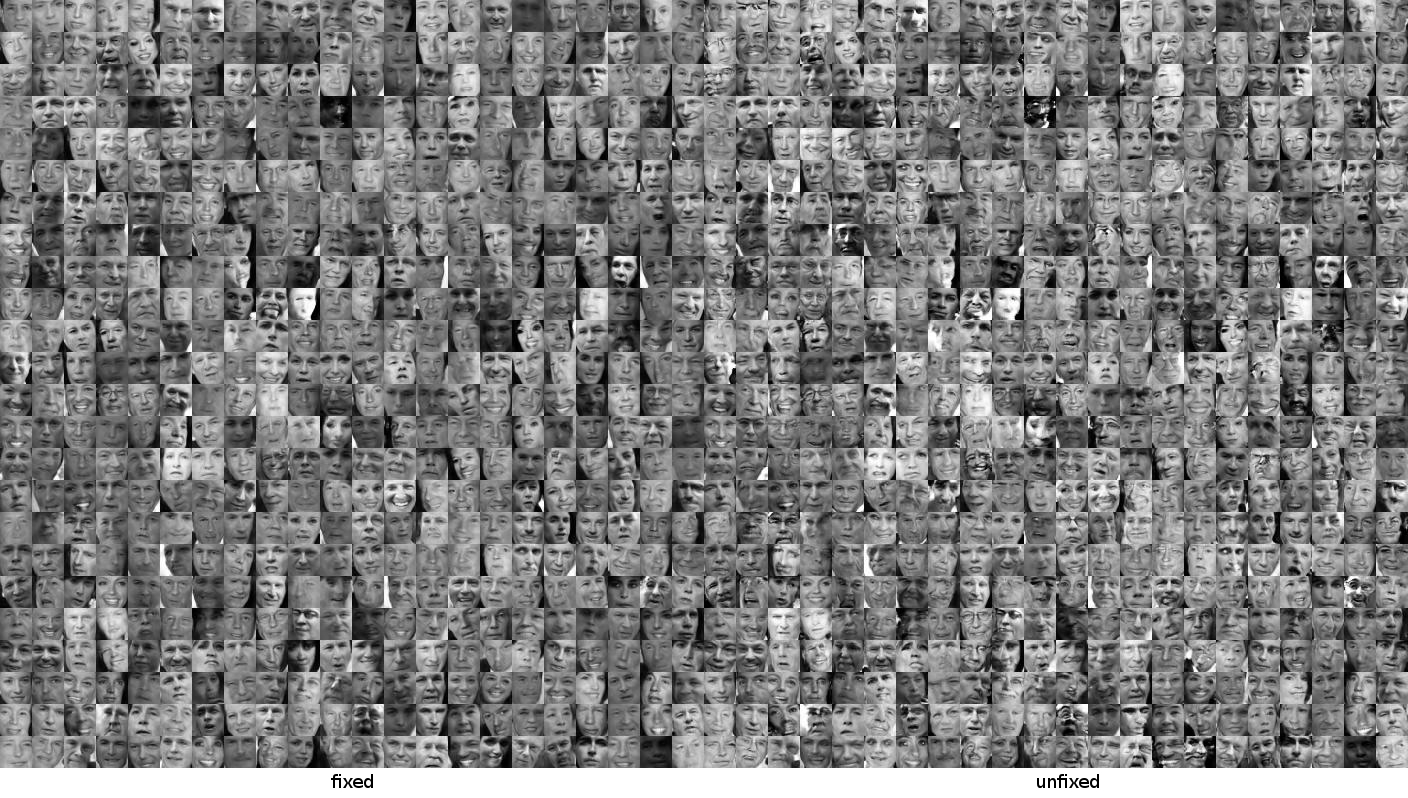
The new image tends to be a regression to the mean, i.e. many errors are fixed and some characteristic details get lost or are replaced by more common details. The error fixing effect seems to be overall more prominent (compared to the removal of details), making this process useful. Note that R usually does not fix catastrophic failures of G (e.g. mostly white/black images, completely distorted faces).
The following image shows faces before and after fixing.
To get the best possible effects, it seemed to be a good choice to add a 50% dropout layer at the very start of R (between input and the first layer). For technical reasons this layer was kept active after training (deactivating it produced broken images).
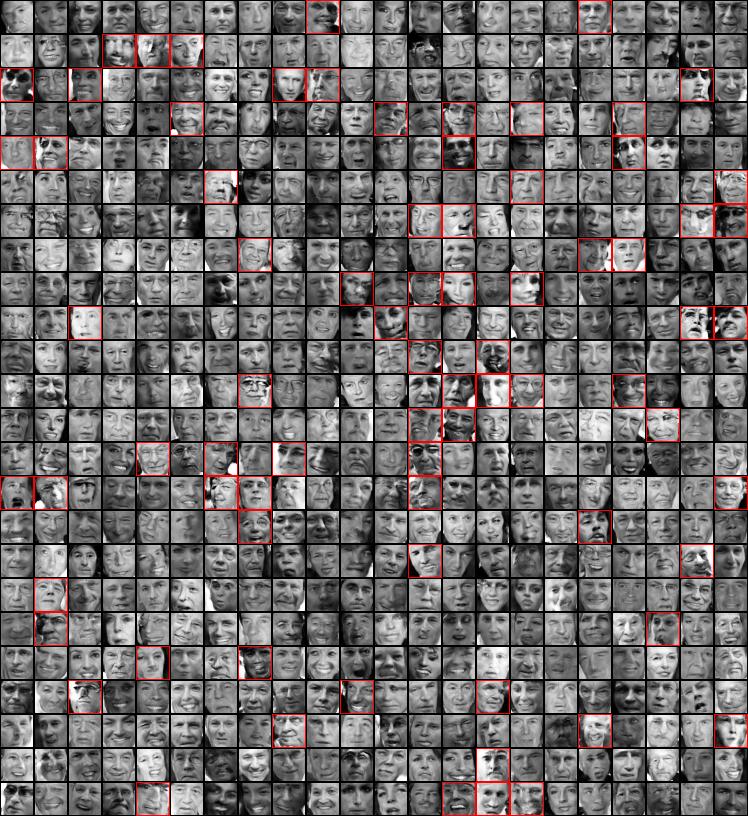
The method of fixing images can also be used to detect anomalous images. In order to do that, one has to pick a generated image, fix it with R and G and then measure the euclidian distance between the original image and the fixed one. If the distance is above a threshold, the image can be considered an anomaly.
The following image shows some generated faces. Detected anomalies are marked with a red border.
Requirements are:
- Torch
- Required packages (most of them should be part of the default torch install, install missing ones with
luarocks install packageName):cudnn,nn,pl,paths,image,optim,cutorch,cunn,cudnn,dpnn,display,unsup
- Required packages (most of them should be part of the default torch install, install missing ones with
- Dataset from face-generator (requires LFW and Python to generate)
- NVIDIA GPU with cudnn3 and 4GB or more memory
To train a network:
th -ldisplay.start- This will startdisplay, which is used to plot results in the browser- Open http://localhost:8000/ in your browser (
displayinterface) - Train a pair of G and D with
th train.lua --dataset="/path/to/your/images". (Add--colorSpace="y"to generate grayscale images instead of RGB ones.) Manually stop (ctrl+c) this script when you like the results. Might take a few hundred epochs. - Train R using
th train_r.lua --dataset="/path/to/your/images" --nbBatches=2000. (Runs for 2000 batches. Less batches results in more "average" faces.) - Train R for fixing images using
th train_r.lua --dataset="/path/to/your/images" --nbBatches=2000 --fixer. - Apply R using
th apply_r.lua --dataset="/path/to/your/images".
For train_r.lua and apply_r.lua you can change the used networks with --G, --R and --R_fixer, e.g. --G="logs/foo.net". You will have to use that if you chose grayscale images (instead of RGB), other image heights/widths or other noise vector dimensions.
- Compare to Autoencoders, especially VAEs.
- Run experiments with more images in training set. Maybe then components get more associated with specific features?
- Analyze results for RGB images.


