The Hubcare is an open-source project intended to help free software users and potential contributors to decide which repositories they should use or on which they should contribute. It has an API that pulls data from GitHub API and post it to this Add-on. Any more details about project may be found on Documentation, which is mostly in Portuguese, due to Brazilian project stakeholders.
This repository, in special, is fully dedicated to the maintain Add-on details. Feel free to read, run and contribute.
Just go to HubCare's page on Chrome Store and be happy 😉
Wanna see it working on your machine, uh?
Unfortunately, the Add-on code wasn't made for local interaction, you may want to up the API on some deploy service to see it working. But you can still run the API and the Add-On separately if you want.
You'll need have Docker and Docker-Compose installed to see the magic happenning.
And I just know how to do it on a Linux machine. C'mon, Windows is just for gaming, y'know. And MacOS users surely can pay someone to discover how to do it.
Downloading
cd ~/your/directory/
git clone https://github.com/fga-eps-mds/2019.1-hubcare-api.git
cd 2019.1-hubcare-api
The HubCare API need to send a GitHub username and an API token to authenticate on GitHub API. This is set by environment variables as shown below. You can generate tokens here.
export NAME='username'
export TOKEN='token'
There you go!
docker-compose build
docker-compose up
If everything was done right, you now have the HubCare running on your machine. Just navigate to 0.0.0.0:8000 and you should see something. There are services running on ports [8000..8003].
Test it on http://0.0.0.0:8000/hubcare_indicators/fga-eps-mds/2019.1-hubcare-api
Obs: If you ever need to change the values of NAME or TOKEN, rerun docker-compose build. Those variables are got in build time.
Downloading
cd ~/your/directory/
git clone https://github.com/fga-eps-mds/2019.1-hubcare-plugin.git
cd 2019.1-hubcare-plugin
Building and uping things:
docker-compose build
docker-compose up
This should be enough to turn the service on ( ͡° ͜ʖ ͡°).
Now, exists a dist/chrome directory with all things Chrome needs to execute the Add-on.
Obs: port 35729 must be free to connect to Chrome
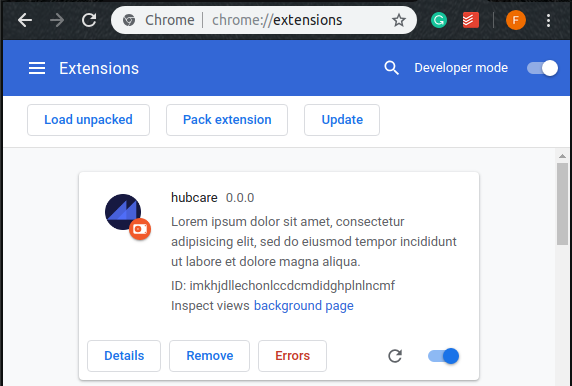
Then, open Google Chrome on chrome://extensions/, activate Developer mode on top right corner. Some new options will appear, click on Load unpacked e open the generated 2019.1-hubcare-plugin/dist/chrome directory.
You now shoud see hubcare extension, just activate it.
Just go to some GitHub repo to see it working. I recommend this one, you can even give it a star! ⭐ 😉
If you want to execute commands inside your docker container, use:
$ docker-compose exec hubcareplugin <command>example:
$ docker compose exec hubcareplugin npm installThe Add-on uses Node, so npm commands can be used. To install dependencies:
$ npm installAlthough this software only focuses the support on Google Chrome, it is possible to try it on other browsers. We can't ensure your PC will not explode with the foward steps, good luck!
This runs the Add-on on dev mode:
$ npm run dev chrome
$ npm run dev firefox
$ npm run dev opera
$ npm run dev edge
This generate a package to be published:
$ npm run build chrome
$ npm run build firefox
$ npm run build opera
$ npm run build edge
To run the tests:
$ npm testThe build tool also defines a variable named process.env.NODE_ENV in your scripts.
To use the Github oauth2 login, it is necessary to create an oauth app, as in the example below:
With the created oauth app just grab the CLIENT_ID and the CLIENT_SECRET and insert into the file app/scripts/constants.js, like this:
module.exports = {
    CLIENT_ID: 'XXXXXXXXXXXX',
    CLIENT_SECRET: 'XXXXXXXXXXXXXXXXXXXXX'
}
Please make sure to read the Contribution Guide before making a pull request. After you've read, don't forget to take an issue!
Do whatever you want with this code, bro/sis. This is under MIT License.


