This is English translation of https://github.com/nikolaymatrosov/go-yc-serverless-snapshot Readme.md as well as code commentary. Aim is to make it easier for international Yandex.Cloud clients to start using this Lambda.
By default in user cloud there is a limit on maximum amount of concurrent operations, which equals 15.
Which means, that if we want to do more than 15 disk snapshots at the same time, we can't just call in one function which will invoke snapshot creation for all of the disks in folder or cloud.
To keep things simple without designing custom "retry" conditions or waiting to snapshot to finish, we will use Yandex Message Queue for task coordination between functions.
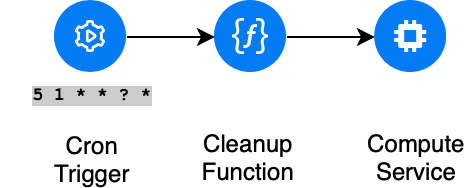
will be triggered by cron scheduler, will discover the list of disks which will be scheduled for backup and then will push messages into the Yandex Message Queue, one per each disk that have to be backed up.
will use Yandex Message Queue messages as a trigger, will read the message with disk_id will attempt to create a snapshot for this disk.
In case Cloud API (the one responsible for VMs, disks and snapshots) returns an error, for example if we exceed the quota on total number of snapshots or concurrent operations, function will throw a exception.
The message will not be removed from the Queue, and after some time, will once again become available to be received. This way we provide 'retry' functionality in case something is preventing us from doing snapshots, and we want to automatically recover when those conditions clear.
does cleaning up unneeded or expired snapshots. When creating shapshot a , we automatically label it with expiration_ts label containing unix-timestamp of when this snapshot expires and is no longer needed.
Using cron scheduler triggers, this function will delete all expired snapshots whole with expiration timestamp below current date and time. This operation does not count towards quotas (since we are obviously decreasing the amount of snapshots)
To deploy this solution you have to have YC-CLI installed and initialized yc As well as S3-CMD tool to interact with AWS-API sercvices s3cmd.
We will need both to automate our function deployment.
For windows you also need to have both tools installed as well as mingw (git bash).
To install it first do:
-
Download and insstall GnuZip
-
Add
GnuZipto PATH.
You will need administrator account to do that.
To deploy functions in your cloud you need to do the following:
-
Create file named
.envbased on template file.env.templateand fill in the following:1.1 Fill in
FOLDER_ID=with folder id where to deploy the function1.2 Fill in
AWS_ACCESS_KEY_ID=andAWS_SECRET_ACCESS_KEY=To get those keys create service account with role "editor" in the folder where you will be deploying your function
Expand command output
{
"id": "aje82e80o9roadhod6bl",
"folder_id": "b1gul7j7tkf53j6imep0",
"created_at": "2020-10-07T01:18:02Z",
"name": "sa-snapshot",
"description": "service account for snapshot automation"
} |
Show the resulting keypair
{
"access_key":
             {
               "id": "ajeup40ardboshpnifcn",
               "service_account_id": "aje82e80o9roadhod6bl",
               "created_at": "2020-10-07T01:20:11Z",
               "key_id": "qPKMRDUcwxPWHQ1D7av4
             },
"secret": "somesecrett"
} |
Where Key_id would be AWS_ACCESS_KEY_ID, and secret would be AWS_SECRET_ACCESS_KEY
1.3 Fill in DEPLOY_BUCKET= name of s3 Bucket where to publish Function code and binaries. Create private bucket in the same folder and write its name. (https://cloud.yandex.com/docs/storage/operations/buckets/create)
1.4 Choose either MODE=all or MODE=only-marked - in mode all snapshots will be done for every disk in folder, in only-marked modeo only for disks with label snapshot
Show the full output
yc compute disk add-labels --name=init-test-disk --labels=snapshot=1{
"id": "fhmhsdpqauu4vasm5tsl",
"folder_id": "b1gul7j7tkf53j6imep0",
"created_at": "2020-08-19T15:51:36Z",
"name": "init-test",
"labels":
{
"snapshot": "1"
},
"type_id": "network-hdd",
"zone_id": "ru-central1-a",
"size": "2445983875072",
"block_size": "4096",
"product_ids": [
"f2e714m5slsflaoji565"
],
"status": "READY",
"source_snapshot_id": "fd8b2e4op5qmj27p2s79",
"disk_placement_policy":
{
}
} |
1.5 Fill inSERVICE_ACCOUNT_ID= use id of SA that you've created earlier
1.6 Fill inTTL= in Snapshot Time To Live in seconds. 1 week = 606024*7 = 604800 will be TTL=604800
1.7 Fill in CREATE_CRON= schedule for snapshot creation and DELETE_CRON= schedule for removing expired snapshots. Both should be filled in in AWS-format https://cloud.yandex.com/docs/functions/concepts/trigger/timer
1.8 QUEUE_URL и QUEUE_ARN will be autopopulated, leave them empty.
-
./script/create.shLaunch this script first, it will create 3 functions, message queue and 3 triggers -
./script/deploy.shLaunch this script next to upload the function code to bucket, and activate them

