It is easy to get started with Watson Studio. First of all, you need to login into Watson Studio. If you do not have a Watson Studio account use the Account Setup guide to help you create one quickly.
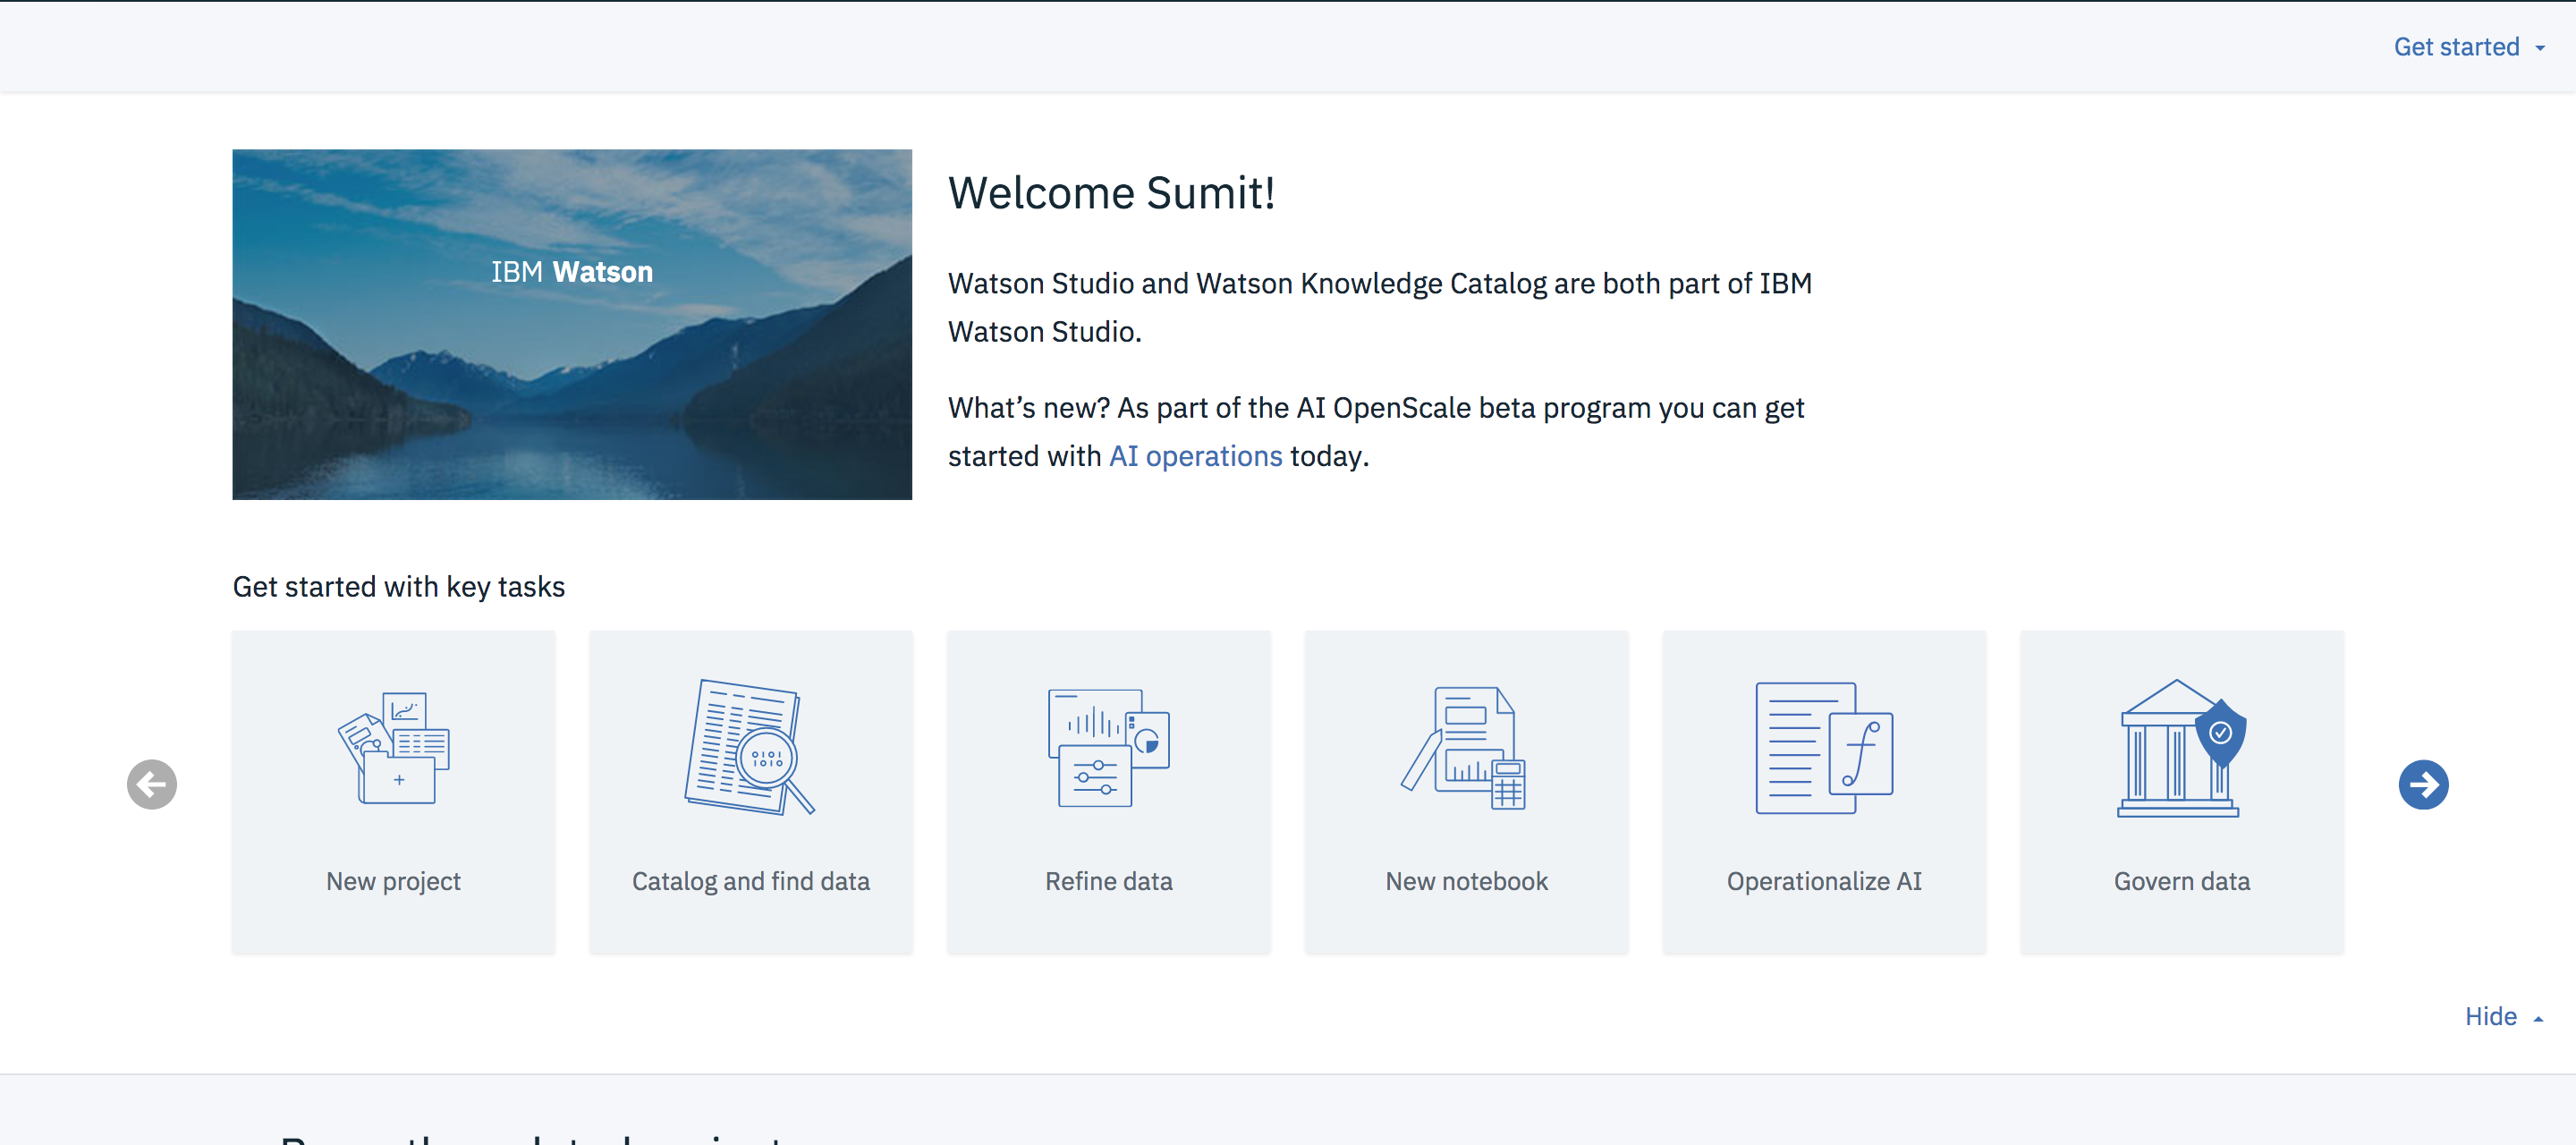
After logging in you will see the overview page which gives you information about your previous activity and some tabs to get started with key tasks.
- Choose
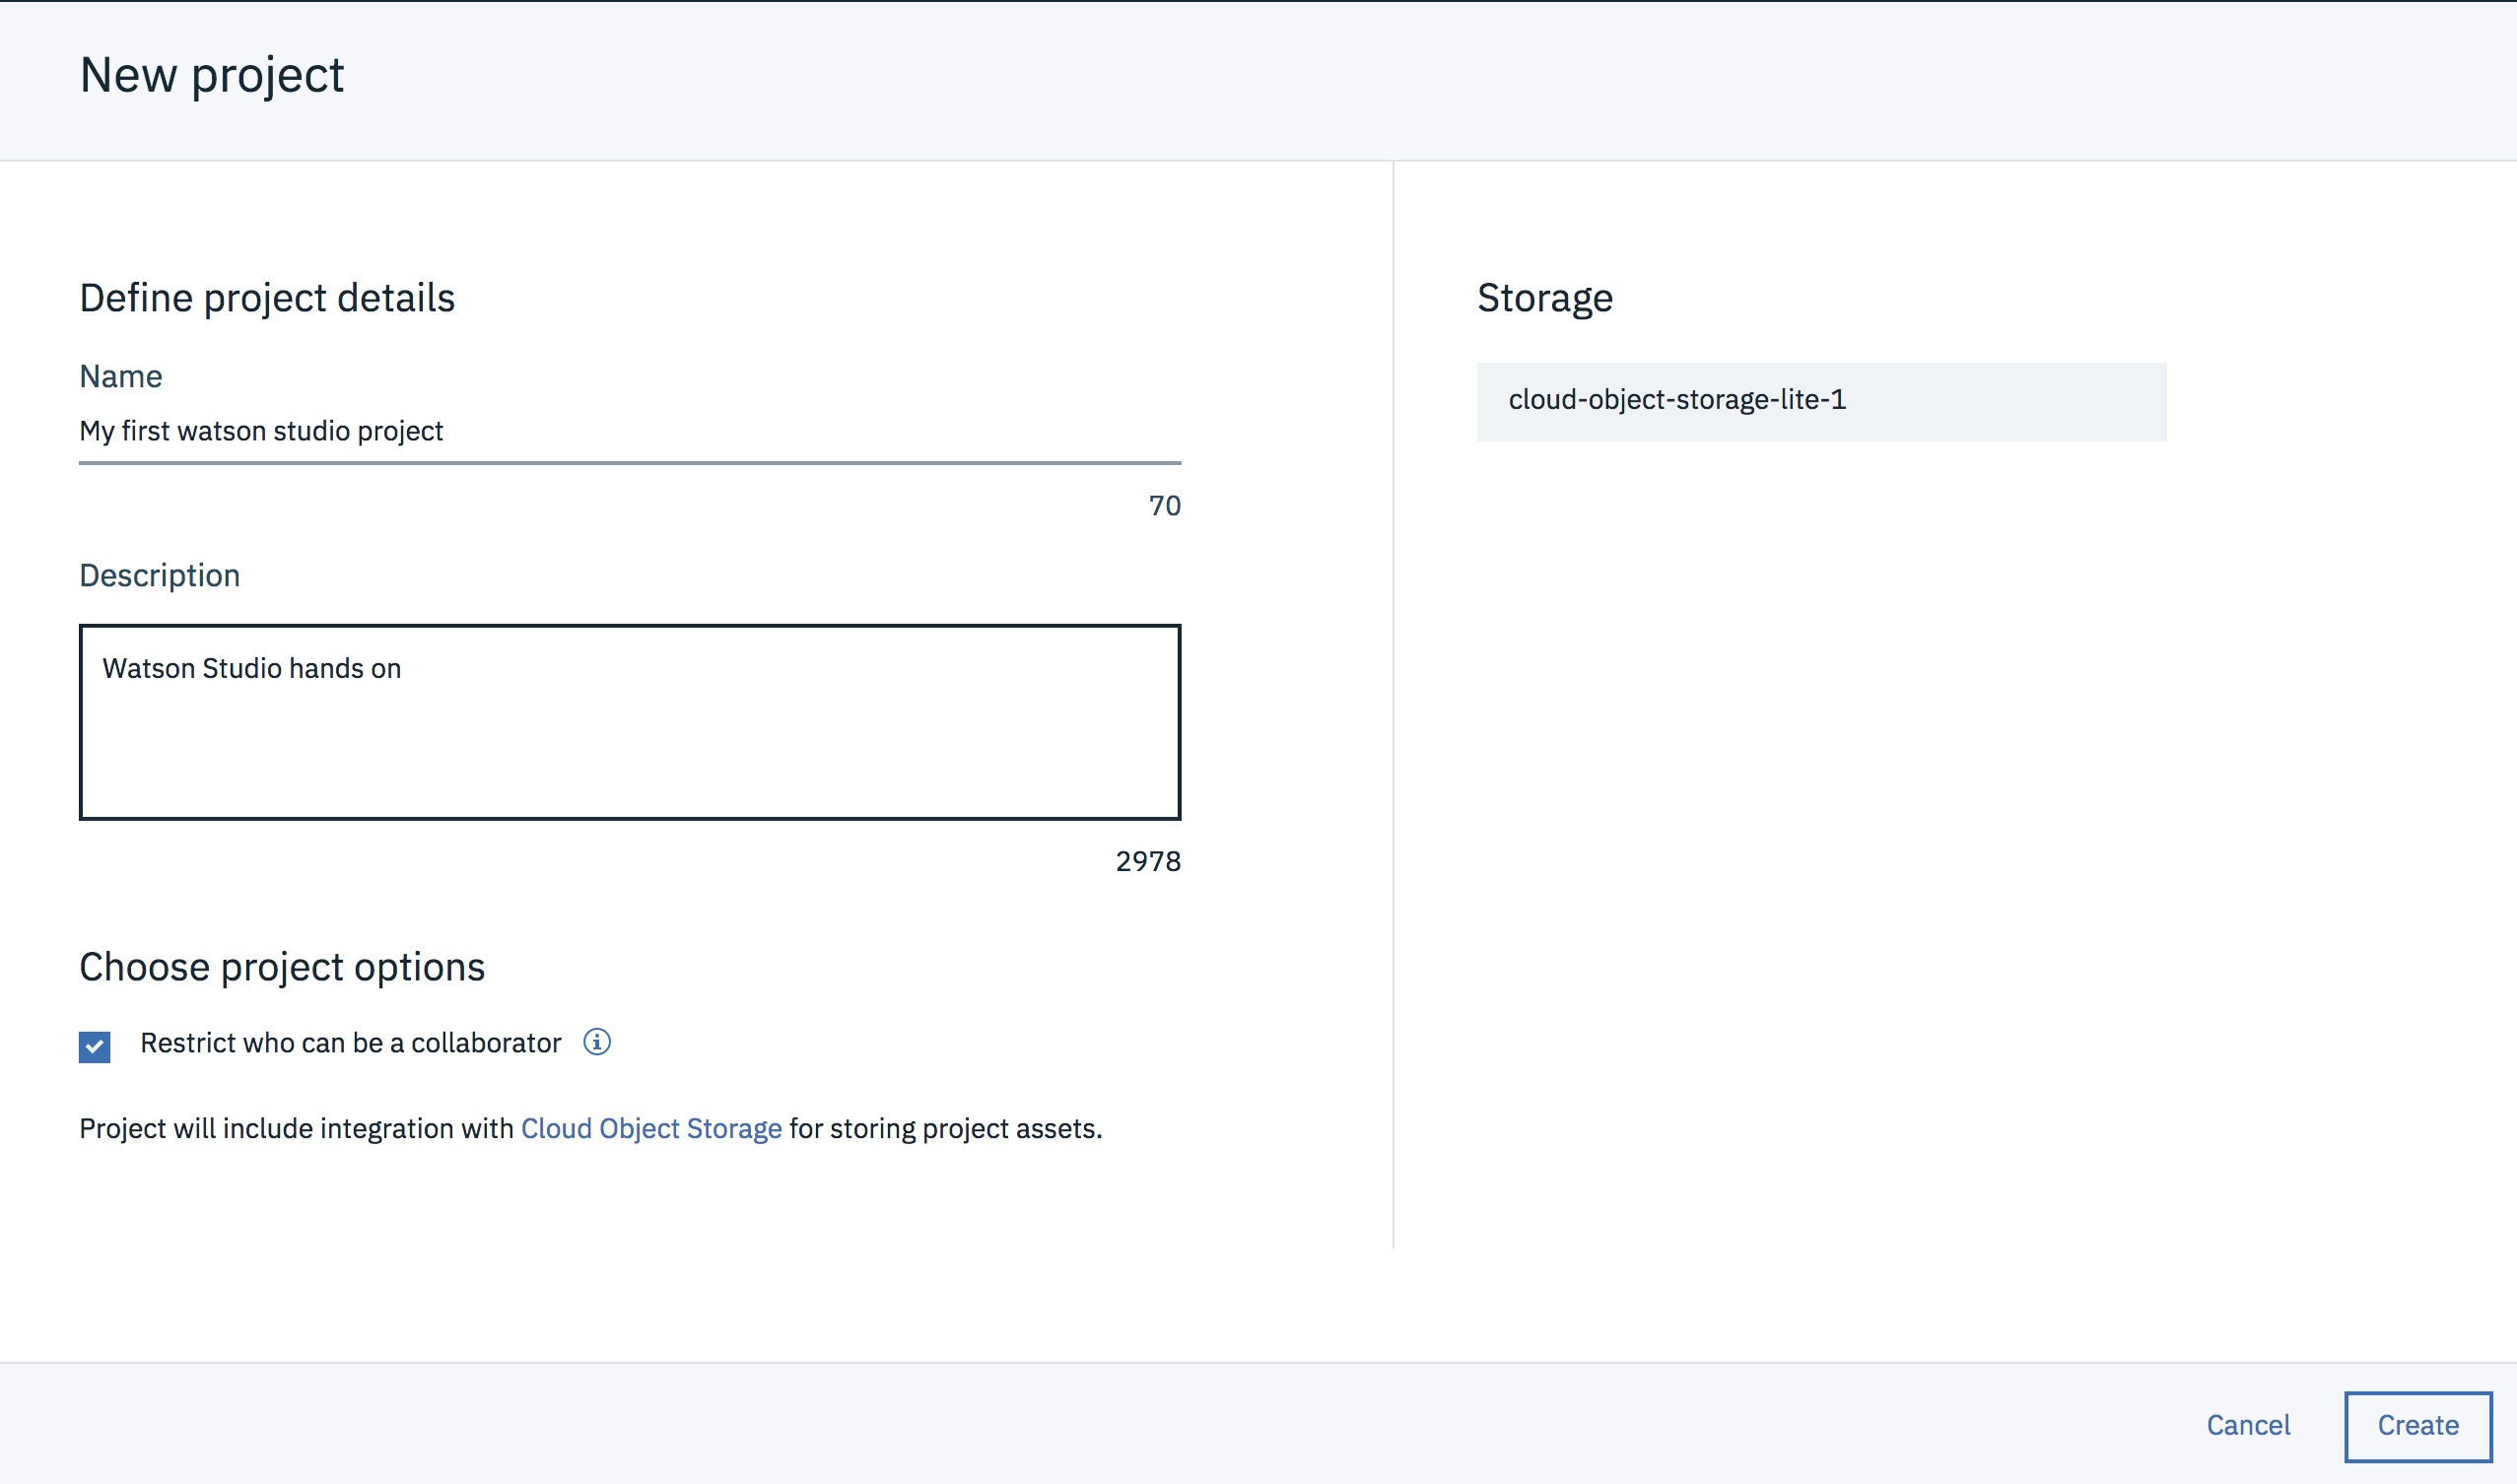
New project("Complete" is good). - On the New project screen, add a name and optional description for the project.
- Choose an existing object storage service instance or create a new one.
- Click Create. Your new project opens and you can start adding resources to it.
Download and unzip the .zip file. It has the Jupyter Notebooks and datasets that you need during the hands on session.
- Select the
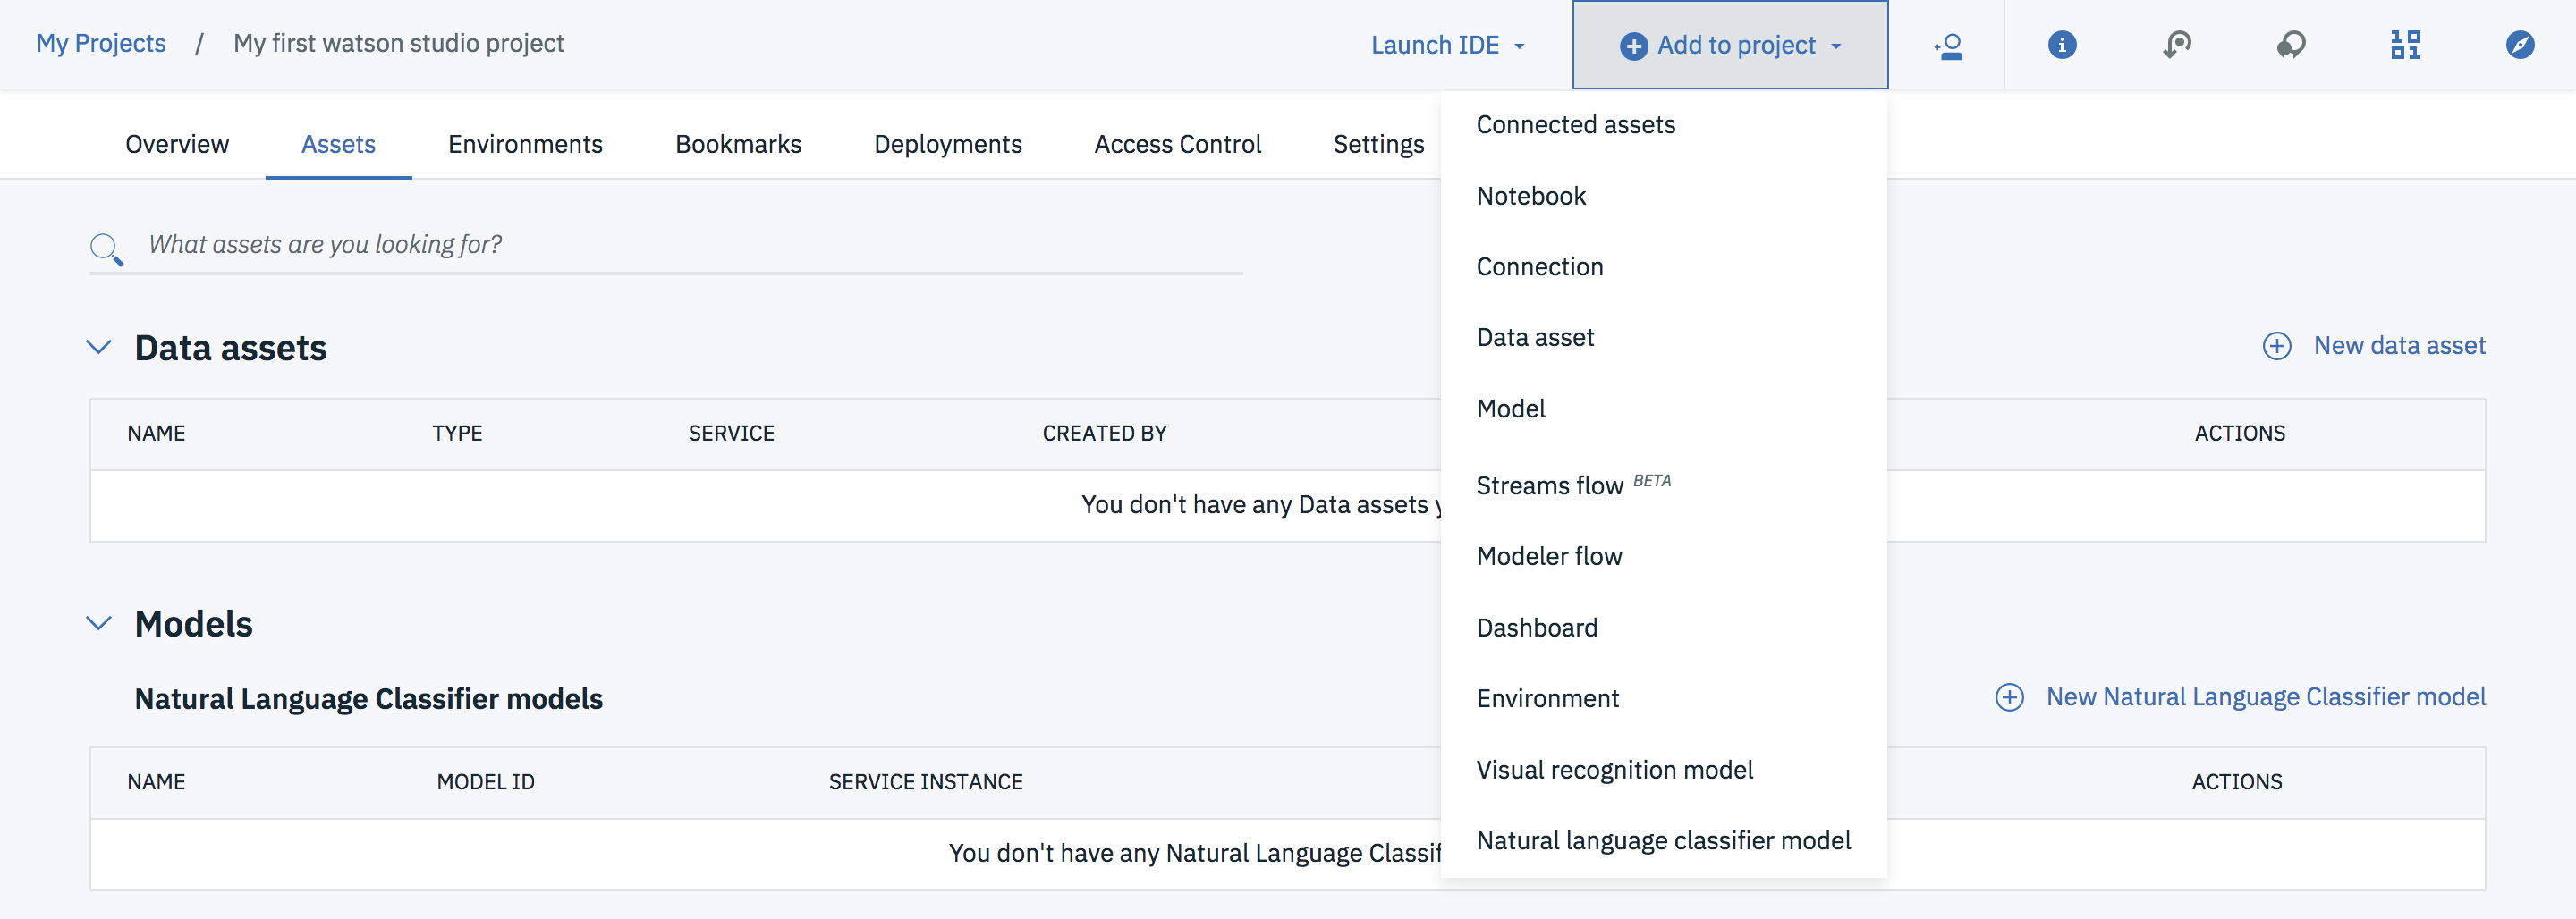
Assetstab in the Project Menu - Click on the
+ Add to projectmenu item and selectNotebookto create a new notebook.
-
On the
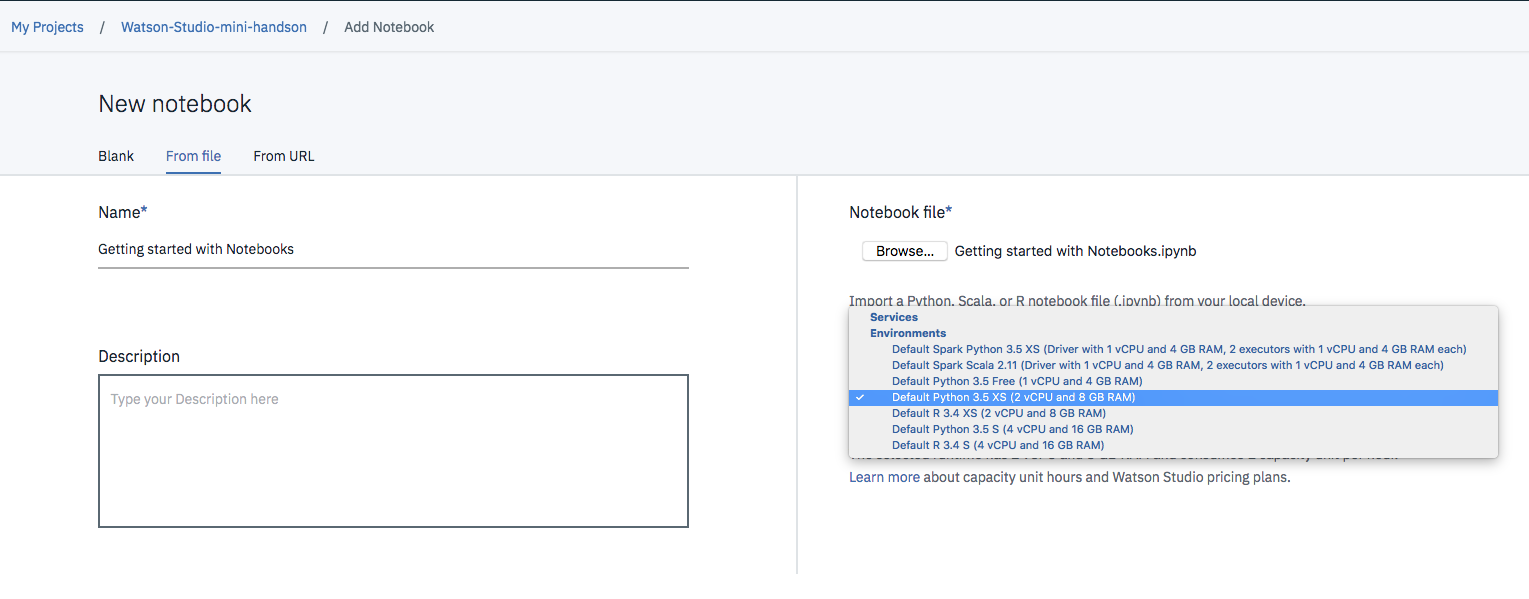
New Notebookpage select theFrom filetab as you wil be creating a New Notebook from a file. -
Browse the
.ipynbfile in the .zip folder you just downloaded. The download .zip has two Notebooks.
- Getting started with Notebooks.ipynb - Use this notebook to get started with using Jupyter Notebooks in Watson Studio.
- Use Spark and Python to Predict Equipment Purchase.ipynb - Use this Notebook if you are familiar with Jupyter Notebooks and basic concepts of machine learning.
- Select the runtime called
Default Python 3.5 XS (2 vCPU and 8 GB RAM)from the dropdown on the right if you chose the first notebook (Getting started with Notebooks) and the runtime calledDefault Spark Python 3.5 XS (Driver with 1 vCPU and 4 GB RAM, 2 executors with 1 vCPU and 4 GB RAM each)for the second notebook as it requires an Apache Spark runtime.
- Click
Create Notebookin the bottom right and your notebook will be created. You are all set to work with your notebook. The notebook has all the further instructions.


