A moderately opinionated file structure template for computational research project
Reproducibility and file organization have been continuously discussed across computational research communities (see References). However, it remains a challenge to implement a one-size-fits-all standard as research projects come in all forms and sizes and continuously evolve. The following template offers general recommendations to quick start a typical computational research project while allowing some flexibility to add, remove, and edit its parts as needed.
This template is designed to be:
- Consistent – follow certain structure
- Simple – easy to start and navigate
- Scalable – can be used for small or big projects of many kinds
- Portable – enable synchronization across various computing platforms
This template is intended to be not a rigid set of rules, but a starting point to build upon.
The main aim of this project template is to allow a quick and smooth onboarding / handover for a new person
Please keep this in mind when making additions / changes to the initial template. When in doubt, document what you did (write README file, comment codes, etc)
The default project structure is outlined below
<project_name>
├─ admin
├─ figures
├─ job_logs
├─ README.md
├─ resources
├─ results
├─ scripts
├─ tables
└─ workflow
    ├─ rules
    │  ├─ module1.smk
    │  └─ module2.smk
    ├─ envs
    │  ├─ tool1.yaml
    │  └─ tool2.yaml
    ├─ snakescripts
    │  ├─ script1.py
    │  └─ script2.R
    ├─ notebooks
    │  ├─ notebook1.py.ipynb
    │  └─ notebook2.r.ipynb
    ├─ report
    │  ├─ plot1.rst
    │  └─ plot2.rst
    └─ snakefile
-
admin - Admin documents, e.g. meeting notes, applications, ethical approvals, MTA
-
resources - Read only data files / external softwares used as input for analysis and results
-
scripts - Ad hoc analysis scripts
-
results - large results / intermediate data files
-
figures - figures from analysis
-
tables - tables from analysis
-
writing - Analysis write ups, subfolders can be created specifically for early analysis drafts and later on manuscript drafts and final editions ready for submission to specific journals (this can also include reviewer comments and reply)
This git repository contains a template
that can be used to automate creation of project with the structure above, if preferred.
- python 3
- cookiecutter
- git
- GitHub account
- ssh
- [Optional] sshfs
- [Optional] rclone
- Prepare the pre-requisites softwares and accounts above. If installing cookiecutter onto myriad is causing issues, undertake the following steps:
- SSH into myriad
module load python3/3.8- this step was undertaken because the default python is 2.7.9 (usingpython --version)python3 -m ensurepip --upgrade- not actually necessary for me but if pip isn't working this ensurespipis bootstrapped into the Python installationpip install cookiecutter- Installs cookiecutter
-
Set up an SSH key following instructions found here: https://docs.github.com/en/authentication/connecting-to-github-with-ssh/generating-a-new-ssh-key-and-adding-it-to-the-ssh-agent. Note: If you are on Myriad this will require a different ssh key to your local machine.
-
Add this SSH key to your github account.
-
Run
cookiecutterpointing to project template git repocookiecutter git@github.com:ihi-comp-med/project-template.git -
When prompted, enter the project title, project directory name, GitHub username, GitHub repository name (make sure name is available), and GitHub personal access token. Leave blank to use the default value (shown in square bracket).
Issues may arise with this method as github doesn't seem to recognise when a personal access token is used.
-
Generate a new GitHub personal access token, fill in the Note field and tick repo box under Select scopes, copy the generated token
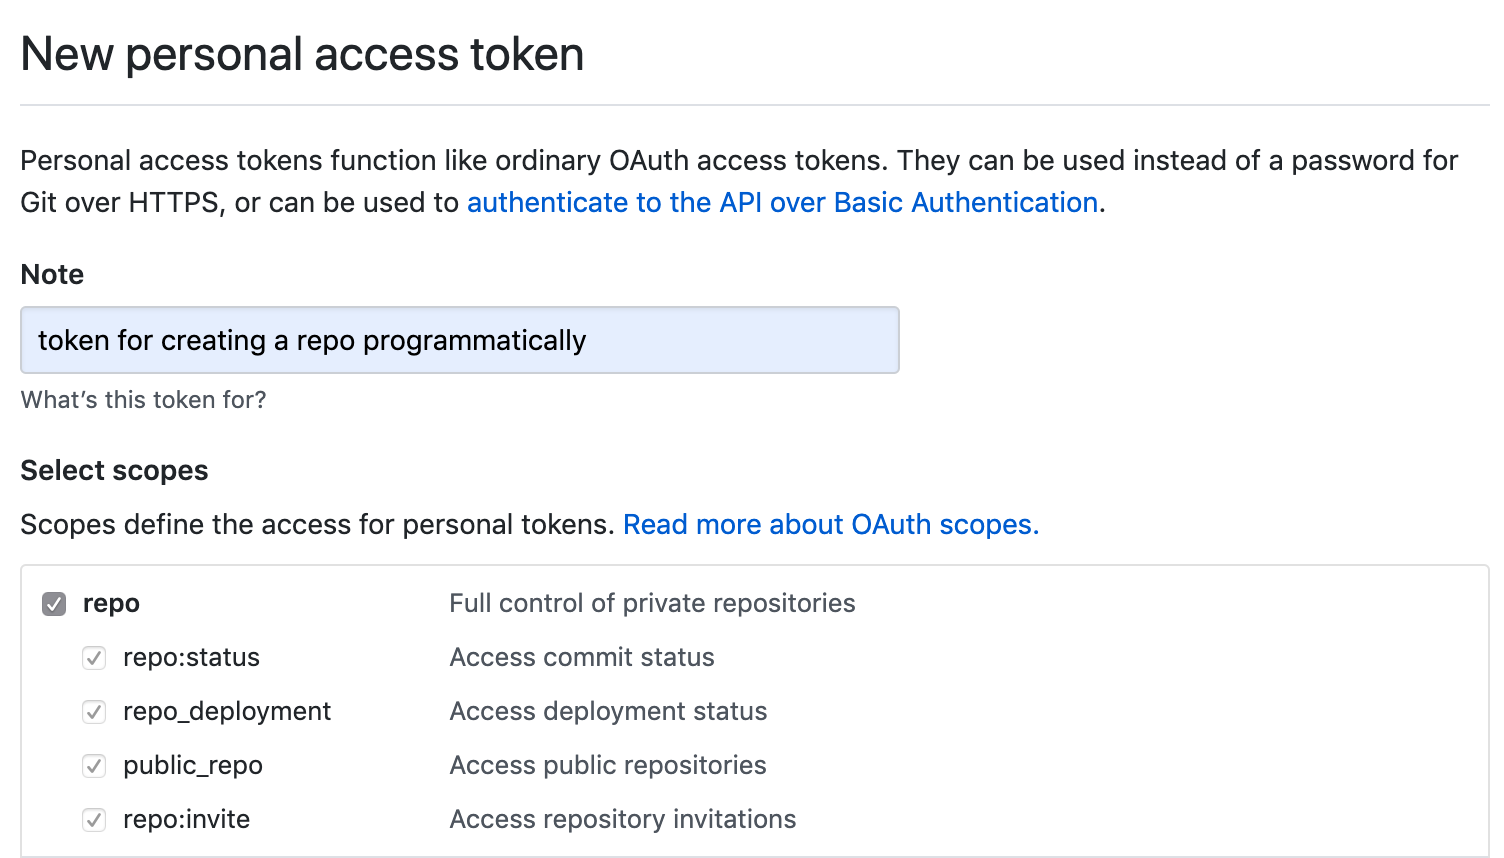
-
Open Command Line Interface (e.g. Terminal in Mac)
-
Change directory to parent project directory
cd my_directoryNOTE if using Google Backup & Sync, this directory should be located inside the local copy of Google Drive
-
Run
cookiecutterpointing to project template git repocookiecutter https://github.com/Hermes-consortium/project-template.git -
When prompted, enter the project title, project directory name, GitHub username, GitHub repository name (make sure name is available). Leave blank to use the default value (shown in square bracket).

- Create a local copy of Google Drive with Google Backup & Sync
- Follow steps above to set up local project directory with
cookiecutter - Choose what to sync (default to sync everything)
-
Open Command Line Interface (e.g. Terminal in Mac)
-
Set up a new rclone remote Google Drive
-
Follow steps above to set up local project directory with
cookiecutter -
Sync the new local project directory to Google Drive
-
Sync everything
cd my_project_local rclone sync . my_GDrive:my_project_GDrive --create-empty-src-dirs -u -
Selective sync with
--filter-fromflagcd my_project_local rclone sync . my_GDrive:my_project_GDrive --create-empty-src-dirs \ -u --filter-from .rclone-filter
-
-
Subsequent sync from/to Google Drive
- Sync from Google Drive
rclone copy my_GDrive:my_project_GDrive my_project_local \ -u --filter-from .rclone-filter- Sync to Google Drive
rclone copy my_project_local my_GDrive:my_project_GDrive \
    -u --filter-from .rclone-filter
NOTE:
-uupdate only (skip newer files).rclone-filteris an arbitrary-named hidden file to pass filtering rules to--filter-fromargument. Think of it as.gitignoreforrclone copyrclone copycan be replaced withrclone syncto make sure both local and remote directories have the same contents, HOWEVERrclone synccan overwrite the destination folder contents so please proceed with caution.- Tip: add
-nor--dry-runflag before syncing to check which files are copied / replaced.
<Note on date / chronological subfolders>
This project template utilises the following platforms:
-
local - local machine e.g. personal laptop, UCL machine
-
compute - remote computing platform, typically a headless machine in HPC cluster (e.g. UCL Myriad, UCL CS Cluster) or cloud computing services (e.g. Amazon Web Service, Google Computing Platform
-
drive - remote disk drive e.g. Google Drive / OneDrive
-
code - remote code repository e.g. GitHub / GitLab
-
storage - remote storage (for backup / archive) e.g. UCL Research Data Storage Service, UCL S: drive
| local | compute | drive | code | storage | |
|---|---|---|---|---|---|
| .git | ✅ | ✅ | ✅ | ||
| admin | ✅ | ✅ | |||
| data | ✅ | ✅ | |||
| scripts | ✅ | ✅ | ✅ | ||
| exploratory | ✅ | ✅ | |||
| results | ✅ | ✅ | |||
| writing | ✅ | ✅ |
| local | compute | drive | code | storage | |
|---|---|---|---|---|---|
| local | ssh | rclone GBS/OneDrive |
git | ssh rclone |
|
| compute | ssh rclone |
rclone | git | ssh rclone |
|
| drive | rclone GBS/OneDrive |
rclone | rclone (via local) GBS/OneDrive (via local) |
rclone | |
| code | git | git | rclone (via local) GBS/OneDrive (via local) |
git | |
| storage | ssh rclone |
ssh rclone |
rclone | git |
Note
- ssh - Secure Shell protocol, also see sshfs for mounting remote file system to local machine via ssh protocol
- GBS - Google Backup & Sync
- git
- rclone
File organization
- A Quick Guide to Organizing Computational Biology Projects
- MIT Comm Kit - File Structure
- The Turing Way - Research Data Management
Coding style
- General recommendations: MIT Comm Kit - Coding and Comment Style
- Python: Google Python Style Guide
- R: tydyverse style guide
Other template