修改application.yml文件中的 idp 配置
spring:
    security:
        saml2:
            relyingparty:
                registration:
                    aliyunidaas: # samlexample 即为 {registrationId} 可为任意字符串
                        signing:
                            credentials:
                                certificate-location: "classpath:credentials/public.cer"  # 即公钥目录地址
                        identityprovider:
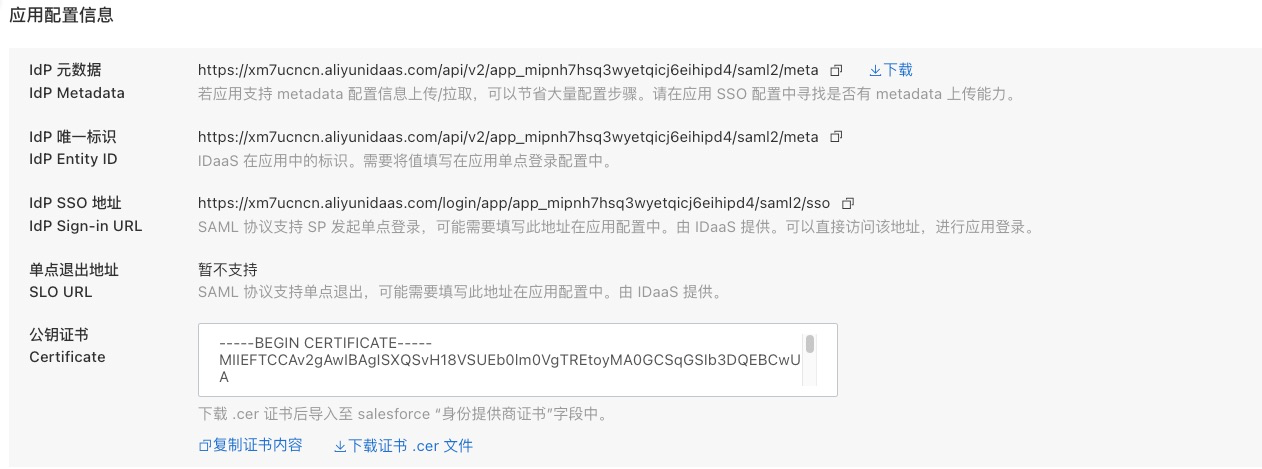
                            entity-id: #idaas中拿到的 IdP 唯一标识- IdP Entity ID
                            singlesignon:
                                sign-request: false
                                url:  #idaas 中拿到的 IdP SSO 地址
                            metadata-uri:  #idaas中拿到的 IdP 元数据
同时把在 idaas 注册应用时拿到的公钥public.cer文件复制到 credentials 目录下。具体信息展示如下图所示
- 本地启动项目
- 访问
http://localhost:8080/saml2/service-provider-metadata/aliyunidaas - 上传拿到的
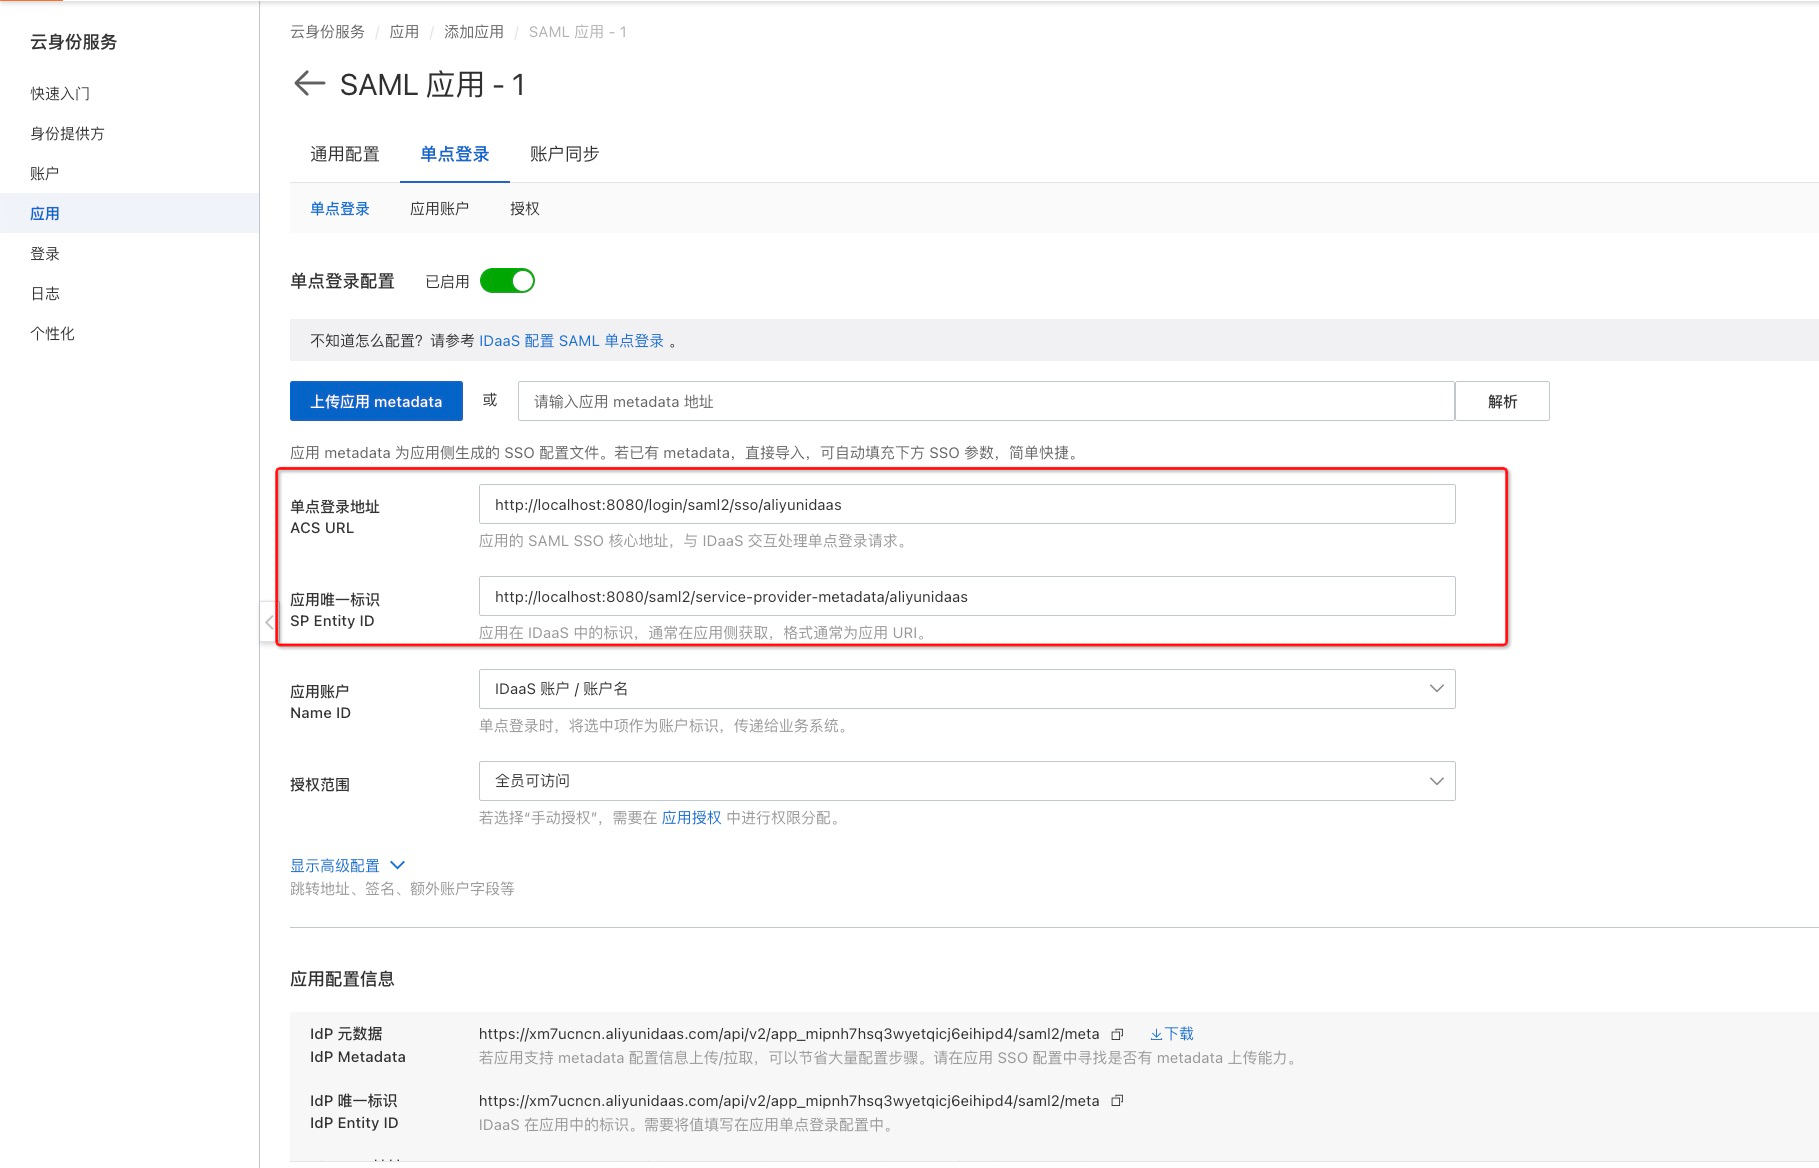
saml-aliyunidaas-metadata.xml文件,或者也可手动输入,如下图所示
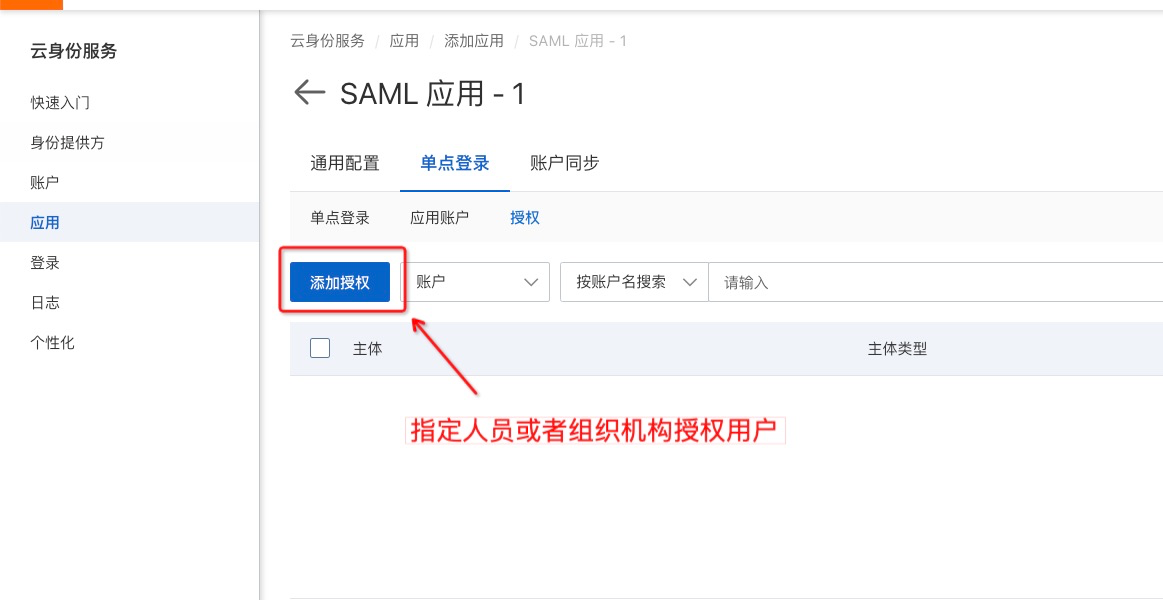
- 如图所示,在应用中为某一用户授权
- 访问
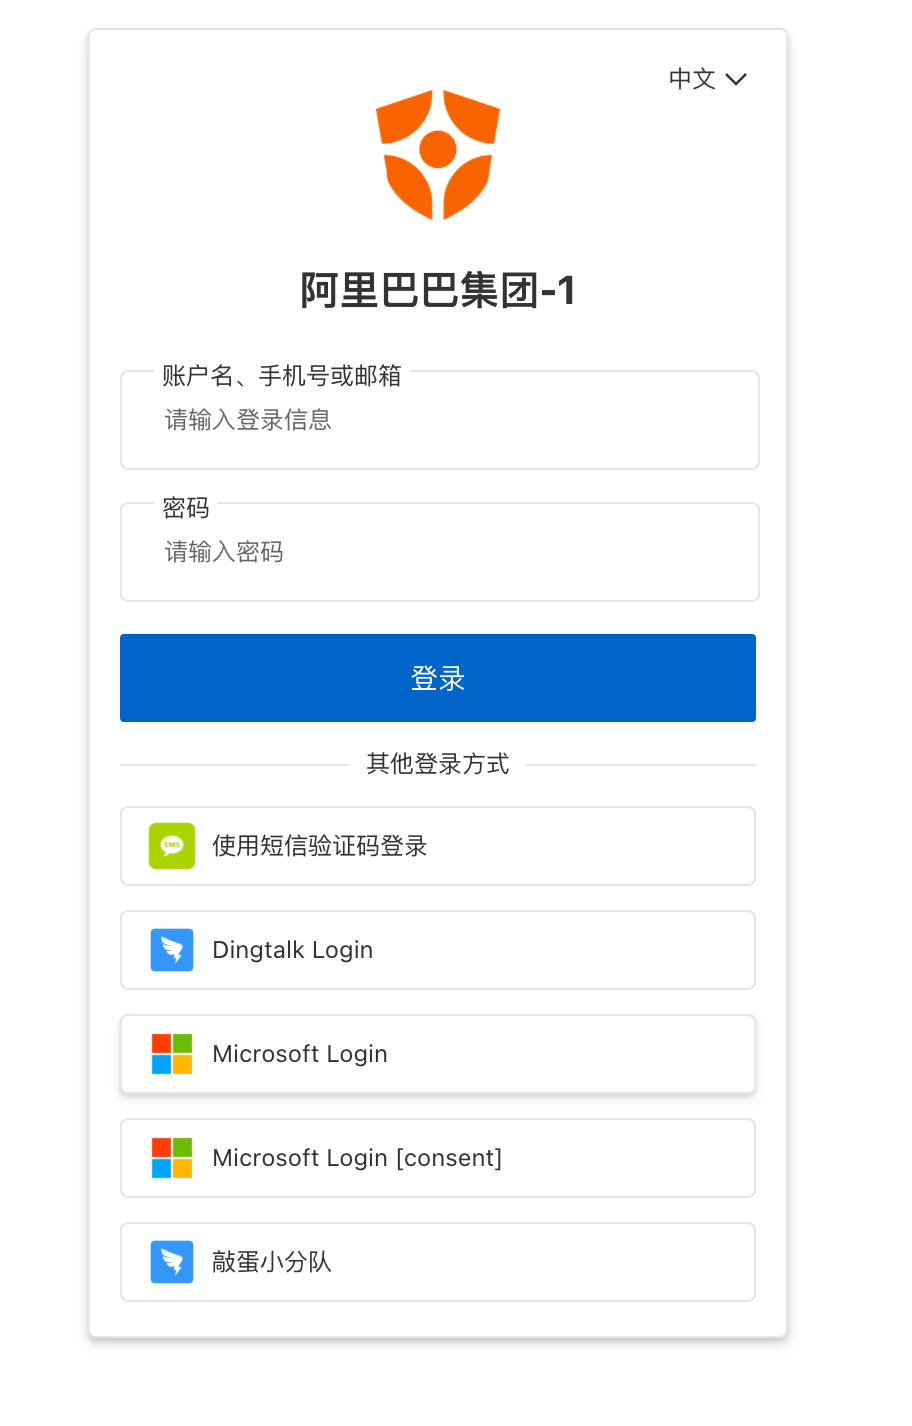
http://localhost:8080 - 此时会跳转到登录认证页面
同快速开始
-
使用 SpringBoot 版本为 2.4.1,其余依赖都使用 spring-boot-dependencies 中的默认版本号
-
Saml 依赖
<dependency>
    <groupId>org.springframework.security</groupId>
    <artifactId>spring-security-saml2-service-provider</artifactId>
</dependency>
-
security 相关依赖
<dependency>
    <groupId>org.springframework.security</groupId>
    <artifactId>spring-security-config</artifactId>
</dependency>
-
thymeleaf 相关依赖
      <dependency>
          <groupId>org.thymeleaf.extras</groupId>
          <artifactId>thymeleaf-extras-springsecurity5</artifactId>
      </dependency>
      <dependency>
          <groupId>org.springframework.boot</groupId>
          <artifactId>spring-boot-starter-thymeleaf</artifactId>
      </dependency>
-
web 相关
<dependency>
    <groupId>org.springframework.boot</groupId>
    <artifactId>spring-boot-starter-web</artifactId>
</dependency>
- 创建 SecurityConfig 类
- 定义受 saml 保护的路径
- 启用sp 元数据提供端点,通过 URL 提供元数据 xml 文件
@Configuration
public class SecurityConfig extends WebSecurityConfigurerAdapter {

    @Autowired
    RelyingPartyRegistrationRepository relyingPartyRegistrationRepository;

    @Override
    protected void configure(HttpSecurity http) throws Exception {

        Converter<HttpServletRequest, RelyingPartyRegistration> relyingPartyRegistrationResolver =
                new DefaultRelyingPartyRegistrationResolver(this.relyingPartyRegistrationRepository);
        // 启用 sp 元数据提供端点
        Saml2MetadataFilter filter = new Saml2MetadataFilter(relyingPartyRegistrationResolver, new OpenSamlMetadataResolver());

        // 定义受 saml 保护的路径
        http.saml2Login(Customizer.withDefaults())
                .addFilterBefore(filter, Saml2WebSsoAuthenticationFilter.class)
                .antMatcher("/**")
                .authorizeRequests()
                .antMatchers("/**").authenticated();
    }
}在 resources 目录下创建 templates 目录,并创建一个 index.html 页面,用以后续的访问。
<!doctype html>
<html xmlns="http://www.w3.org/1999/xhtml" xmlns:th="https://www.thymeleaf.org"
      xmlns:sec="https://www.thymeleaf.org/thymeleaf-extras-springsecurity5">
<head>
    <title>Spring Security SAML2</title>
</head>
<body style="background-color: aquamarine;">
    <h1>SAML2 Login Example with Spring Security 5.2</h1>
    <div>You are logged in as
        <span sec:authentication="name"></span>
    </div>
    <div>
        <form th:action="@{/logout}" method="post">
            <input type="submit" value="Logout"/>
        </form>
    </div>
</body>
</html>@RestController
public class SampleController {
@GetMapping("/principal")
public Object getOidcUserPrincipal2() {
Authentication authentication = SecurityContextHolder.getContext().getAuthentication();
return authentication.getPrincipal();
}
@GetMapping("/sensitive_resource")
public String getSensitiveResource() {
return "success";
}
}在 resources 目录下创建 credentials 目录。
将在 idaas 注册应用时拿到的公钥public.cer文件复制到 credentials 目录下。
- 在
application.yml中添加 IdP 配置信息,包括如下内容
spring:
    security:
        saml2:
            relyingparty:
                registration:
                    aliyunidaas: # samlexample 即为 {registrationId} 可为任意字符串
                        signing:
                            credentials:
                                certificate-location: "classpath:credentials/public.cer"  # 即公钥目录地址
                        identityprovider:
                            entity-id:  #idaas中拿到的 IdP Entity ID
                            singlesignon:
                                sign-request: false
                                url:  #idaas 中拿到的 IdP SSO 地址
metadata-uri: #idaas中拿到的 IdP Metadata- sp 需要向 idaas 提供 ACS 地址和 entityID,生成规则如下
- ACS 地址:
{baseUrl}/login/saml2/sso/{registrationId} - entityID:
{baseUrl}/saml2/service-provider-metadata/{registrationId} - 元数据端点 URL :同 entityID
- ACS 地址:
server:
    servlet:
        context-path: /  # 此处为{baseUrl}
也可以自定义ACS地址
spring:
    security:
        saml2:
            relyingparty:
                registration:
                    aliyunidaas: # samlexample 即为 {registrationId} 可为任意字符串
                        acs:
location: "{baseUrl}/login/saml2/sso/{registrationId}" - 添加 sp 配置的方式
- 上传从元数据端点 URL 下载到的 xml文件。
- 输入元数据端点 URL ,idaas 会自动解析,前提是可以访问到该地址。
- 手动输入,如下图所示。
同快速开始


