Custom Workflow Forms
This project should be used to build any custom workflow form. It allows importing any third party npm library and/or any component used in the Platform 6 Portal to build a custom UI for a Work Item in the Portal.
A custom workflow form is often pre-populated with some data, provided by a Script in a JSON format.
Getting Started
First, make sure you have node and npm installed and usable via the command line. (I recommend using the latest LTS version of node which can be downloaded from here).
I recommend using Visual Studio Code as source code editor. It works great with TypeScript and React.
You also need to have the port 9090 available on your computer.
Clone the repo and run the following command in the project root
npm install
Demo Form
You can quickly run a demo form with the following steps:
- Go to the example-form folder
- Run the following commands
npm install
npm run dev
/* it will start a small server with your UI on localhost:9090, which can be read by the Portal */
It should look like this:
See the following section to view the UI in the Platform6 Portal.
Testing
To be able to test how your UI will render quickly in the Portal:
- You can go on the Platform6 Portal and click on the Local UI Test menu entry
- It will ask you to input a JSON object. This is to "simulate" the data provided by the Script which generates the custom workflow form when triggering the work item. You can leave it as an empty JSON object if your custom form doesn't require any injected data.
- Keep in mind you won't be able to trigger you work item task with this testing menu entry. It only allows you to see how it renders and interact with the form you created. To be able to test it from end to end, you need to deploy it.
Use the following Demo JSON Data (copy-paste it) in the Import Data popup of the testing tool.
Demo JSON Data
{
    "pdfUrl":"https://www.google.com/",
    "currency": "USD"
}
Development process - Creating a new Form
At this stage you probably just want to start from the content of the example-form folder. You can edit the form.tsx file and use npm to add more components and other third party libraries.
Kill the server before doing that and then restart it with npm run dev.
Custom Workflow Forms UI can be created using the same components as the Custom Services UI. You can go see the documentation here.
Use the testing tool (Testing section) on the Platform6 Portal to quickly see how your updates will be rendered to the user.
Deploying your custom form
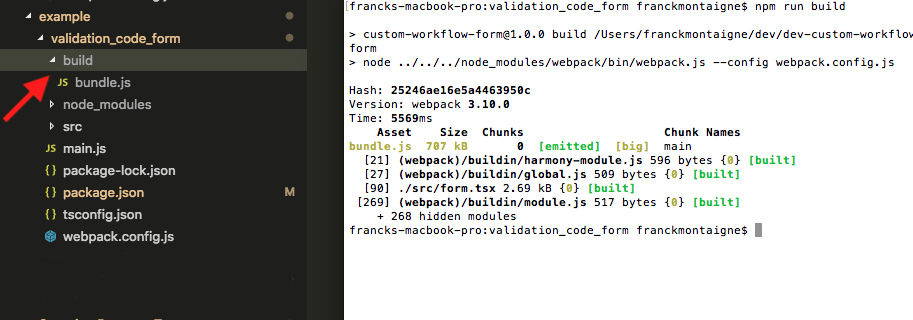
When you are happy with the way your UI renders, you can deploy it by generating a build file. Kill the dev server and run the following command:
npm run build
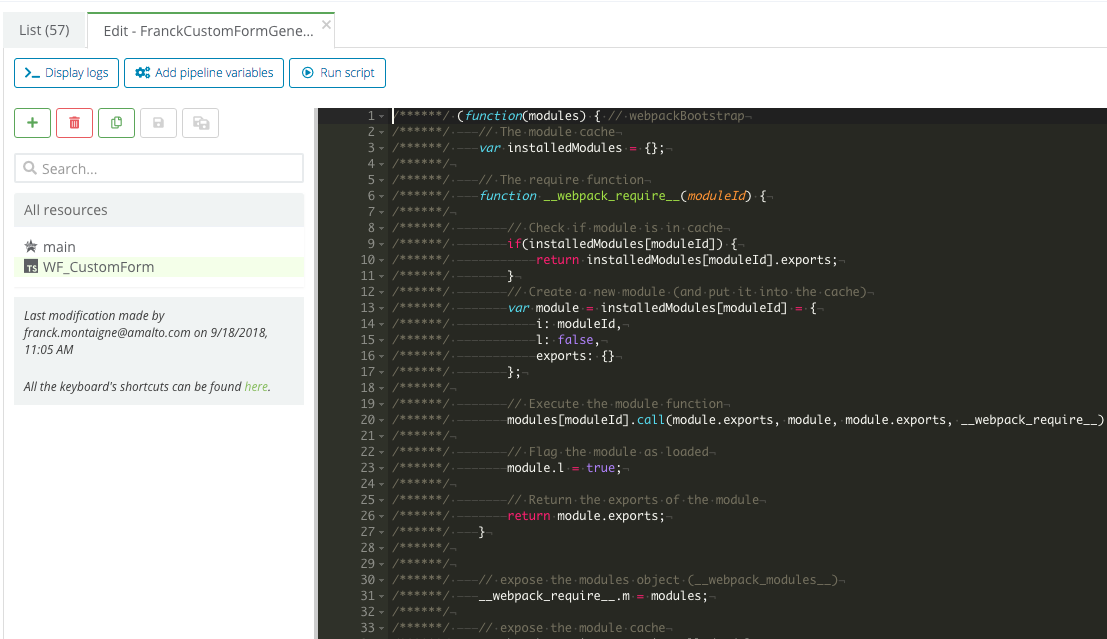
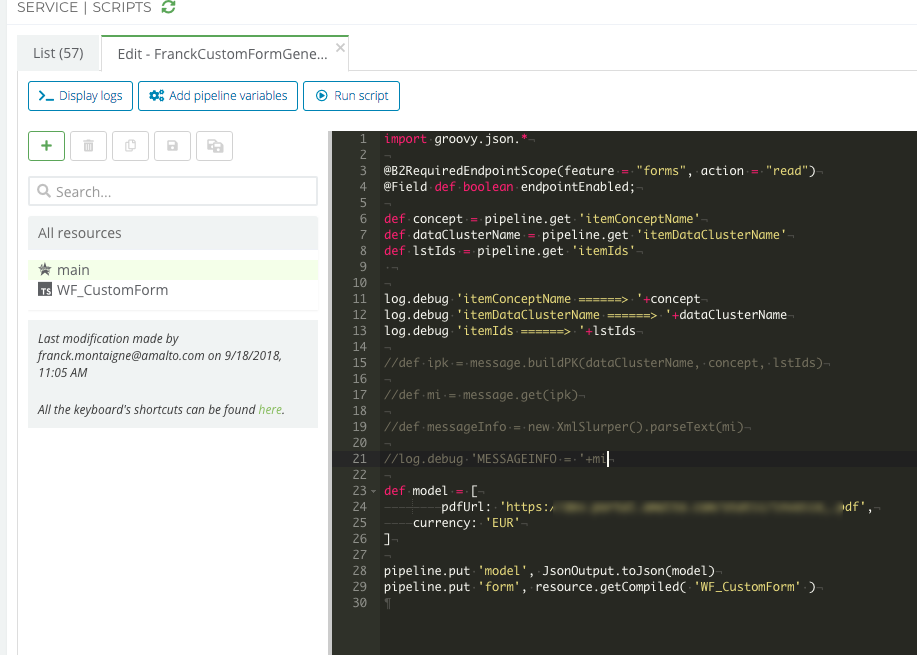
You should get a bundle.js file in the build folder. To deploy your form, copy paste the content of this file in the Scripts Service of the Platform6 instance in a dedicated resource. You can either use a TYPESCRIPT resource type and use the getCompiled util in the Script (this is used in the example below - see screenshots) or user a TEXT resource type with the get util in the Script.
Screenshot - Copying the bundle.js file content
Screenshot - Getting the resource in the Script. You can also see how the JSON data is injected into the form via the model pipeline variable.


