Command line utility to export colors, typography, icons and images from Figma to Xcode / Android Studio project.
- color - Figma's color style
- typography - Figma's text style
- icon — Figma's component with small black vector image
- image — Figma's components with colorized image (Light/Dark)
The utility supports Dark Mode and SwiftUI.
Why we've developed this utility:
- Figma doesn't support exporting colors and images to Xcode / Android Studio. Manual export takes a long time.
- For easy sync of the component library with the code
Articles:
Table of Contents:
- Features
- Result
- Installation
- Usage
- Design requirements
- Example project
- Contributing
- License
- Feedback
- Authors
- Export light & dark color palette directly to Xcode / Android studio project
- Export icons to Xcode / Android Studio project
- Export images to Xcode / Android Studio project
- Export text styles to Xcode project
- Supports Dark Mode
- Supports SwiftUI and UIKit
Exporting icons and images works only for Professional/Organisation Figma plan because FigmaExport use Shareable team libraries.
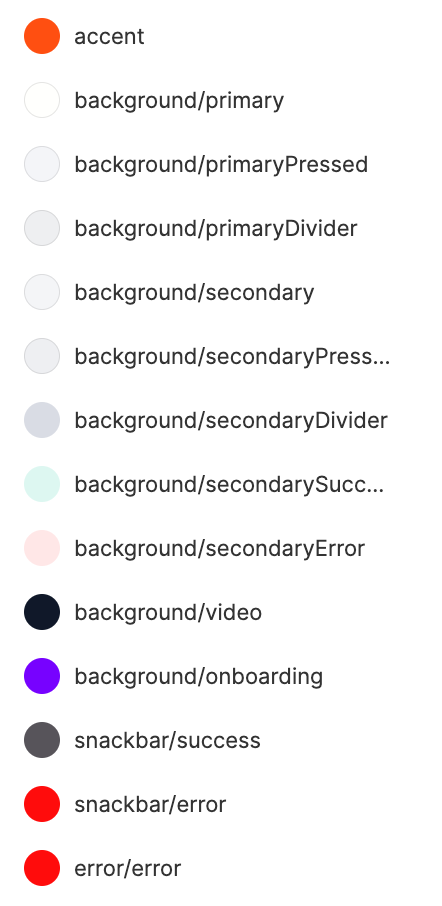
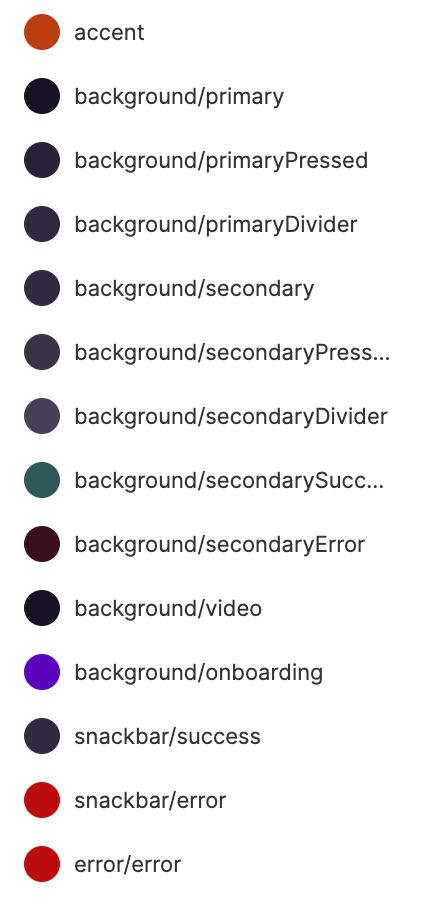
When your execute figma-export colors command figma-export exports colors from Figma directly to your Xcode project to the Assets.xcassets folder.
| Figma light | Figma dark | Xcode |
|---|---|---|
 |
 |
 |
Additionally the following Swift file will be created to use colors from the code.
 import UIKit

 extension UIColor {
    static var backgroundSecondaryError: UIColor { return UIColor(named: #function)! }
    static var backgroundSecondarySuccess: UIColor { return UIColor(named: #function)! }
    static var backgroundVideo: UIColor { return UIColor(named: #function)! }
    ...
 }
For SwiftUI the following Swift file will be created to use colors from the code.
 import SwiftUI

 extension Color {
    static var backgroundSecondaryError: Color { return Color(#function) }
    static var backgroundSecondarySuccess: Color { return Color(#function) }
    static var backgroundVideo: Color { return Color(#function) }
    ...
 }
If you set option useColorAssets: False in the configuration file, then will be generated code like this:
import UIKit

extension UIColor {
    static var primaryText: UIColor {
        if #available(iOS 13.0, *) {
            return UIColor { traitCollection -> UIColor in
                if traitCollection.userInterfaceStyle == .dark {
                    return UIColor(red: 0.000, green: 0.000, blue: 0.000, alpha: 1.000)
                } else {
                    return UIColor(red: 1.000, green: 1.000, blue: 1.000, alpha: 1.000)
                }
            }
        } else {
            return UIColor(red: 1.000, green: 1.000, blue: 1.000, alpha: 1.000)
        }
    }
    static var backgroundVideo: UIColor {
        return UIColor(red: 0.467, green: 0.012, blue: 1.000, alpha: 0.500)
    }
}
Icons will be exported as PDF or SVG files with Template Image render mode.
Additionally the following Swift file will be created to use icons from the code.
import UIKit

extension UIImage {
    static var ic16Notification: UIImage { return UIImage(named: #function)! }
    static var ic24ArrowRight: UIImage { return UIImage(named: #function)! }
    static var ic24Close: UIImage { return UIImage(named: #function)! }
    static var ic24Dots: UIImage { return UIImage(named: #function)! }
    ...
}
For SwiftUI the following Swift file will be created to use images from the code.
import SwiftUI

extension Image {
    static var ic16Notification: Image { return Image(#function) }
    static var ic24Close: Image { return Image(#function) }
    static var ic24DropdownDown: Image { return Image(#function) }
    static var ic24DropdownUp: Image { return Image(#function) }
    ...
}
...
VStack {
  Image.ic24Close
  Image.ic24DropdownDown
}
...
Images will be exported as PNG files the same way.
Additionally the following Swift file will be created to use images from the code.
import UIKit

extension UIImage {
    static var illZeroEmpty: UIImage { return UIImage(named: #function)! }
    static var illZeroNetworkError: UIImage { return UIImage(named: #function)! }
    static var illZeroServerError: UIImage { return UIImage(named: #function)! }
    ...
}
For SwiftUI a Swift file will be created to use images from the code.
If name of an image contains idiom at the end (e.g. ~ipad), it will be exported like this:
When your execute figma-export typography command figma-export generates 3 files:
UIFont+extension.swiftextension for UIFont that declares your custom fonts. Use these fonts like thisUIFont.header(),UIFont.caption1().LabelStyle.swiftstruct for generating attributes for NSAttributesString with custom lineHeight and tracking (letter spacing).Label.swiftfile that contains base Label class and class for each text style. E.g. HeaderLabel, BodyLabel, Caption1Label. Specify these classes in xib files on in code.
Example of these files:
- ./Examples/Example/UIComponents/Source/Label.swift
- ./Examples/Example/UIComponents/Source/LabelStyle.swift
- ./Examples/Example/UIComponents/Source/UIFont+extension.swift
Colors will be exported to values/colors.xml and values-night/colors.xml files.
Icons will be exported to drawable directory as vector xml files.
Vector images will be exported to drawable and drawable-night directories as vector xml files.
Raster images will be exported to drawable-???dpi and drawable-night-???dpi directories as png or webp files.
Before installation you must provide Figma personal access token via environment variables.
export FIGMA_PERSONAL_TOKEN=value
This token gives you access to the Figma API. Generate a personal Access Token through your user profile page or on Figma API documentation website. If you use Fastlane just add the following line to fastlane/.env file
FIGMA_PERSONAL_TOKEN=value
Download latest release and read Usage
brew install RedMadRobot/formulae/figma-export
If you want to export raster images in WebP format install cwebp command line utility.
brew install webp
Add the following line to your Podfile:
pod 'FigmaExport'This will download the FigmaExport binaries and dependencies in Pods/ during your next
pod install execution and will allow you to invoke it via Pods/FigmaExport/Release/figma-export in your Fastfile.
Add the following line to your Fastfile:
lane :sync_colors do
  Dir.chdir("../") do
    sh "Pods/FigmaExport/Release/figma-export colors ."
  end
end
Don't forget to place figma-export.yaml file at the root of the project directory.
Run fastlane sync_colors to run FigmaExport.
-
Open
Terminal.app -
Go (cd) to the folder with
figma-exportbinary file -
Run
figma-exportTo export colors use
colorsargument:./figma-export colors -i figma-export.yamlTo export icons use
iconsargument:./figma-export icons -i figma-export.yamlTo export images use
imagesargument:./figma-export images -i figma-export.yamlTo export typography (iOS only) use
typographyargument:./figma-export typography -i figma-export.yaml
In the figma-export.yaml file you must specify the following properties:
android.mainResandroid.icons.outputif you want export iconsandroid.images.outputif you want export images
When you execute figma-export icons command, FigmaExport clears the {android.mainRes}/{android.icons.output} directory before exporting all the icons.
When you execute figma-export images command, FigmaExport clears the {android.mainRes}/{android.images.output} directory before exporting all the images.
Example folder structure:
main/
  res/
    figma-export-icons/
      drawable/
      drawable-night/
    figma-export-images/
      drawable/
      drawable-night/
Before first running figma-export you must add path to these directories in the the app‘s build.gradle file.
...
android {
  ...
  sourceSets {
    main {
      res.srcDirs += "src/main/res/figma-export-icons"
      res.srcDirs += "src/main/res/figma-export-images"
    }
  }
}
If you want to export specific icons/images you can list their names in the last argument like this:
./figma-export icons "ic/24/edit" — Exports only one icon.
./figma-export icons "ic/24/edit, ic/16/notification" — Exports two icons
./figma-export icons "ic/24/videoplayer/*" — Exports all icons which names starts with ic/24/videoplayer/
./figma-export icons — Exports all the icons.
Argument -i or -input specifies path to FigmaExport configuration file figma-export.yaml.
All available configuration options described in the CONFIG.md file.
Example of figma-export.yaml file for iOS project — Examples/Example/figma-export.yaml
Example of figma-export.yaml file for Android project — Examples/AndroidExample/figma-export.yaml
Generate figma-export.yaml config file using one of the following command:
figma-export init --platform android
figma-export init --platform ios
It will generate config file in the current directory.
- Add a custom font to the Xcode project. Drag & drop font file to the Xcode project, set target membership, and add font file name in the Info.plist file. See developer documentation for more info.

- Run
figma-export typographyto export text styles - Add generated Swift files to your Xcode project. FigmaExport doesn’t add swift files to
.xcodeprojfile. - Use generated fonts and labels in your code. E.g.
button.titleLabel?.font = UIFont.body(),let label = HeaderLabel().
If a color, icon or image is unique for iOS or Android platform, it should contains "ios" or "android" word in the description field in the properties. If a color, icon or image is used only by the designer and it should not be exported, the word "none" should be specified in the description field.
Styles and Components must be published to a Team Library.
For figma-export colors
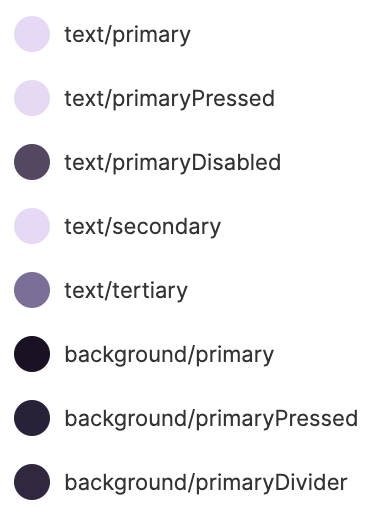
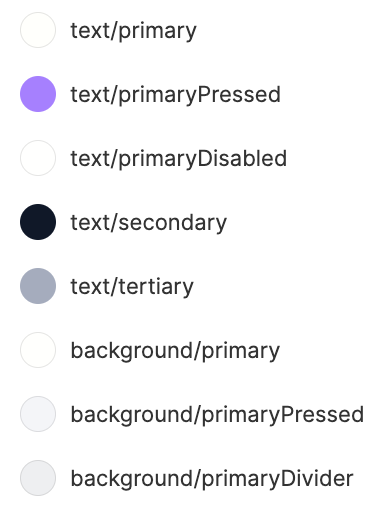
If you support dark mode your figma project must contains two files. One should contains a dark color palette, and the another light color palette. Names and number of the colors must matches.
Example
| File | Styles |
|---|---|
 |
 |
 |
 |
For figma-export icons
By default your Figma file should contains a frame with Icons name which contains components for each icon. You may change a frame name in a config file by setting common.icons.figmaFrameName property.
For figma-export images
Your Figma file should contains a frame with Illustrations name which contains components for each illustration. You may change a frame name in a config file by setting common.images.figmaFrameName property.
If you support dark mode you must have two Figma files.
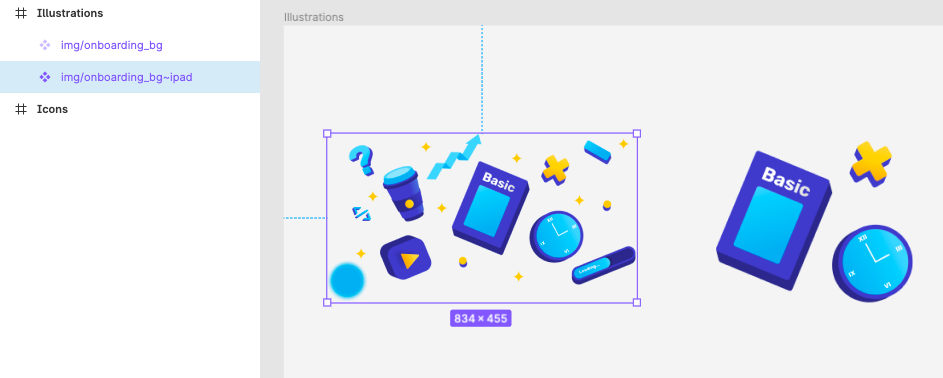
If you want to specify image variants for different devices (iPhone, iPad, Mac etc.), add an extra ~ mark with idiom name. For example add ~ipad postfix:
For figma-export typography.
Your Figma file must contains Text Styles.
It is recommended to support Dynamic Type. Dynamic Type provides additional flexibility by letting readers choose their preferred text size.
If you want to support Dynamic Type you should specify iOS native text style for your custom text styles in the description field of Text Style. Available iOS native text styles you can find on Human Interface Guidlines page in Typography/Dynamic Type Sizes.
For example: You have header text style with 20 pt font size. Native iOS text style that matches is "Title 3". In the description field of your header text style you should specify "Title 3".
Advice: Font in Tab Bar and standard Navigation Bar must not support Dynamic Type.
Example iOS projects, Android project and example Figma files see in the Examples folder
We'd love to accept your pull requests to this project.
figma-export is released under the MIT license. See LICENSE for details.
If you have any issues with the FigmaExport or you want some new features feel free to create an issue or contact me.
Daniil Subbotin - d.subbotin@redmadrobot.com


