Follow this guide to create your databases
Once you have complete the above guide, continue to the steps below.
- Copy
.env.exampleand name it.env(NOTE: Make sure to copy the file, don't remove the original) - Copy the URL of your PRIMARY database instance (see image below on how to get this) and place it into the
.envfile'sDATABASE_URLvariable, keeping?schema=prismaon the end. E.g.DATABASE_URL="postgres://uy:ay@ka.db.elephantsql.com/ufy?schema=prisma"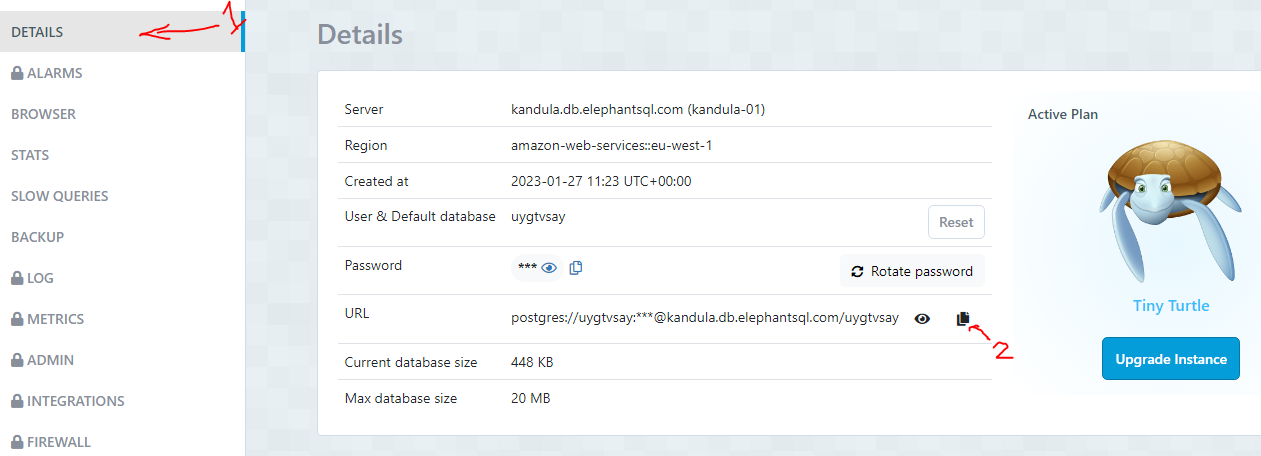
- Do the same thing for your SHADOW database, placing its URL into the
SHADOW_DATABASE_URLvariable, keeping?schema=shadowon the end. E.g.SHADOW_DATABASE_URL="postgres://jk:la@ka.db.elephantsql.com/irk?schema=shadow" npm cito install dependenciesnpx prisma migrate resetto build the database tables and insert some seed data (as defined in ./prisma/seed.js)npm run devto run the app

The API Spec is hosted by the server itself (i.e. this project), and the view/page is generated automatically by the SwaggerUI libraryi.
To view it locally, you can just go to: http://localhost:4000/api-docs.
Whenever you make any change to the API (e.g. adding a new route, changing the payload for an existing route, adding a new error), you must update the API Spec accordingly. To do this, you just need to update the openapi.yaml file -- guidance on the basic structure of the openapi.yaml file can be found here.
- You should always verify these changes locally before committing your work.
- If your server is already running when you changed the
openapi.yamlfile, you will need to stop and restart your server. - Once verified, stage and commit the changes on the same branch where you changed the behaviour of the API.
TODO