In this repository we will place our web application, which is aimed to provide a study environment to teachers and students. Teachers will be able to control students' progress.
- User
- Student
- Teacher
- Subject
- Message
- Course
- Study item
The application will be able to show some information in graphics, like:
- Students' califications (with filters individual student or a group of students).
- Time series charts to compare students' progress with the average progress of the full group
- Restrictions in order to enter in a course
- Recommend a course based on previous courses done by the student
- Generate PDF with useful information (students' califications, final certificates)...
AMICO Group:
- Antonio Alcojor Patilla
- Github: https://github.com/analpa1997
- Mail: a.alcojor@alumnos.urjc.es
- Miguel Esteban Illescas
- Github: https://github.com/mesteban96
- Mail: m.estebani@alumnos.urjc.es
- Iván Motos Montalbán
- Github: https://github.com/ivanchi88
- Mail: i.motos@alumnos.urjc.es
- Carlos Gil Herranz
- Github: https://github.com/Carlosghms
- Mail: c.gilh@alumnos.urjc.es
- Oleh Hrinchenko
- Github: https://github.com/oleh97
- Mail: o.hrinchenko@alumnos.urjc.es
Trello board: https://trello.com/b/8yzPSK13/amicourse
In this phase, we started to define web's appearance, using HTML, CSS and Bootstrap 4 templates.
First of all, we defined an activity diagram to explain the main navigation into the page since the moment you enter into our application until you sign out and close your session.
Finally, with that diagram, we created the main pages of the application. Some of then were adaptations of Bootstrap 4 templates found in Internet, and some other are Bootstrap 4 pages created by us.

The user starts his road into the application in the main page, he/she can show and search courses to get information of them, or he can log in/sign up. When he/she enter into the course information, the user can suscribe into the course, but first he must have been logged into the system. When the user is into the course, he/she can see all the subjects the course have, and enter into anyone to show the resources, exams, califications... He/she also can enter into the mail and the forum of the subject, and in all pages the user can go into his profile, and can sigh out the system.

As you can see in that image, into the main page you can search what course do you want to do, filtering by newest courses, best rated courses or another criterial you want. You can see also some entities who collaborate with us making the courses


When you need to enter into the system, that are the pages you will see.

When u enter into the information of any course we offer into the page, you will see a short introduction of it, all the skills that the course give to their students, all the subjects the students will study during the course, and a contact tool to ask or suggest anything to the teachers.

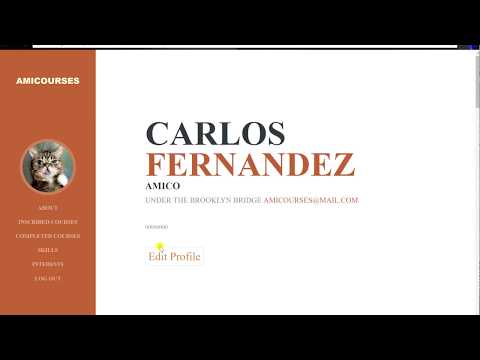
Student and teacher profile page are similar, a little space where the user shares some personal information about him

In this page, into user's profile, the user can see all the courses he/she is doing or he/she did since he/she registered into our application, and the user can enter into them to revise something, continue learning about it or download again the document that certificate he/she passed the course

When the user is into a course, he/she can see all the subjects that belongs to the course, and he/she can enter into them to revise them or continue studying.

These are the main environment of learning in our application. Students can see all his teachers and go into their profiles or contact them, or they can open their inbox to see all the mails they received, or they can enter into the subject's forums to ask questions to their classmates or their teachers. And, obviously, they are able to navigate between the tabs and see all the resources they have for learning, like videos, images, pdf, powerpoint presentations, excel sheets, external URLs, tests and califications...
On the other hand, teachers have same funcionalities than students into their subject main page, but they are able to see all the students registered into the course, or they can add, edit and delete resources and exams.


And last, but not least, the user can enter into the forum, where he can interact when all their classmates/other teachers and their teachers/students. He/she can read the latest news related to the subject, and post all his questions and suggestions in order to make easier his learning.


The navigation diagram haven't changed since the last phase


We created a Maven project and we imported in pom.xml all the dependencies we needed to manage the application. For the database connection, we used JPA Repository interfaces, based on CRUD method, to manage the queries and the modifications into the BD


To deploy the application in docker it is necessary:
Create the image of the web application - from the docker directory execute create_image.bat
Optionally the image can be uploaded to docker hub. To upload the image to docker hub - from the docker directory run plublish_image.bat
Once the image is generated, from the docker directory, using docker-compose up, the containers are displayed. the application is available when "Tomcat started on port" appears
to stop docker-compose using docker-compose stop from the docker directory.
Docker Community Edition (CE) for windows required Docker containers require the windows local drives to be shared
The create_image.ps1 (powershell script):
- builds the angular client files and publish them to the HTTP erver
- generates the jar files
- generates the docker image
The publish_image.bat uploads the docker image to the docker hub The docker-compose.yml file creates the MySQL and the application containers
The create_image.bat file execute the create_image.ps1 script in a windows CMD screen
To start the application:
- open a CDM windows
- go to docker directory and execute: 2.1. .\create_image.bat 2.2. docker-compose up
To stop the application execute in docker directory docker-compose stop
