This is a community project for gathering all translations for other XCOM 2 mods in one place. Anyone can submit their translation for any existing mod, and it will be added to the Community Translation Mod.
For translators, it is more convenient and reliable than asking individual mod authors to add their translations to their mods.
For mod users, it is more convenient, because they can use just one translation mod.
Subscribe to the mod on the Steam Workshop, wait for Steam to download the mod, then activate it in your mod launcher.
If you are using a non-Steam version of the game, download the X2CommunityTranslation.zip from the latest release page and follow these instructions to install it manually.
The list of translated mods is here.
Submissions are handled via GitHub interface. See this video for an example or follow step-by-step instructions below.
- Sign into your GitHub account. Sign up if you don't have one.
- Follow this link to open this mod's Localization folder.
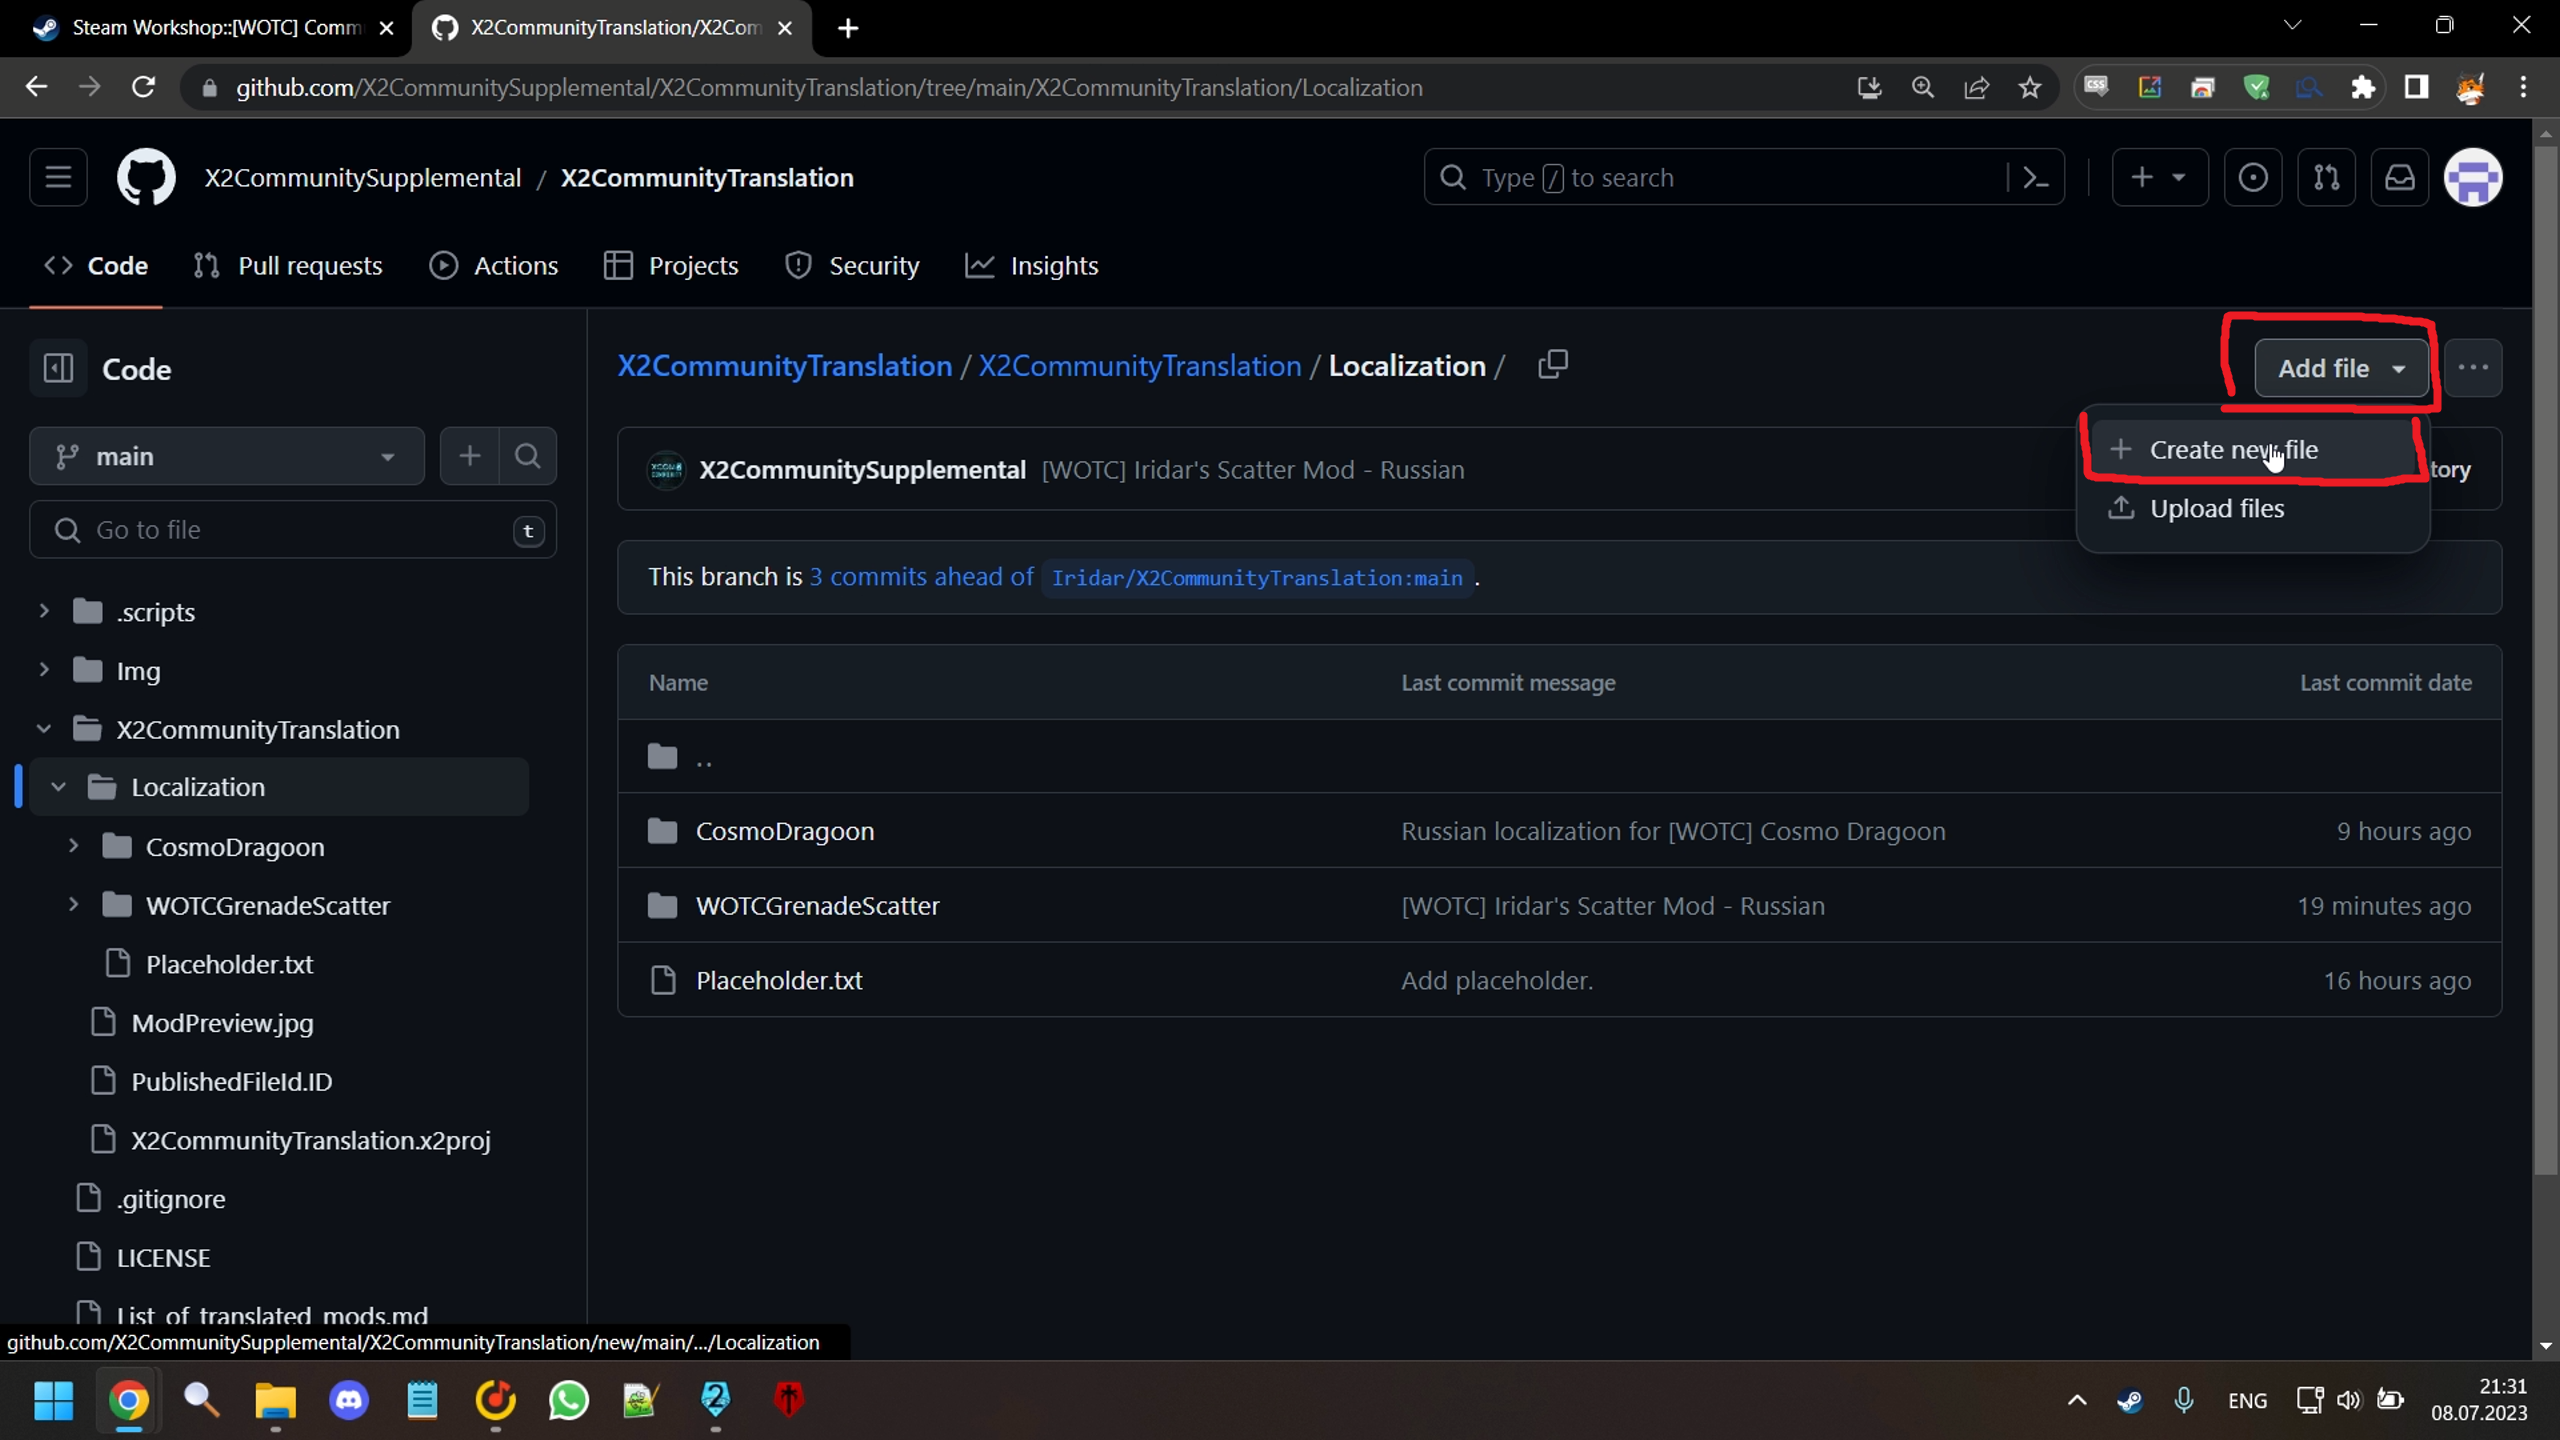
- In the top right, click Add file -> Create new file.
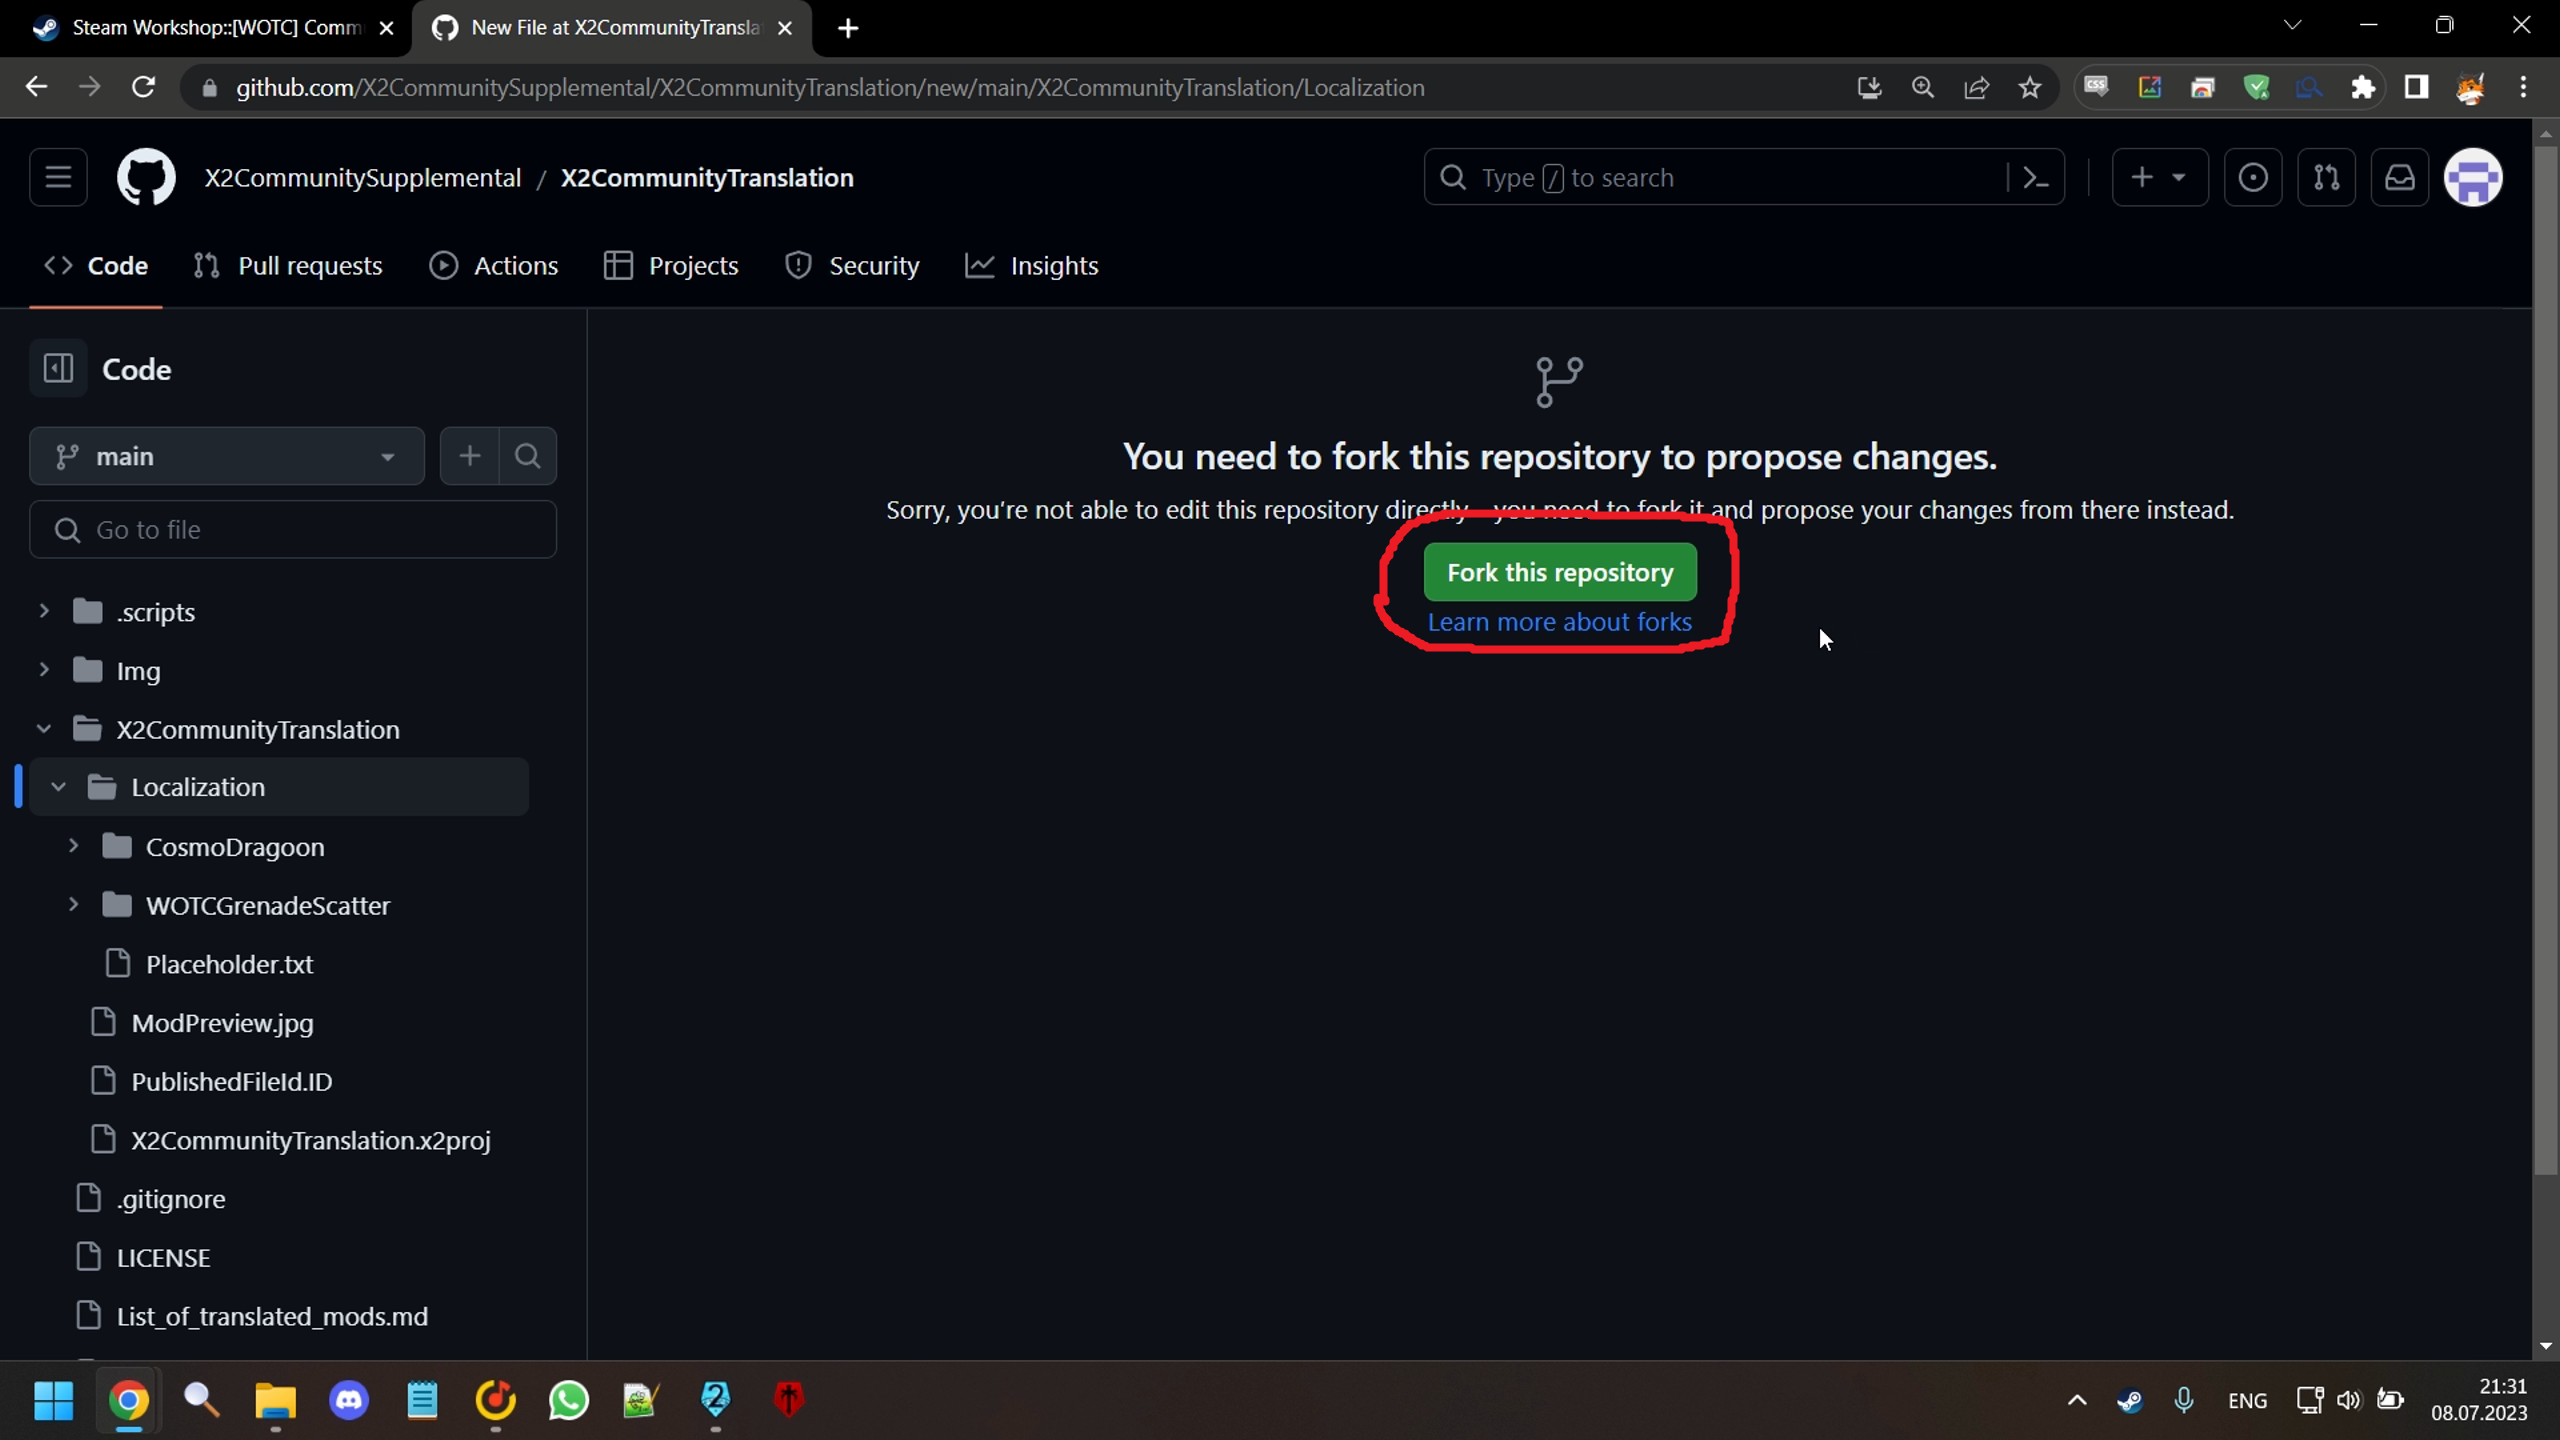
If this is your first submission on this account, you will be asked to fork the repository. Simply click the "Fork this repository" green button.
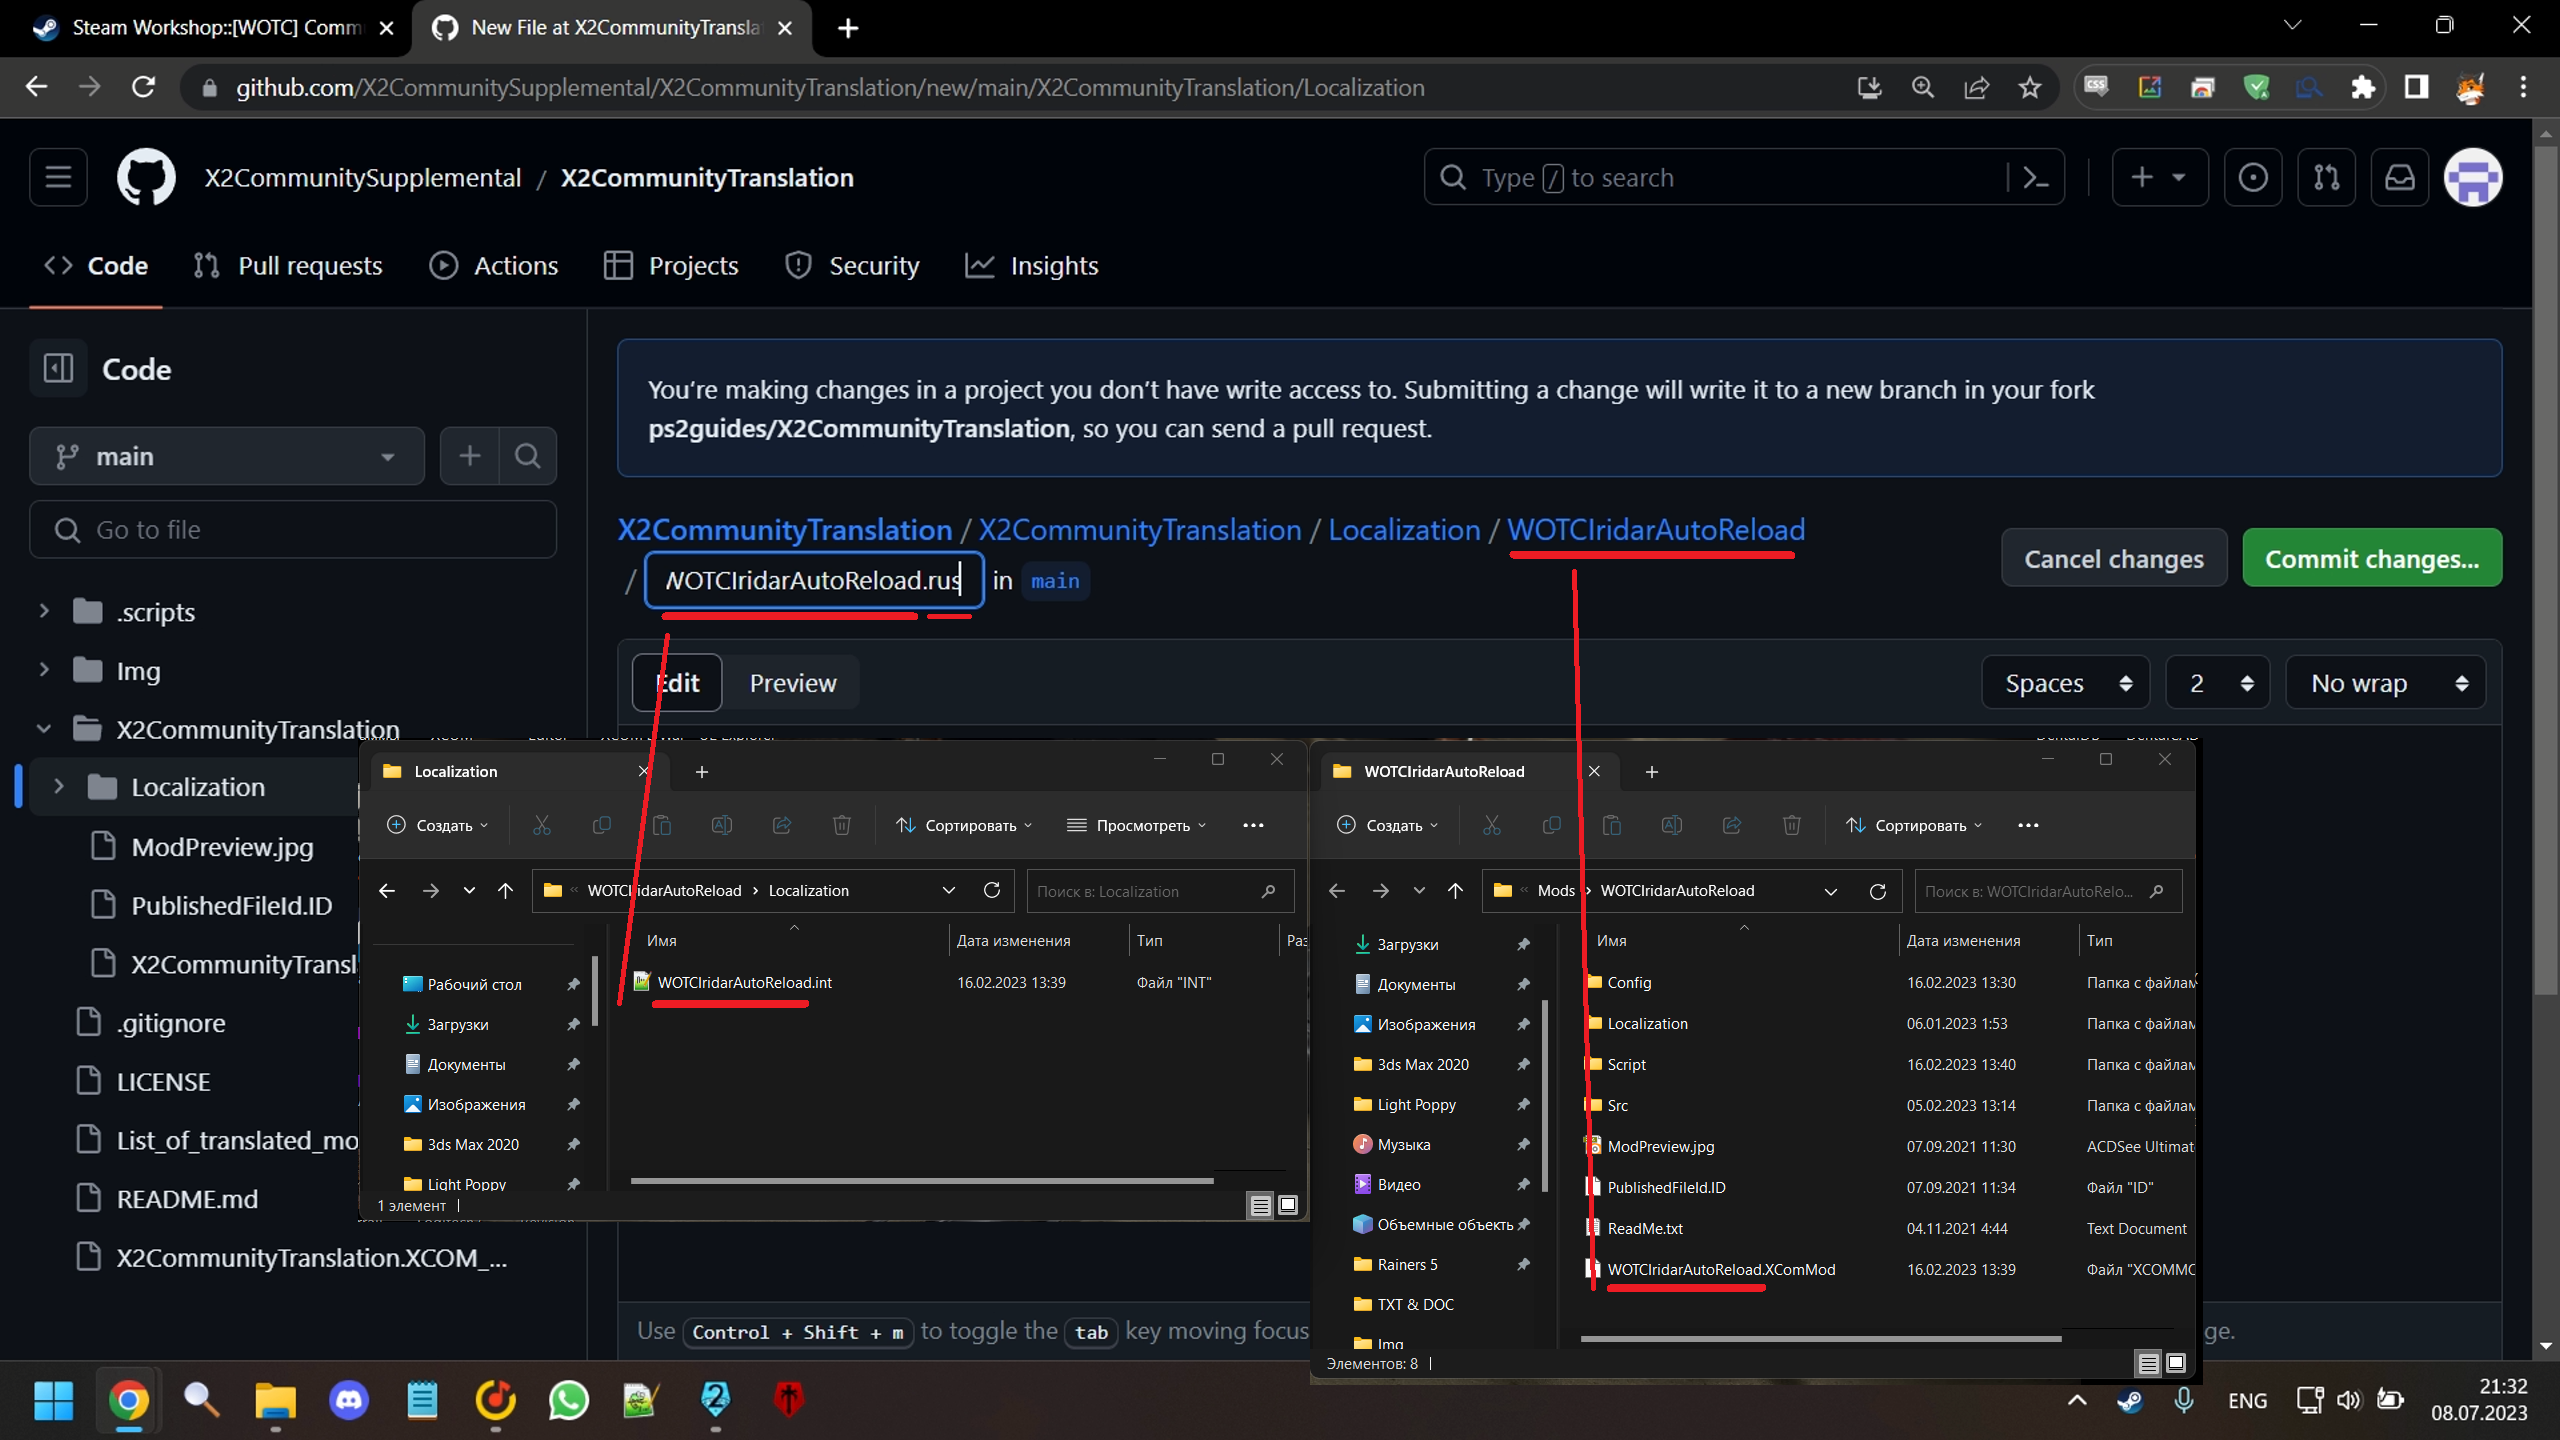
- In the top bar, you will see "Name your file" text field. Use the following template:
ModName/FileName.Extension
ModName - the name of the mod's .XComMod file without the extension. Translation for each individual mod should exist in its own folder to make it easy to find and modify.
If needed, you can add more folders after ModName.
FileName - name of the localized file.
Extension - depends on the language you're adding the translation for:
- int - International English
- chn - Simplified Chinese
- cht - Traditional Chinese
- deu - Deutch (German)
- esn - Espanjol (Spanish)
- fra - French
- ita - Italian
- jpn - Japanese
- kor - Korean
- pol - Polish
- rus - Russian
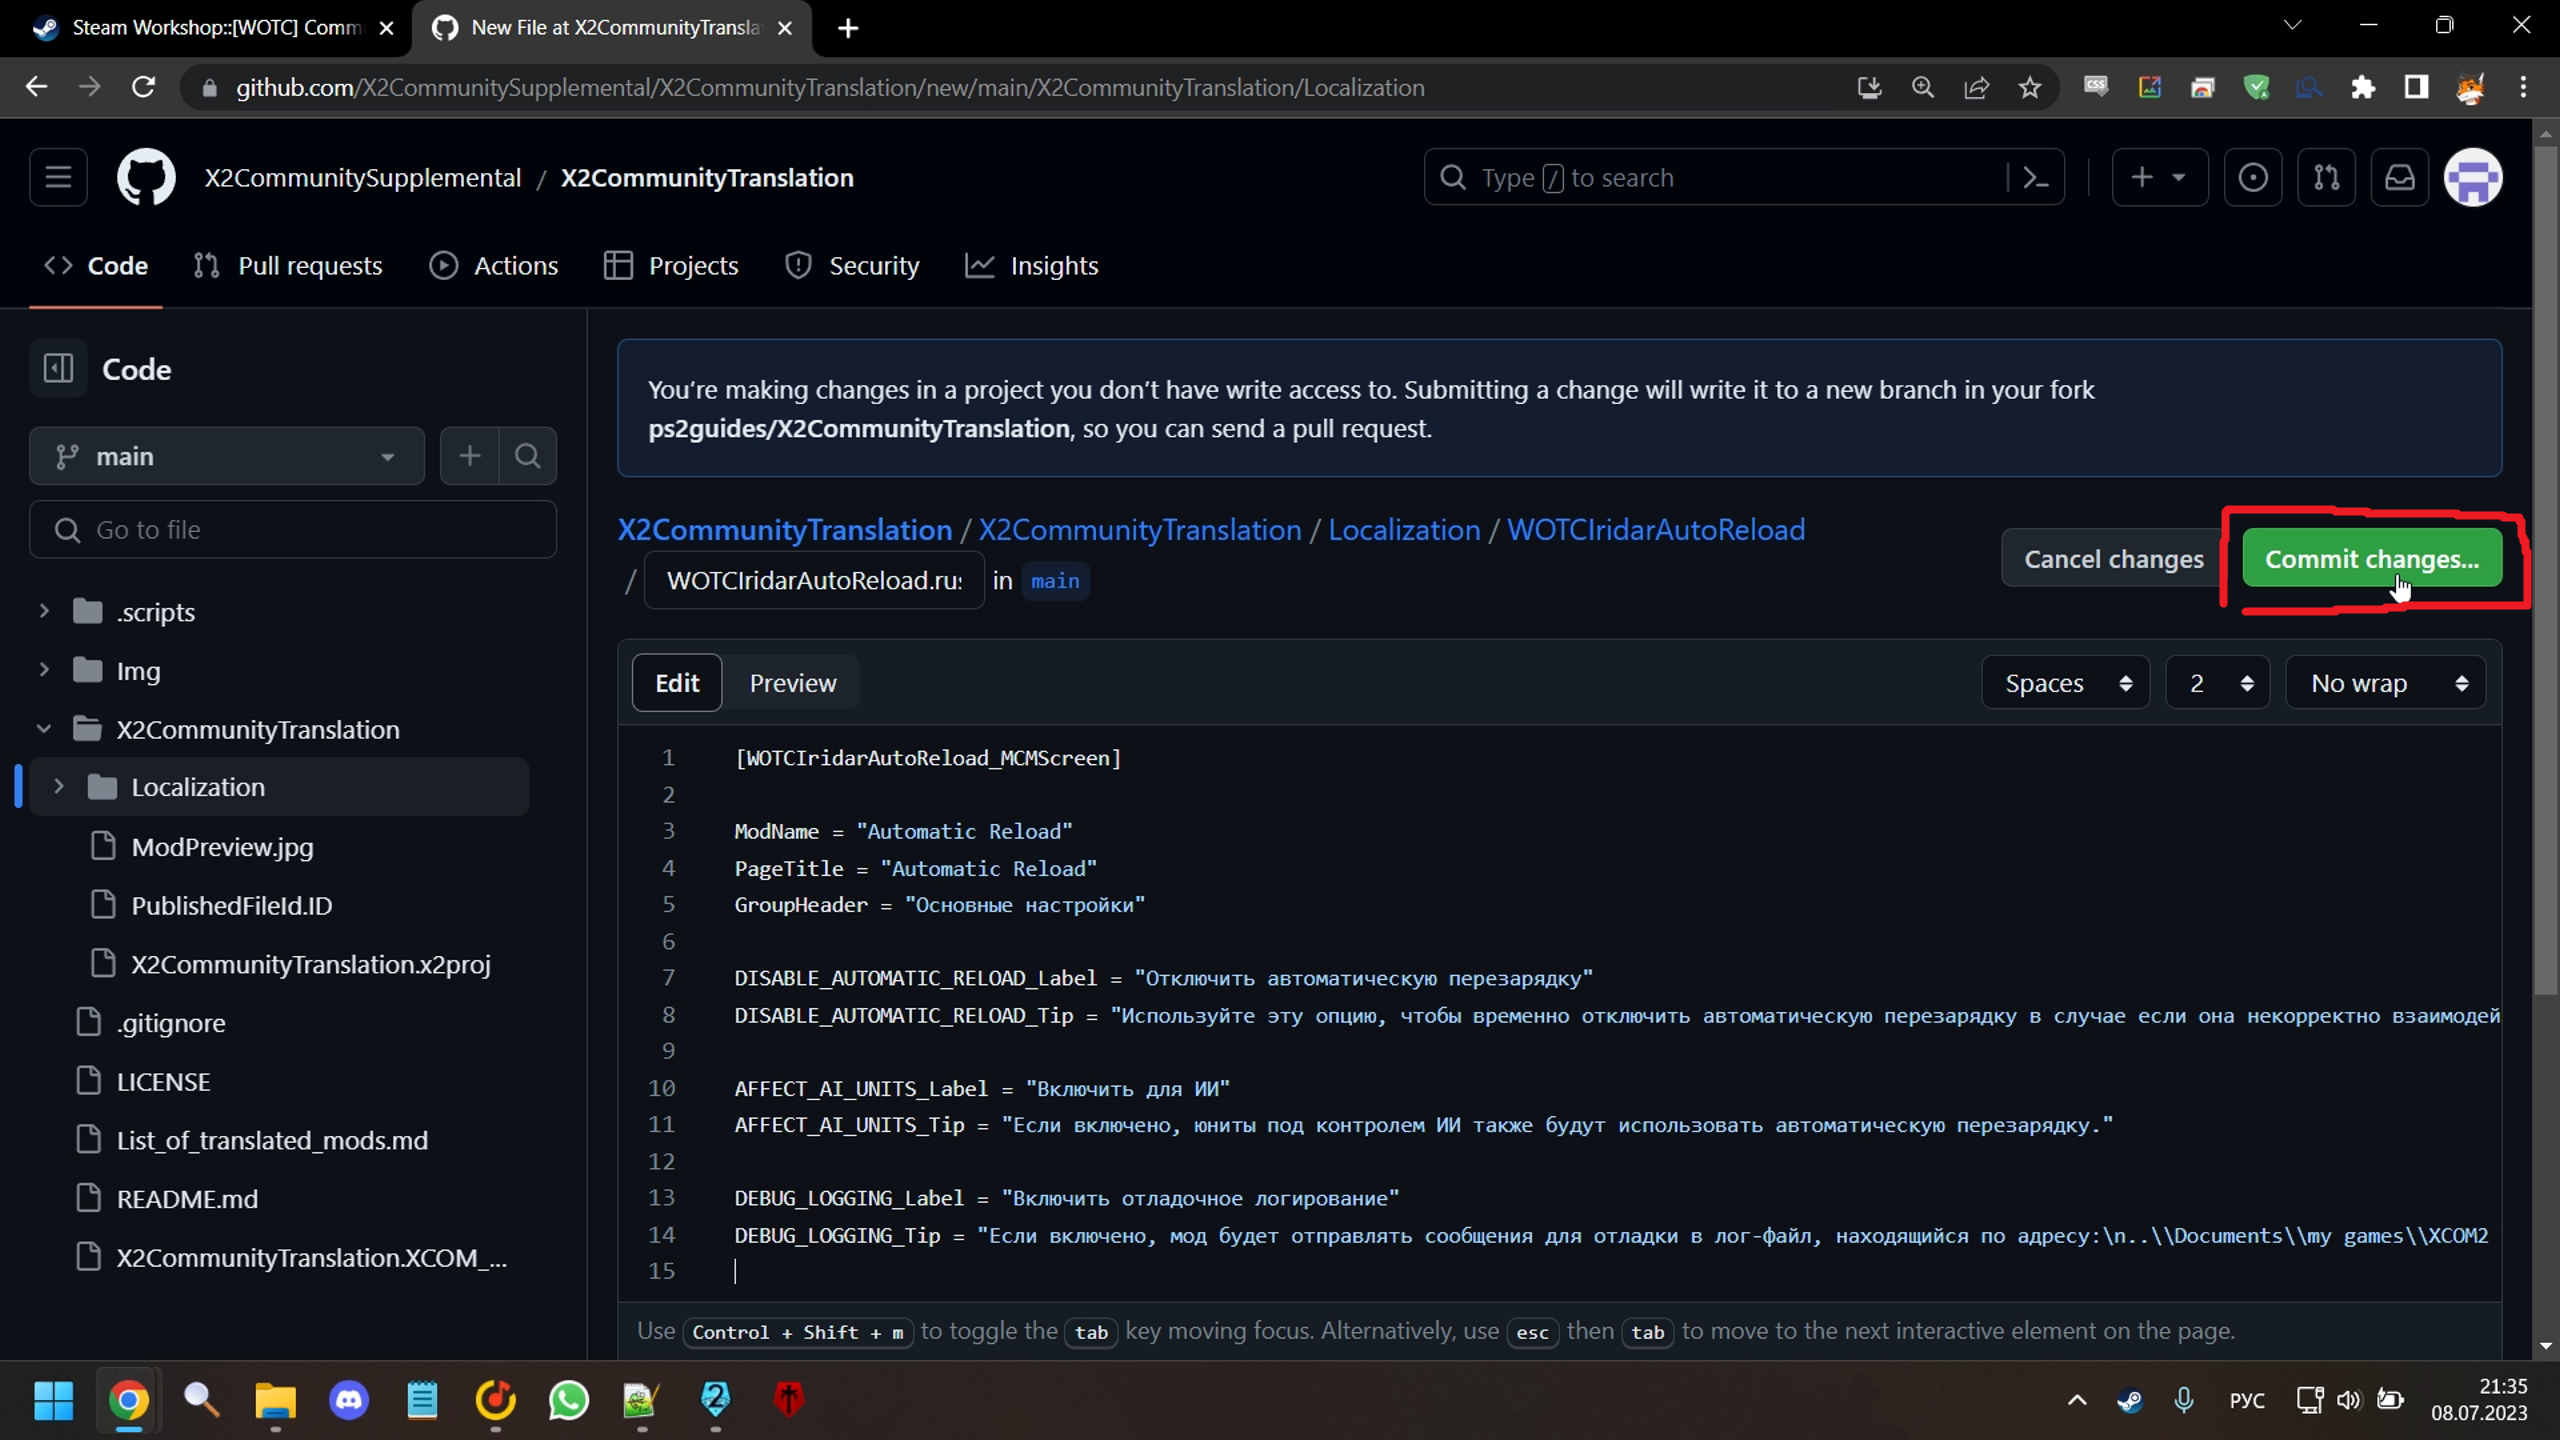
- Enter the translated text into the main window and click the green button "Commit changes"
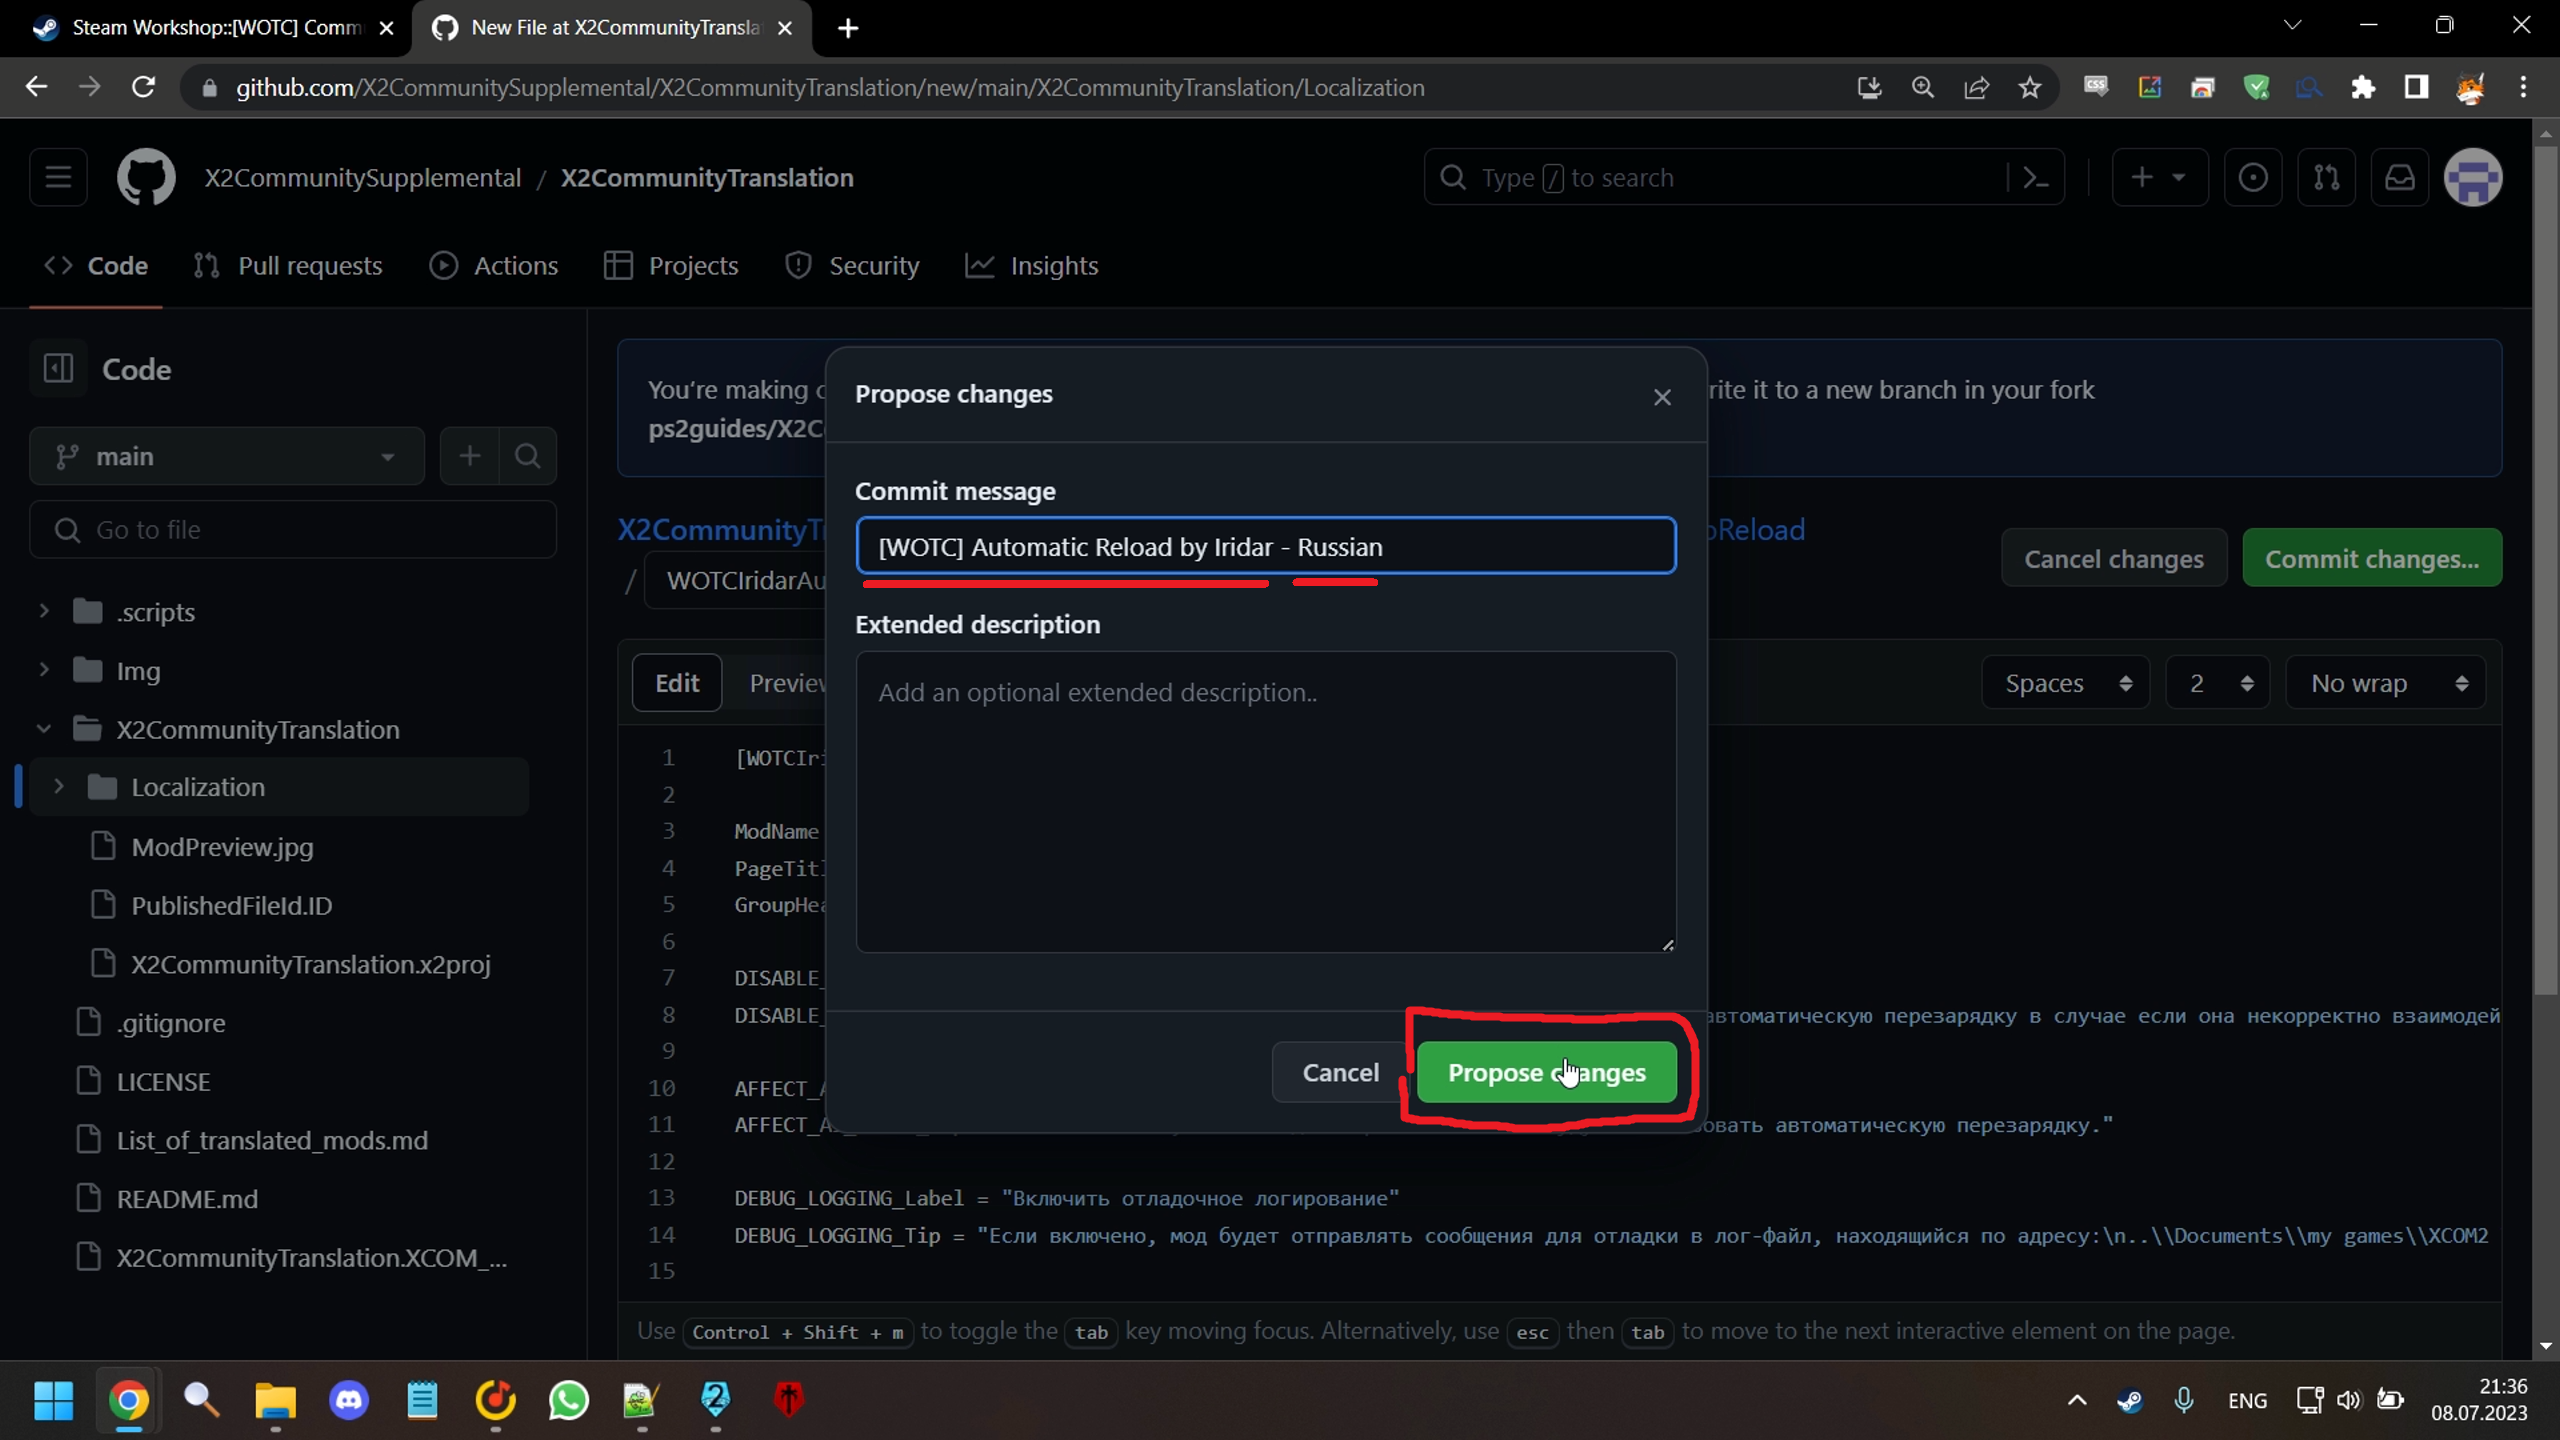
- In the Commit message text field, use the template:
<workshop mod name> - <language>, then click the green button "Propose changes".
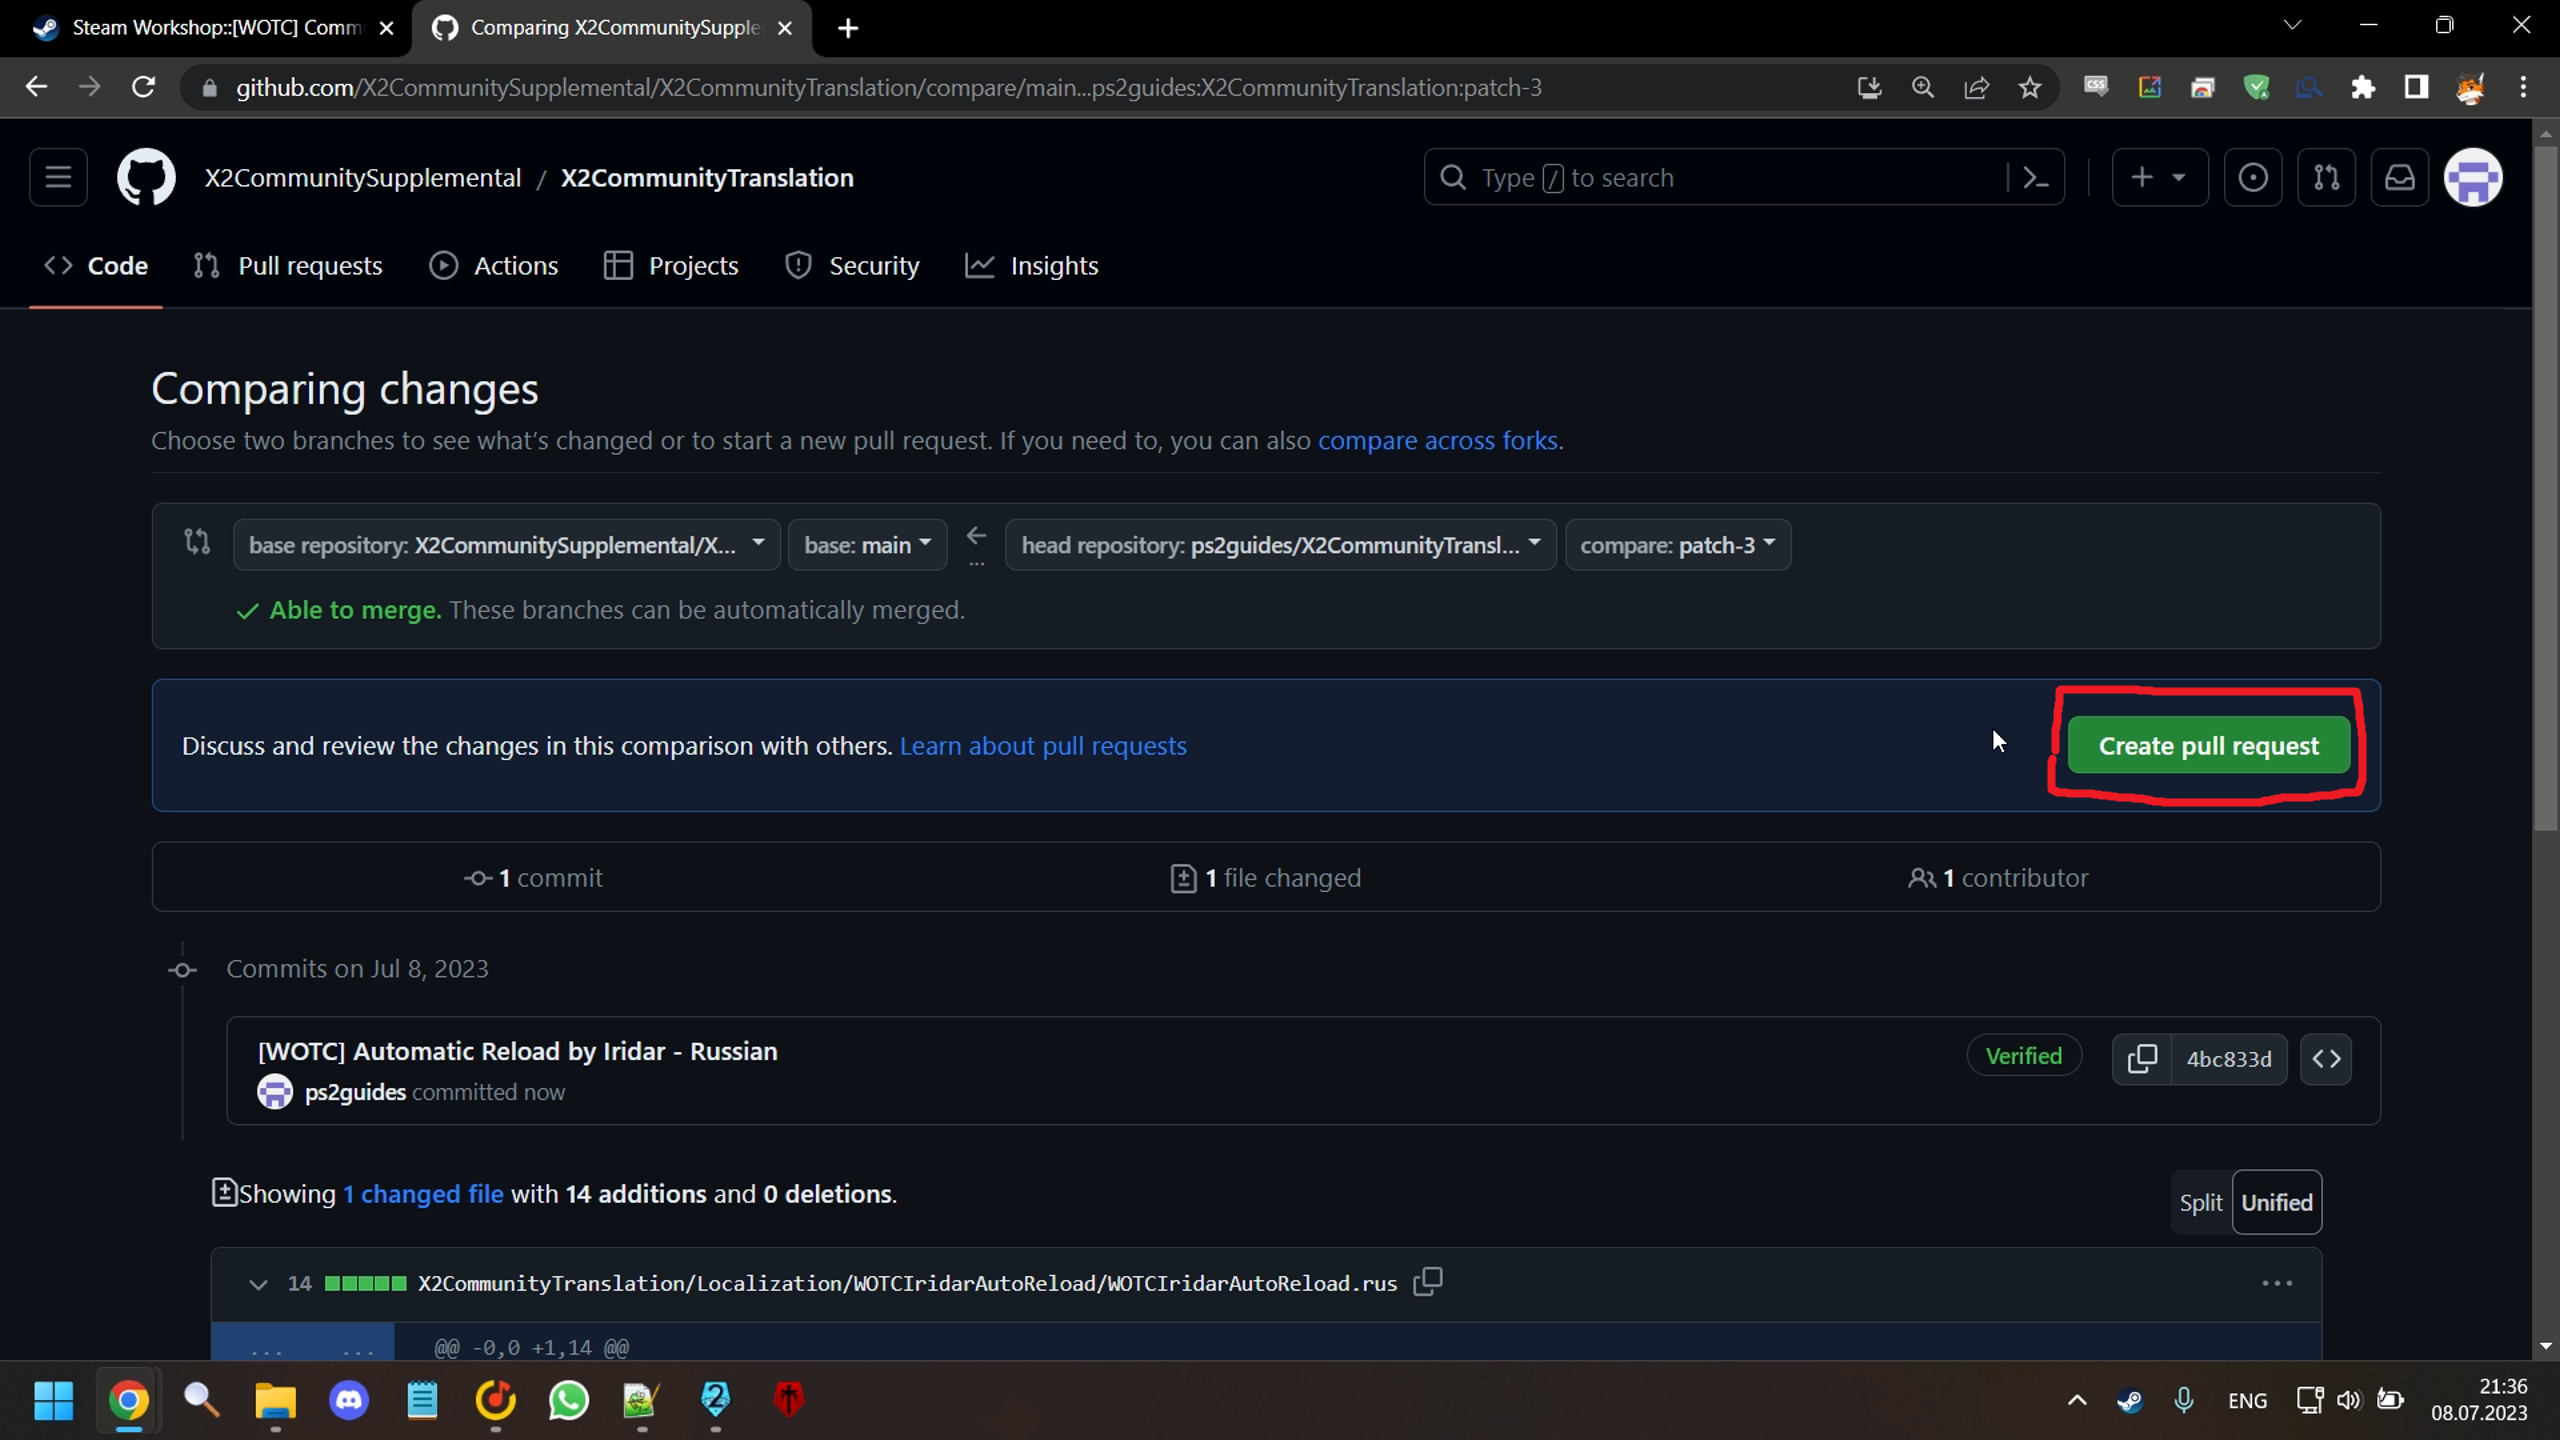
- A new page will open. Click the green button "Create pull request".
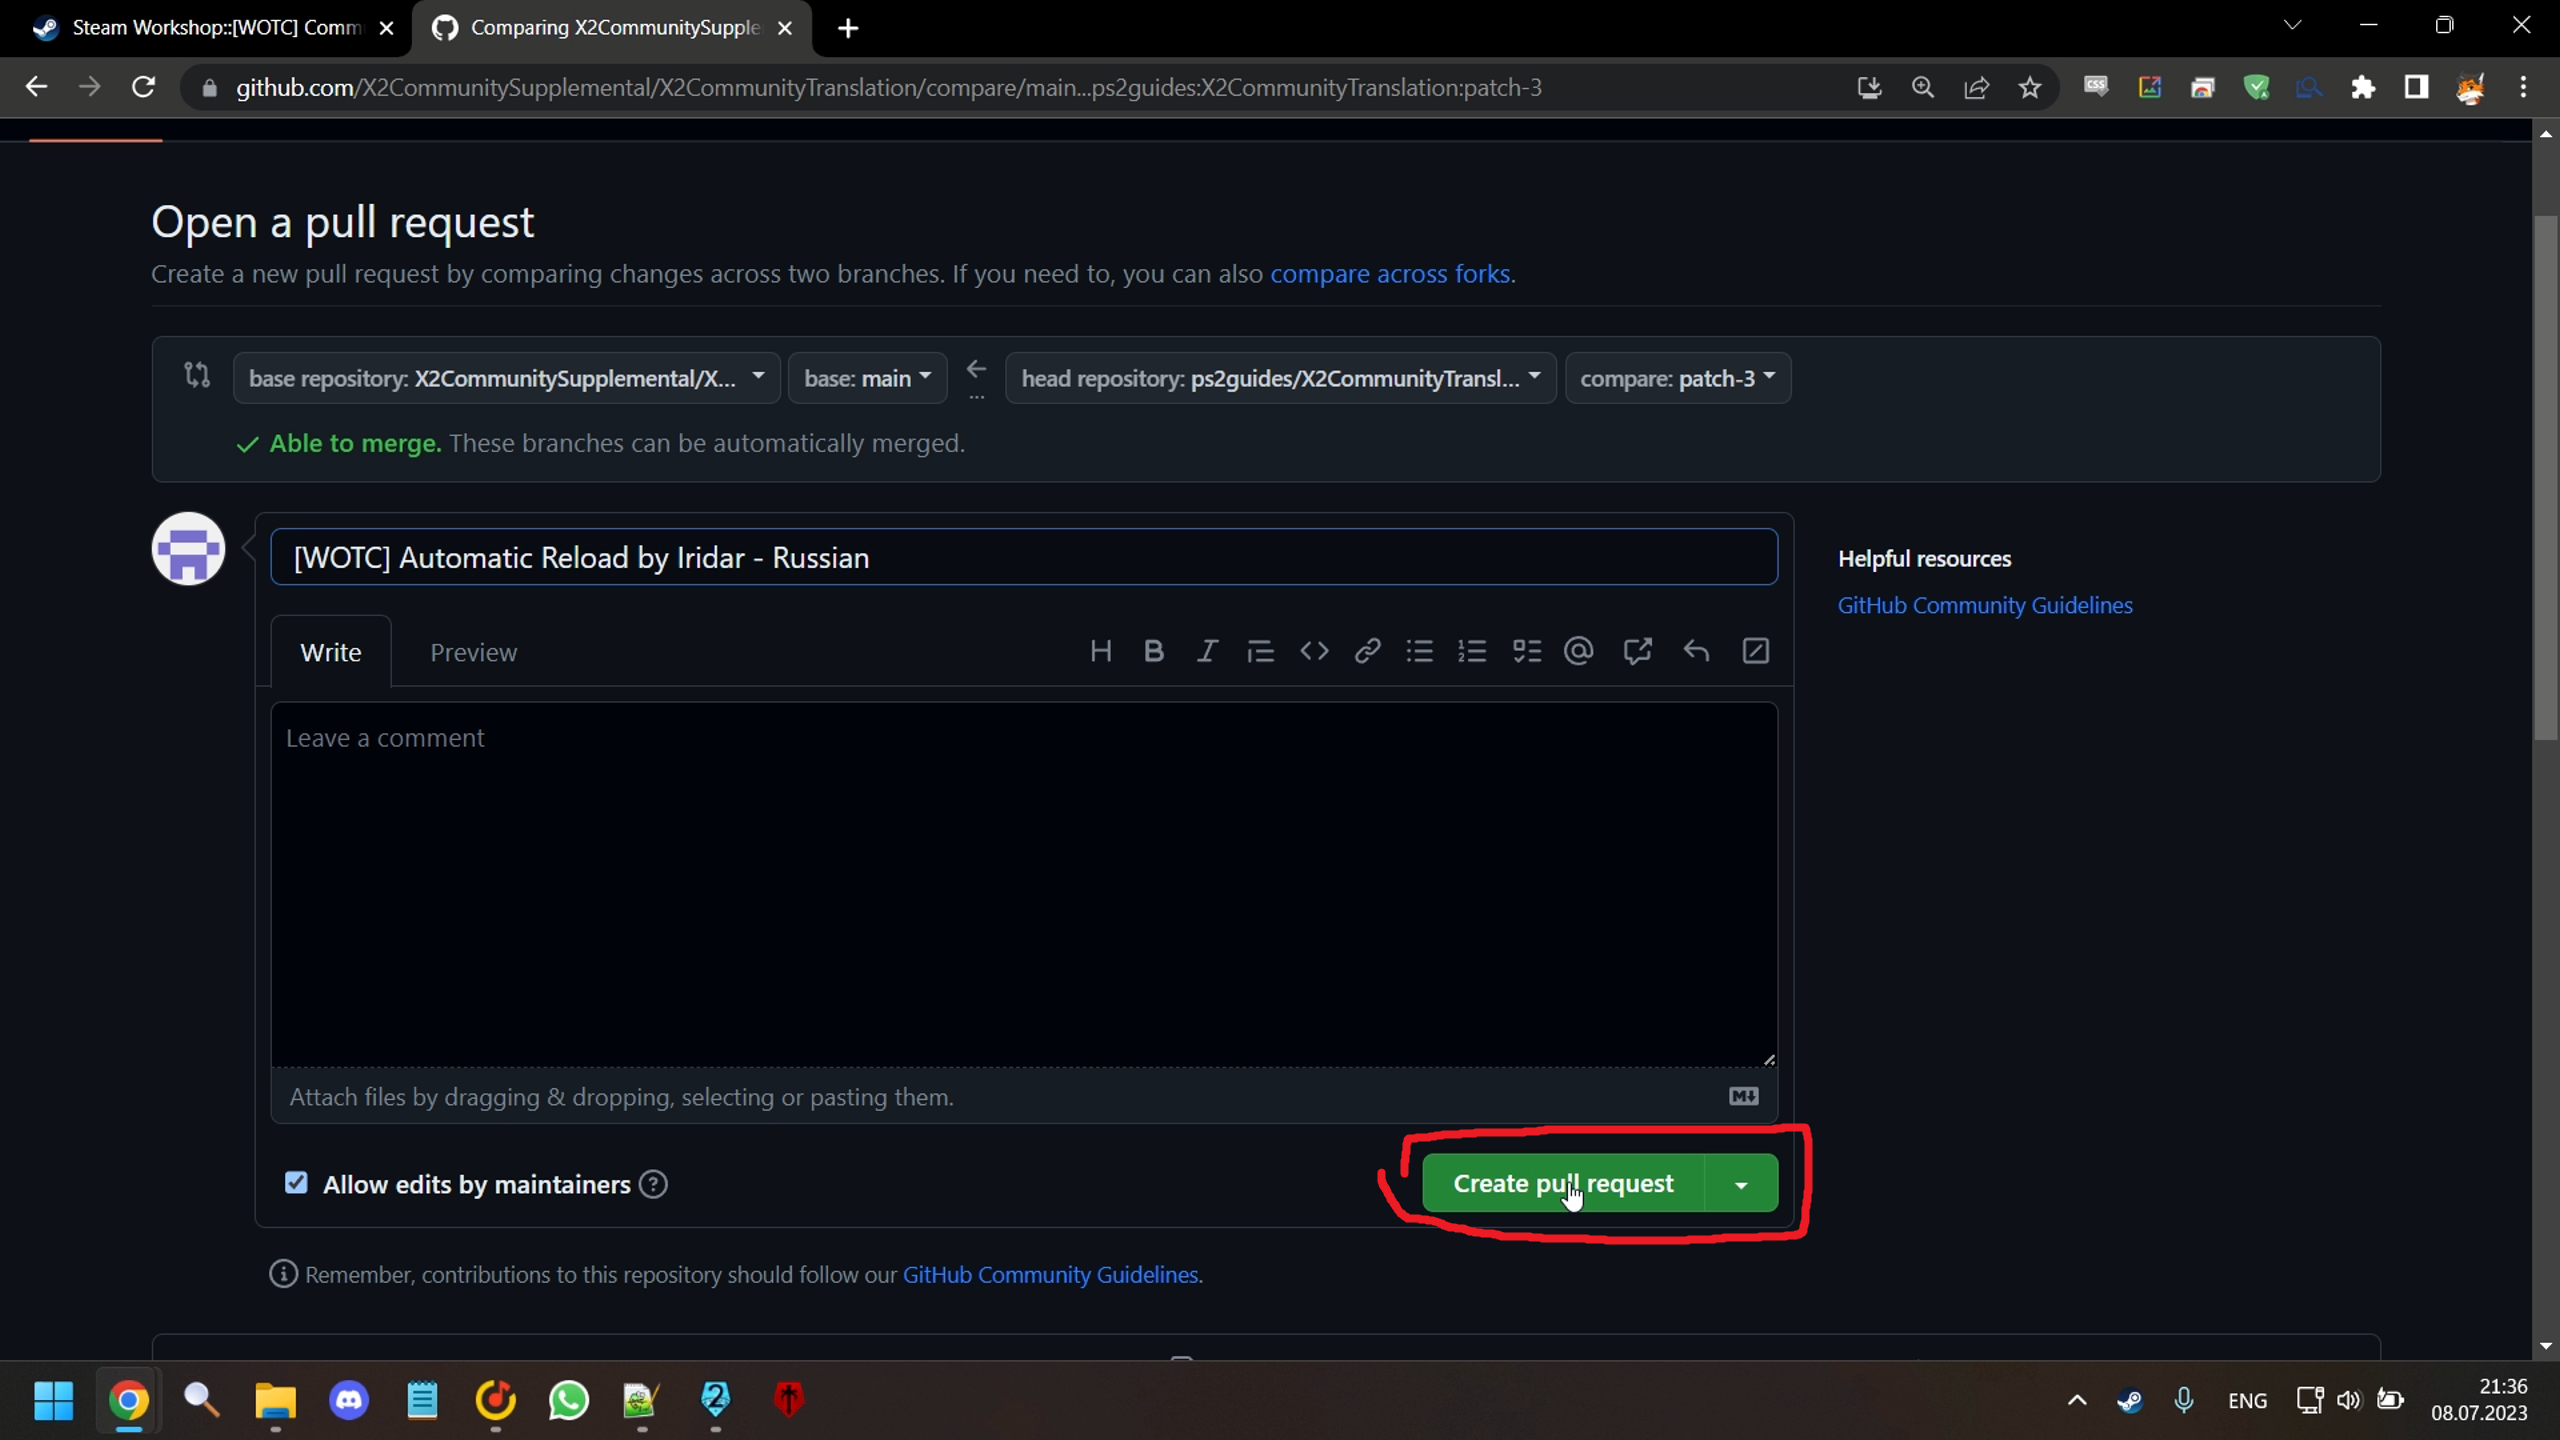
- You will be redirected to another page. Once again, click the green button "Create pull request".
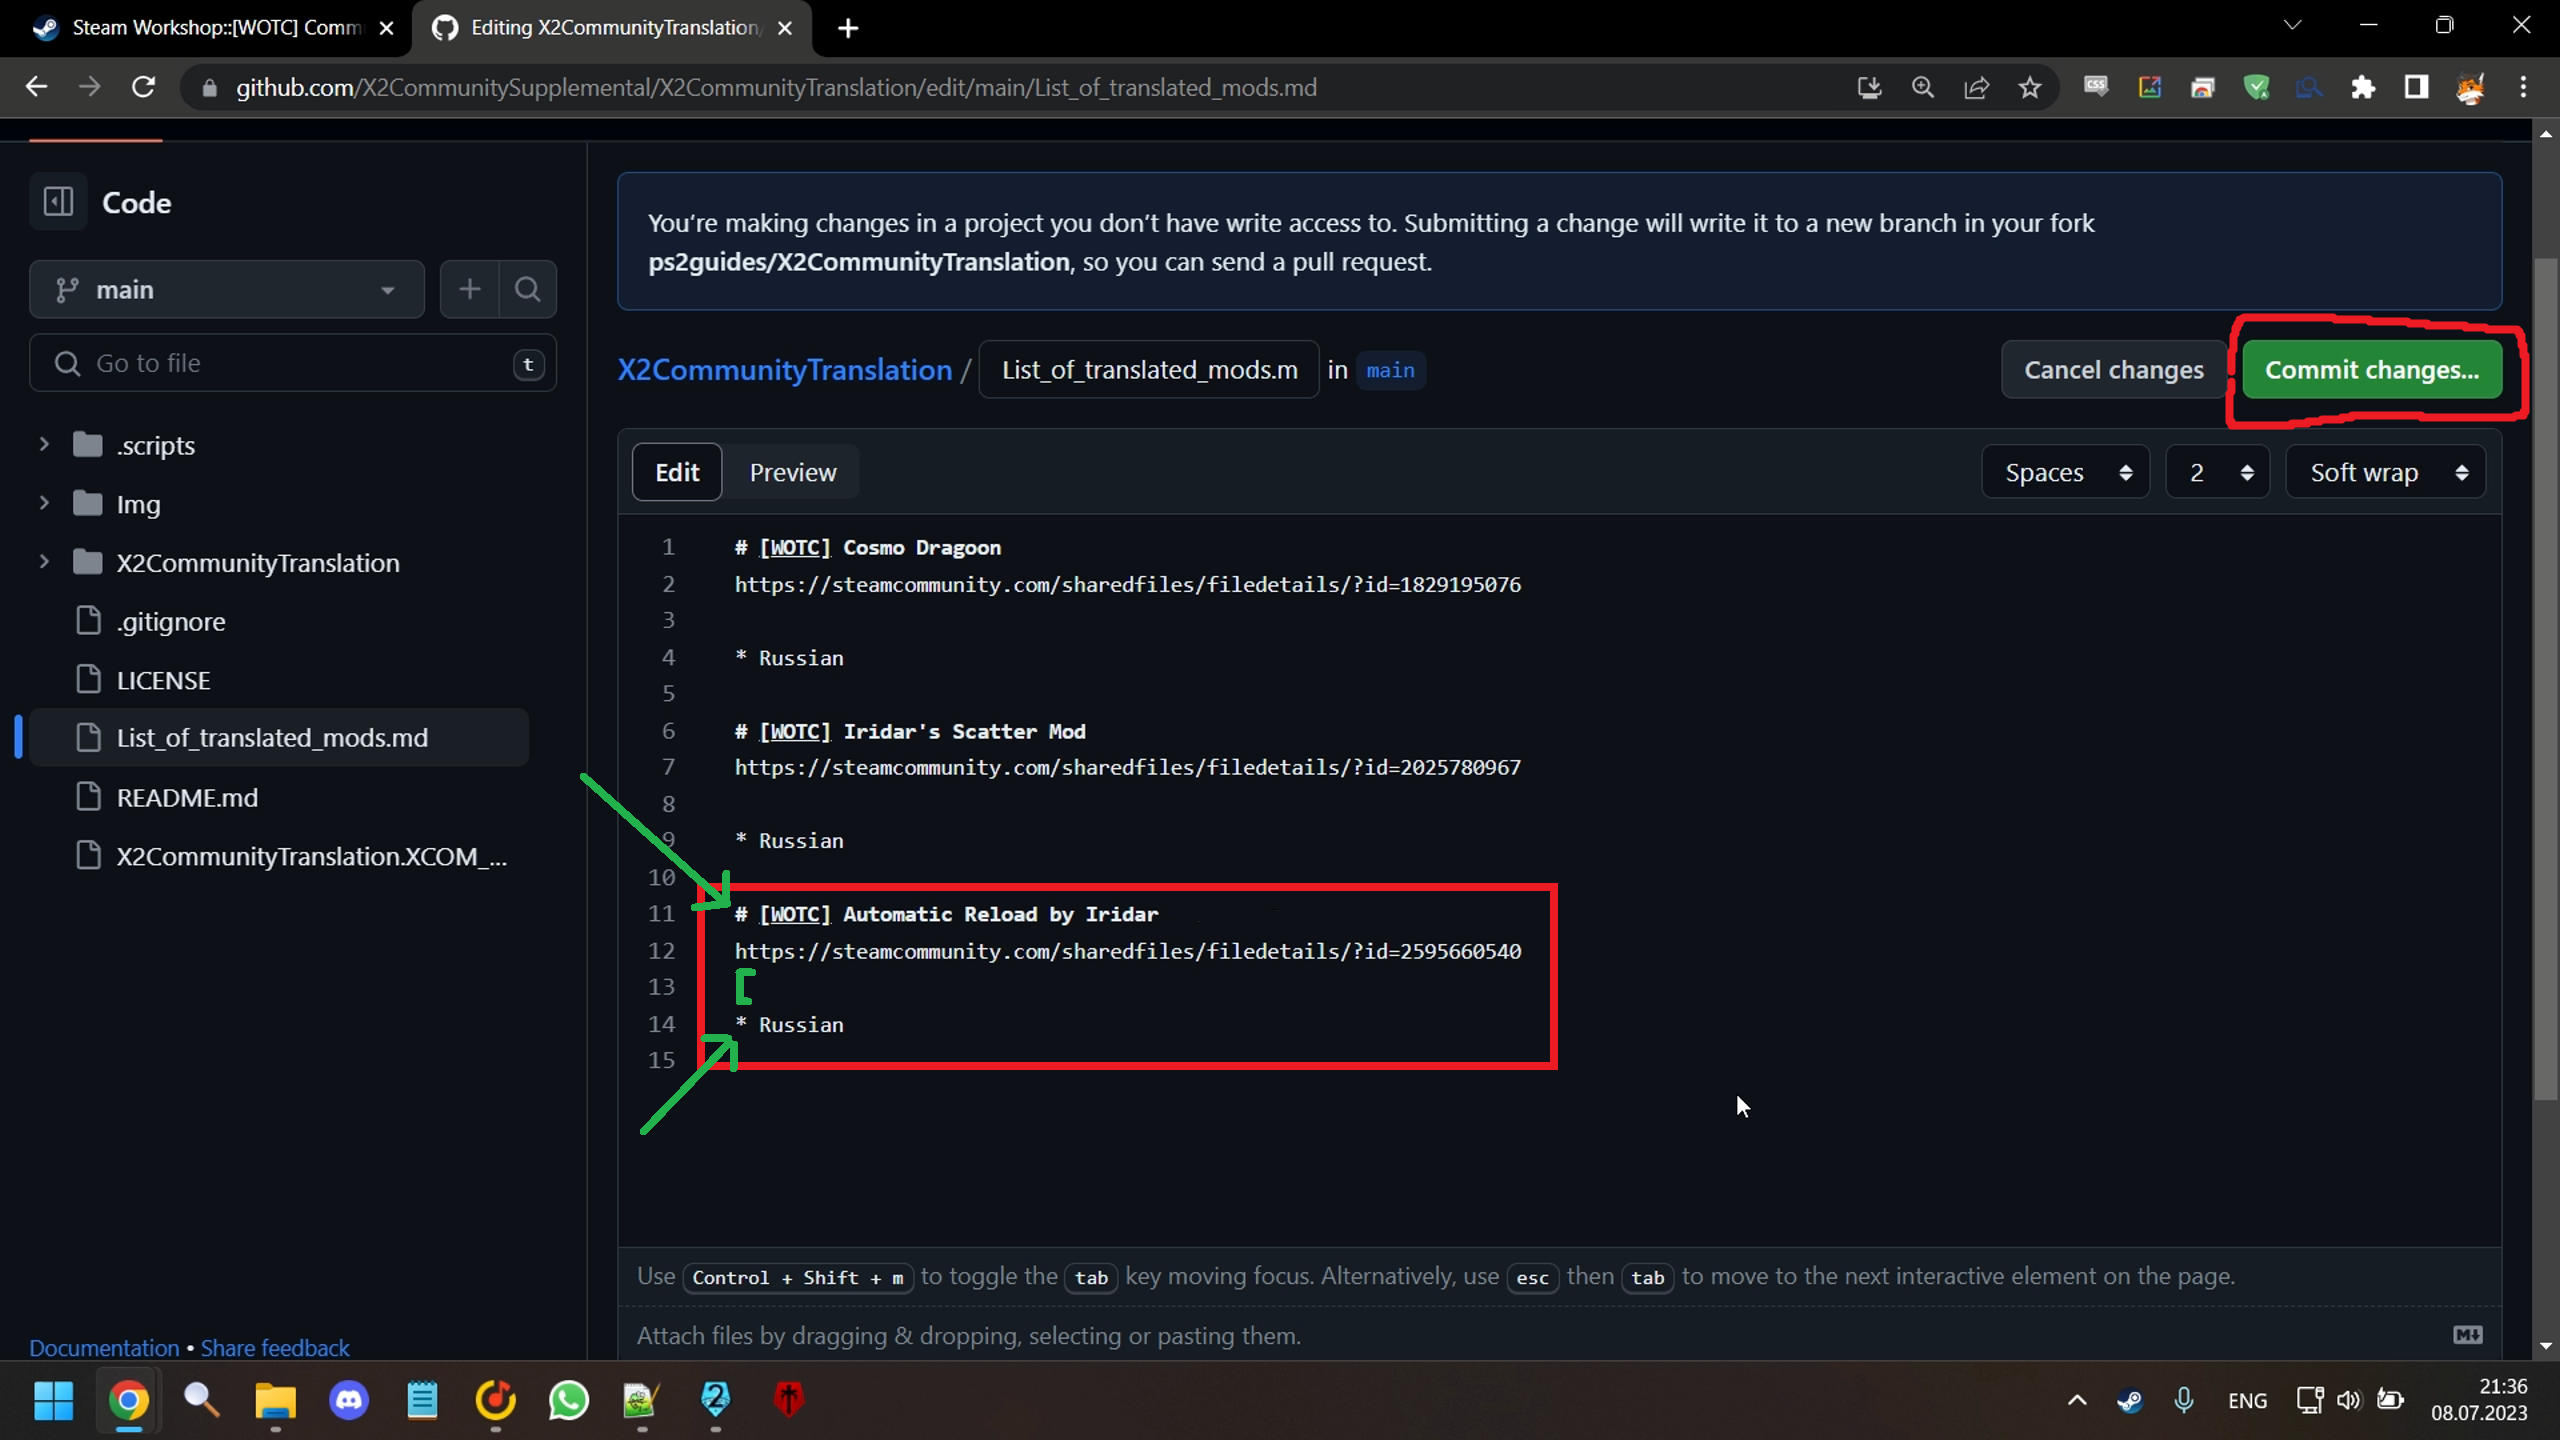
- Click this link to edit the file with the list of translated mods.
If the list doesn't already have an entry for the mod that you have added translation for, then add it.
The entry needs to contain the mod's workshop name, prefaced with a # symbol, and a workshop link to the mod on the next line, followed by an empty line.
Then add the language you have added translation for to the list of languages under the mod name. The language name must be prefaced by a * symbol.
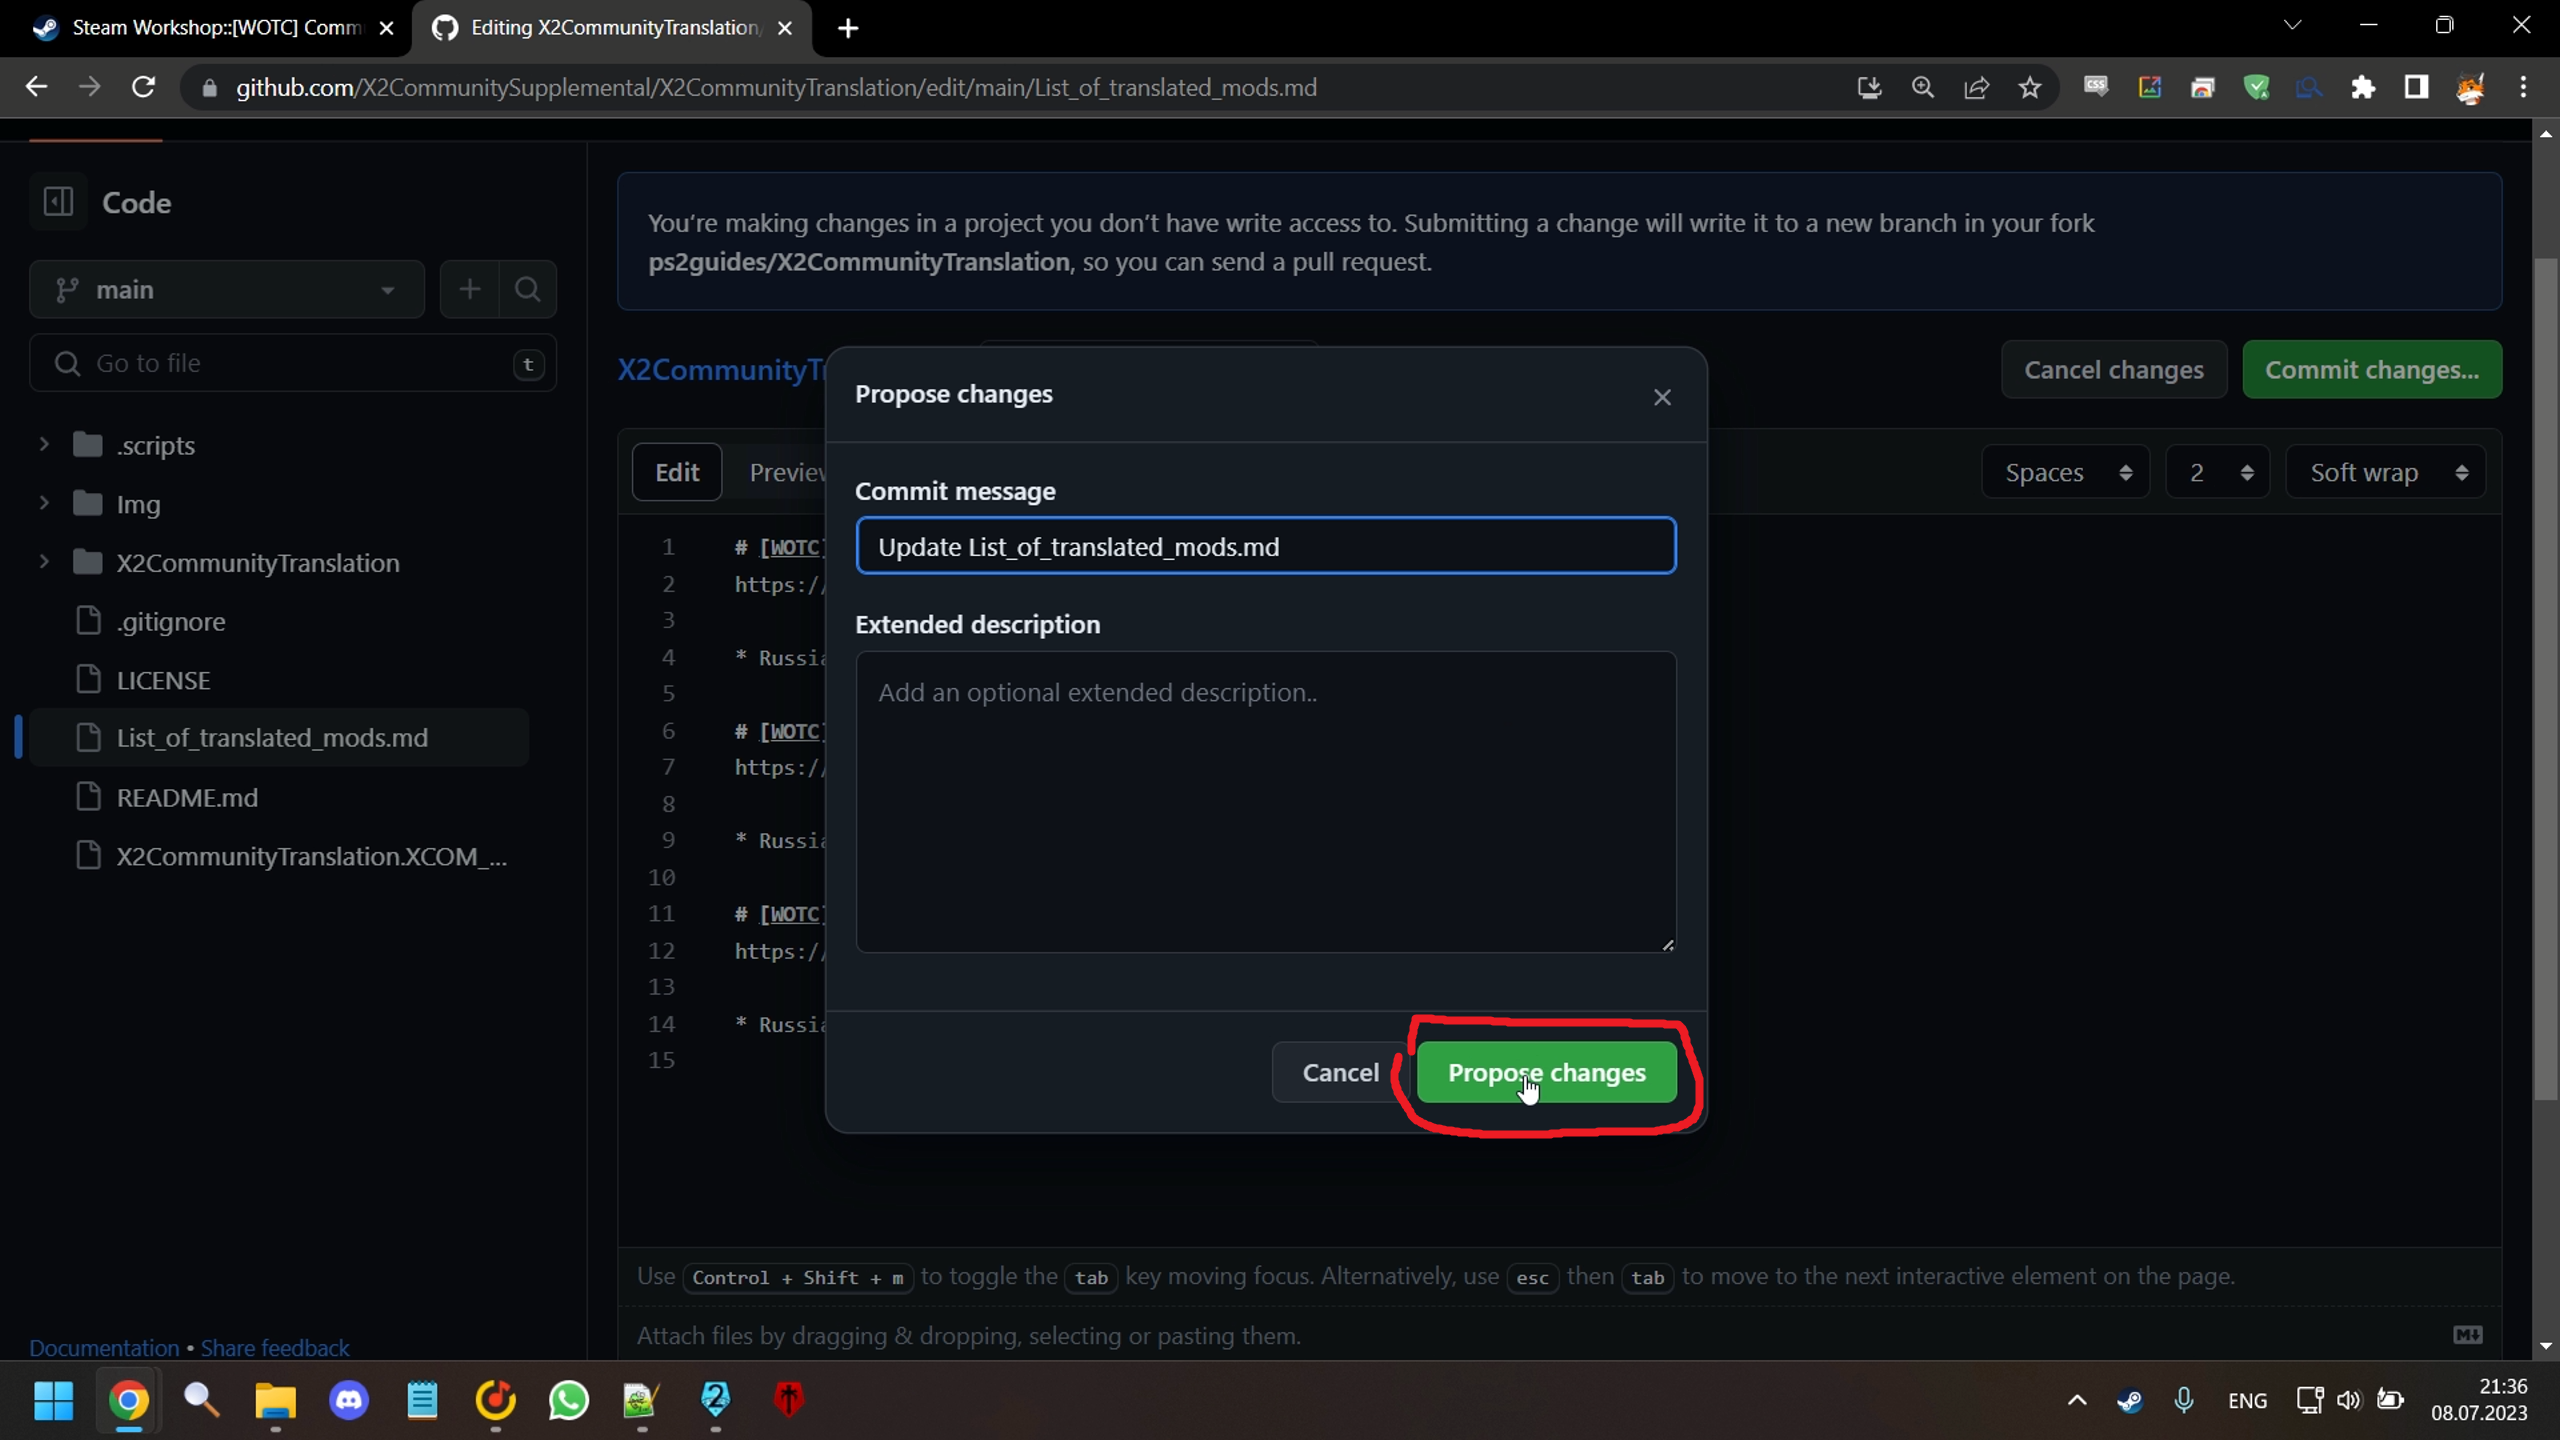
- Same as before, click "Commit changes", but this time do not change the commit message. Once again, click "Propose changes".
Then click "Create pull request" on both of the next pages.
- All done. Wait for maintainers to review your pull request and upload the update to Steam Workshop. This process may take a few days.
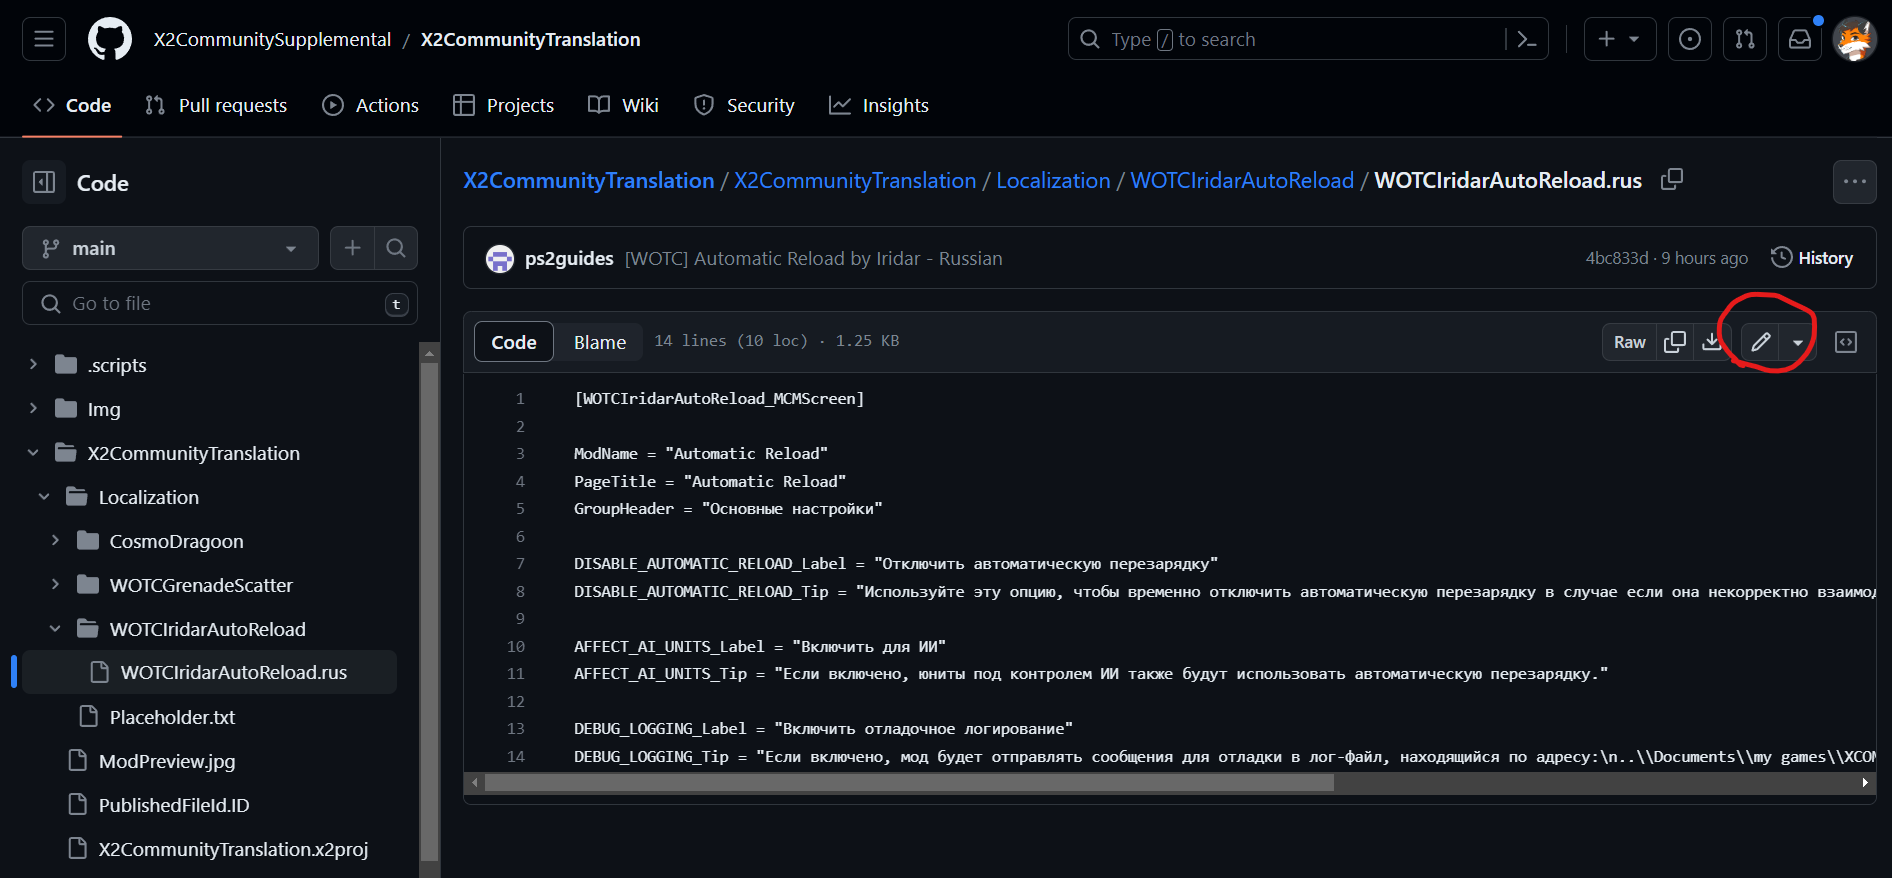
Open the file you wish to edit, then click the pencil icon to enter editing mode.
Once you're done, click the green button "Commit changes" and follow the process explained above to submit a pull request.
