This is a sample full stack application built using React and Nodejs. The application allows users to create tasks for a particular day, edit, update the task and task status and also delete tasks.
The project also includes a Swagger documentation.
The task is to seamlessly integrate the provided figma design, into a fully functional web application, demonstrating expertise in full stack web development and pixel-perfect implementation.
This Todo list should be web and mobile responsive
- Users should be able to add a todo
- Users should be able to edit a todo
- Users should be able to delete a todo
- Users should be able to see all todos
- All todos should be paginated


- Live Site URL: (https://task-app-andemosa.vercel.app/)
This guide will walk you through the process of setting up the Task Manager App on your local machine.
Before you begin, ensure you have Node.js installed on your system.
Start by cloning the repository to your local machine:
git clone https://github.com/andemosa/task-app.git
cd task-app-
Environment Files: Navigate to the
serverfolder and create an.envfile using the.env.examplefile. -
MongoDB Setup:
- Sign up for an account at MongoDB Atlas.
- Create a new cluster and follow the instructions to set up a new database.
- Once set up, obtain your MongoDB connection string and add it to the
MONGODB_CONNECTION_STRINGvariable in your.envfiles. - For the
.env.e2esetup see "running automated tests" below
-
JWT_SECRET_KEY:
- This just needs to be any long, random string. You can google "secret key generator".
-
Environment Files: Navigate to the
frontendfolder and create an.envfile using the.env.examplefile. -
Cloudinary Setup:
- Create an account at Cloudinary.
- Navigate to your settings and create a new preset.
- Replace the placeholder
:cloud_namewith your username and:actionwith upload for theVITE_UPLOAD_LINK - Add your preset name as
VITE_UPLOAD_PRESET.
-
VITE_BASE_URLL:
- The
VITE_BASE_URLshould point to the URL where your backend application is running (typicallyhttp://localhost:4000if you're running it locally).
- The
-
Backend:
- Navigate to the
serverdirectory. - Install dependencies:
yarn install. - Start the server:
yarn dev.
- Navigate to the
-
Frontend:
- Open a new terminal and navigate to the
frontenddirectory. - Install dependencies:
yarn install. - Start the frontend application:
yarn dev. - The application should now be running on
http://localhost:5173but verify this in your command line terminal
- Open a new terminal and navigate to the
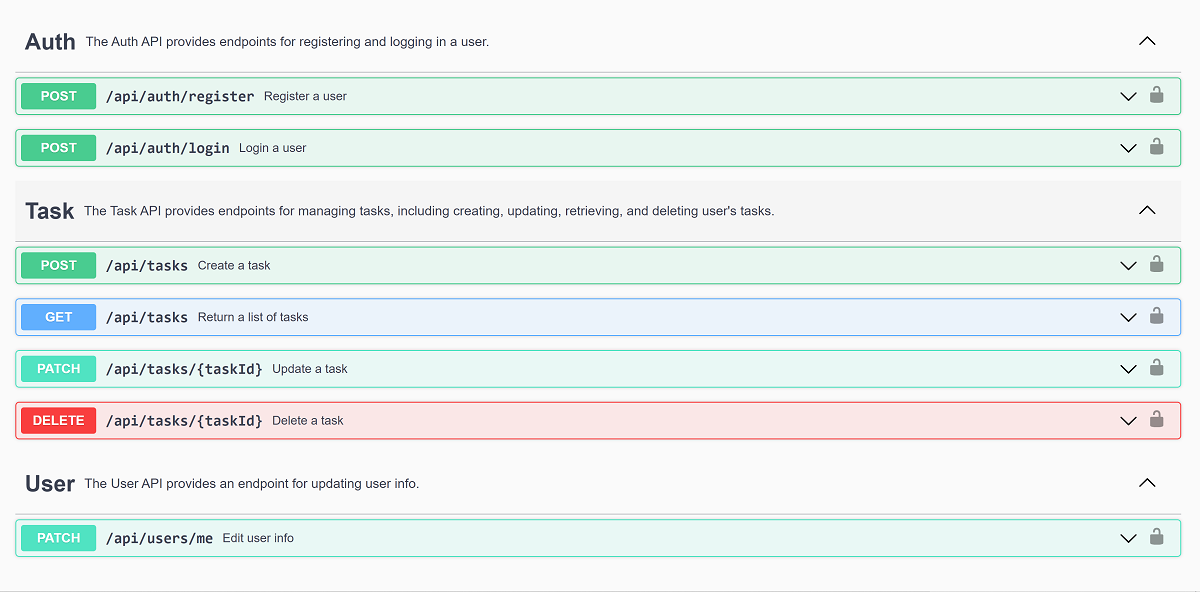
The REST API exposes its OpenAPI. You can view the API definition interactively using the Swagger UI, hosted at /docs. Simply start the server and navigate to http://127.0.0.1:4000/docs in your browser to access the Swagger UI.
Alternatively, you can explore the online version of the API documentation without running the server.