Here i collect all my expertise on how to install klipper on our QIDI X-Plus. X-Max.
Starting from the work of Funkton and ecsv (thanks to them) i'm trying to collect every info on this page
First of all you neead an ST-link v2 to dump and flash klipper.bin you can buy from amazon or aliexpress
You need a raspberry. Starting from model 3b+ everythings works. If you don't want to use raspberry you can also use a minipc but you need ad usb-ttl cable
Dupont cables, to connect raspberry to mainboard or as said before usb-ttl cable
Following steps are for Ubuntu. I did some test with windows but i wasn't able to get stlink working correctly.
First of all download STM32cubeProg 2.7. Follow this link on right select 2.7 version and download. When you press to download it ask you to register, follow registration steps and after you get STM32cubeProg.
Double click on SetupSTM32CubeProgrammer-2.7.0.linux and follow steps for installation.
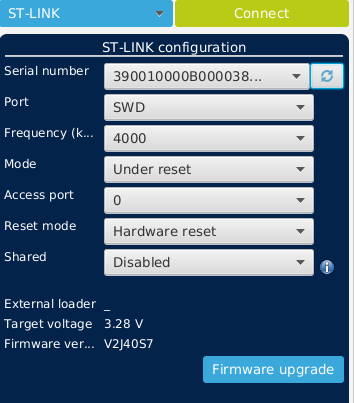
Launch STM32cubeProg and plug STLink, click on refresh icon (top right) and you'll see a long number on Serial number. If you see it everything it's working.
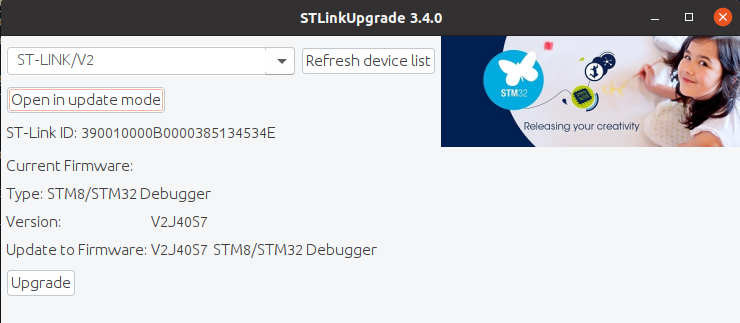
Close STM32CubeProg. Now you need to download STLINK007 to upgrade your ST-Link. Go to Download page and download latest version. Extract, inside AllPlatform you find STLinkUpgrade.jar, double click and it will open.
Unplug STLink and re-plug it, now click on refresh Device list and after click on Open in update mode.
Check if a new version of firmware are ready and in case press Upgrade
In below image Version and Update to Firmware are the same so i don't need to upgrade. After upgrade close window.
let's go to next chapter, Dump current Firmware
Open bottom panel of your Qidi printer, remove all screws, take some photos of mainboard connections ( some photos will be uploaded on images/mainboard) and remove mainboard.
I suggest to remove because it's easier to plug dupont cables, flash firmware and test with klipper.
With dupont calbles connect STLink to Main board, folloing this schema:
| STLink | mainboard |
|---|---|
| 3.3V | 3V |
| SWCLK | SWCS |
| GND | GND |
| SWDIO | SWI |
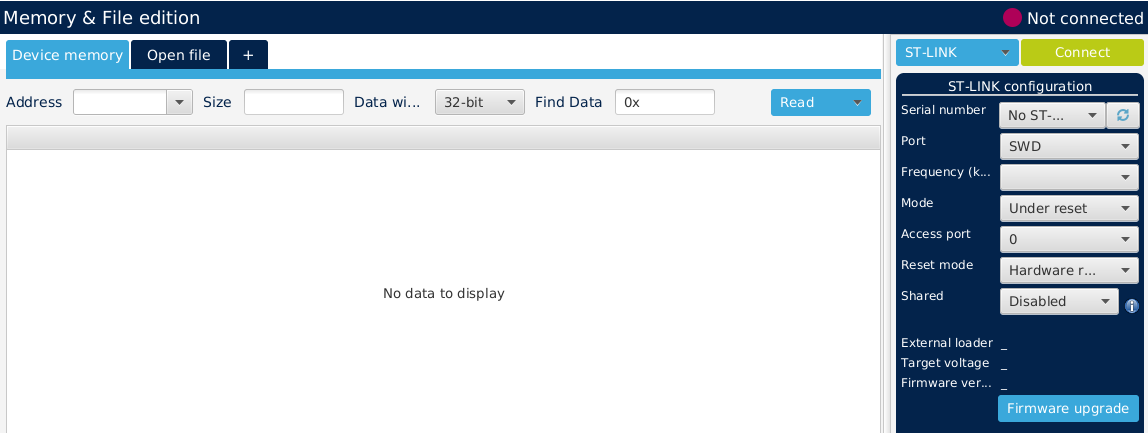
Connect STLink to your computer and press connect
Note: if you already have klipper installed you need to press reset button and keep it pressed while you click connect and relase after it connected
On _Address insert 0x08000000 on _Size insert 0x80000 and press read. If everything is ok you'll see a table below the bar full of data, now press the arrow in Read button and click on Save as ... and save your firmware.
Dimensions should be near 524 KB
Now you need a raspberry, you can install imager from here, once you have installed open imager click on Operative System -> Raspberry Pi OS (other) and select Raspberry Pi OS Lite (64) remember to install the lite version, you don't need UI.
On Imager on Bottom right click on settings (gear icon) click on Enable SSH and leave use password authentication. On set Username and password insert an user (please different from pi) and insert a real password (different from raspberry).
Now click on Configure wirelesss lan and insert yout SSID and password.
If you use ethernet cable you can skip last configuration.
Power in your raspberry, look on your router when it connect and copy the IP.
Now if you use windows open putty and configure raspberry ip with user and password, if you use linux distro open terminal and press
ssh user@ip it ask you for password. Now that you are inside your raspberry you can install KIAUH. Before installing it update and upgrade your rasp sudo apt update and sudo apt upgrade after that install git sudo apt install git (press Y when it ask you to install) now download KIAUH
cd ~
git clone https://github.com/th33xitus/kiauh.git
./kiauh/kiauh.sh
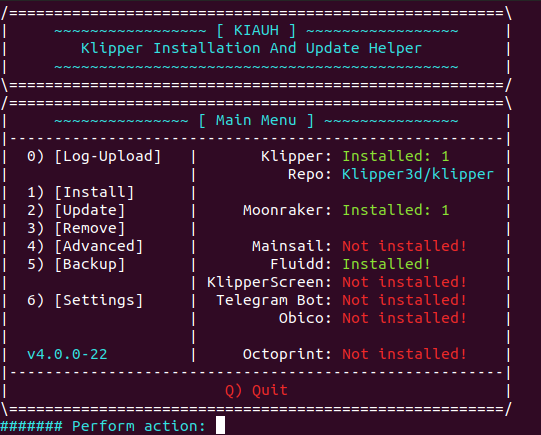
Press 1 for Install and select Klipper (press 1), when it complete press again 1 for install and install Moonraker (press 2) repeat for fluidd or mainsail (press 4 for fluidd, 3 for Mainsail)
When you press B you will see an image like one posted here. Press Q and exit.
Open a new page on your browser and past the ip of your raspberry, if everything it's ok you will see the fluidd or mainsail webpage
Congratulations klipper it's correctly installed (don't worry about the error on mcu we will fix later)
Now we need to compile klipper and install in our main board. follow carefully next steps
open putty/terminal and connect to your raspberry, in home folder you find a Klipper folder
cd klipper
make menuconfig
if you see an error like
locale.Error: unsupported locale setting
simply copy this on terminal and press enter
export LC_ALL=C
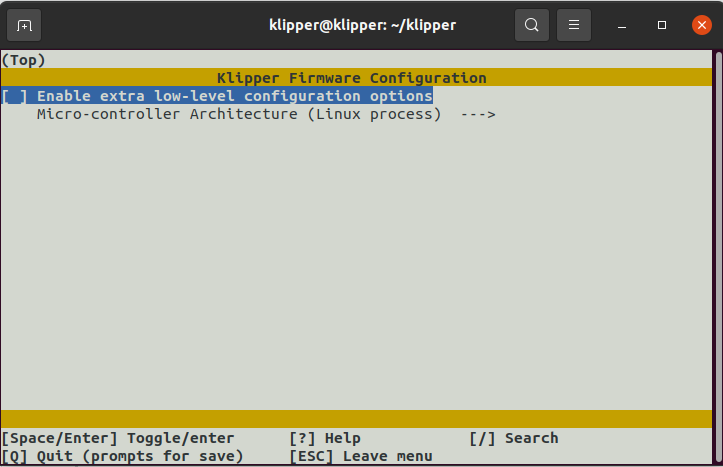
now you see this menù
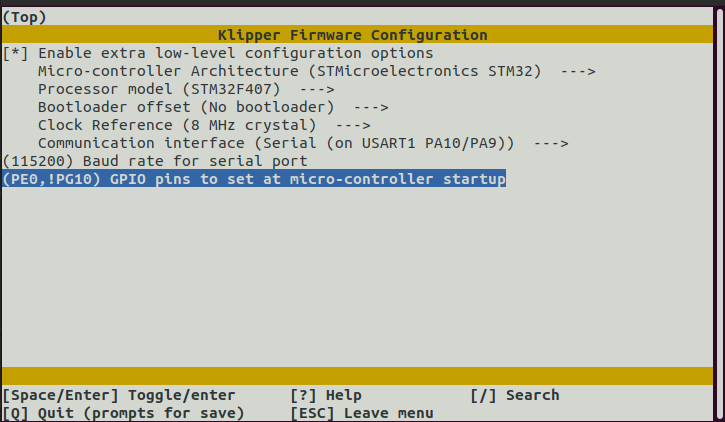
press space bar to enable extra low level configuration, press space bar on Micro-controller and select STM32 Press space bar on processor model and select STM32F407 Press space bar on bootloader offset and select No bootloader Press space bar on Communication Interface and select Serial (on USART1 PA10/PA9) Now on baud rate insert 115200 and last on on GPIO Pins insert PE0, !PG10
configuration must be like this one
Now press ESC and save
from terminal now write make press enter and wait. When it finish klipper.bin will be on out folder and will be around 24KB
