A hands on lab to explore native integration of Microsoft Power Pages and Stripe
- Navigate to https://dashboard.stripe.com/register, and set up a new Stripe account. Remember the password you used!
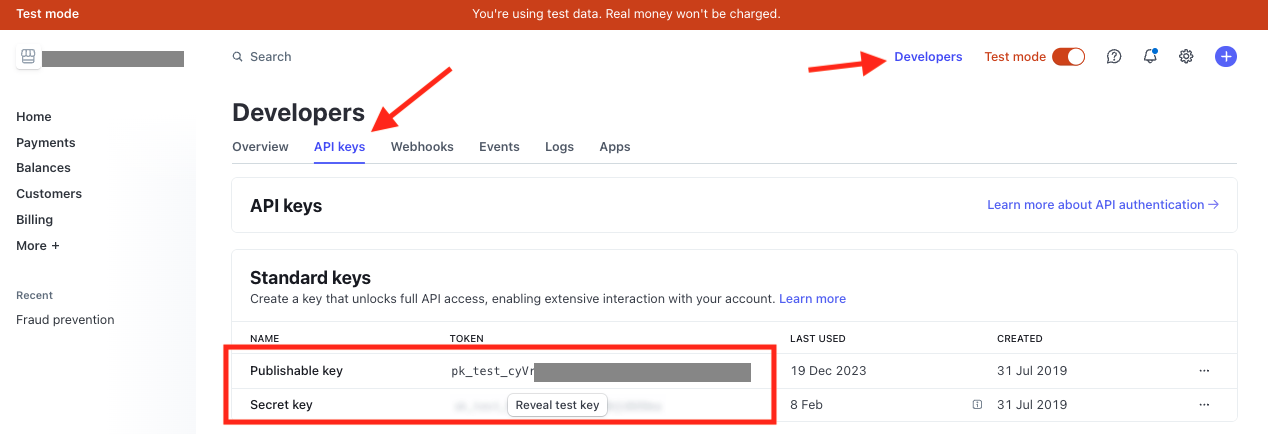
- On the Stripe dashboard, select the Developers section at the top left and the API keys tab, then under the Developers heading.
- There are two keys listed: a publishable key and a secret key (masked). You will need these in the next steps, so keep this tab open.
- Navigate to https://make.powerpages.microsoft.com/ and login using the credentials you created in the start of this lab or were provided with.
- After login, make sure that you select the environment as you login name, e.g. Crimson Canyon for the user crimson.canyon@powerlabs1.onmicrosoft.com
- Click the Get started button and follow the prompts to create the Power Pages site:
- Select any option or Skip the first step
- Choose a website template (for this Lab recommended to choose the Starter layout 1, Starter layout 2 or Starter layout 3)
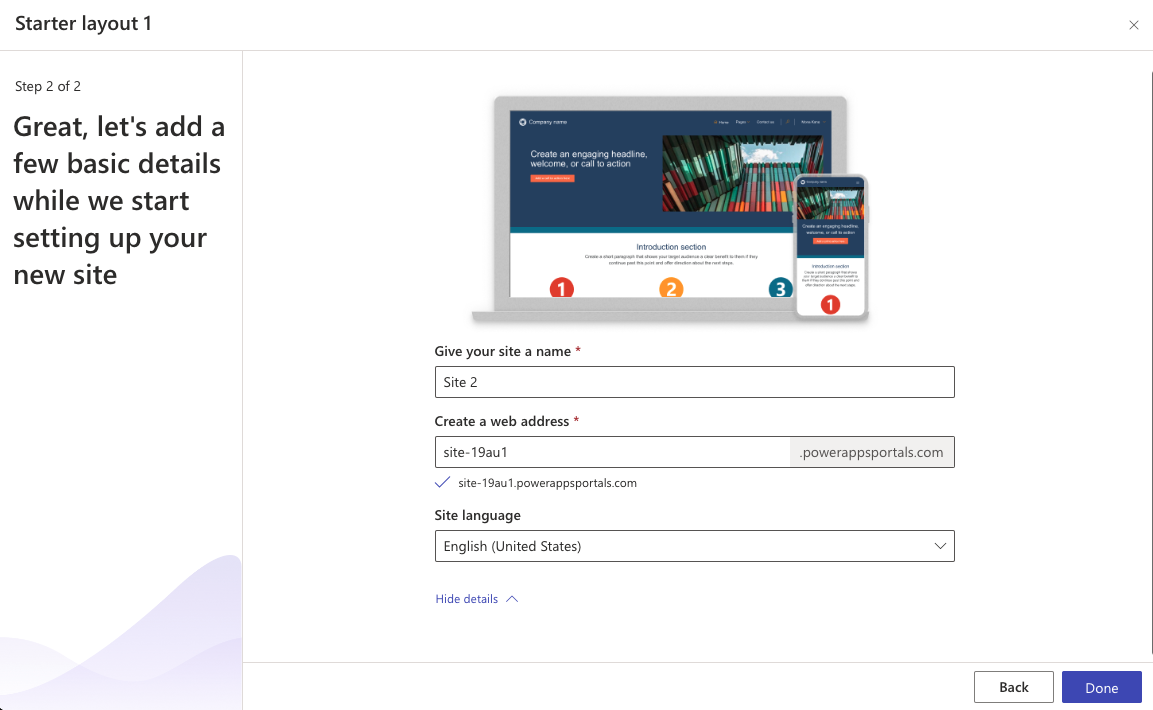
- Enter a unique name and domain for your site or leave the default values. Click Done to creat the site.
-
Once the creation of the site is finished, you will land in the Power Pages Studio.
-
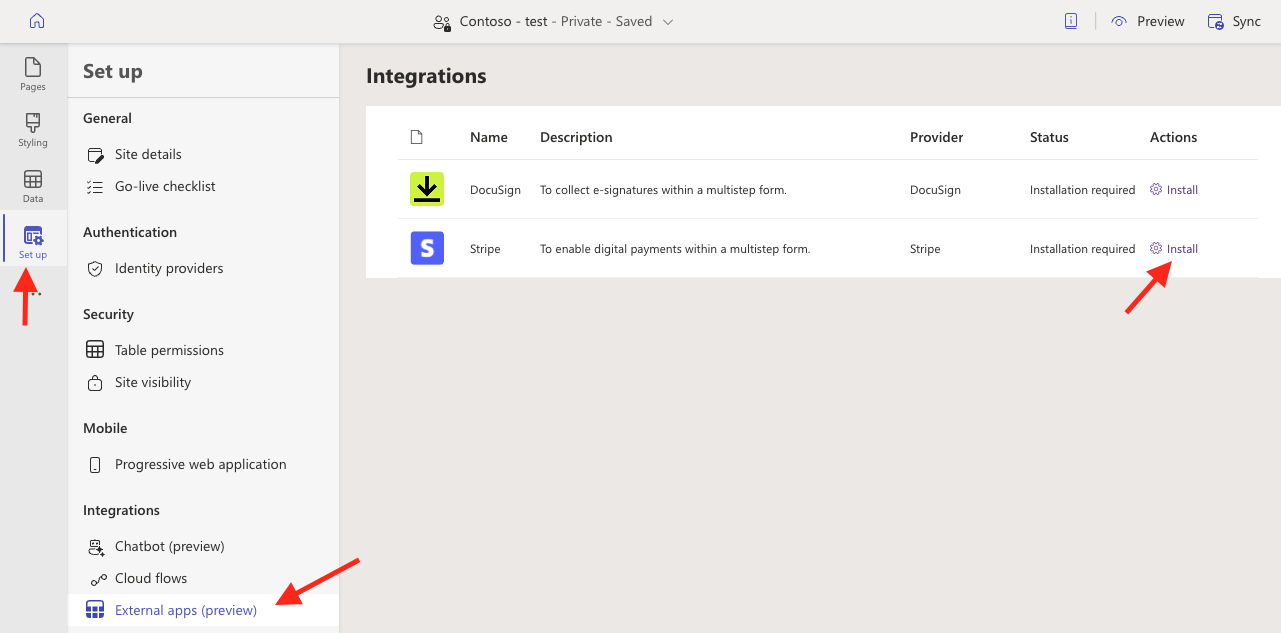
In the Power Pages Studio select Set up section on the left panel and then find the External apps (preview) section.
-
You will see 2 integrations available - DocuSign and Stripe. We are interested in the latter today, so select Install in the Stripe row below. Click Start installation in the pop up dialog to confirm and wait until it completes.
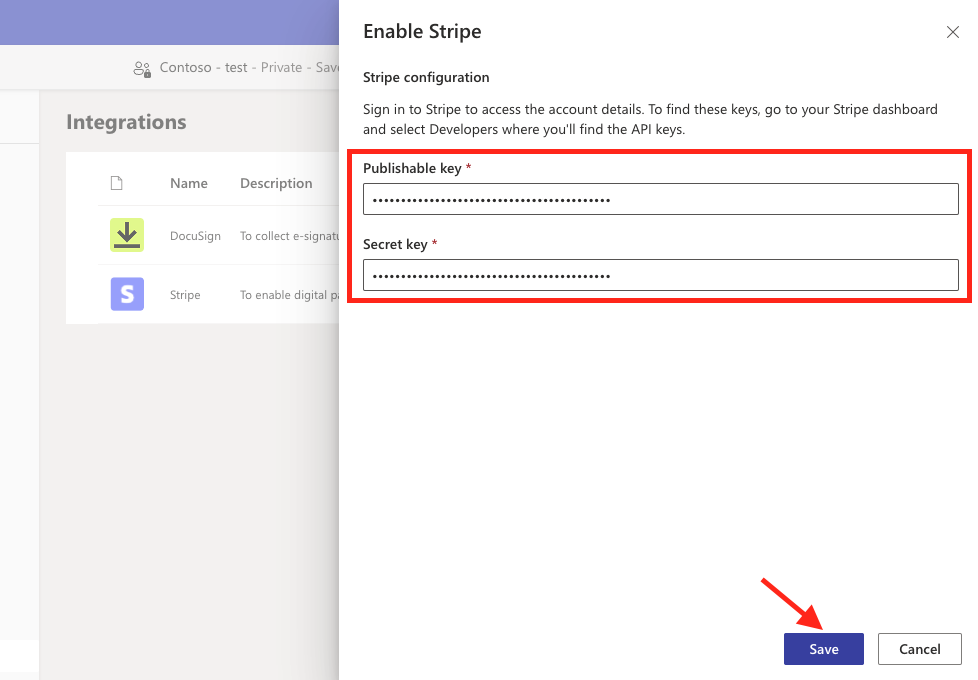
- Once Installing... status turned into Installed, click Manage button and enter Secret key and Publishable key from the Stripe test account you created earlier. Click Save to save the changes.
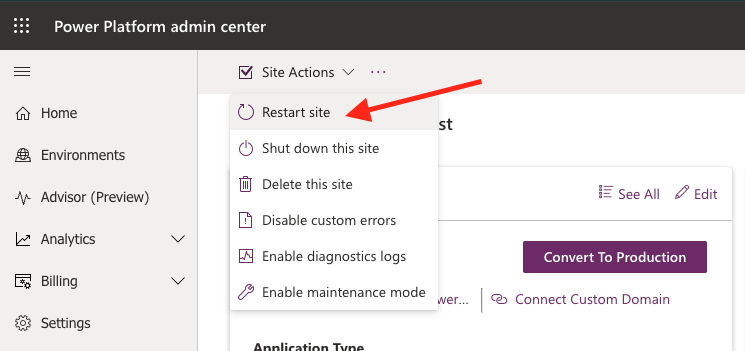
- In the Set up scroll down teh page and in teh section Admin actions click Open admin center. In the new tab opened, in the Site Action menu at the top select Restart site action.
Completion of this section is not strictly required to make the lab work. However, this is the best practice to create new objects (in the next section) in solutions.
- Go to the Power Pages home and select Solutions section. Create there a new solution and name it Power Pages Payments Lab or similar.
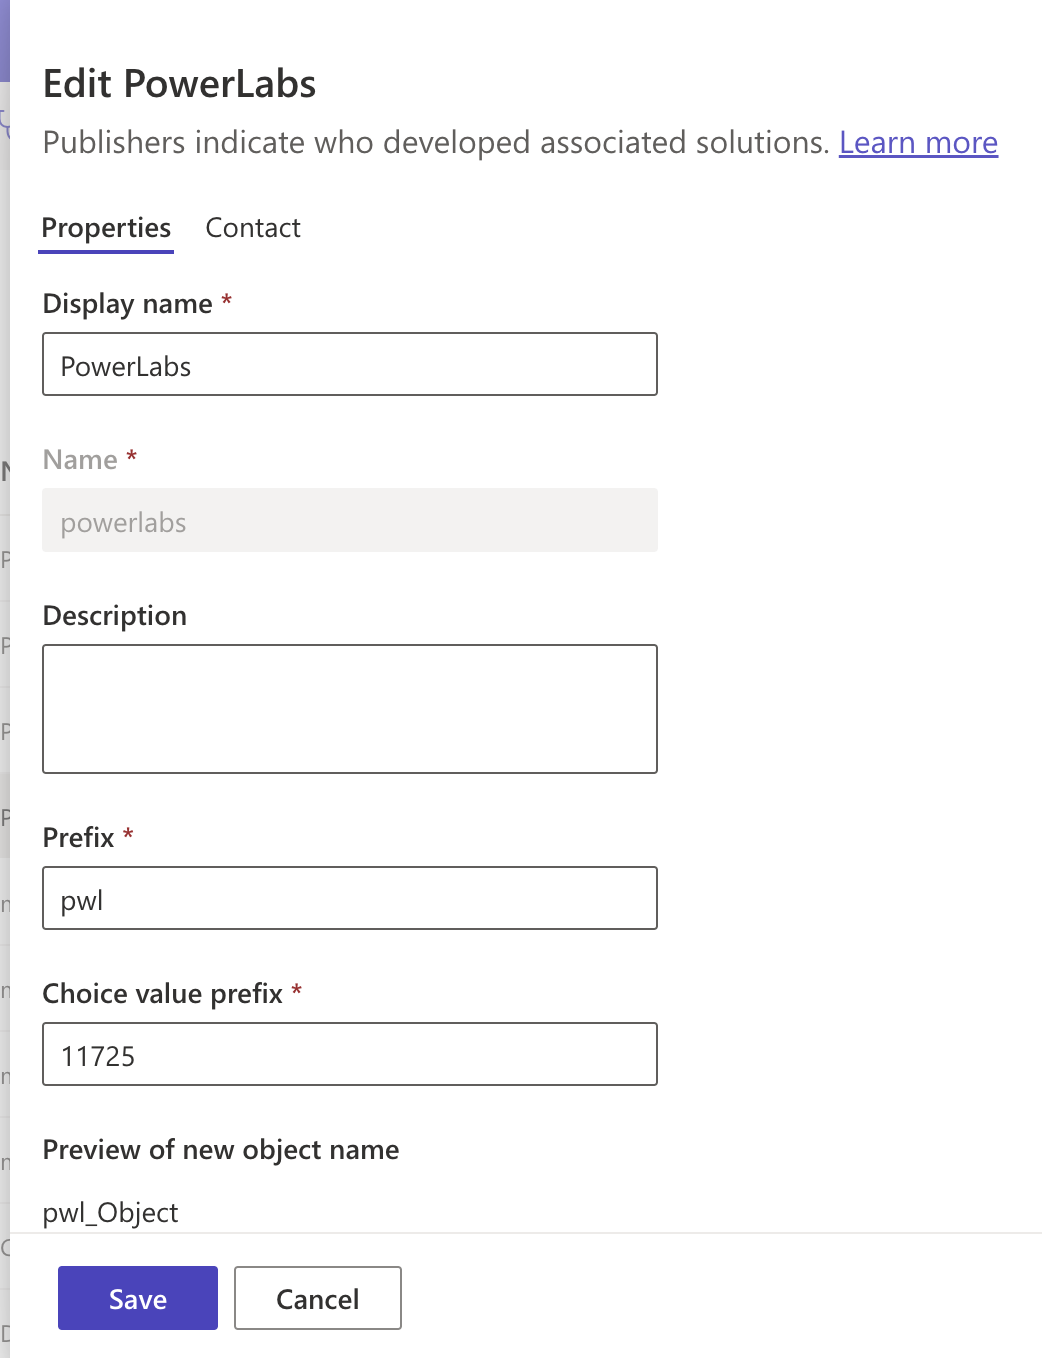
- You will be required to select or create a publisher as well. Create a new publisher and call it like your environment name, e.g. Amber Sunset and select a prefix, e.g. lab_
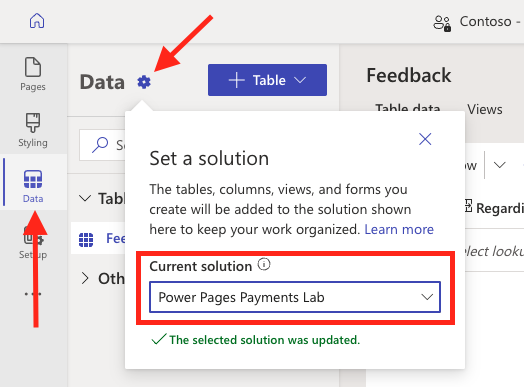
- Return to the Power Pages Studio of your site, select Data section on the left panel and click on the cogs icon next to the Data header. Select a predefined solution Power Pages Payments Lab. This will ensure that the changes made in the next steps are associated with that Dataverse solution and not the Default solution.
-
Click + Table button and select New Table to create a new table called My Order (or other name of your choice). Click Save to create the table.
-
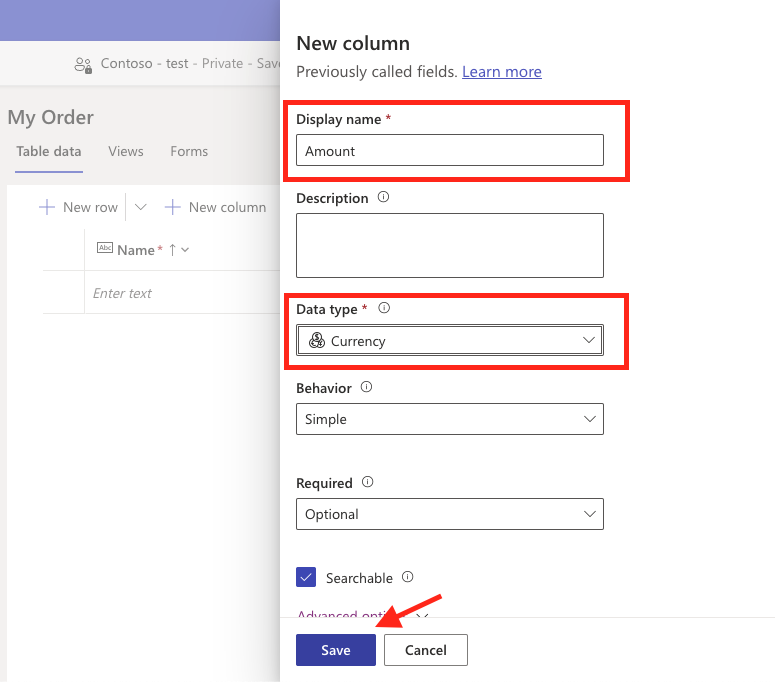
Select New column for the created table and add a new column with Display name Amount and of Data type Currency.
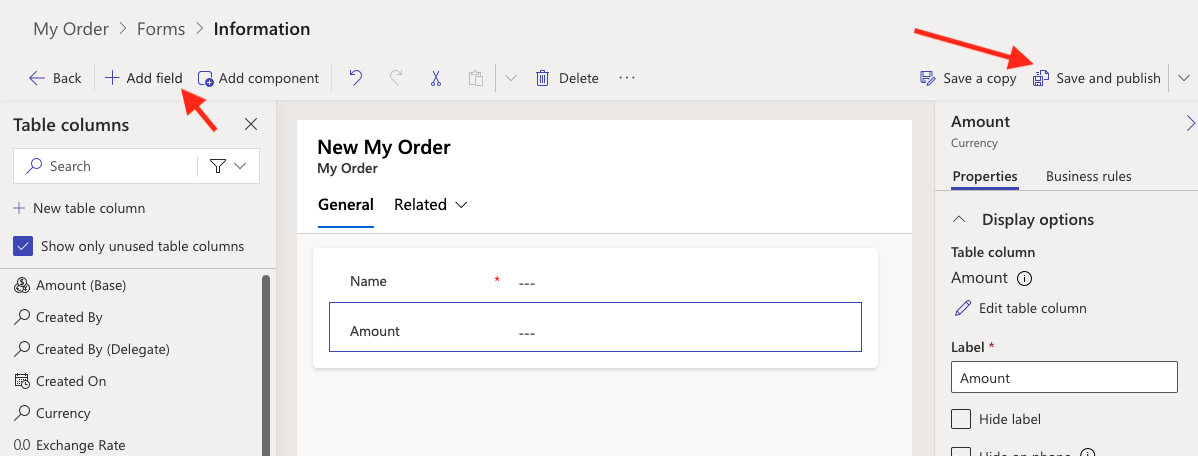
- On the Forms tab find the default Information form, and edit it. Click Add field and select the column Amount to add it to the form. Hide the Owner column. Click Save and publish to save the form and then click Back to edit the table Payments.
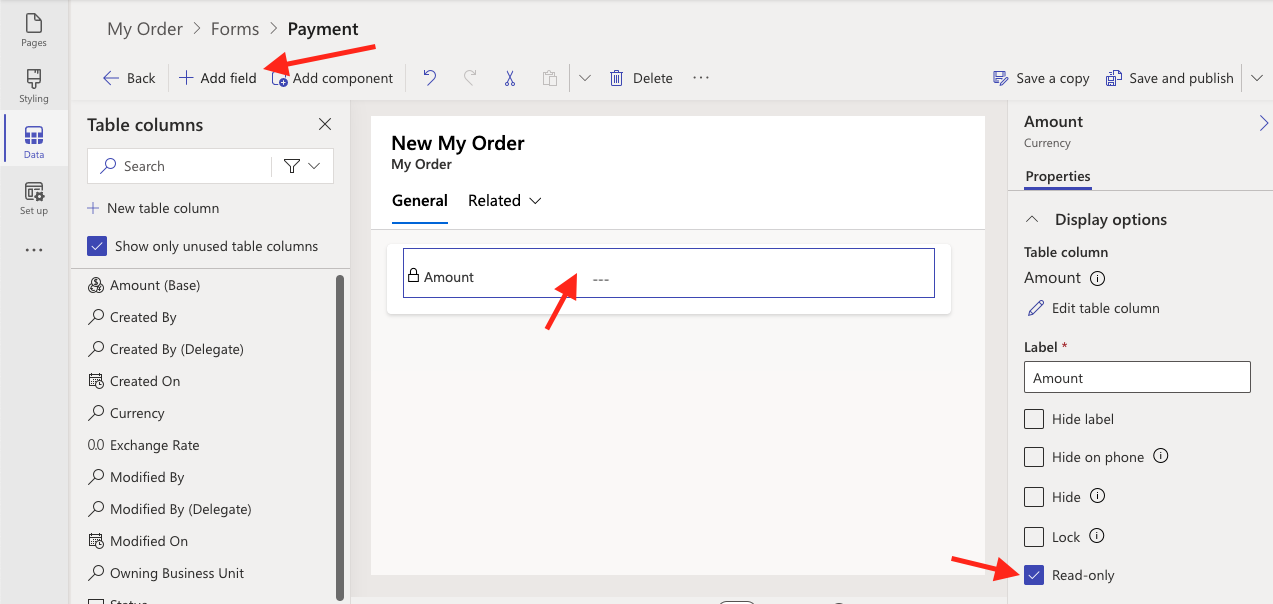
- Click New form and add a new form called Payment. Click Add field and select the column Amount to add it to the form. Hide the Name and Owner columns. Click Save and publish to save the form and then click Back to edit the table Payments.
This is the form where Stripe control will be inserted automatically by Power Pages platform!
- In the Power Pages Studio, click Sync button on the top right corner. This is necessary for the changes made in the previous section to take effect.
- Select Pages section in Design Studio and click + Page to create a brand new page. Name it Checkout or name of your choice. Leave the Add page to main navigation selected and click Add.
- On the new page select Multistep form component from the list of section components available. Name it Checkout or similar and click Done to save it.
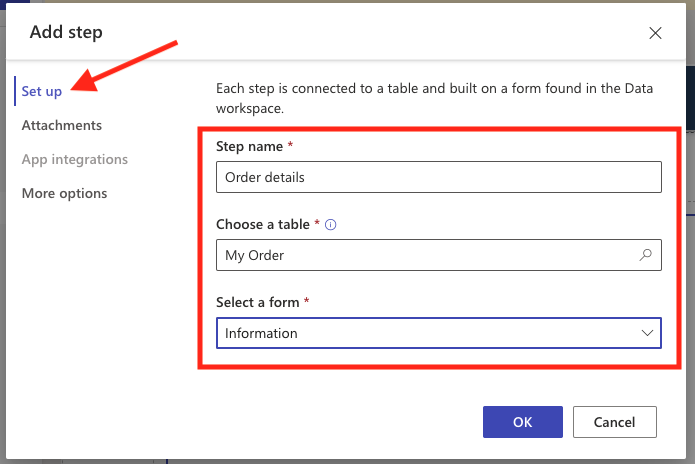
- On the added multistep component select + Add step and set the step properties:
- Step name: Order details
- Choose a table: My Order
- Select a form: Information
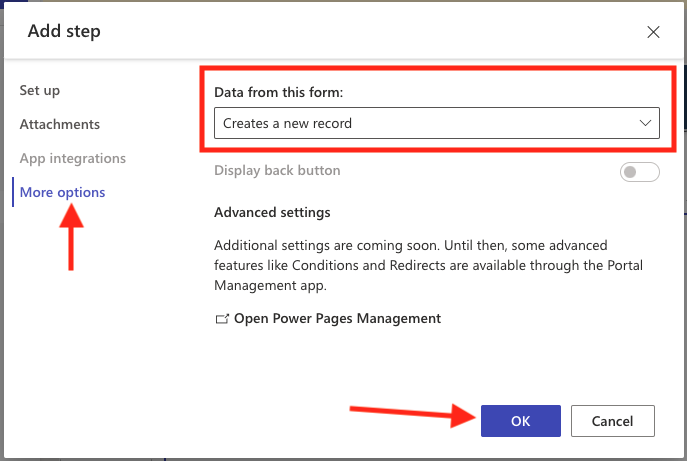
- Data from this form: Creates a new record (in the More options section).
- You may see a message Set the permissions on this form"with a button New permission available on the right. Click it and set the permission properties and save the record:
- Permission to: Create, Read, Update
- Roles: Anonymous users and Authenticated users are selected.
Please note, this lab is just a demo and doesn't authenticate users. In the real world scenario, you would need to remove "Anonymous users" from the permissions list. Leave it there for the purpose of this lab.
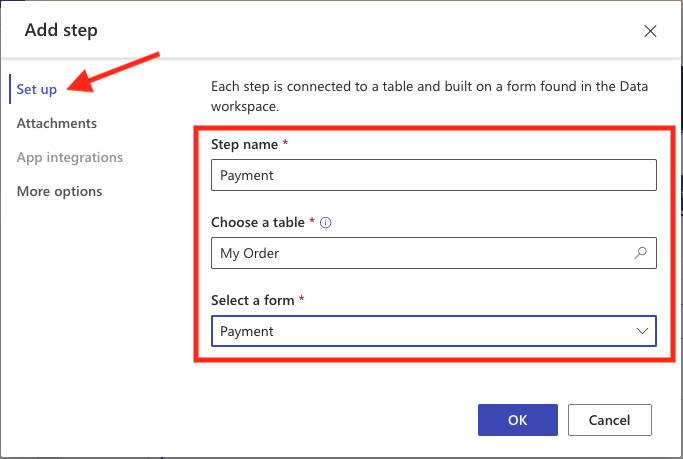
- On the Multistep component select + Add step to add another step and set the step properties and save the step:
- Step name: Payment
- Choose a table: My Order
- Select a form: Payment
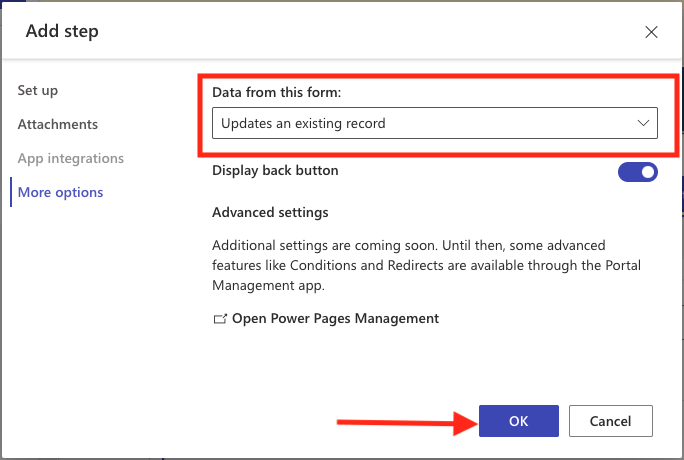
- Data from this form: Updates an existing record (on the More options section).
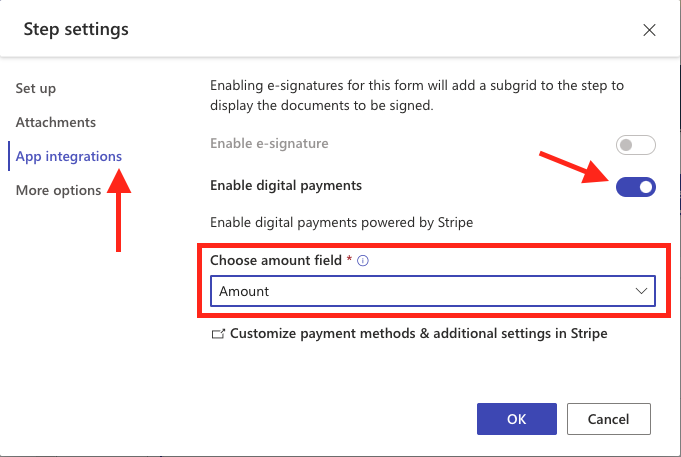
- Open the step settings again and on the App integrations tab select Enable digital payments. In the Choose amount field select the Amount filed and click OK.
- If the Enable digital payments option is disabled, make sure that you've done step #1 (Sync).
- If that was done and the option is still not available, you may need to return to https://make.powerpages.microsoft.com/ and click Admin center and restart the website.
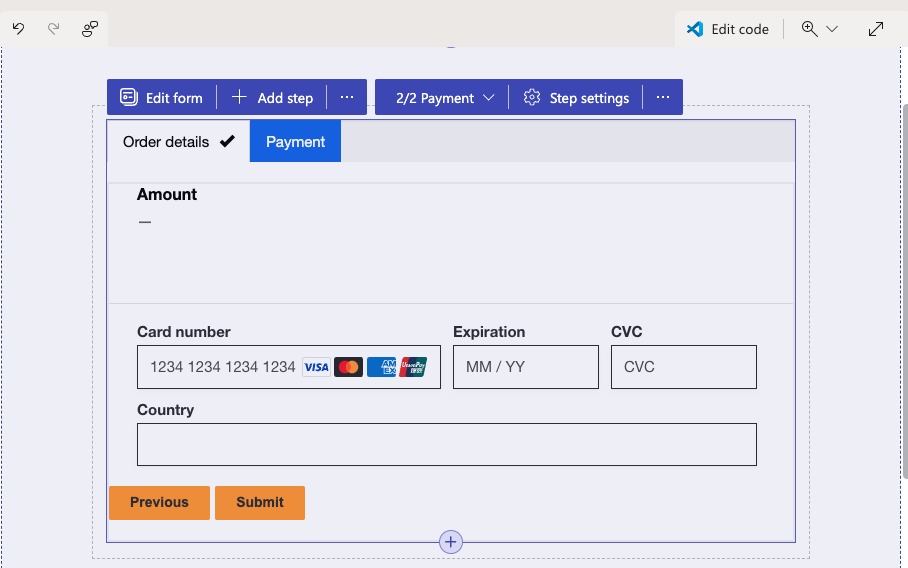
- Now you should see the Stripe credit card payments form appear on the newly created step, hooray!
- Click Preview button and then Desktop option to view the site preview in the new tab and navigate to the Checkout page.
If you see the You don't have the appropriate permissions. message, make sure that you have completed the permissions setup steps for the My order table and have Anonymous Users role selected
- Enter test information to validate that the integration works end to end:
- Name: John Smith or any string
- Amount: 100, or any amount greater than
0
- Click Next and enter the payment details. Please do NOT enter the real card details! While it will not create a charge, it's not a good practice for testing from the security point of view!
- Card number
4242424242424242(this is a test card number). - Expiration:
01/30(or any other future date) - CVC:
123(or any 3 digit number) - Other details as required
- Card number
If the page is displayed, but no Stripe form is rendered, go to Set up section, scroll down to Admin actions, select Open admin center link and then in the admin center on the top select Site Actions and Restart site. Wait for a minute or two and then try again previous step to access the payments page.
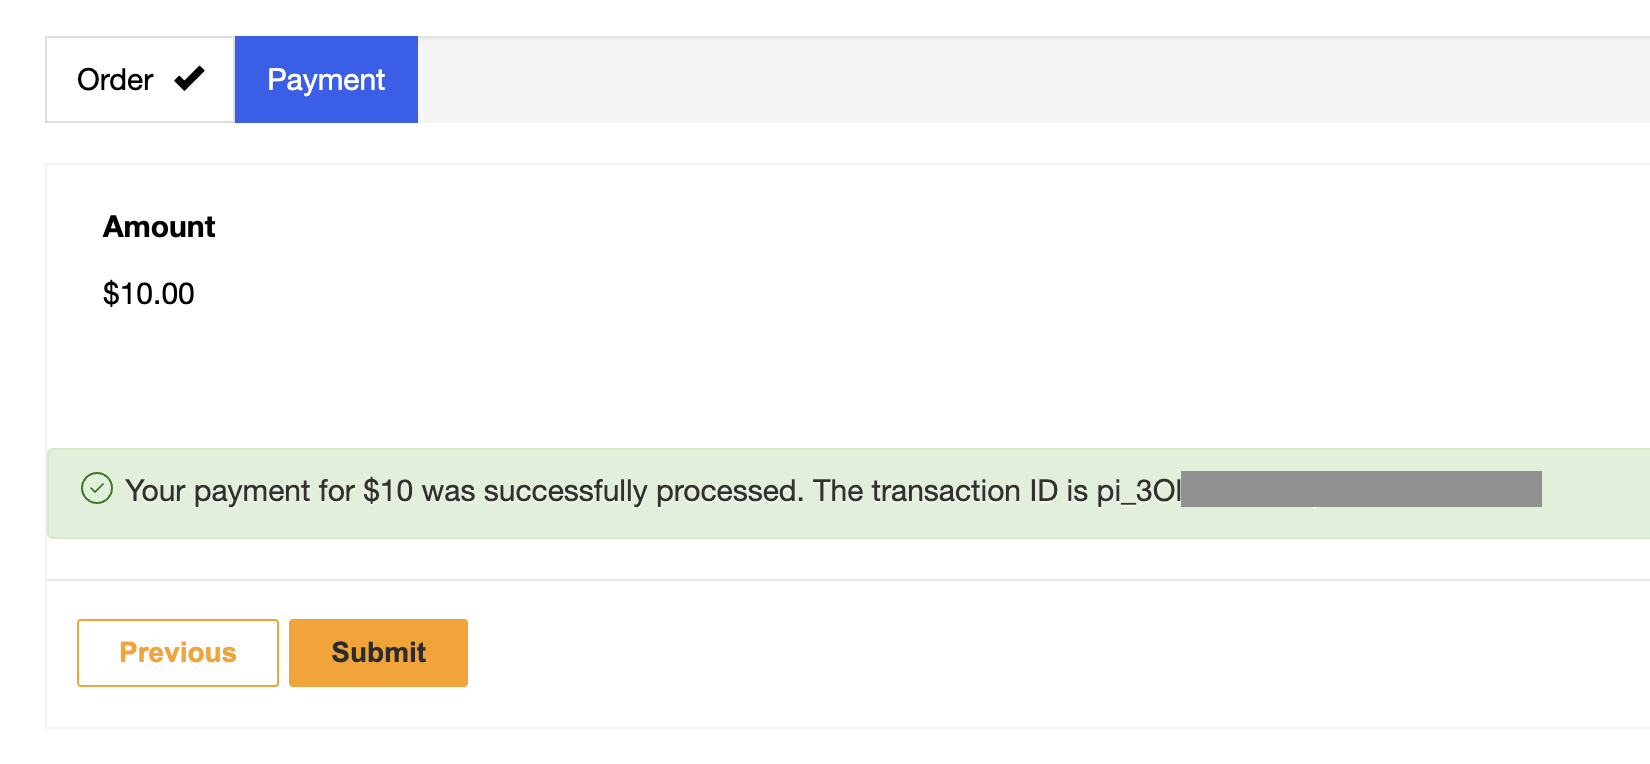
- Click Pay now and in a second or few you should see a message Your payment for ... was successfully processed. The transaction ID is ...
- Navigate to you Stripe account (which still may be open in your browesr tab) and select Payments section on the left panel of the Stripe dashboard. You should see a successful payment created a few seconds ago with the amount you specified.
- Click on the payment record and in the payment details page scroll down to the Events and logs section and examine the API request and responses and data that were initiated during this test. Note the pending Webhook requests!
Follow the steps defined in the original article: https://cloudminded.blog/2024/01/09/how-to-improve-stripe-payments-in-power-pages/

