Welcome to the Revenue training course for Java! This Git repo contains a skeleton project ready for you to clone. Over the next few days, we'll build it up to be a fully fledged Java/Spring API. The aim of this course is to get you familiar with the basics of Java, working with Spring and sending and receiving data through web requests.
The underlying theme of the app is that it acts as an API for doctors to access and store malignant cancer diagnoses, called screenings. Under the hood in the skeleton project is an in-memory database of about 500 cancer diagnoses taken from a well known dataset. This is the same dataset you'll be using in the AI hackathon at the end of your training. By the end of the course, you will be able to query this dataset and insert new records by using an API you built!
Sounds exciting!
This course is perfect for complete Java newbie's. If you have previous experience in development, this will act as a great refresher. If not, we'll get you up to speed on the basics of how a Java app works. Each day you'll perform a number of tasks to build the application. Before you start a task, you should watch the related YouTube videos listed to give you a bit of background and help you complete the task. But don't rely solely on the videos or the hints in this guide. There's a wealth of information out there on the Internet, particularly from sites such as Stack Overflow.
Some things we'll cover over the next few days include:
- Setting up you development environment.
- Working with Git to clone, commit, push and merge.
- Creating classes with variables, methods and interfaces and other Java stuff.
- Using design patterns to solve the issue of mapping our data to Java from the database.
- Building an API to GET and POST data to a database.
- Writing some basic SQL.
- Creating a front end for our app in Angular that interacts with our API.
Let's get started...
Some tools we'll be using today include:
- Git is used to store and manage our code. When we make a change, we want to commit it to Git so that it is saved somewhere safe. Others can then pull down our code and run or modify it. Throughout the course, we will be committing our code to our own private repository. To do this, we will create our own personal repository in GitHub and then push our skeleton project to it. At the end of each day, we'll push our code up to this repo.
- Intellij is the IDE we will be using to write and run our code. An IDE is our development environment for writing code. It's easy to use and contains everything we need to create and deploy Java applications.
- Java is the language we use to write our code. It is based around the idea of Objects. In our case, a patient that could potentially have a malignant cancer could be a
Patientobject who has a name, date of birth and gender, which make up the object. - Postman is a tool we can use to test our API. It allows us to easily send an recieve data. We will be using this starting from around Day 2.
Watch the below videos before you attempt the first task:
- What is Git - Overview of what Git is and why we use it.
- Git Hipster Analogy - Another way to think about version control systems.
- Basic Git Commands - Basics such as clone, push, pull & branch which you'll need.
- What is Java - Overview of Java.
- JRE & JDK - A bit more background on Java. Good to know...
- Creating a Basic Intellij Java Project - Another nice to know to get you familiar with Intellij. We'll be importing our project however.
- Packages - Classes are stored in packages. They help to logically organize our code.
- Variables - Variables are used in all programming languages to store data.
- Classes - Classes are a how we represent our data.
- Methods - These allow us to perform operations on our classes.
- Strings - Strings represent sentences and allow us to represent information.
With the videos watched, we can now move onto the fun part. What we'll be doing today is setting up our development environment, cloning this repo to our local environment and start creating some basic Java classes.
- Setup up Git on your local PC.
- Fork this Git repository to your personal GitHub account and then clone it to somewhere on your computer.
- Import the project into Intellij.
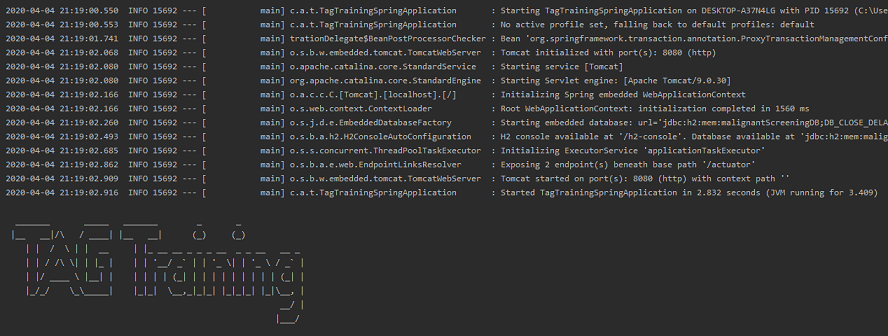
- Run the app. You should see a welcome message in the console screen.
Hints
- You can install Git for Windows to use Git on your laptop.
- A fork is just a copy of a Git repository that doesn't affect the original!
- The URL for your cloned version of this project should look like this: https://github.com/TAG-Training/revenue-java-training.git
- If you have any problems forking or cloning, you can simply download this project and run it locally.
- It's a good idea to have a dedicated development folder on your PC. Perhaps C:/development/projects...
- Import the project as a Maven project. We'll come to what Maven is later.
With the app up and running, we can now write some basic code. In our project, we want to represent patient's and their cancer diagnoses. We can do this using classes. Each new patient will be an object which is an instance of our patient class. These classes will contain multiple fields to represent the information we need. Read the hints for more info on how to correctly name and populate these objects.
- First thing first is to create a new branch in git for the code we're about to write.
- Create a basic class to represent a
Patient. Put this object in the patient package. Give it the following fields:- Name
- Id
- Date of Birth
- Gender
- Create another class to represent a
Screening. Again, store it in the screening package.- Screening Id
- Patient Id
- Date of Screening
- Malignant Result (True/False)
- Add a constructor to each class.
- Add getters and setters for each field.
- In the
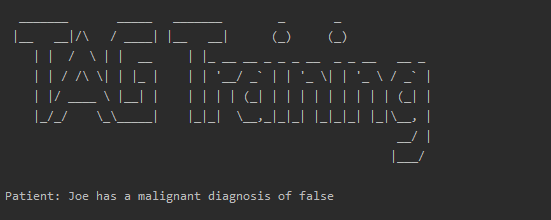
mainmethod in theTagTrainingSpringApplicationclass, create a new instance of each object using some dummy data. - Print out the patient's name and their diagnosis to the console using a
String.
- Change the
patientIdfield inScreeningto be an instance ofPatient. You will need to update the constructor, getters & setters. - Rerun the app and verify the same info is printed to the console.
- Update the patient's name using the setter on the
Patientclass. Verify the new name is printed. - Once everything's done, merge your changes into your main branch and push it up to GitHub!
Hints
- In most project you have a main branch and your own dev branch. Call the branch something identifiable, such as john_doe_dev, or day_1.
- Switching to a new branch is easy. Simply use
git checkout -b <branch> - Packages help logically organize our code. You can either create a package called models for both classes or better yet a new package for each.
- Naming is important in Java. i.e.
Patientclass goes into thepatientpackage. - ID fields are normally of type
Integer, i.e. 1, 2, 3... - Date's can be represented using the
LocalDatetype. - Gender can be easily represented using Enums. One is already provided!
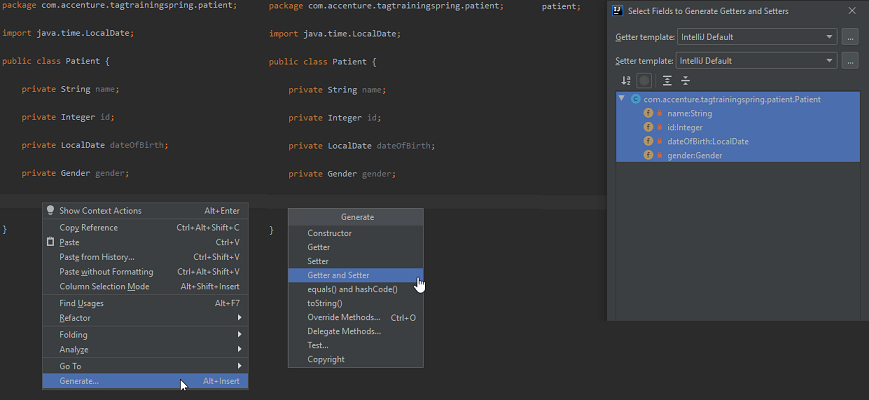
- Constructors, getters and setters can be automatically generated by Intellij to save a lot of typing! (See below)
That's it for Day 1!
Yesterday we focused on creating classes with some fields to hold our data. Today we will be exploring more of the features that Java provides to do some more intricate logic stuff with our classes.
Some of these Java things we'll cover include:
- Conditional Logic also known as if-else statements are used to make decisions if something is true or false.
- Loops give us the ability to iterate over these arrays and other collections to perform operations on them.
- Arrays allow us to store multiple objects together.
- Methods are a core part of classes in Java. They allow us to perform operations on our objects.
Again, watch the below videos before you attempt each of the tasks:
- Conditional Logic - What is conditional logic in Java.
- If-Else Statements - Most commonly used way of making decisions in Java.
- Logical Operators - We use logical operators to make decisions in our conditional logic. i.e. is 1 == 1, true.
- Switch - Similar to an if-else statement, but more appropriate in certain contexts.
- Arrays - Way of storing multiple objects in a group.
- Lists - A type of collection similar to an array but with additional functions.
- Loops - How to loop over a list of objects.
- For-each Loop - Handy way of looping over objects.
- Equality - For when you're trying to find a match between two objects.
- Null - Objects that have no data are null.
- Spring Intro - Watch just the intro to get an idea of what Spring is and why we use it.
- REST API - REST is what we use to send and receive information. In our case it will be screening results.
- Spring REST - Here's how to do it in Spring!
- Autowring and a short demo - The spring framework comes with handy Java annotations that reduce the amount of code we need to write.
- Spring Annotations - Bit of background on the annotations we will use. In particular,
@Autowired,@Serviceand@GetMapping.
We're going to be applying some of what we've learnt in the first few of the above videos to our project now. We use conditional logic to enhance some of the code we've already written. This can be used to prevent errors by checking if certain conditions are true. We can also leverage the power of collections. This allows us to process multiple objects, such as a list of Screening, at once.
Finally, we're going to add Spring to our project! This will allow us to make requests to our app from our browser/Postman using a URL and to get resources (like Screenings) back in response. This is known as a REST API. Again, there's a lot going on under the hood with Spring but we'll just be wiring up the basics. Spring is designed to be very easy to work with and provides a number of annotations. These are single lines of code starting with the @ symbol which do a lot of work for us.
Let's start...
- First things first, check your project from yesterday is still working (printing a patients screening result) and create a new branch in Git for Day 2!
- Create a new class called
ScreeningServicein the service package.- Give the class a default constructor.
- Add a method in the new class that accepts a
Screening&Patientas parameters. The method should return true or false depending on if the screening is for the specified patient.
- In your main class, instantiate the
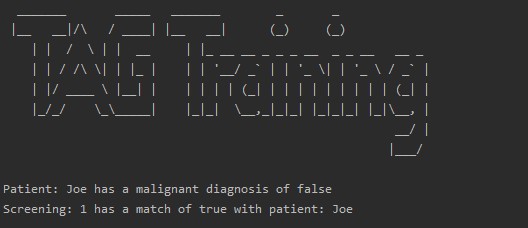
ScreeningSerivce. - Pass in a screening and patient and capture the result. With the result, print a message stating if the screening matches the patient or not.
- Create 2 or 3 new
Patientobjects - Also create a few corresponding
Screeningobjects for each patient. - Create a
Listof screenings and add each screening to that list. - Using a loop, iterate over the list of screenings and print out the patient's name and their screening result.
Now we're going to clean up our code by moving what we've written so far into separate classes.
- Start by creating a
ScreeningDatabase. - Add a new public method to this class to return a list of all the screenings. Move all the patients and screenings to this class.
- Update the
ScreeningServiceclass with a field (and its constructor) of typeScreeningDatabase. - Also give the
ScreeningServicea new method to return the list of screenings from theScreeningDatabaseobject it has. - In your main class, create a new
ScreeningDatabaseobject and pass it into theScreeningService. - Now in your main class, fetch the
Screeninglist from theScreeningService. - Remove any redundant code and hit play! Check the loop still works as it did in Task 2.
Extra points If you've finished the above, congrats! Here's one last challenge:
- Add a second method to the
ScreeningServiceclass that takes a name, loops over all the screenings and returns the matchingScreening. If no match is found, return null. - In your main class, call this new method to get a
Screeningback for a name. - If the
Screeningyou get back is not null, print the name and the screening result. Else, print a message stating that no screening was found.
Finally, we're going to leverage Spring to Autowire our Service and Database classes! This mean that we no longer use the new keyword to create our utility classes, such as the database. Instead, Spring makes them available to us to use on-demand. These are called beans (for some reason).
However, we have to first do a little bit of prep work to our code. This will allow us to fully leverage Spring and to start making requests from our browser. Our first task is to create a controller. This will take requests from our web browser and gives us back a result. In our case we want to get a screening result for a patient.
Let's begin...
- In the screening package, create a new
ScreeningControllerclass. Annotate it with@RestController. - Update the
ScreeningDatabaseclass to be a bean by adding the@Componentannotation. - Autowire the
ScreeningDatabaseinto theScreeningServiceclass. - Update the
ScreeningServiceto itself be a service bean using the@Serviceannotation. You can also remove it's constructor. - Now, autowire the
ScreeningServiceinto the newScreeningController. - Now add a new method to the
ScreeningControllercalled getScreenings which returns a list ofScreening. This is our first API method which returns all the screenings we have. - Update this new method to call the
ScreeningServiceget screenings method and return the list ofScreening. - Add the Spring
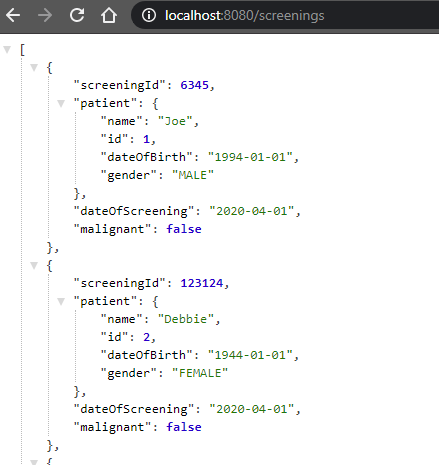
@GetMapping("/screenings")annotation to our new method. This is our URL to access the endpoint. - Run the Spring app and test it out! Try hitting
http://localhost:8080/screeningsfrom Postman or Chrome and all the screenings should be returned in JSON. - Don't forget to merge your Day 2 changes into your master branch and push to GitHub!
Hints
- Your main class by the end of task 4 should only have the line
SpringApplication.run(TagTrainingSpringApplication.class, args); - Install a JSON formatter in Chrome to prettify your JSON.
- Spring uses a library called Jackson to automatically formot our objects as JSON.
For the final day of Java training, well be adding some additional features to our API to retrieve and create screenings. To do this, we'll be leveraging the power of Spring. Spring has many powerful tools for manipulating data, particularly for creating APIs. The annotations it provides (some of which you used yesterday) will allow us to easily read and insert data. We'll also be implementing a simple Design Pattern to access our data, as well as implementing an interface and doing some basic interactions with a database using SQL.
In the background of our Spring app is a pre-populated, in-memory database of screenings. This is what we're going to be interacting with today to get and store data through our API. The database contains about 500 screenings with each one being uniquely identified by an id. This id belongs to a single patient. Our Spring app interacts with the database using the power of SQL. We'll only have to write a few lines to get things up and running.
If you want to play around with the in-memory database, you can! To do so:
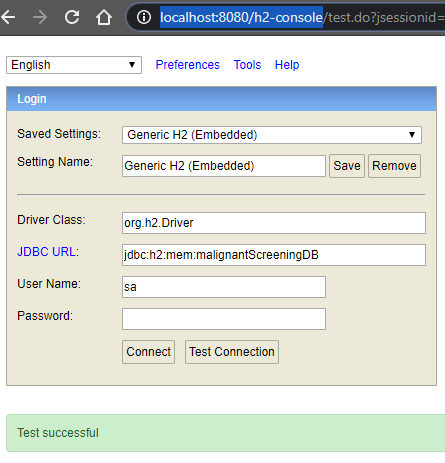
- Login to the database using the following url: http://localhost:8080/h2-console
- You should see the following login form. If the box for JDBC url isn't populated with the below, simply copy
jdbc:h2:mem:malignantScreeningDBin and then connect.
- Once in, click the
SCREENING_RESULTScolumn on the left and start typing some SQL into the form! The example below lists all the screenings in the database. Don't worry about breaking anything. Whenever you restart the Spring app, the DB is reloaded from scratch.
Below are several videos to watch related to Spring, Maven, HTTP, API's and databases, all of which we're going to cover in the tasks for today:
- Maven - Maven is what we use to manage dependencies in our project. Lombok is one of these.
- Lombok - Lombok reduces the amount of repetitive code we need to write. Such as getters/setters and even constructors.
- JSON - JSON is a way of formatting our objects in a standard format so they can be used by other programs. This is useful in our case when we want to send a screening to our frontend!
- Design Patterns - Design patterns are proven coding solutions to common occurring problems in software design. We'll be using the DAO (Data Access Object) pattern to get our Screenings from a database, map them to our Java object and send them back to the client.
- Interfaces - Part of implementing our DAO requires creating an interface. This is like a Java contract which is implemented by our classes.
- What is CRUD - Acronym for Create, Read, Update and Delete used commonly with APIs. In our case we are going to Read and Create screenings. Link also contains some good examples of JSON and how it's used in CRUD operations.
- Intro to Databases/SQL - We'll be writing a small bit of SQL to get data from our local database.
- SELECT statements in SQL - SELECT's are used to GET the data we want from the database.
- INSERTS statements in SQL - INSERT's are used to add data to a database.
- Exceptions - Java throws exceptions when it hits a problem. One of the problems we can face in our app is no data existing for a particular patient when we run some SQL. We can catch these runtime errors and handle them cleanly in our program using exception handling.
Our first task will be to update our existing Screening class with the 30 odd fields that exist for a malignant screening in our data set. Up until now, we've just had 4. As you can see from the file, which represents malignant screenings for a number of patient's, there are quite a lot of fields we will need in our class! If we were to write (or generate) a getter/setter for each field, the class would run to 100's of lines.
To get around this, we can use a code generation tool called Lombok. Lombok will create getters/setters on the class at runtime, saving us from having to explicitly write them. Now instead of having a bloated class file, we simply have Lombok do all the work using 2 simple annotations at the top of the class!
Let's do this now:
- Install the Lombok plugin for Intellij and enable annotation processing.
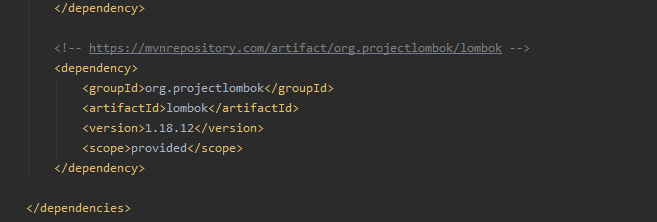
- Now add the Lombok dependency to the pom.xml so we can use Lombok in our project.
- In the
Screeningclass, delete every field and constructor. - Copy the pre-made fields from here and paste them as fields into your empty
Screeningclass. - Now add the Lombok
@Getterand@Setterannotation to theScreeningclass. - Do the same in the
Patientclasses, except use the@Dataannotation. Delete the existing explicit getters/setters/constructors as they are not needed anymore.
Now we just need to clean up our code to factor in our changes to the Screening class!
- We deleted the constructor earlier from the
Patientobject. Add a LombokAllArgsConstructorannotation in addition to the@Dataannotation to replace it. - Delete the ScreeningDatabase class. We're going to use the in-memory database in the next task to replace this.
- Update the
ScreeningServiceisPatientScreeningmethod to compare theScreeningid to thePatientid using equality. Notice that we are comparing a primitive to a class! - In the same class, up the
getScreeningsmethod to returnNullfor now. - Run the app and check there are no errors.
Our objects should now be wired with Lombok! The amount of what is called BoilerPlate code has been significantly reduced and our classes look much cleaner. Next, we need to populate our Screening fields with data from the in-memory database!
We'll do this now in Task 2...
Hints
- We just need to do 2 things to setup Lombok in Intellij. That is enable annotation processing in settings and add the Lombok plugin for Intellij.
- You can find the Maven dependency for Lombok here https://mvnrepository.com/artifact/org.projectlombok/lombok/1.18.12. Simply copy and paste this into your dependency section in your pom.xml (Project Object Model) file.
Now we're ready to implement the population of screenings from our local database. Running in the background of our Spring app is an in memory database with 100's of screenings. What we're going to do now is implement a few changes so that we can get this data!
First we need to create our contract for accessing the Screening data from our local database.
- Create a new interface
ScreeningDaoin the screening package. - Give the interface 2 methods.
- Get a
Screeningfor a patient id. - Get all the
Screenings.
- Get a
- Create a new class called
ScreeningDaoImplthat implements theScreeningDao(can use Intellij again to generate methods). Wire it up as a Spring bean. - Lastly, delete the
ScreeningSerivcegetScreeningsmethod. We're now just going to use our DAO above to get data. - Lastly, lastly, replace the
ScreeningSerivcewithScreeningDaoImplupdate any references. - Press play and check everything is still working!
Now we're going to write some SQL to get screenings from the local database.
- First autowire the
JdbcTemplateBean into ourScreeningDaoImpl. This bean is provided by Spring to easily execute our SQL. - Uncomment the class
ScreeningRowMapper. This was disabled up until now as the Screening class didn't have the correct fields we needed to map. - Create a new String to represent an SQL statement to get all the fields from the table screening_results.
- Add this line to your method which will use the JDBCTemplate to attempt to execute your SQL you just wrote and return a list of
Screenings. - Do the same for a single patient id. Use this Java code to execute your SQL to return just a single
Screening. - Update the
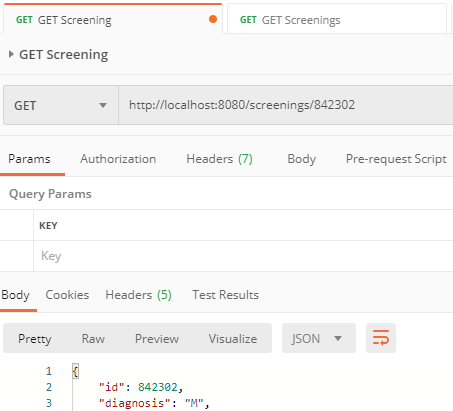
ScreeningControllerwith a new endpoint to accept a single patient id and return the Screening from the DAO using the above method. You can use the@PathVariableannotation in the method signature. - Run the app and check that both the endpoints are now working!
To Test the Endpoints: Try a patient id (from the data set) that does exist and one that does not. You should get an error for the one that does not exist. This is an exception and we will be updating our code to better handle this later. Also, try the endpoint to get all Screenings. It should return every Screening from the database as one big blob of JSON.
Hints
- Intellij can implement the methods from an interface automatically for you. Click the red ballon after you have added the
implements ScreeningDaoline to theScreeningDatabaseand click Implement Methods. - The
ScreeningRowMappermaps the SQL screening result to our JavaScreeningobjects.
In the previous task we selected, or Read, screenings. Now we are going to Create them.
- Add a new method signature to the
ScreeningControllerthat's purpose is to update a screening. - Give it an annotation of
@PostMapping("screenings"). - Also give it a
@RequestBodyofScreening. This means that we expect a JSON version of a screening to be sent in the request to our app. - Update the
ScreeningDaowith a new save method. It should take aScreeningas a parameter. - Implement this method in the
ScreeningDaoImpl. Using thejdbcTemplate.update(), write SQL to insert a new row intoscreening_resultswith the valuesid,diagnosis,symmetry_meanandgroup_id.
Now we're ready to send some JSON to our new endpoint!
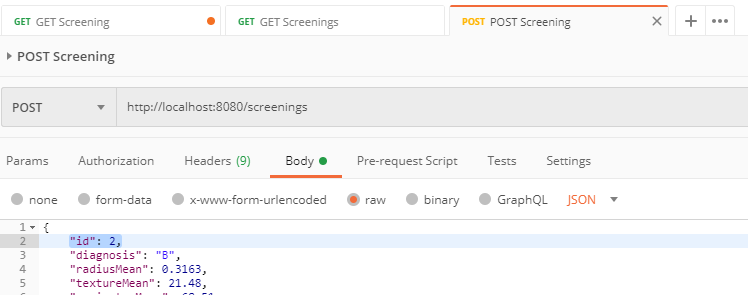
- In PostMan, create a new request with a method type of Post.
- Get a JSON
Screeningfrom the single screening endpoint and paste it into the Body -> raw JSON tab of the request in PostMan. - Modify some of the values on the request, particularly the screening id.
- Send it and verify your new screening exists by fetching the screening for the new patient id.
That's it, you've now created an API using Spring!
For our final task, we're going to implement a small bit of exception handling. This is to catch errors in our Java program when we don't get any results back after running our SQL.
- In the
ScreeningDaoImplget for patient id method, implement an empty try/catch block. - Wrap your
jdmbcTemplate.queryForObject()code in the try block. - In the catch block, you want to catch the Exception type
EmptyResultDataAccessException. - Print a helpful message in the catch block.
For extra points, you can implement logging! Logs are what we analyze on live systems to see where errors occurred.
- At the top of the
ScreeningDaoImplclass, add the annotation@Slf4j. This is our logging library. - In the catch method, replace the message with
log.info("..."")for example. - Run the app and try a patient id that doesn't exist. Verify the log message shows on the console output.
Done! We have now implemented C and R from CRUD in our Screening API.

