-
Create a socksifier service - transparent firewall-based redirector of TCP/IP connections to a SOCKS-proxy server
-
Support platforms:
- macOS, FreeBSD and OpenBSD with PF
- Linux with nftables or iptables
-
IPv6 stack support
-
Maintain simple configuration structure as INI-file
-
Support basic SOCKS authentication methods
-
Password encoding (obfuscation) in configuration files
-
SOCKS proxy chains
-
Daemon mode
-
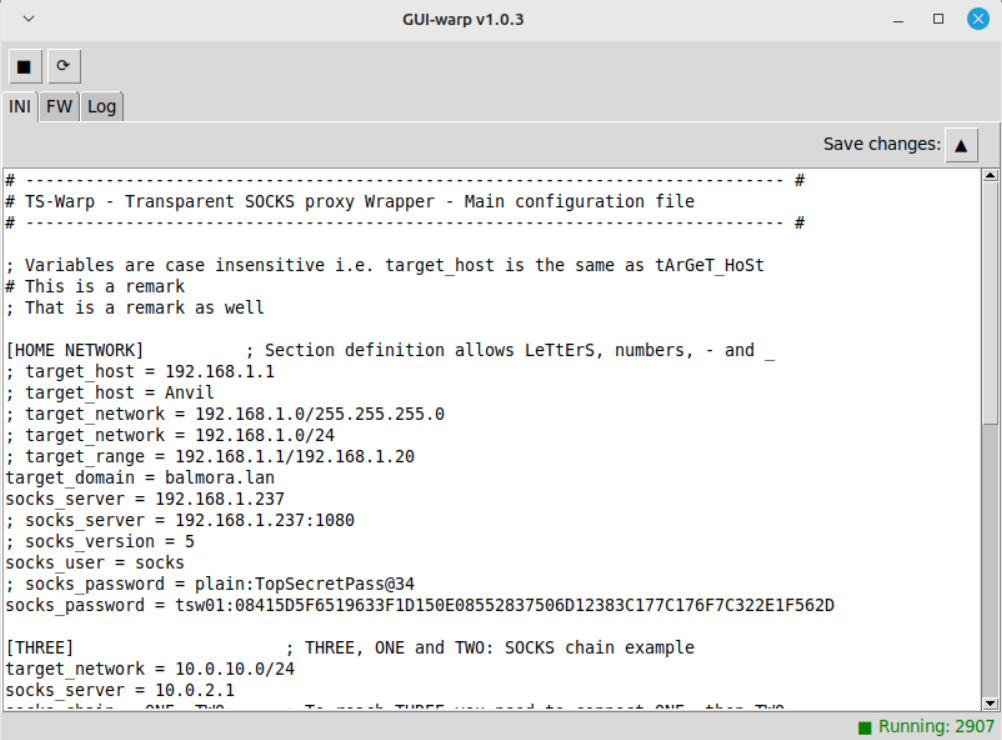
Front-end UI
-
Installation script
-
Documentation
-
UDP support
-
Remote names resolution using NS-Warp
-
(optional) HTTP proxy
-
SOCKS workload balance modes:
Failover/Roundrobin/None -
Implement SOCKS-server with support of hostnames in requests
See it here
-
Download TS-Warp sources and unarchive them
-
Or clone the repository running
gitin a terminal:$ git clone https://github.com/mezantrop/ts-warp
Using terminal, in the directory with TS-Warp source code run as the normal user:
$ makeTypically, installation requires root privileges. Below we use sudo to achieve the goal, but on some operating
systems you may need to invoke su instead:
$ sudo make install cleanThis installs all the files under the /usr/local tree and after that cleans source codes from object and temporary
created files. If a different installation path is required, set PREFIX:
$ sudo make install PREFIX=/path/to/installBased on <PREFIX>/etc/ts-warp.ini.sample file create <PREFIX>/etc/ts-warp.ini to suite your SOCKS configuration.
For example:
$ sudo cp /usr/local/etc/ts-warp.ini.sample /usr/local/etc/ts-warp.ini
$ sudo nano /usr/local/etc/ts-warp.iniOptional. Edit <PREFIX>/etc/ts-warp.sh to customize PID-, LOG- and INI-files location. For example:
$ sudo nano /usr/local/etc/ts-warp.sh-
On macOS and *BSD to configure the packet filter create
<PREFIX>/etc/ts-warp_pf.confbased on<PREFIX>/etc/ts-warp_pf.conf.sample. For example:$ sudo cp /usr/local/etc/ts-warp_pf.conf.sample /usr/local/etc/ts-warp_pf.conf $ sudo nano /usr/local/etc/ts-warp_pf.conf
-
On Linux. Create
<PREFIX>/etc/ts-warp_nftables.shor<PREFIX>/etc/ts-warp_iptables.shusing as templates<PREFIX>/etc/ts-warp_nftables.sh.sampleor respectively<PREFIX>/etc/ts-warp_iptables.sh.sampleto configure firewall. For example:$ sudo cp /usr/local/etc/ts-warp_nftables.sh.sample /usr/local/etc/ts-warp_nftables.sh $ sudo nano /usr/local/etc/ts-warp_nftables.sh
or
$ sudo cp /usr/local/etc/ts-warp_iptables.sh.sample /usr/local/etc/ts-warp_iptables.sh
$ sudo nano /usr/local/etc/ts-warp_iptables.sh
-
The helper script
<PREFIX>/bin/bin/ts-warp_autofw.shmakes and prints out sample firewall configuration based onts-warp.inicontents. It can be used to populate contents ofts-warp_pf.conf,ts-warp_iptables.shorts-warp_nftables.sh
There are two predefined sets of example firewall configuration files: general and special.
Simple general rulesets redirect all outgoing TCP traffic through TS-Warp, which in it's turn dispatches it to SOCKS
servers or to the destination targets. More complex special firewall configuration contains rules to only redirect
TCP traffic to TS-Warp that requires to be soxified. By default, to minimize system workload, make installs
special firewall rulesets, but it is possible to switch between both options using:
$ make examples-specialor
$ make examples-generalThen install the selected configuration examples:
$ sudo make install-examplesSpecify custom PREFIX if other the default /usr/local/etc directory is desired for the configuration files.
You can control, e.g. start, stop ts-warp daemon using ts-warp.sh script. Under root privileges or sudo run:
# <PREFIX>/etc/ts-warp.sh start|stop|reload|restart [options]
# <PREFIX>/etc/ts-warp.sh status
For example:
$ sudo /usr/local/etc/ts-warp.sh start
$ sudo /usr/local/etc/ts-warp.sh stopAll the ts-warp command-line options can be listed using $ ts-warp -h:
Usage:
  ts-warp -i IP:Port -c file.ini -l file.log -v 0-4 -d -p file.pid -f -u user -h

Version:
  TS-Warp-1.X.Y

All parameters are optional:
  -i IP:Port        Incoming local IP address and port
  -c file.ini       Configuration file, default: /usr/local/etc/ts-warp.ini

  -l file.log       Log filename, default: /usr/local/var/log/ts-warp.log
  -v 0..4           Log verbosity level: 0 - off, default 3

  -d                Daemon mode
  -p file.pid       PID filename, default: /usr/local/var/run/ts-warp.pid
  -f                Force start

  -u user           User to run ts-warp from, default: nobody

  -h                This message
ts-warp.sh respects ts-warp daemon options. For example, to temporary enable more verbose logs, restart ts-warp
with -v 4 option:
$ sudo /usr/local/etc/ts-warp.sh restart -v 4ts-warp understands SIGHUP signal as the command to reload configuration, SIGUSR1 to display working configuration
and clients connection status and SIGINT to stop the daemon.
Use ts-pass to encode passwords if requred. See examples in ts-warp.ini
The GUI front-end application to control ts-warp daemon can be installed from the gui directory:
$ cd gui
$ sudo make installOptionally. Set PREFIX, to use a different installation target in the make command above:
$ sudo make install PREFIX=/path/to/installTo start the GUI run:
$ sudo -b <PREFIX>/bin/gui-warp.pyNote, Python 3 interpreter with tkinter support is required to run the GUI frontend.
Not so early stage of development, yet don't expect everything to work properly. If you have an idea, a question, or have found a problem, do not hesitate to open an issue or mail me: Mikhail Zakharov zmey20000@yahoo.com
Many thanks to contributors of the project
