Welcome to the Datadog documentation repository. The markdown stored in this repo is published to the Datadog documentation site using hugo, a static website generation tool.
Contributions are encouraged! If you notice something on one of the pages that needs an edit, open a pull request in this repo for the documentation team to review.
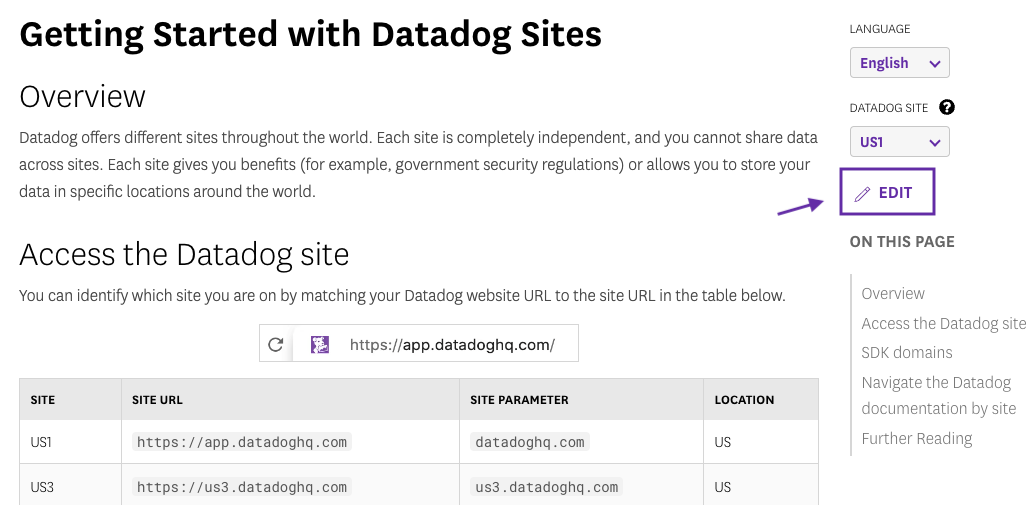
Most pages on the documentation site feature an Edit button that sends you to the source file in this repo. You can make an edit straight from the GitHub website!
For more information on contributing, see the contribution guidelines.
Note
The documentation build is only available to Datadog employees.
-
Install Node / npm (node
>=14.16.0) -
Install Python3 (you can also use pyenv)
-
Install Go (at minimum,
go version1.12) -
Install yarn:
npm install -g yarn -
Download the documentation repo
git clone https://github.com/DataDog/documentation.git
Inside documentation/ folder, create a Makefile.config file from the Makefile.config.example
If you are a Datadog employee, add your GitHub personal token
To run the documentation site locally, execute:
| Command | Description |
|---|---|
make start-no-pre-build |
Build the lightweight version of the documentation with no extra content |
make start* |
Build the full documentation with all extra content (integrations, extra pulled files, localized content, etc). Only useful if you have a GitHub personal token setup in your Makefile.config or the extra content is available locally. |
make start-docker |
Build the documentation using the docker image. For more information see Docker Development. |
Documentation is then available at http://localhost:1313
NOTE: make start attempts to pull all dependent repos from their origins or a local cache. The order it attempts to retrieve is:
- One directory above where this repo is cloned.
integrations_data: A local pull of all dependent repos from the last successful build- If neither of the above exist, an attempt is made to pull dependent repos from upstream.
If you'd like to re-pull dependencies, run make clean-all and then try your make command again.
To learn more about how the documentation is built, refer to the Documentation Build Wiki.
- Always branch off of master; never commit directly to master.
- Name your branch
<SLACK_HANDLE>/<FEATURE_NAME>if you would like to create a preview site and run tests.- If you're collaborating on a branch with someone, you can have two names on the branch so you can both receive Slack notifications when a preview build finishes, e.g.
<SLACK_HANDLE_1>/<SLACK_HANDLE_2>/<FEATURE_NAME>.
- If you're collaborating on a branch with someone, you can have two names on the branch so you can both receive Slack notifications when a preview build finishes, e.g.
- When you are ready to commit, create a new pull request to master from your branch.
- Consult our contributing guidelines, and the Documentation Build Wiki.
- Use GitHub's draft pull request feature and appropriate labels such as "Do Not Merge" or "Work in Progress" until your PR is ready to be merged and live on production.
- Fork the master branch.
- Consult our contributing guidelines.
- When you are ready to finalize your changes, commit them, and then make a pull request back to
DataDog/master. - A DataDog technical writer might change your PR title with a DOCS ticket number, such as "[DOCS-9000]" which just means it has been added to the team's internal Jira queue to triage and review. No action is necessary from you if we change the title of your PR.
This site uses Goldmark for markdown, which is compliant with CommonMark 0.29.
If you include ANY Markdown in a file, give it an .md extension.
Make sure all files are lowercase. Macs are case insensitive when creating links to images and pages, but our build server is not, so tests may work locally, but the site will fail in production.
Within 10 minutes of merging to master, it deploys automatically.
Prerequisites:
- Running Monterey OSX
- Docker Desktop >= 4.7.1 is installed
- At least 6GB of RAM is dedicated towards Docker for Mac
- Open the Docker for Mac app dashboard
- Click the gear icon
- Click Resources
- The memory slider should be set to 6GB
- VirtioFS is enabled
- Open the Docker for Mac app dashboard
- Click the gear icon
- Click Experimental Features
- Click Enable VirtioFS accelerated directory sharing
- Click Apply & Restart
- Go to project root
- Make a copy of
Makefile.config.examplecalledMakefile.config - Enter value for
GITHUB_TOKEN - Set
FULL_BUILDto true to build the full documentation with all extra content - Run
make start-docker
To stop the app, hit Ctrl-C or run make stop-docker
