| page_type | description | languages | products | |||
|---|---|---|---|---|---|---|
sample |
Get familiar with Azure IoT using the Microsoft IoT Pack for Raspberry Pi 3 Starter Kit. |
|
|
IoT Hub Raspberry Pi 3 Client application
This folder contains the source code to help you get familiar with Azure IoT using the Microsoft IoT Pack for Raspberry Pi 3 Starter Kit. You will find the lesson-based tutorials on Azure.com.
The tutorial enables an arduino application that runs on Raspberry Pi 3 with a BME280 temperature&humidity sensor, and then sends these data to your IoT Hub. Also, this application receives Cloud-to-Device message from your IoT Hub, and takes actions according to the C2D command.
Set up your Pi
Enable SSH on your Pi
Follow this page to enable SSH on your Pi.
Enable I2C on your Pi
Follow this page to enable I2C on your Pi
Install new nodejs new version
Check your nodejs version on your Pi:
node -vIf your nodejs' version is below v4.x, please follow the instruction to install a new version of nodejs
curl -sL http://deb.nodesource.com/setup_4.x | sudo -E bash
sudo apt-get -y install nodejs
Connect your sensor with your Pi
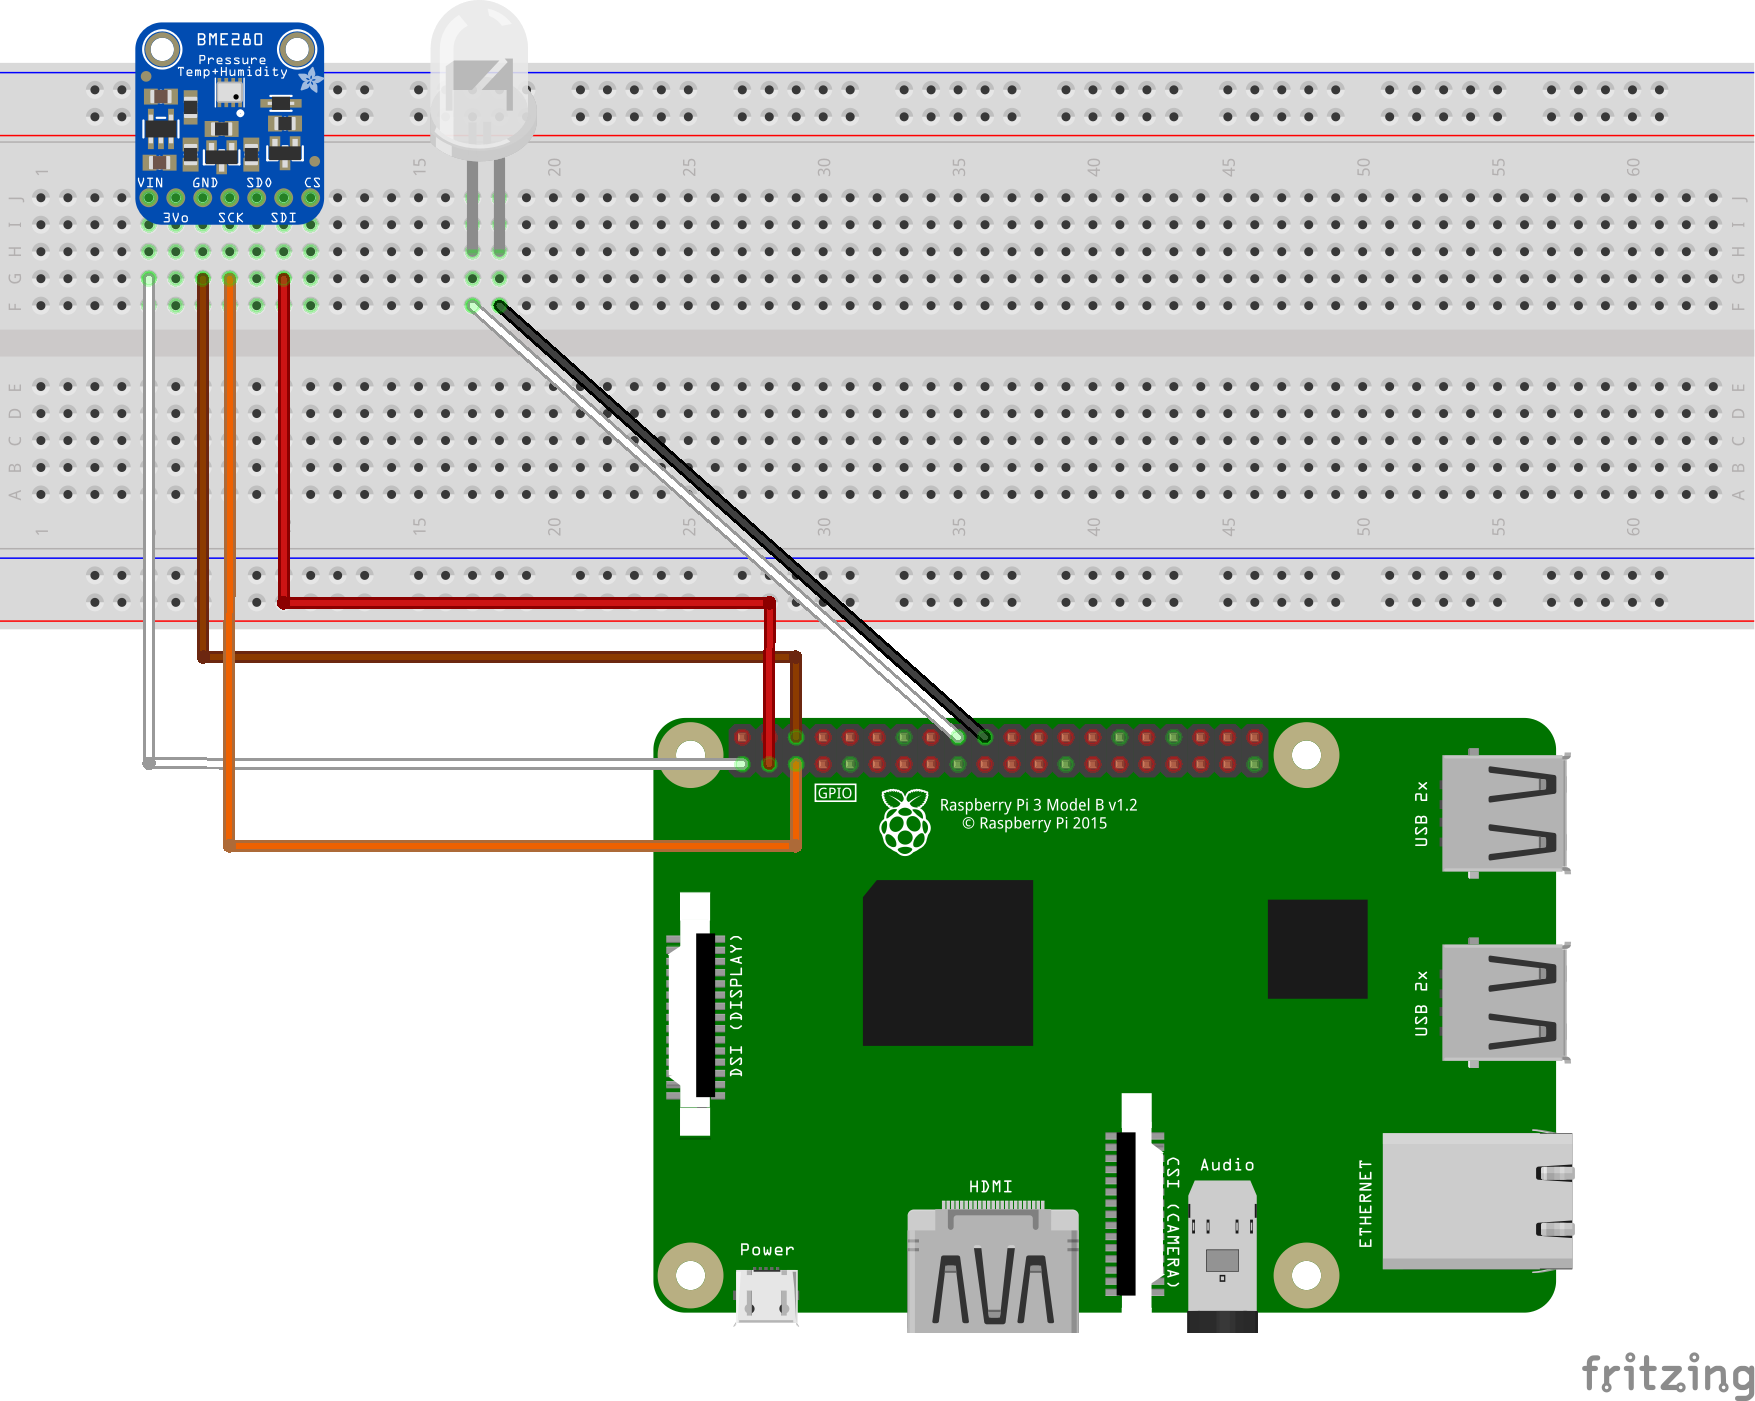
Connect with a physical BEM280 sensor and LED
You can follow the image to connect your BME280 and a LED with your Raspberry Pi 3.
DON'T HAVE A PHYSICAL BME280?
You can use the application to simulate temperature and humidity data and send to your IoT Hub.
- Open the
config.jsonfile. - Change the
simulatedDatavalue fromfalsetotrue.
Running this sample
Install package
Install all packages by the following command:
npm installRun the client application
Run the client application with root priviledge, and you also need provide your Azure IoT Hub device connection string, note your connection should be quoted in the command.
sudo node index.js '<your Azure IoT hub device connection string>'Send Cloud-to-Device command
You can send a C2D message to your device. You can see the device prints out the message and blinks once receiving the message.
Send Device Method command
You can send start or stop device method command to your Pi to start/stop sending message to your IoT Hub.
Run the client using the AMQP transport
By default, the app will use MQTT. If you wish to use AMQP:
- Open the
config.jsonfile. - Change the
transportvalue frommqtttoamqp.
Connect the client to an IoT Edge gateway
If you have an IoT Edge gateway and wish to use it, you'll need to modify the connection string to include the GatewayHostName.
If that gateway uses non-production certificates, this client will need to be configured to use the root cert. Instructions can be found here. After the root cert is installed and trusted on the Pi:
- Open the
config.jsonfile. - Change the
iotEdgeRootCertFilePathvalue specify the full path to the certificate.
Troubleshooting
writeByte error
If you've run, stopped, and re-run the app and see an error like { Error: , Remote I/O error errno: 121, code: '', syscall: 'writeByte' } the BME 280 chip may be in a bad state. Try removing and reinserting the power wire (or the BME 280 chip, if you are unsure). Then try rerunning the app again.
LED not lighting
Make sure the longer of the two pins is connected to the positive terminal.