This is a working example of using Amazon Cognito Identity and User Pools to create a complete Login solution with: Forgot Password, Reset Password, Account Validation via email or mobile phone, and Logout.
It uses Twitter Bootstrap for the design. This likely needs some work as it needs form field validation and some other usability improvements, but you should be able to take most of this to incorporate into your own solution.
All of the information used for this example is based on the following: https://github.com/aws/amazon-cognito-identity-js For the most part you can also just refer to this article. The one catch is that I did need to use a different version of sjcl.js based on the following issue
Create and AWS User Pool (under the Cognito Icon within the management console.)
https://aws.amazon.com/blogs/aws/new-user-pools-for-amazon-cognito/
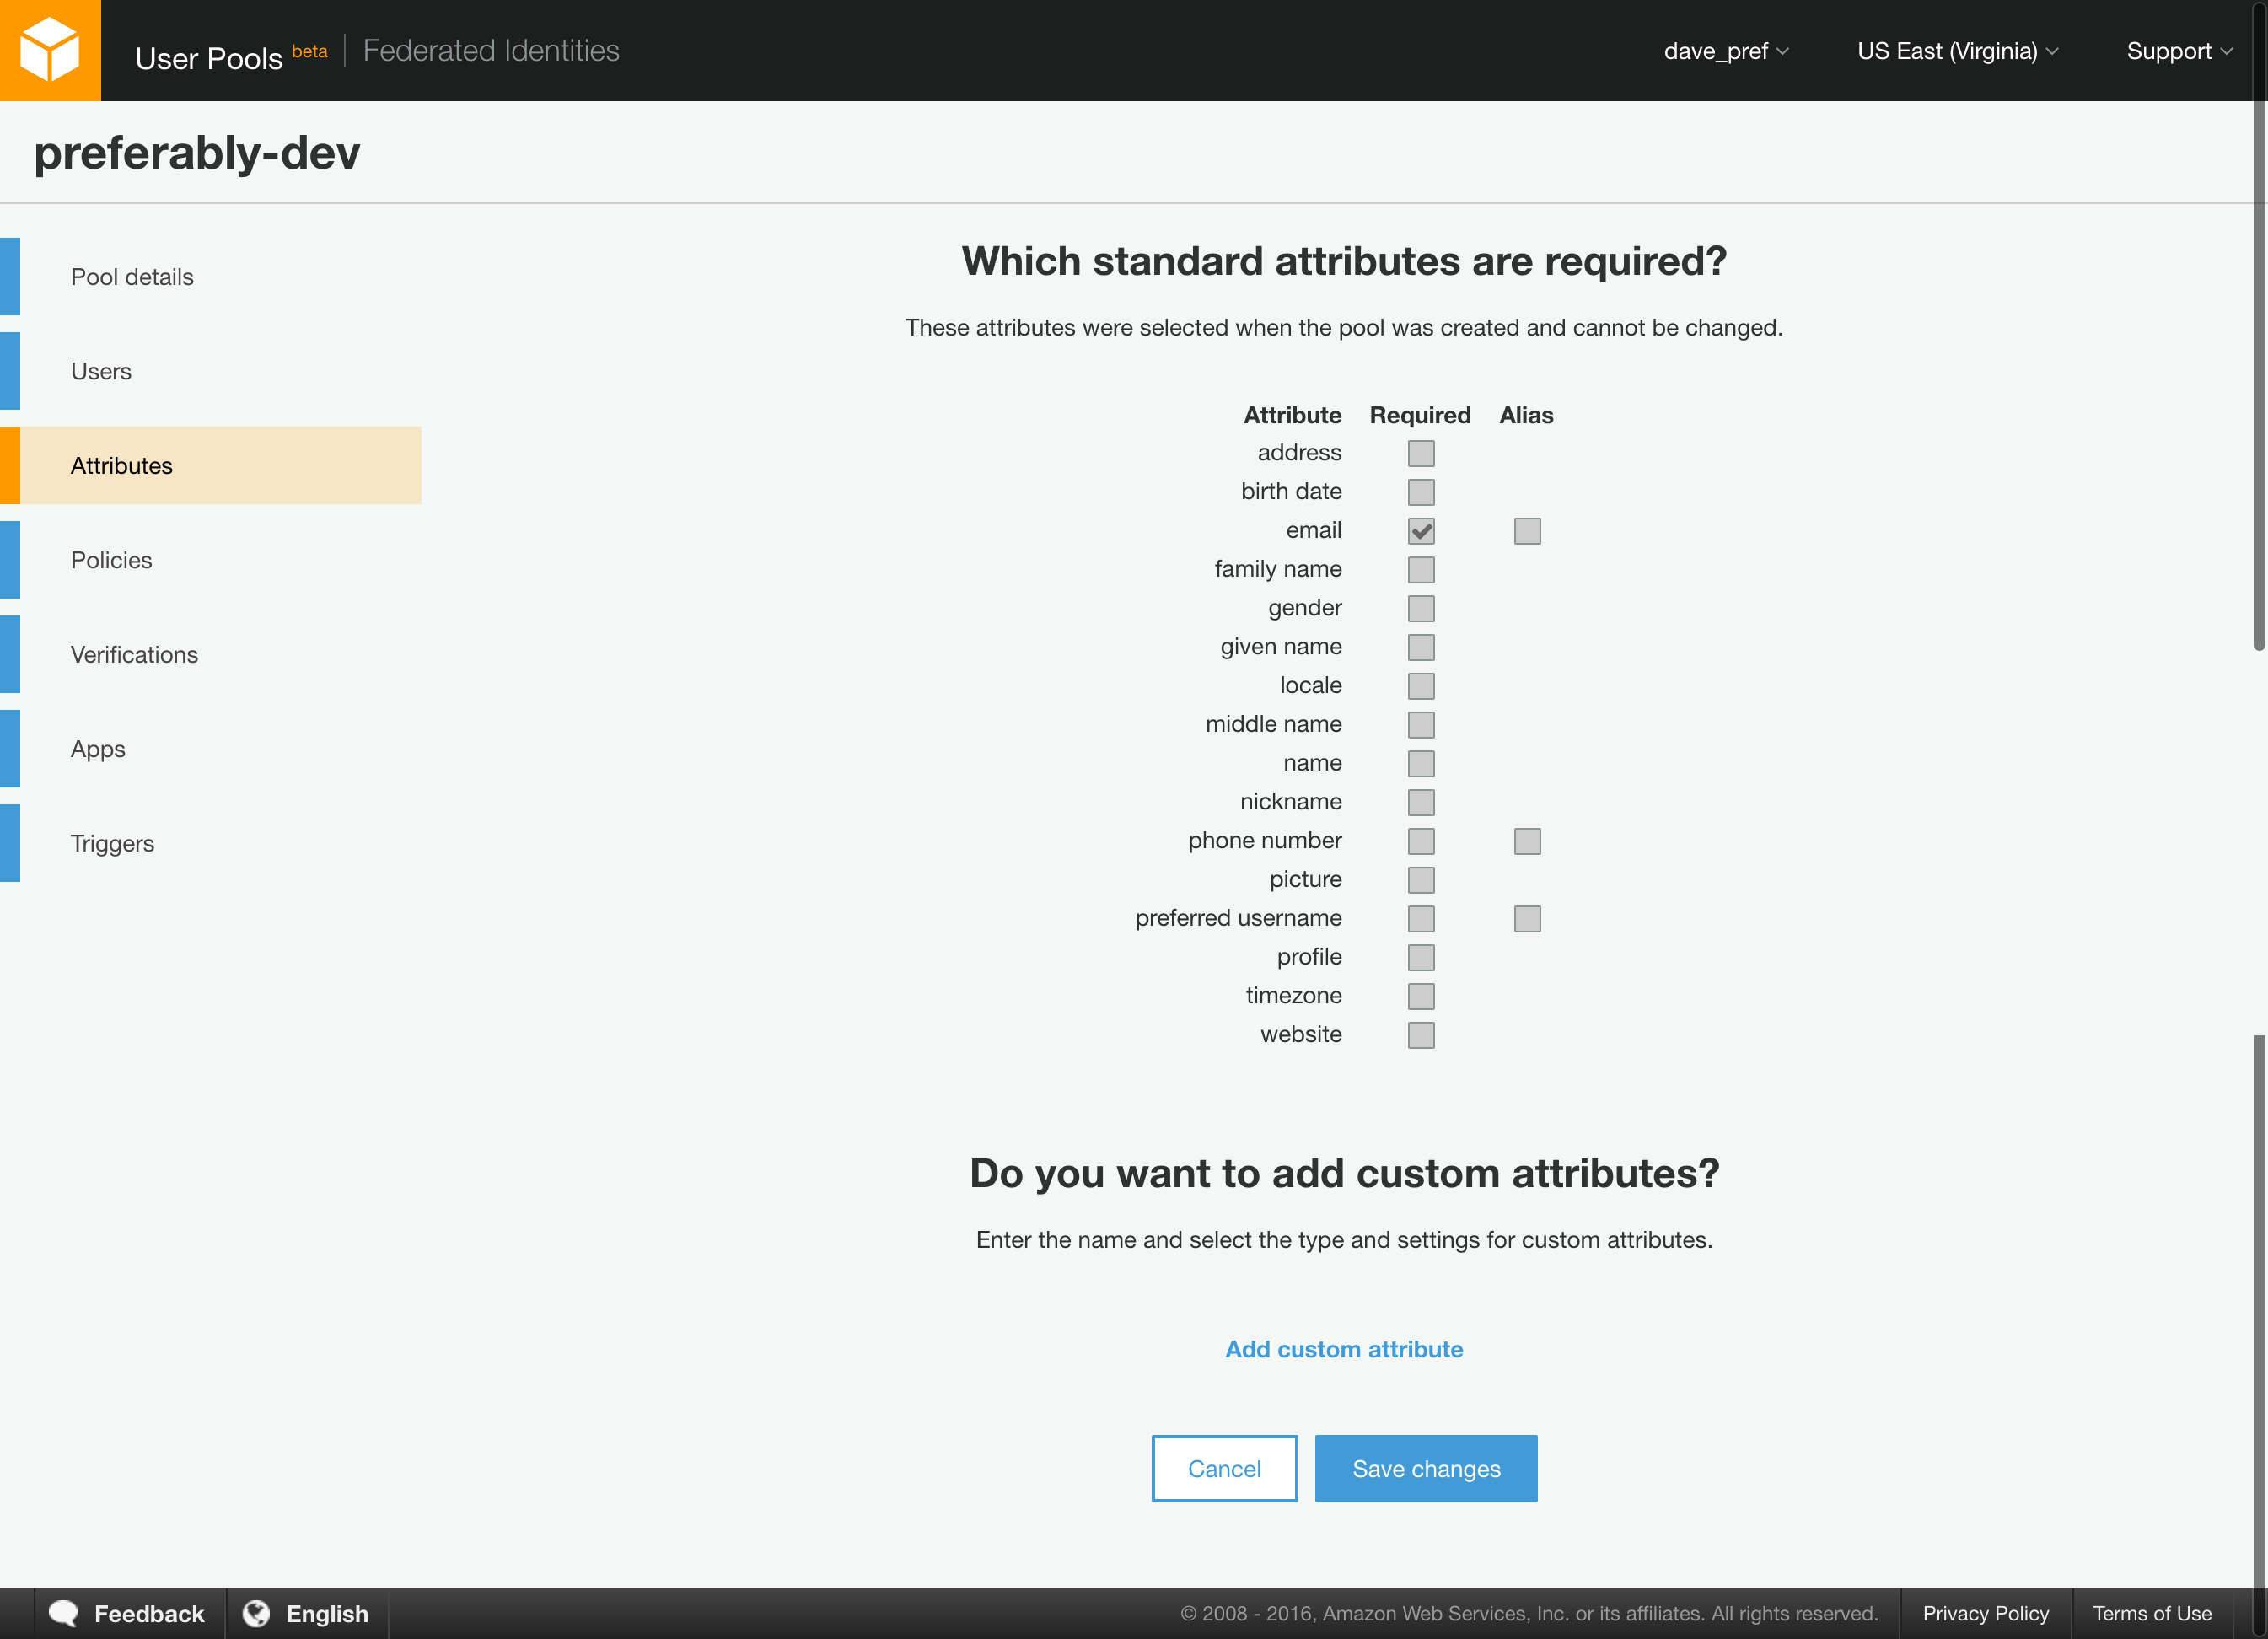
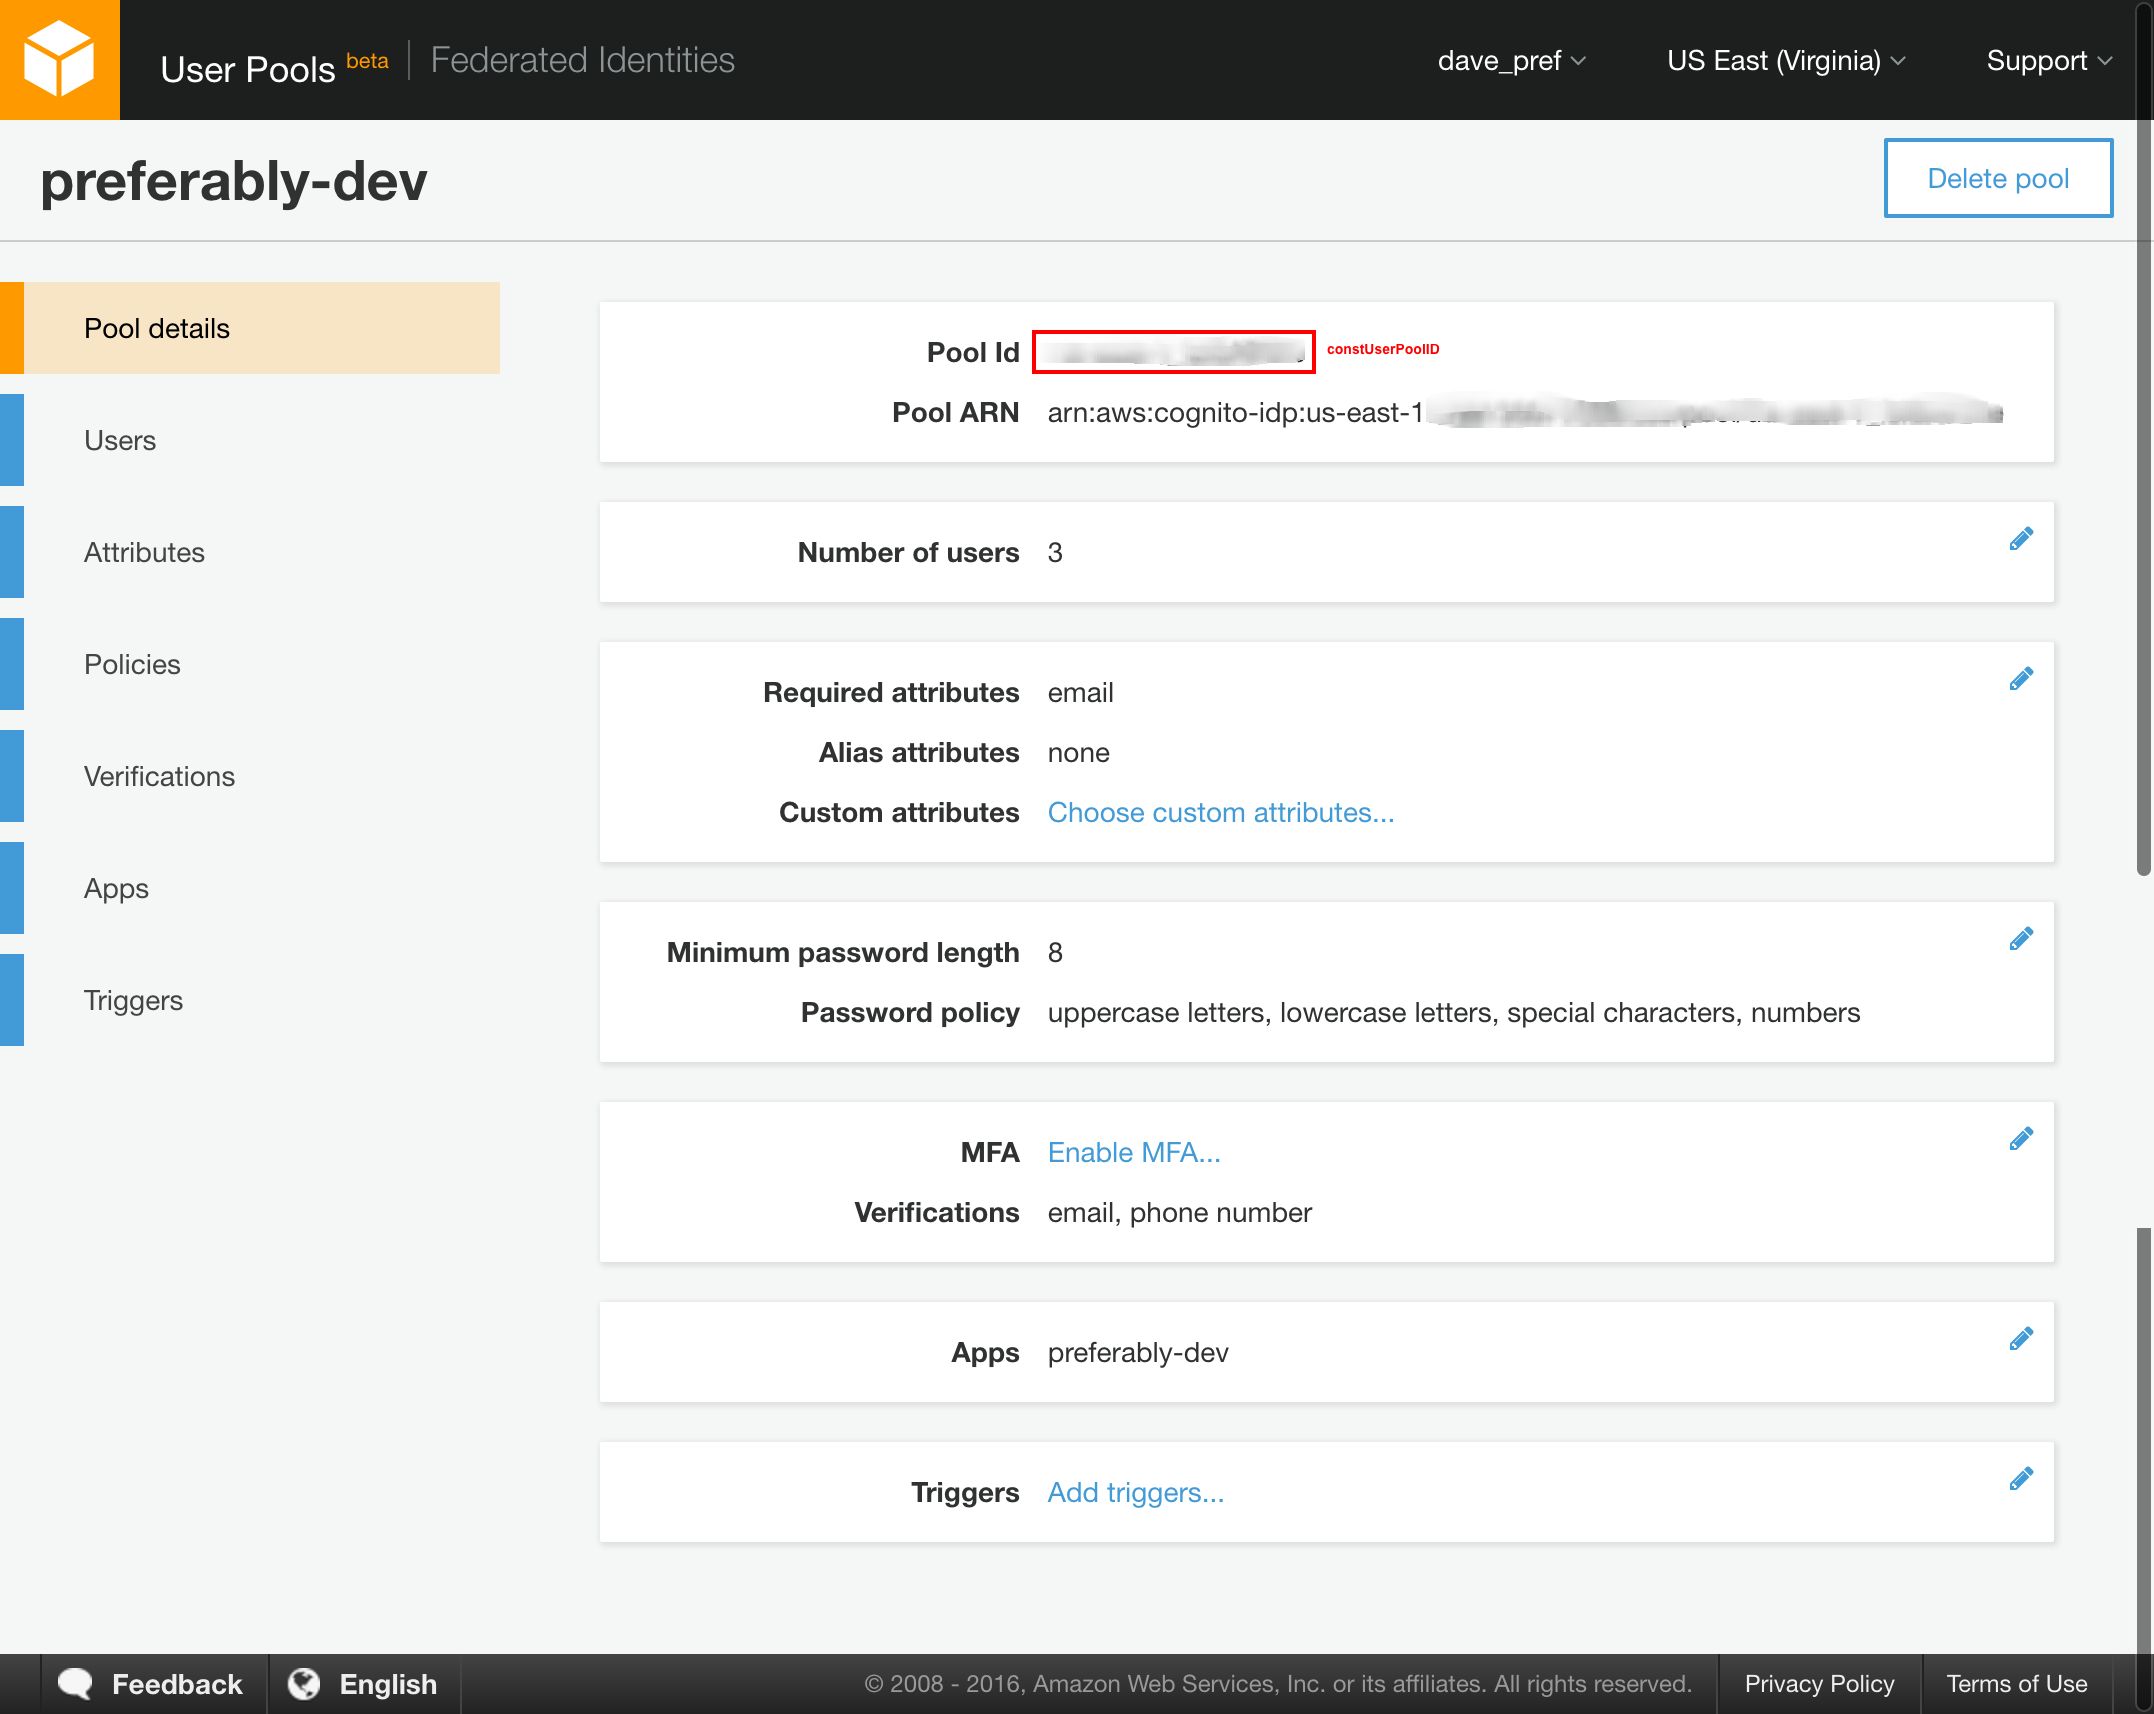
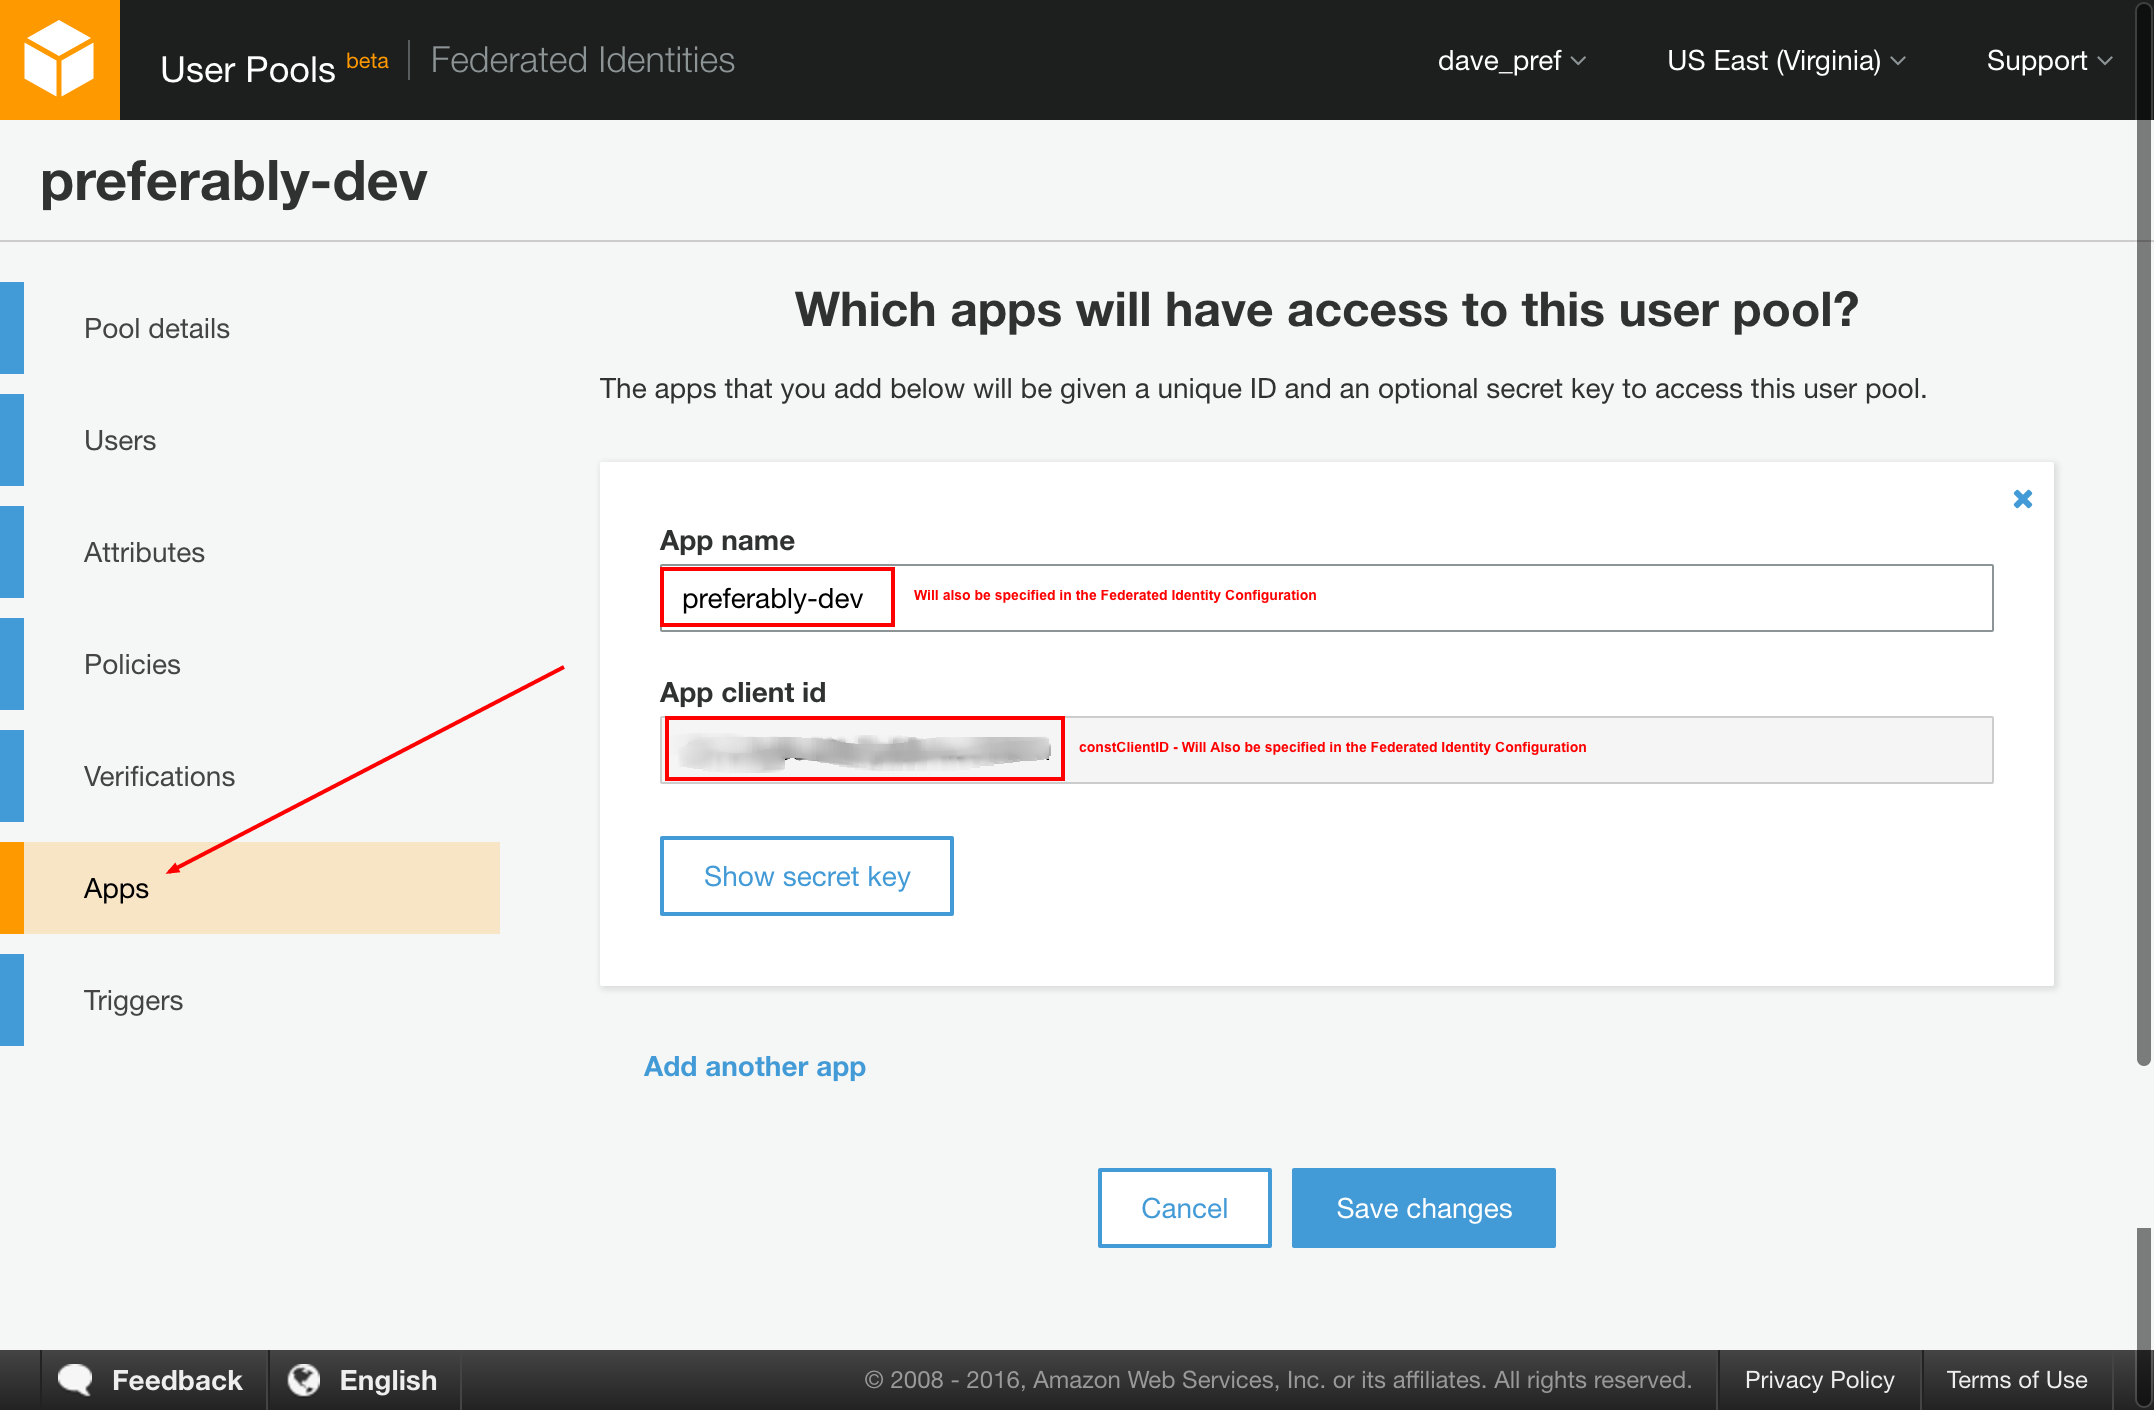
Use the default settings. You will want to create an App and take note of the highlighted items in the screenshots below. These are used to configure javascript with the necessary identifiers for your User and Identity Pools:

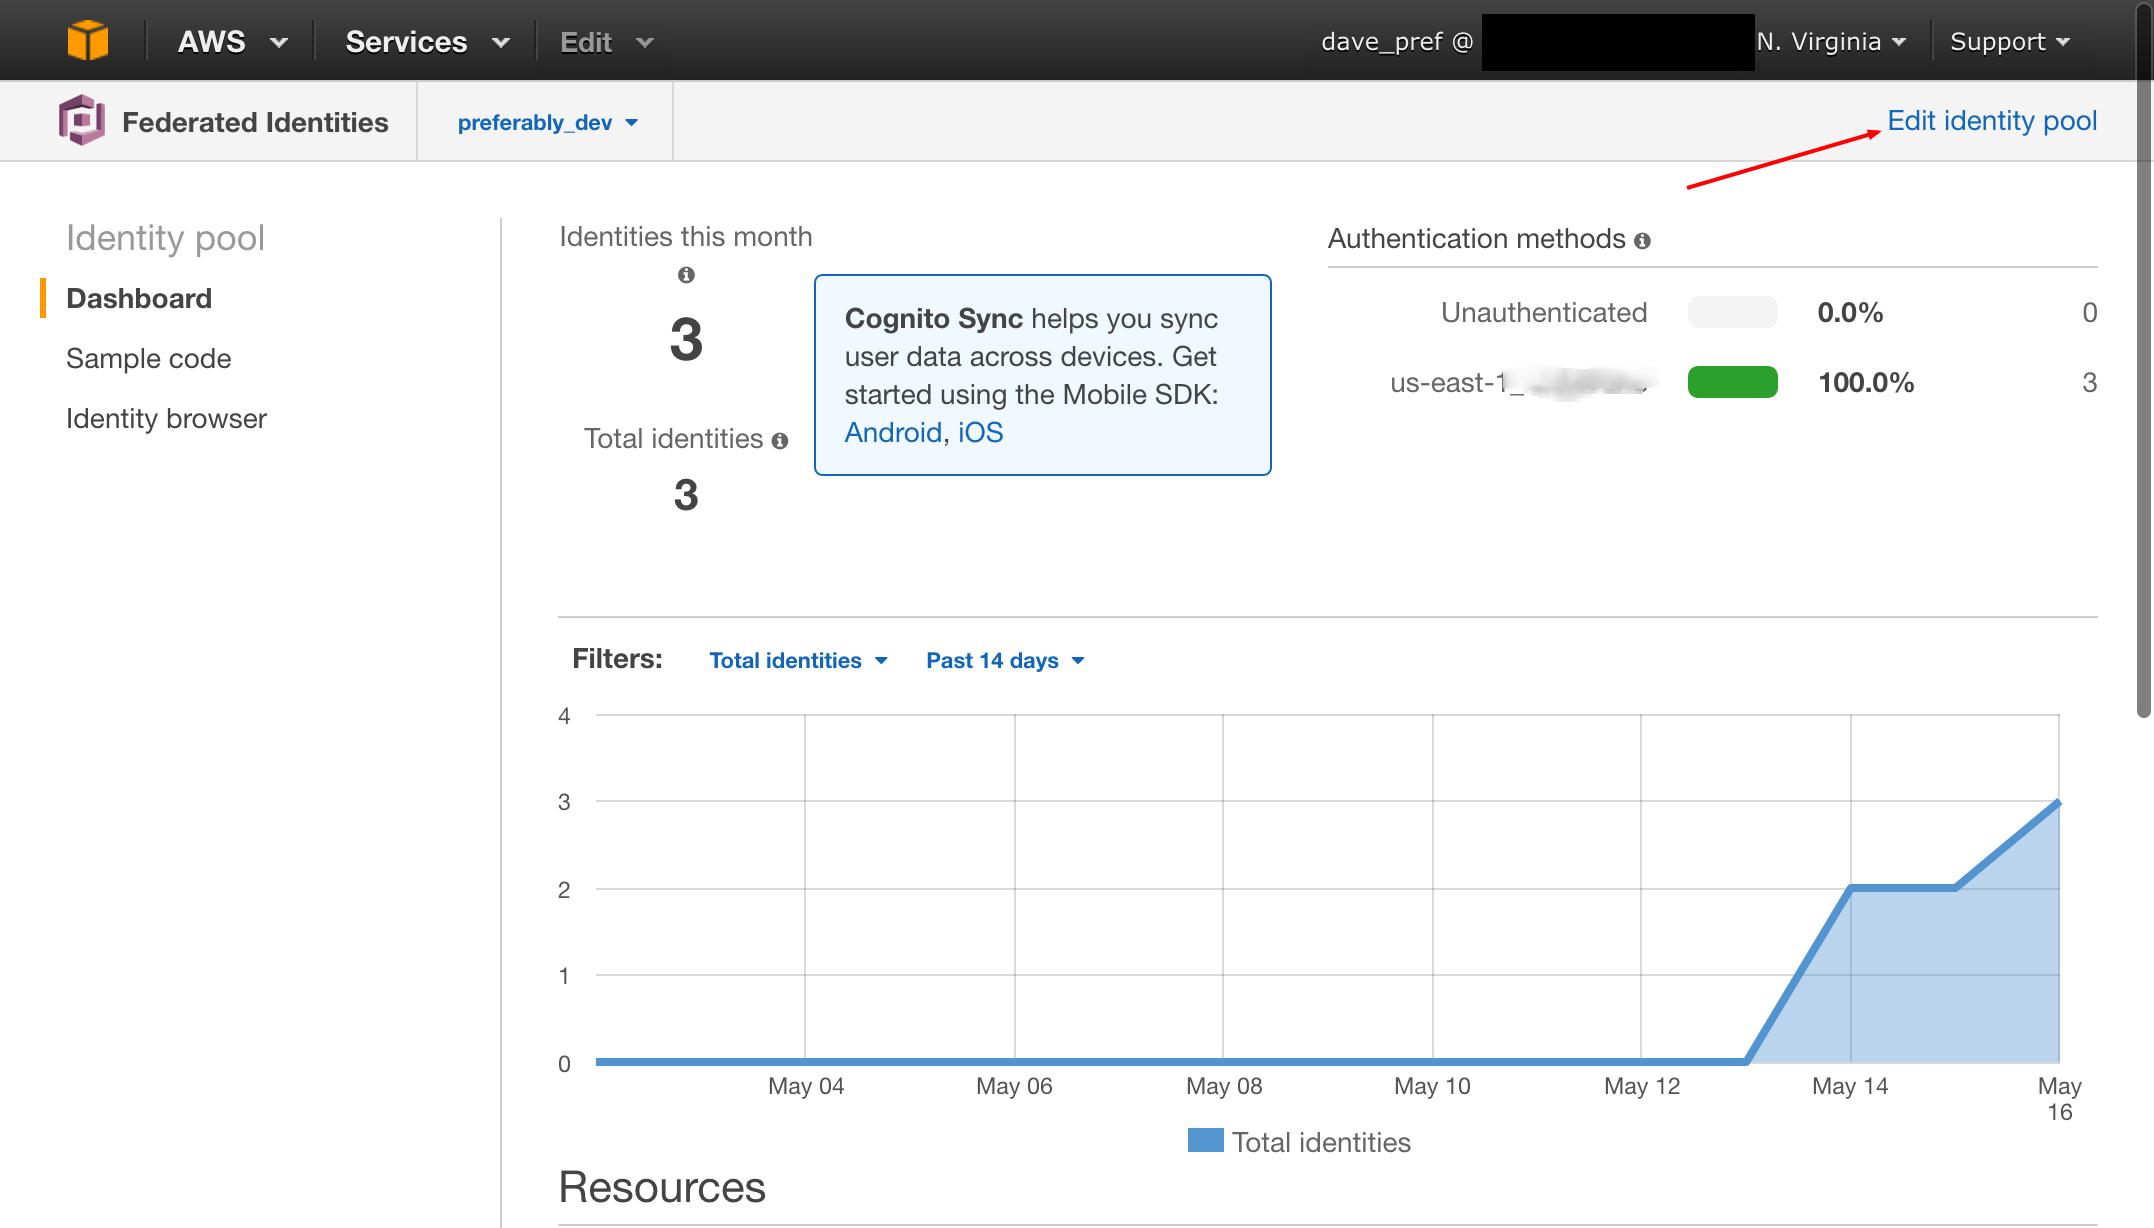
Create your Federated Identity Pool.
http://docs.aws.amazon.com/cognito/latest/developerguide/identity-pools.html
For the most part you can use the defaults, but when you configure Cognito Provider, you will need to use the IDs you captured in Step 1. Also make note of the highlighted IDs as you will need those when configuring javascript.
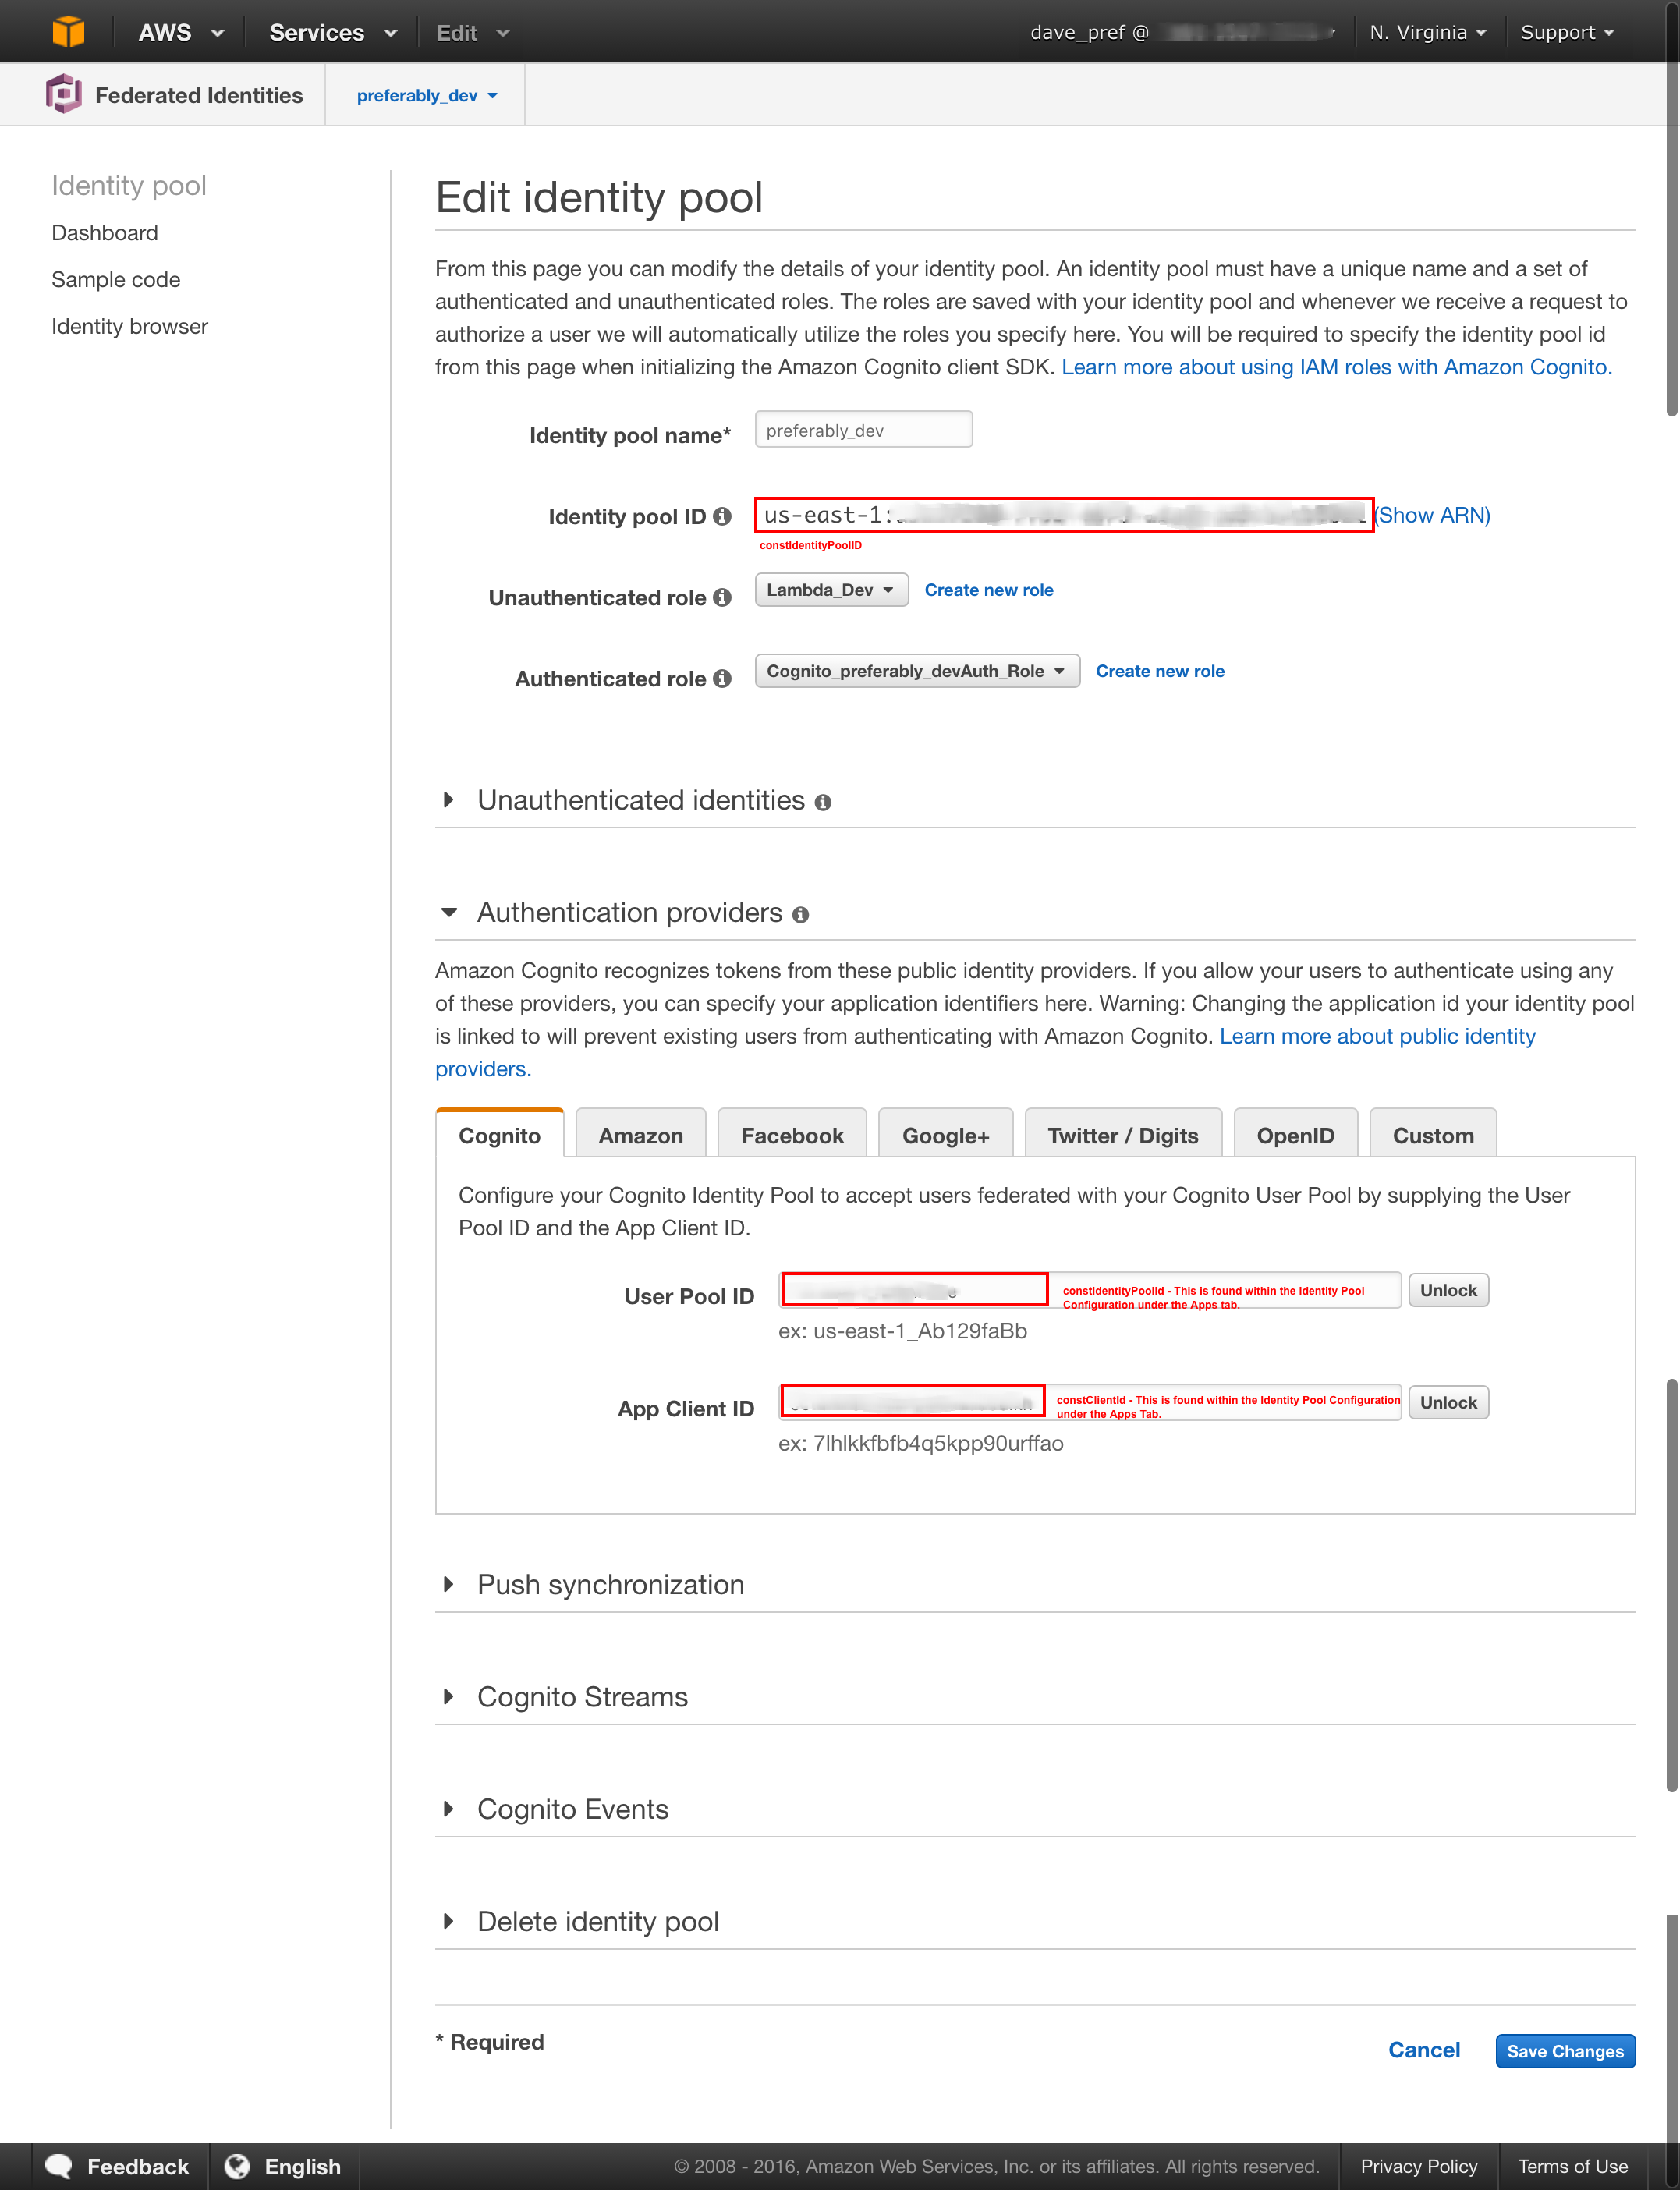
Update the constants at the top of js/main.js with the IDs you collected above.
//AWS IDs
var constRegion = 'us-east-1';
var constIdentityPoolId = 'us-east-1:XXXXXXXXXXXXXXXXXXXXXXXXXXXX';
var constUserPoolId = 'us-east-1_XXXXXXXXXXX';
var constClientId = 'XXXXXXXXXXXXXXXXXXXXXXXX';Now that you have AWS credentials you can access any resources that the Policy defined in the Identity Pool has access to.
Here is information on accessing an IAM protected API Gateway Endpoint. This is from the following post
 var apigClient = apigClientFactory.newClient({
    accessKey: AWS.config.credentials.accessKeyId, //'ACCESS_KEY',
    secretKey: AWS.config.credentials.secretAccessKey, //'SECRET_KEY',
    sessionToken: AWS.config.credentials.sessionToken, // 'SESSION_TOKEN', //OPTIONAL: If you are using temporary credentials you must include the session token
    region: 'us-east-1' // OPTIONAL: The region where the API is deployed, by default this parameter is set to us-east-1
  });

  var params = {
    // This is where any modeled request parameters should be added.
    // The key is the parameter name, as it is defined in the API in API Gateway.
  };

  var body = {
    // This is where you define the body of the request,
    query: '{person {firstName lastName}}'
  };

  var additionalParams = {
    // If there are any unmodeled query parameters or headers that must be
    //   sent with the request, add them here.
    headers: {},
    queryParams: {}
  };

  apigClient.graphqlPost(params, body, additionalParams)
    .then(function (result) {
      // Add success callback code here.
      console.log(result);
    }).catch(function (result) {
    // Add error callback code here.
    console.log(result);
});- Needs field validation - Required Fields, Confirm Password, etc.
- Needs field formatting. For example the phone number needs to be entered as +1 1234567890...need to accept different formats and translate to whats needed.
- Demonstrate what to do with Final Token...can be used to hit DynamoDB Web Services etc.
- Demonstrate how to read/update attributes.