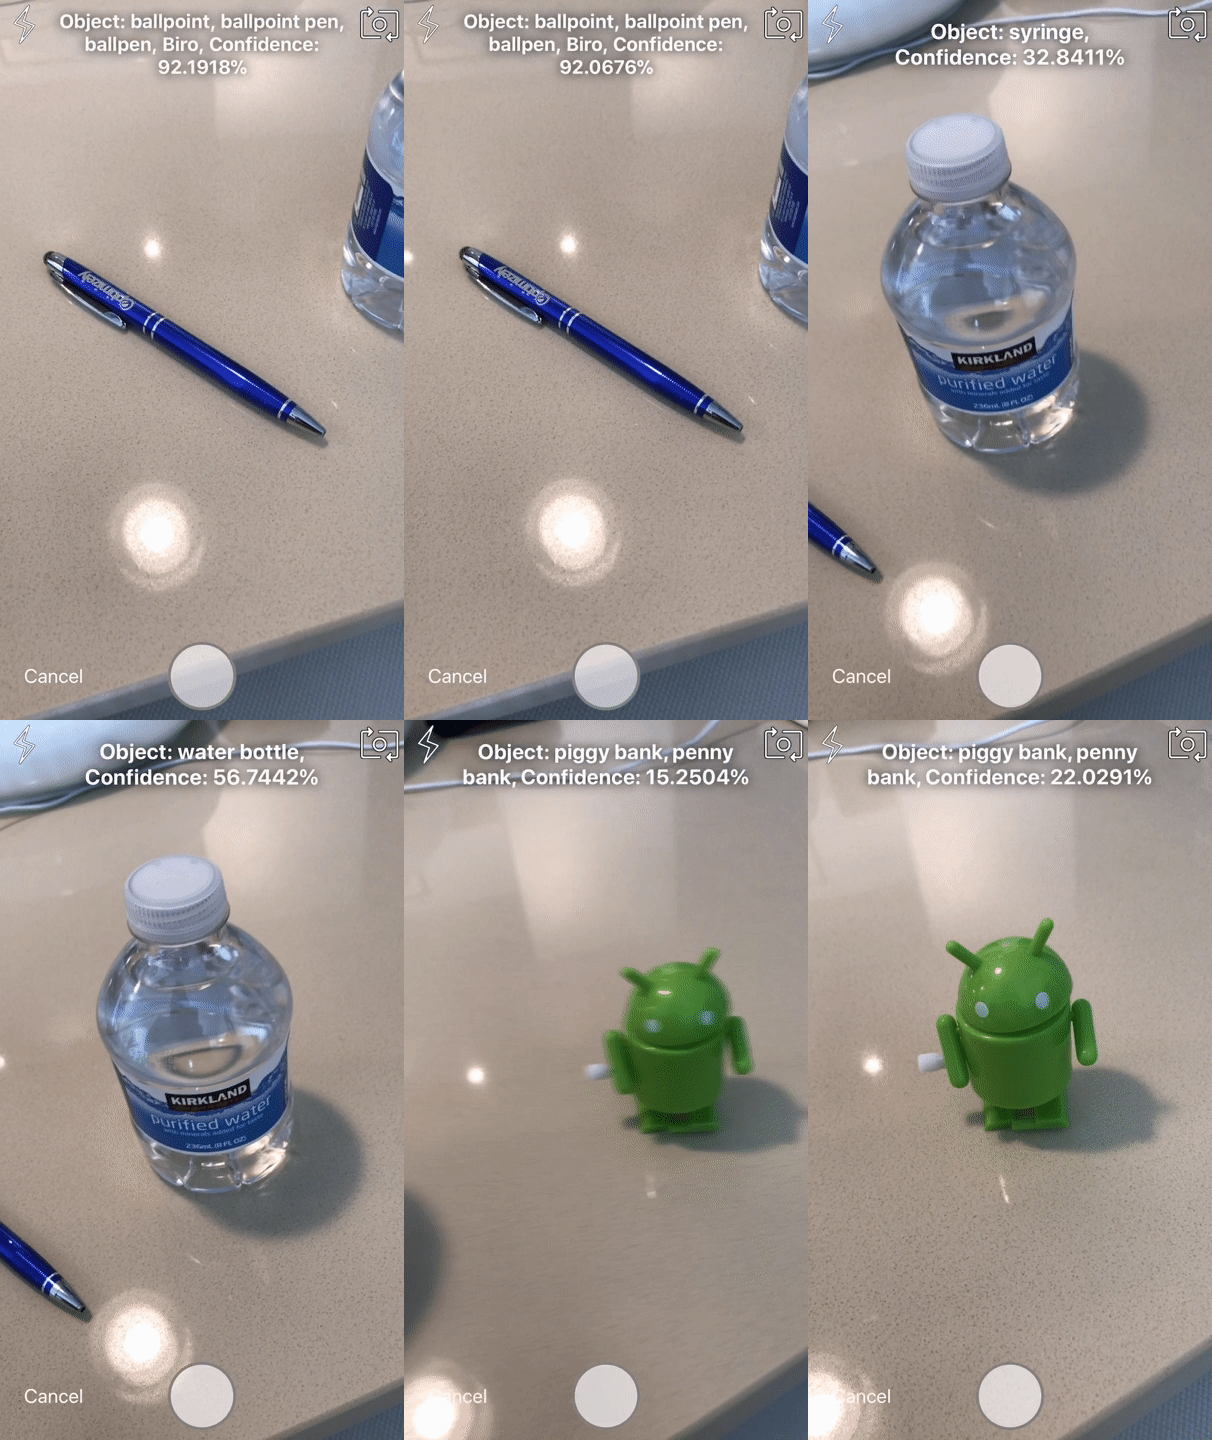
Would you like to use a fully-functional camera in an iOS application in seconds? Would you like to do CoreML image recognition in just a few more seconds on the same camera? Lumina is here to help.
Cameras are used frequently in iOS applications, and the addition of CoreML and Vision to iOS 11 has precipitated a rash of applications that perform live object recognition from images - whether from a still image or via a camera feed.
Writing AVFoundation code can be fun, if not sometimes interesting. Lumina gives you an opportunity to skip having to write AVFoundation code, and gives you the tools you need to do anything you need with a camera you've already built.
Lumina can:
- capture still images
- capture videos
- capture live photos
- capture depth data for still images from dual camera systems
- stream video frames to a delegate
- scan any QR or barcode and output its metadata
- detect the presence of a face and its location
- use any CoreML compatible model to stream object predictions from the camera feed
- Xcode 8.0+ (by loading Swift 4 Toolchain)
- iOS 10.0
- Swift 4.0
David Okun has experience working with image processing, and he thought it would be a nice thing to have a camera module that allows you to stream images, capture photos and videos, and have a module that lets you plug in a CoreML model, and it streams the object predictions back to you alongside the video frames.
See the contribute file!
PRs accepted.
Small note: If editing the README, please conform to the standard-readme specification.
You can use CocoaPods to install Lumina by adding it to your Podfile:
platform :ios, '10.0'
use_frameworks!

target 'MyApp' do
    pod 'Lumina'
endYou can use Carthage to install Lumina by adding it to your Cartfile:
github "dokun1/Lumina"NB: Lumina does not currently build with Swift Package Manager due to a lack of support for frameworks that require UIKit. Nonetheless, as SPM evolves, Lumina will be ready to support it!
You can use Swift Package Manager to install Lumina by adding the proper description to your Package.swift file:
import PackageDescription

let package = Package(
    name: "YOUR_PROJECT_NAME",
    targets: [],
    dependencies: [
        .Package(url: "https://github.com/dokun1/Lumina.git", majorVersion: 0)
    ]
)NB: As the Swift Package Manager continues to grow, please view its documentation here.
Clone or download this repository, and use the provided workspace to build a version of the library for your own use in any application.
NB: This repository contains a sample application. This application is designed to demonstrate the entire feature set of the library. We recommend trying this application out.
Consider that the main use of Lumina is to present a ViewController. Here is an example of what to add inside a boilerplate ViewController:
import LuminaWe recommend creating a single instance of the camera in your ViewController as early in your lifecycle as possible with:
let camera = LuminaViewController()Presenting Lumina goes like so:
present(camera, animated: true, completion:nil)Remember to add a description for Privacy - Camera Usage Description and Privacy - Microphone Usage Description in your Info.plist file, so that system permissions are handled properly.
Lumina allows you to set a level of logging for actions happening within the module. The logger in use is HeliumLogger, made by the Swift@IBM team. The deeper your level of logging, the more you'll see in your console.
NB: While Lumina is licensed by the MIT license, HeliumLogger is licensed by Apache 2.0. A copy of the license is also included in the source code.
To set a level of logging, set the static var on LuminaViewController like so:
LuminaViewController.loggingLevel = .verboseLevels read like so, from least to most logging:
- NONE
- ERROR
- WARNING
- INFO
- VERBOSE
- DEBUG
- EXIT
- ENTRY
There are a number of properties you can set before presenting Lumina. You can set them before presentation, or during use, like so:
camera.position = .front // could also be .back
camera.recordsVideo = true // if this is set, streamFrames and streamingModel are invalid
camera.streamFrames = true // could also be false
camera.textPrompt = "This is how to test the text prompt view" // assigning an empty string will make the view fade away
camera.trackMetadata = true // could also be false
camera.resolution = .highest // follows an enum
camera.captureLivePhotos = true // for this to work, .resolution must be set to .photo
camera.captureDepthData = true // for this to work, .resolution must be set to .photo, .medium1280x720, or .vga640x480
camera.streamDepthData = true // for this to work, .resolution must be set to .photo, .medium1280x720, or .vga640x480
camera.frameRate = 60 // can be any number, defaults to 30 if selection cannot be loaded
camera.maxZoomScale = 5.0 // not setting this defaults to the highest zoom scale for any given camera deviceNB: This only works for iOS 11.0 and up.
You must have a CoreML compatible model(s) to try this. Ensure that you drag the model file(s) into your project file, and add it to your current application target.
The sample in this repository comes with the MobileNet and SqueezeNet image recognition models, but again, any CoreML compatible model will work with this framework. Assign your model(s) to the framework like so:
camera.streamingModelTypes = [MobileNet(), SqueezeNet()]You are now set up to perform live video object recognition.
To handle any output, such as still images, video frames, or scanned metadata, you will need to make your controller adhere to LuminaDelegate and assign it like so:
camera.delegate = selfBecause the functionality of the camera can be updated at runtime, all delegate functions are required.
To handle the Cancel button being pushed, which is likely used to dismiss the camera in most use cases, implement:
func dismissed(controller: LuminaViewController) {
    // here you can call controller.dismiss(animated: true, completion:nil)
}
To handle a still image being captured with the photo shutter button, implement:
func captured(stillImage: UIImage, livePhotoAt: URL?, depthData: Any?, from controller: LuminaViewController) {
        controller.dismiss(animated: true) {
    // still images always come back through this function, but live photos and depth data are returned here as well for a given still image
    // depth data must be manually cast to AVDepthData, as AVDepthData is only available in iOS 11.0 or higher.
}
To handle a video being captured with the photo shutter button being held down, implement:
func captured(videoAt: URL, from controller: LuminaViewController) {
    // here you can load the video file from the URL, which is located in NSTemporaryDirectory()
}NB: It's import to note that, if you are in video recording mode with Lumina, streaming frames is not possible. In order to enable frame streaming, you must set .recordsVideo to false, and .streamFrames to true.
To handle a video frame being streamed from the camera, implement:
func streamed(videoFrame: UIImage, from controller: LuminaViewController) {
    // here you can take the image called videoFrame and handle it however you'd like
}
To handle depth data being streamed from the camera on iOS 11.0 or higher, implement:
func streamed(depthData: Any, from controller: LuminaViewController) {
    // here you can take the depth data and handle it however you'd like
    // NB: you must cast the object to AVDepthData manually. It is returned as Any to maintain backwards compatibility with iOS 10.0
}
To handle metadata being detected and streamed from the camera, implement:
func detected(metadata: [Any], from controller: LuminaViewController) {
    // here you can take the metadata and handle it however you'd like
    // you must find the right kind of data to downcast from, whether it is of a barcode, qr code, or face detection
}
To handle the user tapping the screen (outside of a button), implement:
func tapped(from controller: LuminaViewController, at: CGPoint) {
    // here you can take the position of the tap and handle it however you'd like
    // default behavior for a tap is to focus on tapped point
}
To handle a CoreML model and its predictions being streamed with each video frame, implement:
func streamed(videoFrame: UIImage, with predictions: [LuminaRecognitionResult]?, from controller: LuminaViewController) {
    if #available(iOS 11.0, *) {
        guard let predicted = predictions else {
            return
        }
        var resultString = String()
        for prediction in predicted {
            guard let values = prediction.predictions else {
                continue
            }
            guard let bestPrediction = values.first else {
                continue
            }
            resultString.append("\(String(describing: prediction.type)): \(bestPrediction.name)" + "\r\n")
        }
        controller.textPrompt = resultString
    } else {
        print("CoreML not available in iOS 10.0")
    }
}
Note that this returns a class type representation associated with the detected results. The example above also makes use of the built-in text prompt mechanism for Lumina.
MIT © 2017 David Okun


