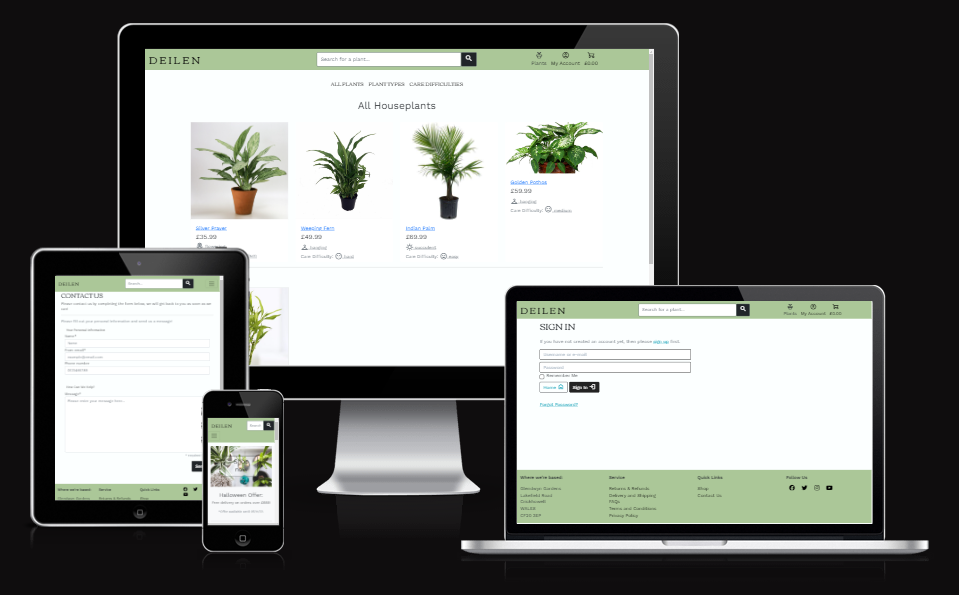
This website is a full stack ecommerce store to allow people to buy house plants and plant related homeware from the mockup plant company Deilen (the Welsh word for 'leaf').
To visit the website, please visit the deployed site here.
- Homeowners looking to buy decorative house plants.
- Interior designers looking to buy plants for indoor spaces e.g., an office space.
- People looking to gift a house plant to a loved one.
- User Authentication / Accounts
- Site users should be able to register an account that allows a user to sign in and out of the site.
- A user should be able to create a profile to store personal information to make checkout easier with default personal information to automatically populate form fields at checkout.
- Users should be able to amend profile information to keep records up-to-date.
- A user should be able to reset their password via email so the account is not lost if the password is forgotten.
- Site Navigation
- Site users should be able to navigate fluidly throughout the website without having to use the back button.
- A user should be able to direct themselves through the site with confidence and clarity to where they are navigating to.
- Users should be able to search the site for specific related content that they seek.
- Shopping
- Users should be able to view the products that Deilen offer for purchase.
- A user should be able to add any products they want to buy to their shopping bag for review.
- A user should be able to add multiples of an item to their shopping bag if they so wish.
- Users should be able to filter and sort results based on their shopping goals.
- Site users should be able to view all product information before adding a product to their bag.
- Bag (Wheelbarrow)
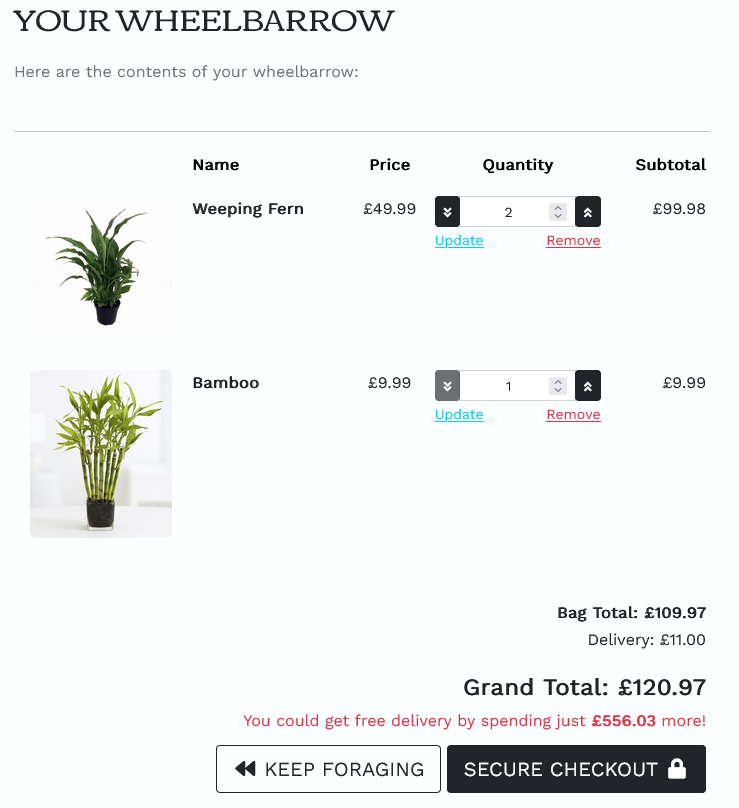
- Users should be able to view all items, and quantities that they have added to their wheelbarrow.
- Site users should be able to amend their order in their wheelbarrow, changing the quantities of a product or removing the product entirely from the wheelbarrow.
- A user should be shown the delivery costs and any additional costs of their order.
- Users should be able to safely navigate to the checkout to finalise their order.
- User Checkout
- A user should be able to checkout securely and pay for their order, finalising the transaction and confirming delivery address.
- Site users should be able to checkout and purchase products regardless of if they have a Deilen account or not.
- Once checked-out, a customer should receive confirmation of their order.
- Profiles
- Site users should be able to create a profile to store their default delivery address, which will auto-populate the checkout view.
- Site users should also be able to view their previous order history.
- Profile users should be able to signin, signout, view their profile and amend their default delivery information.
- Contact
- All site users should have the ability to contact Deilen.
- Site Admin
- Site admins should have secure access to product management.
- Admins will be able to add new products.
- Admins will be able to edit existing products.
- Admins will be able to delete products from the store.
- See all orders, products, product categories, and customer messages.
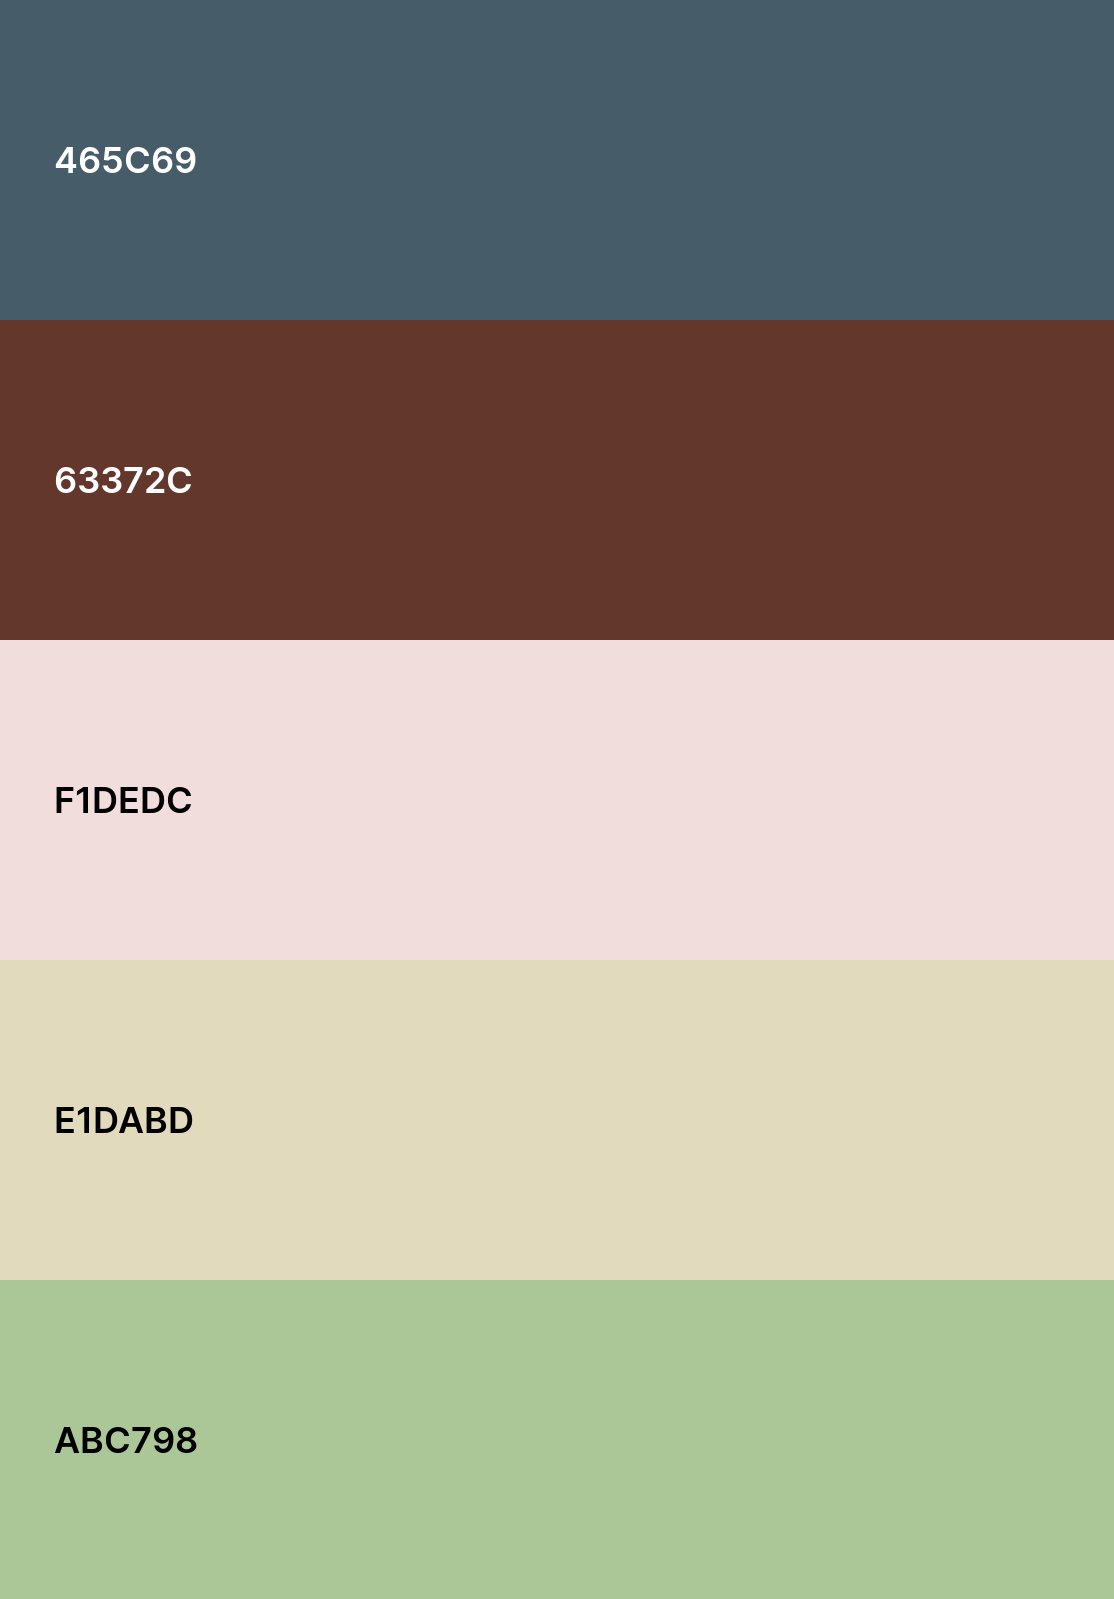
- An earthy and natural blend of pastel pink yellow and green with darker shades of clay-brown and blue-grey. This gives the website a fresh, organic and natural look.
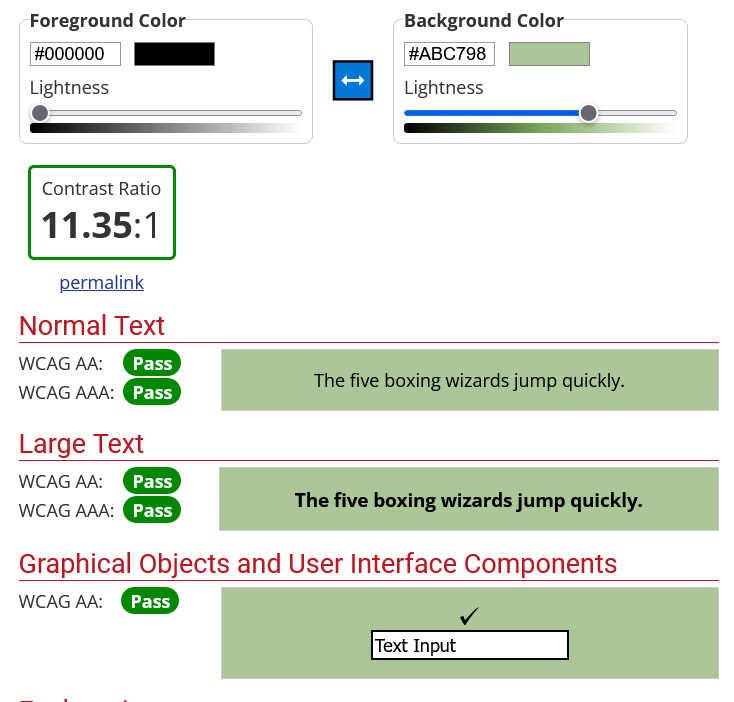
- No accessibility issues were returned when passing the colour scheme through the official WebAIM contrast checker.
- Google Fonts
Font styles were taken from the open source Google Fonts.
- The typography for the text throughout the website is Work Sans. This font was designed by Wei Huang and is optimised for on-screen text usage at medium-sizes (14px-48px). Overall, features are simplified and optimised for screen resolutions; for example, diacritic marks are larger than how they would be in print. This font is loosely based on early Grotesques and, in my opinion, gives the website a crisp feel.
- The typography for the brand logo and page titles is font-family Corben. This was designed by Vernon Adams Corben as a simple web friendly display font with ample curves and ligatures. Corben is designed to be easy on the eye with a touch of classic display lettering. For me, Corben gives the logo and headers a classic, sophisticated feel.
- Accessibility
- The website was designed with accessibility in mind, by providing alt attributes for all img elements and being mindful of visual impairment when designing the website. For example, originally I had a hover effect to increase font-size on footer links. After consideration this was removed as the hover effect caused vertical displacement.
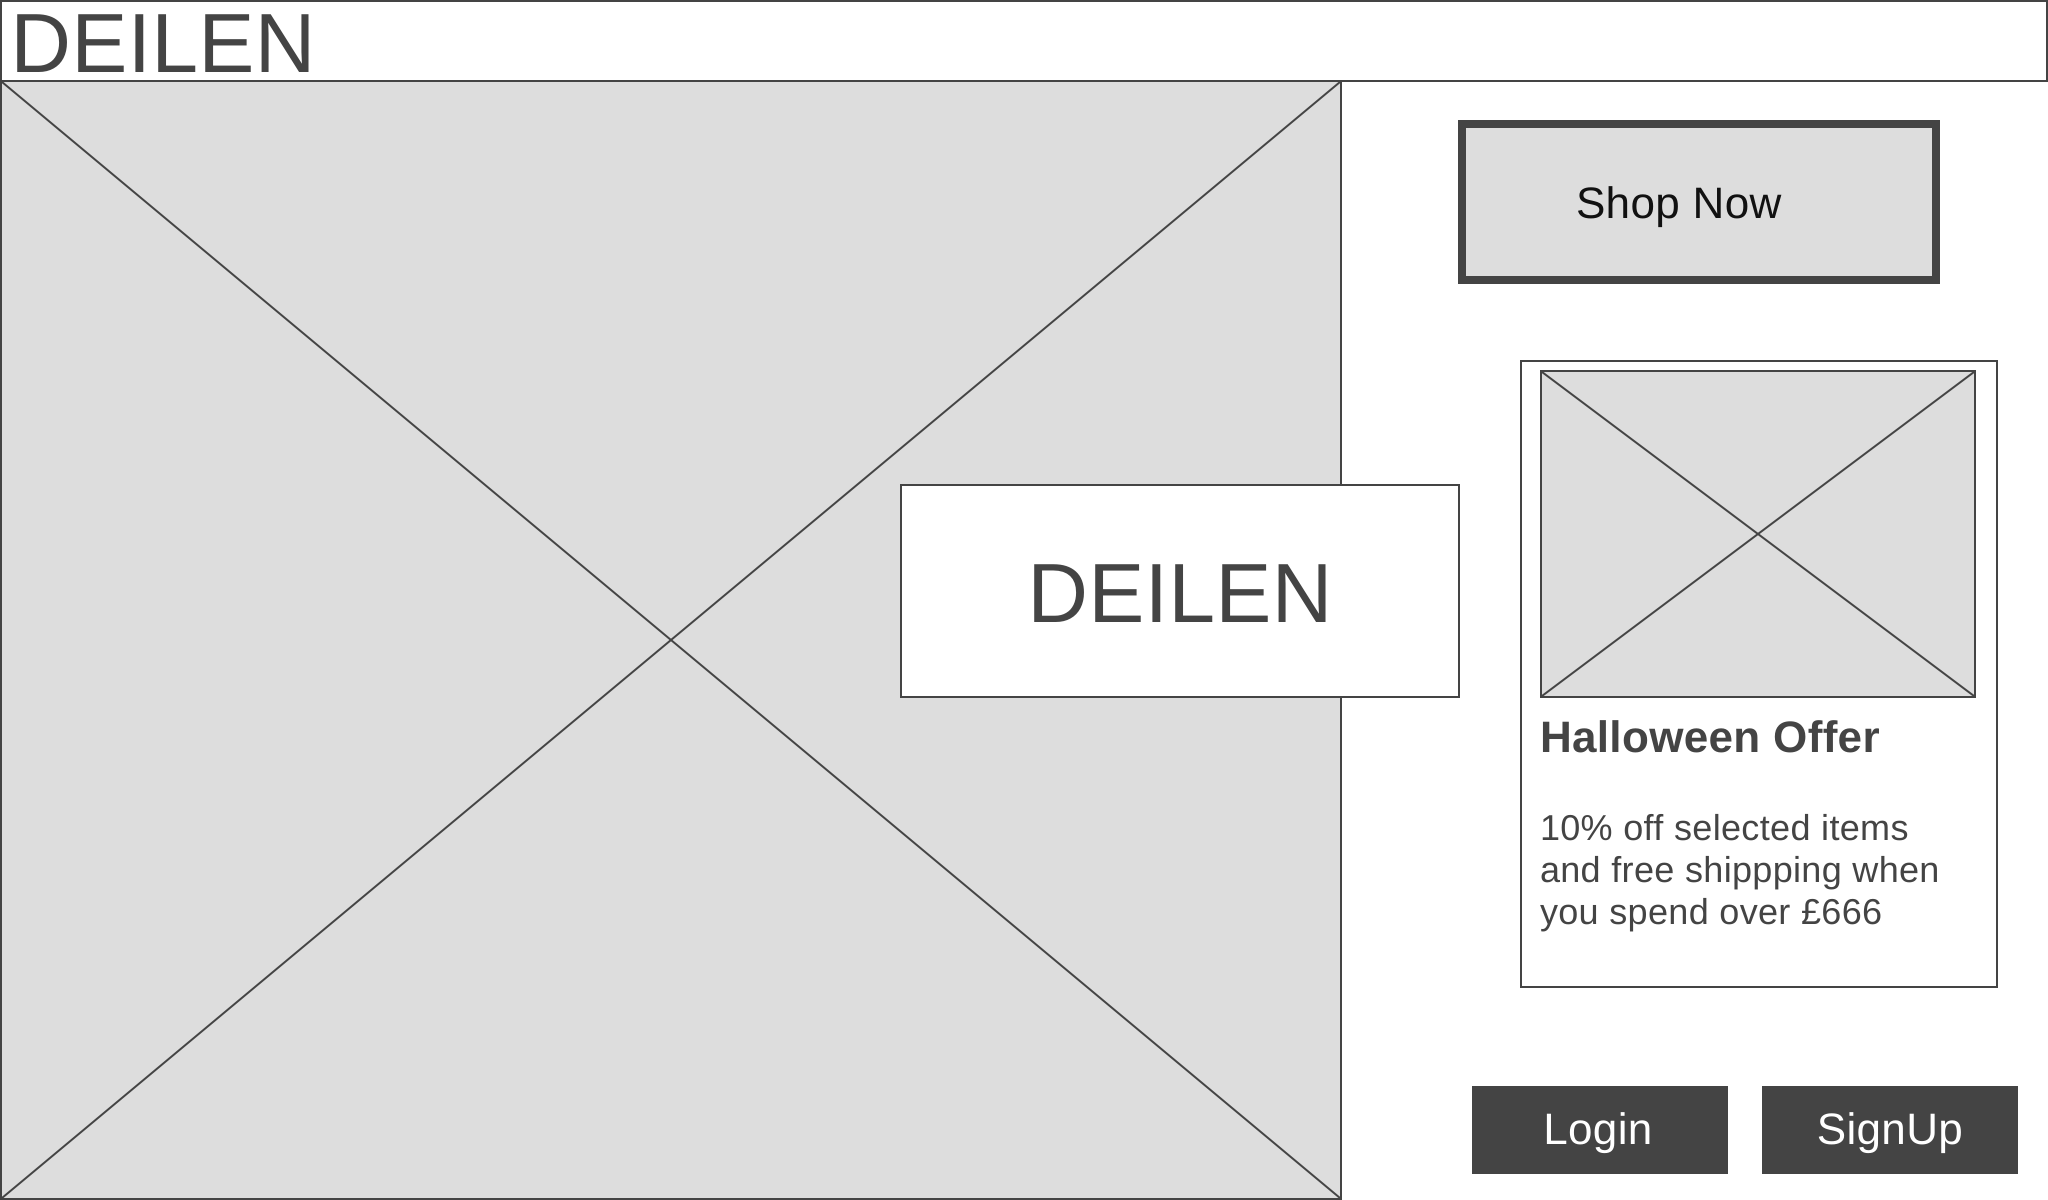
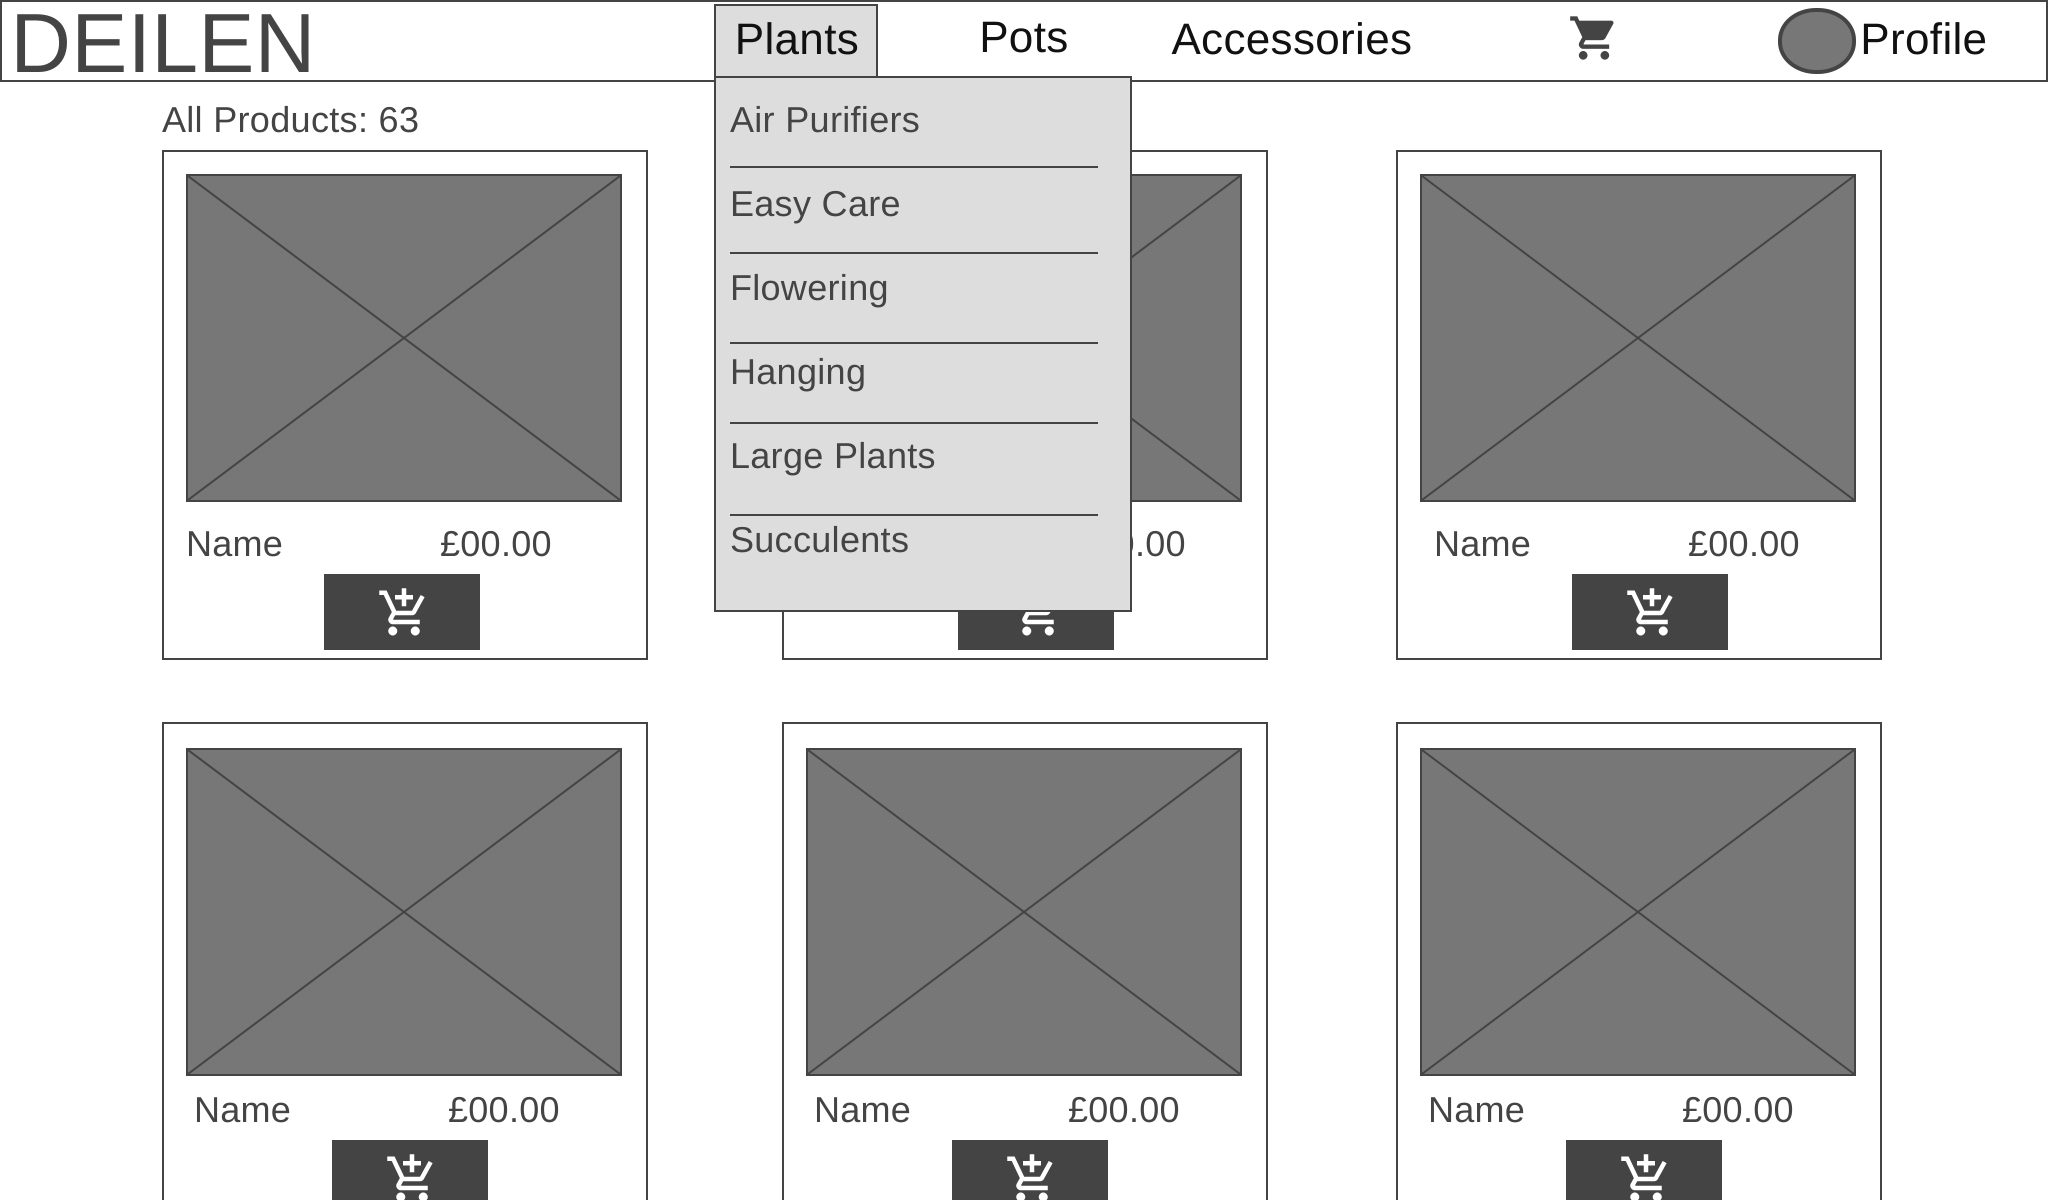
- Home wireframe
- Products wireframe
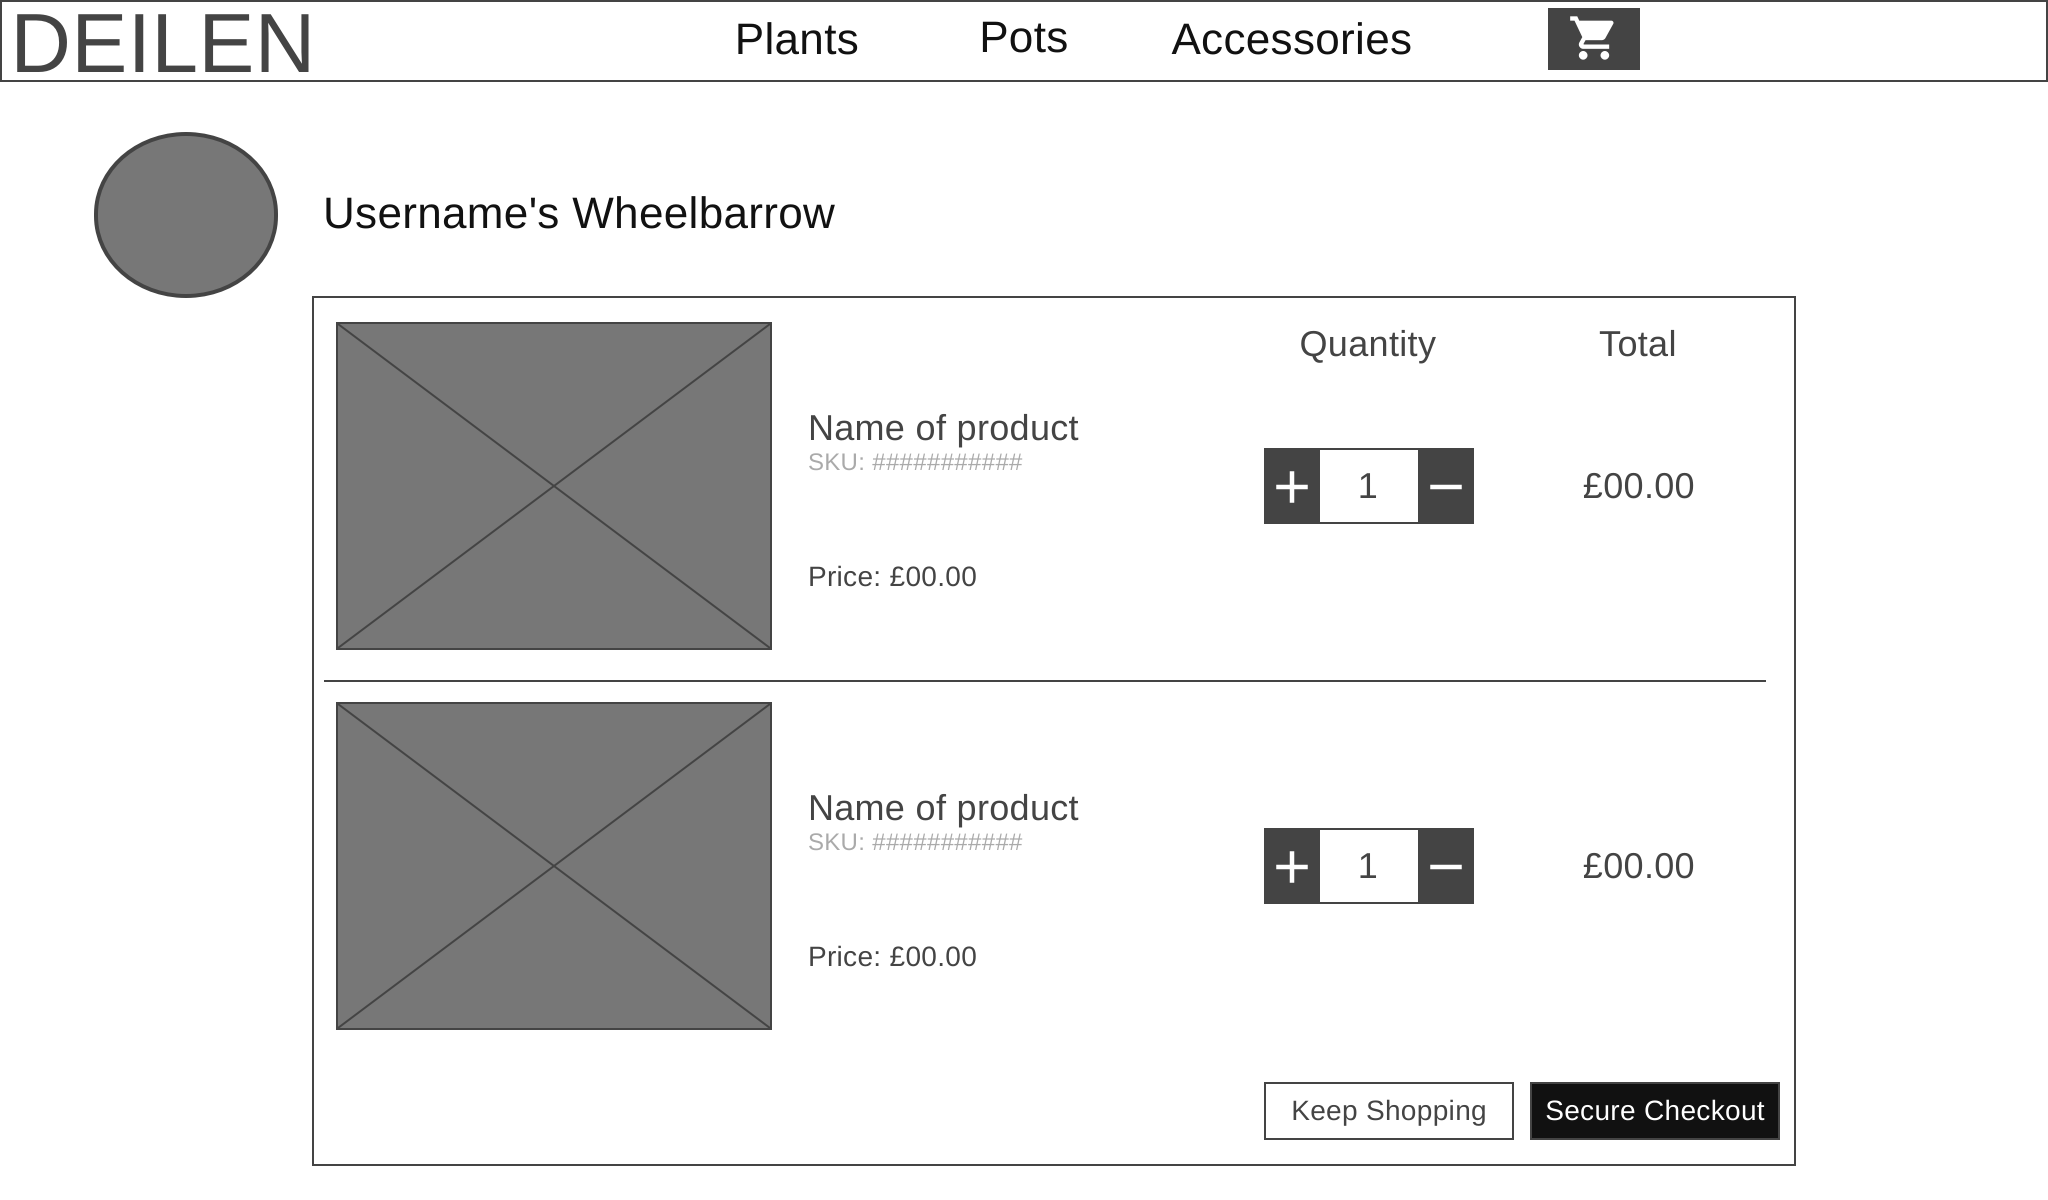
- Shopping bag wireframe
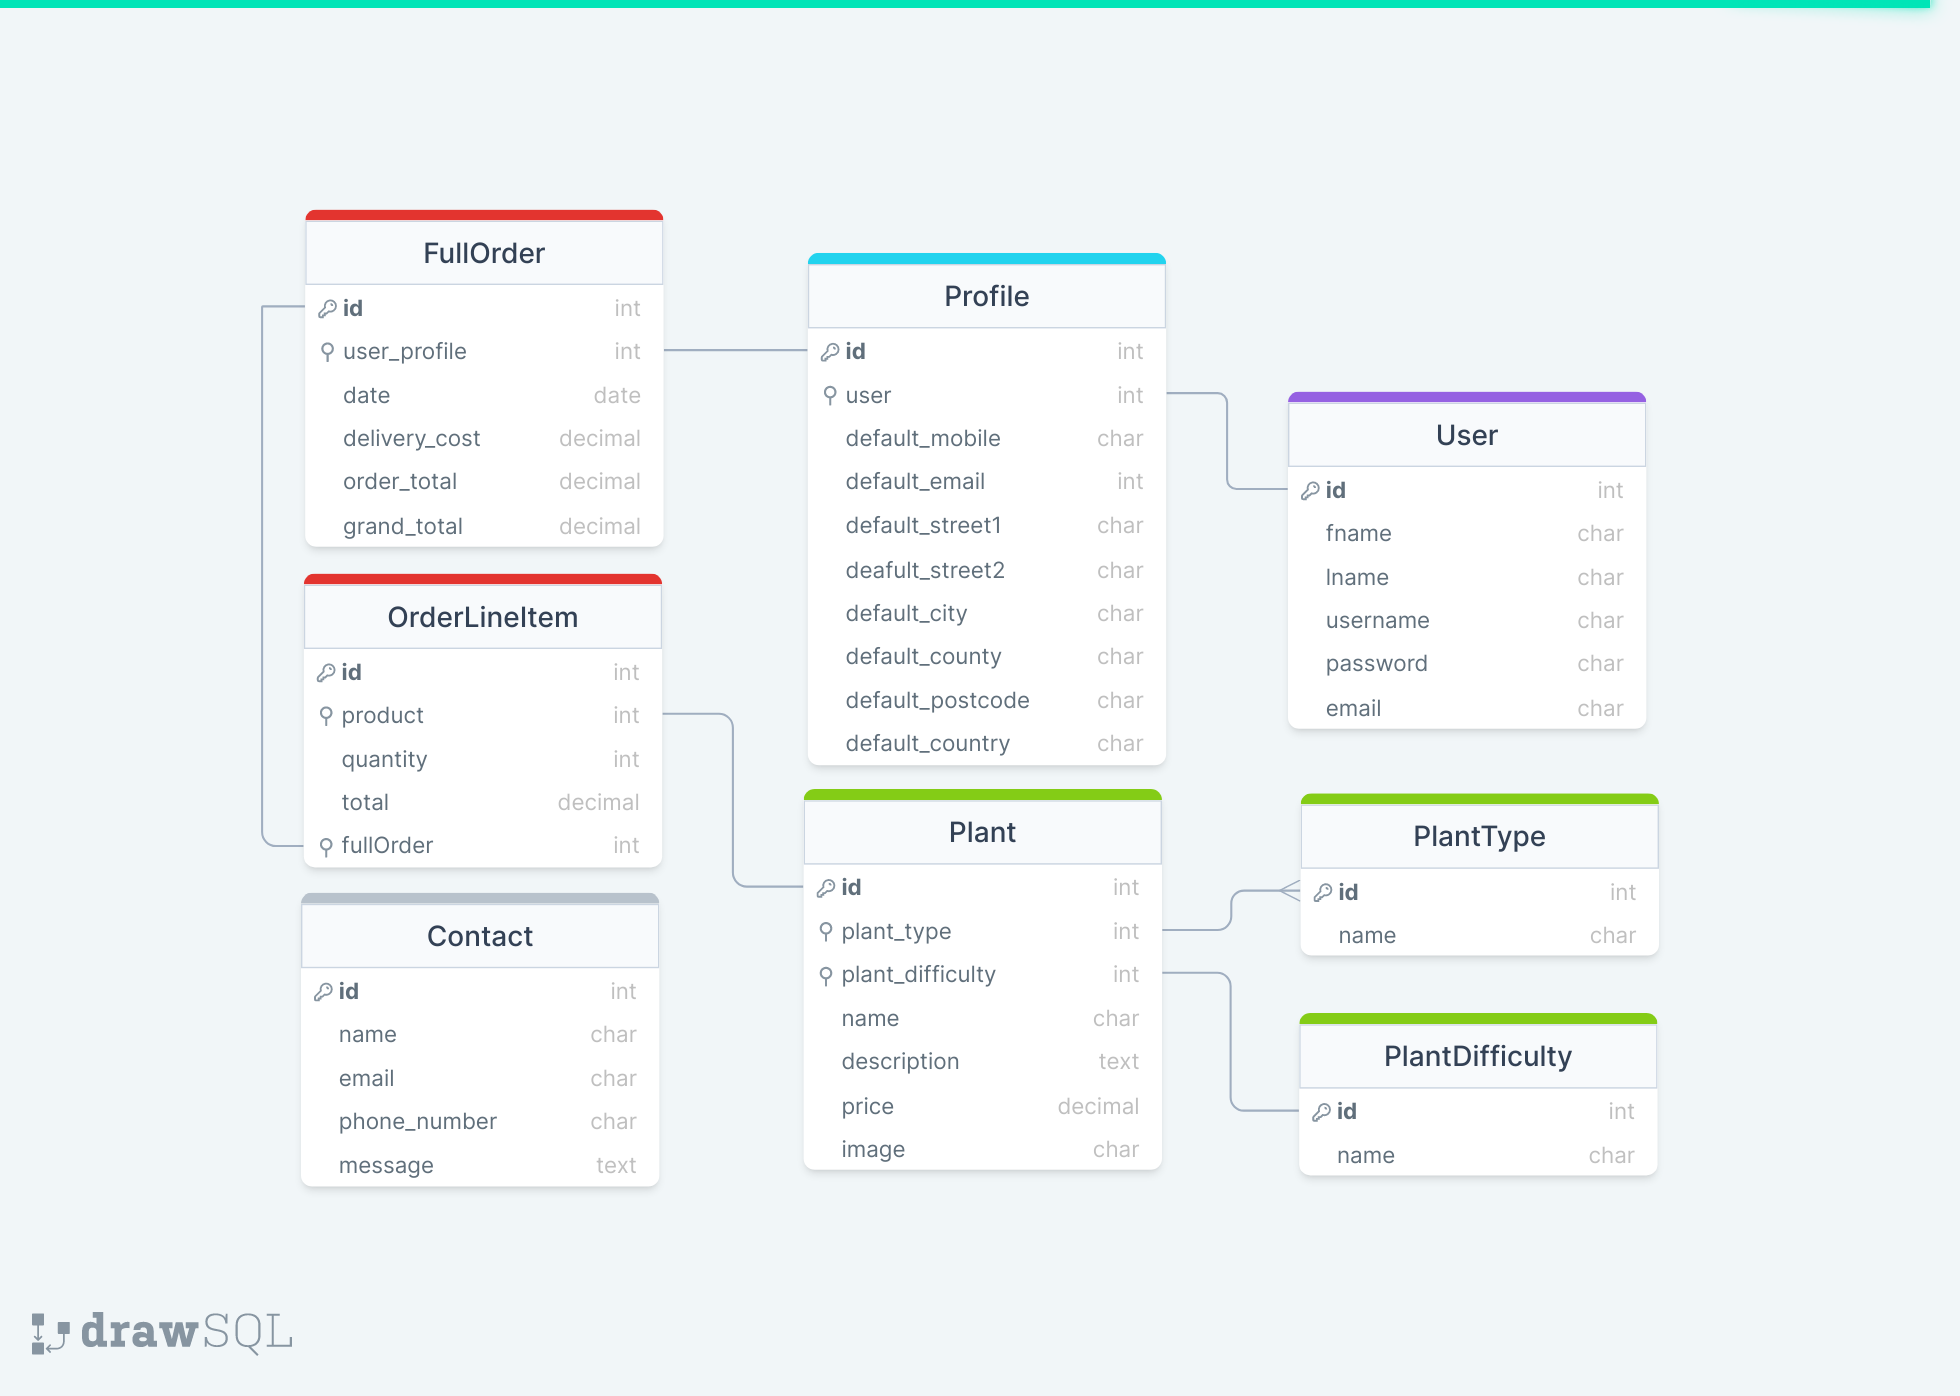
- Database schema for Deilen
Navigation Bar
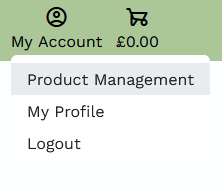
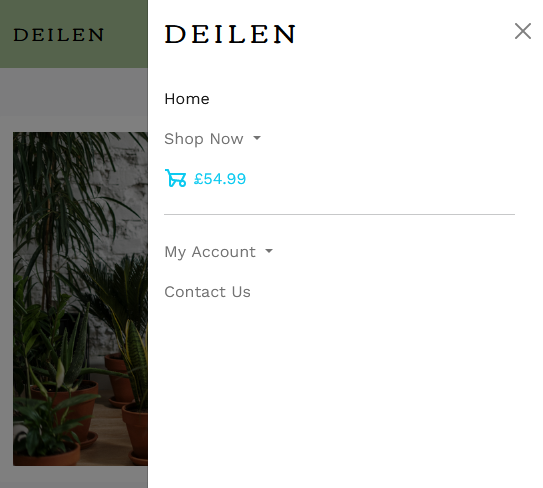
- Allows the user to navigate around the Deilen site. The Deilen logo will direct the user to the homepage, there's an Account Management button with dropdown options relating to profile creation and login, there's a Plants button for easy access to the shop floor, and there's a button to take a user to their Shopping Cart or "wheelbarrow". The wheelbarrows icon changes to blue if there are items currently sitting in the bag.
- The search bar allows users to search for a keyterm throughout the site, this is useful if the user has a particular product in mind to purchase.
- Buttons will be available to the user depending on whether they are logged into their account or not.
- The mobile navbar condenses all the same elements into a burger menu, this retains screenspace for other elements e.g., products.

Footer
- The footer contains the address of the company, useful links, business information and links to social media accounts. All of which either open modals or open new tabs directed away from the website.
- The footer design matches that of the header to give a cohesive feel to the website.

Homepage
- The homepage consists of a eye-catching photo to instantly suggest the purpose of the website to the user.
- There is a section dedicated to advertising company special offers, currently on display is the Halloween offer where free delivery is granted to orders over £666.
- On the homepage there is a button overlaying the main image to direct the user to the main shop.
- Below this are three beautifully styled info cards which inform the reader of why they should buy houseplants.
- Finally, the last feature on the homepage is a section dedicated to Deilen and why someone should shop at this store rather than competitors.

Shop Floor
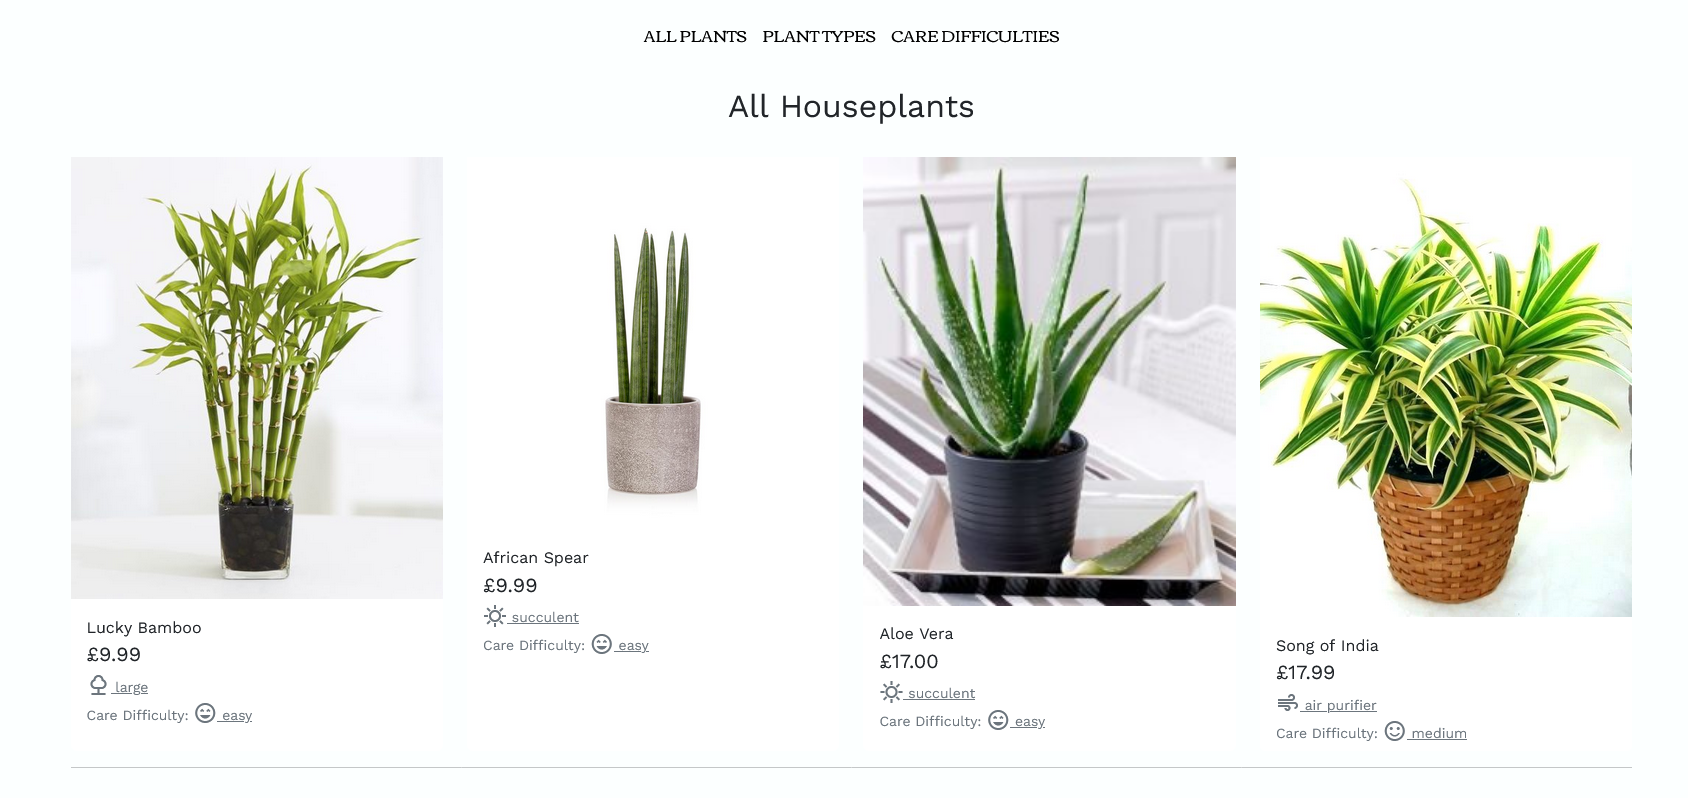
- The shop floor displays the plants that the user is able to buy through the website.
- Each plant has its own info card where the user can see to which category the plant belongs e.g., if the plant is an air purifier or a succulent. The user can also see at a glance the care difficulty of the plant - this informs clients of the attention and care a plant needs and can therefore decide if a plant is suitable for its intended purpose.
Plant Details
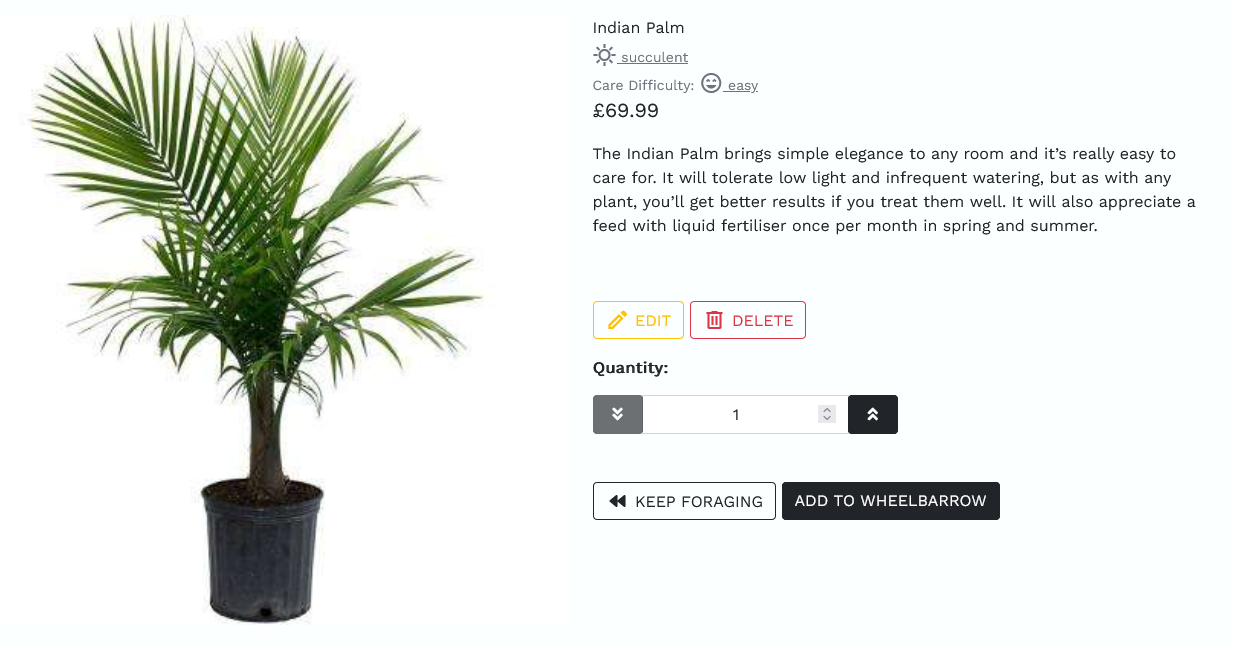
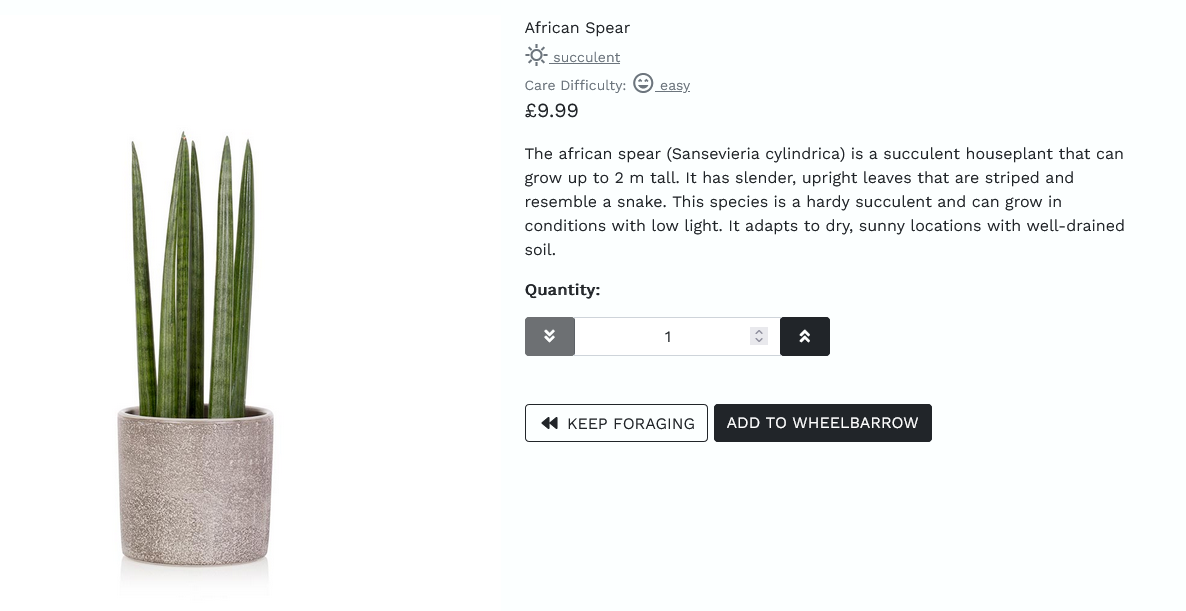
- Each plant detail page shows the product name, price, plant type, care difficulty, and product description.
- From this page, users can select a quantity of the product (within the range 1-99) and add the product to their wheelbarrow.
- It's important to note that users will be unable to select a quantity less than one or greater than 99. This prevents errors when ordering.
Product Filtering
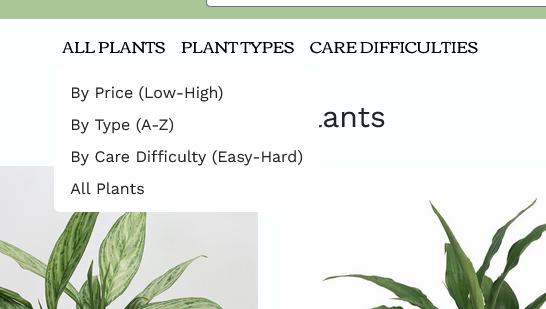
- From the shop floor, users will be able to filter plant products based on the product price, alphabetically as well as filtering by plant type and plant care difficulty.
- This allows users to shop a more selective list of products if they are looking for something specific.


Shopping Bag ("Wheelbarrow")
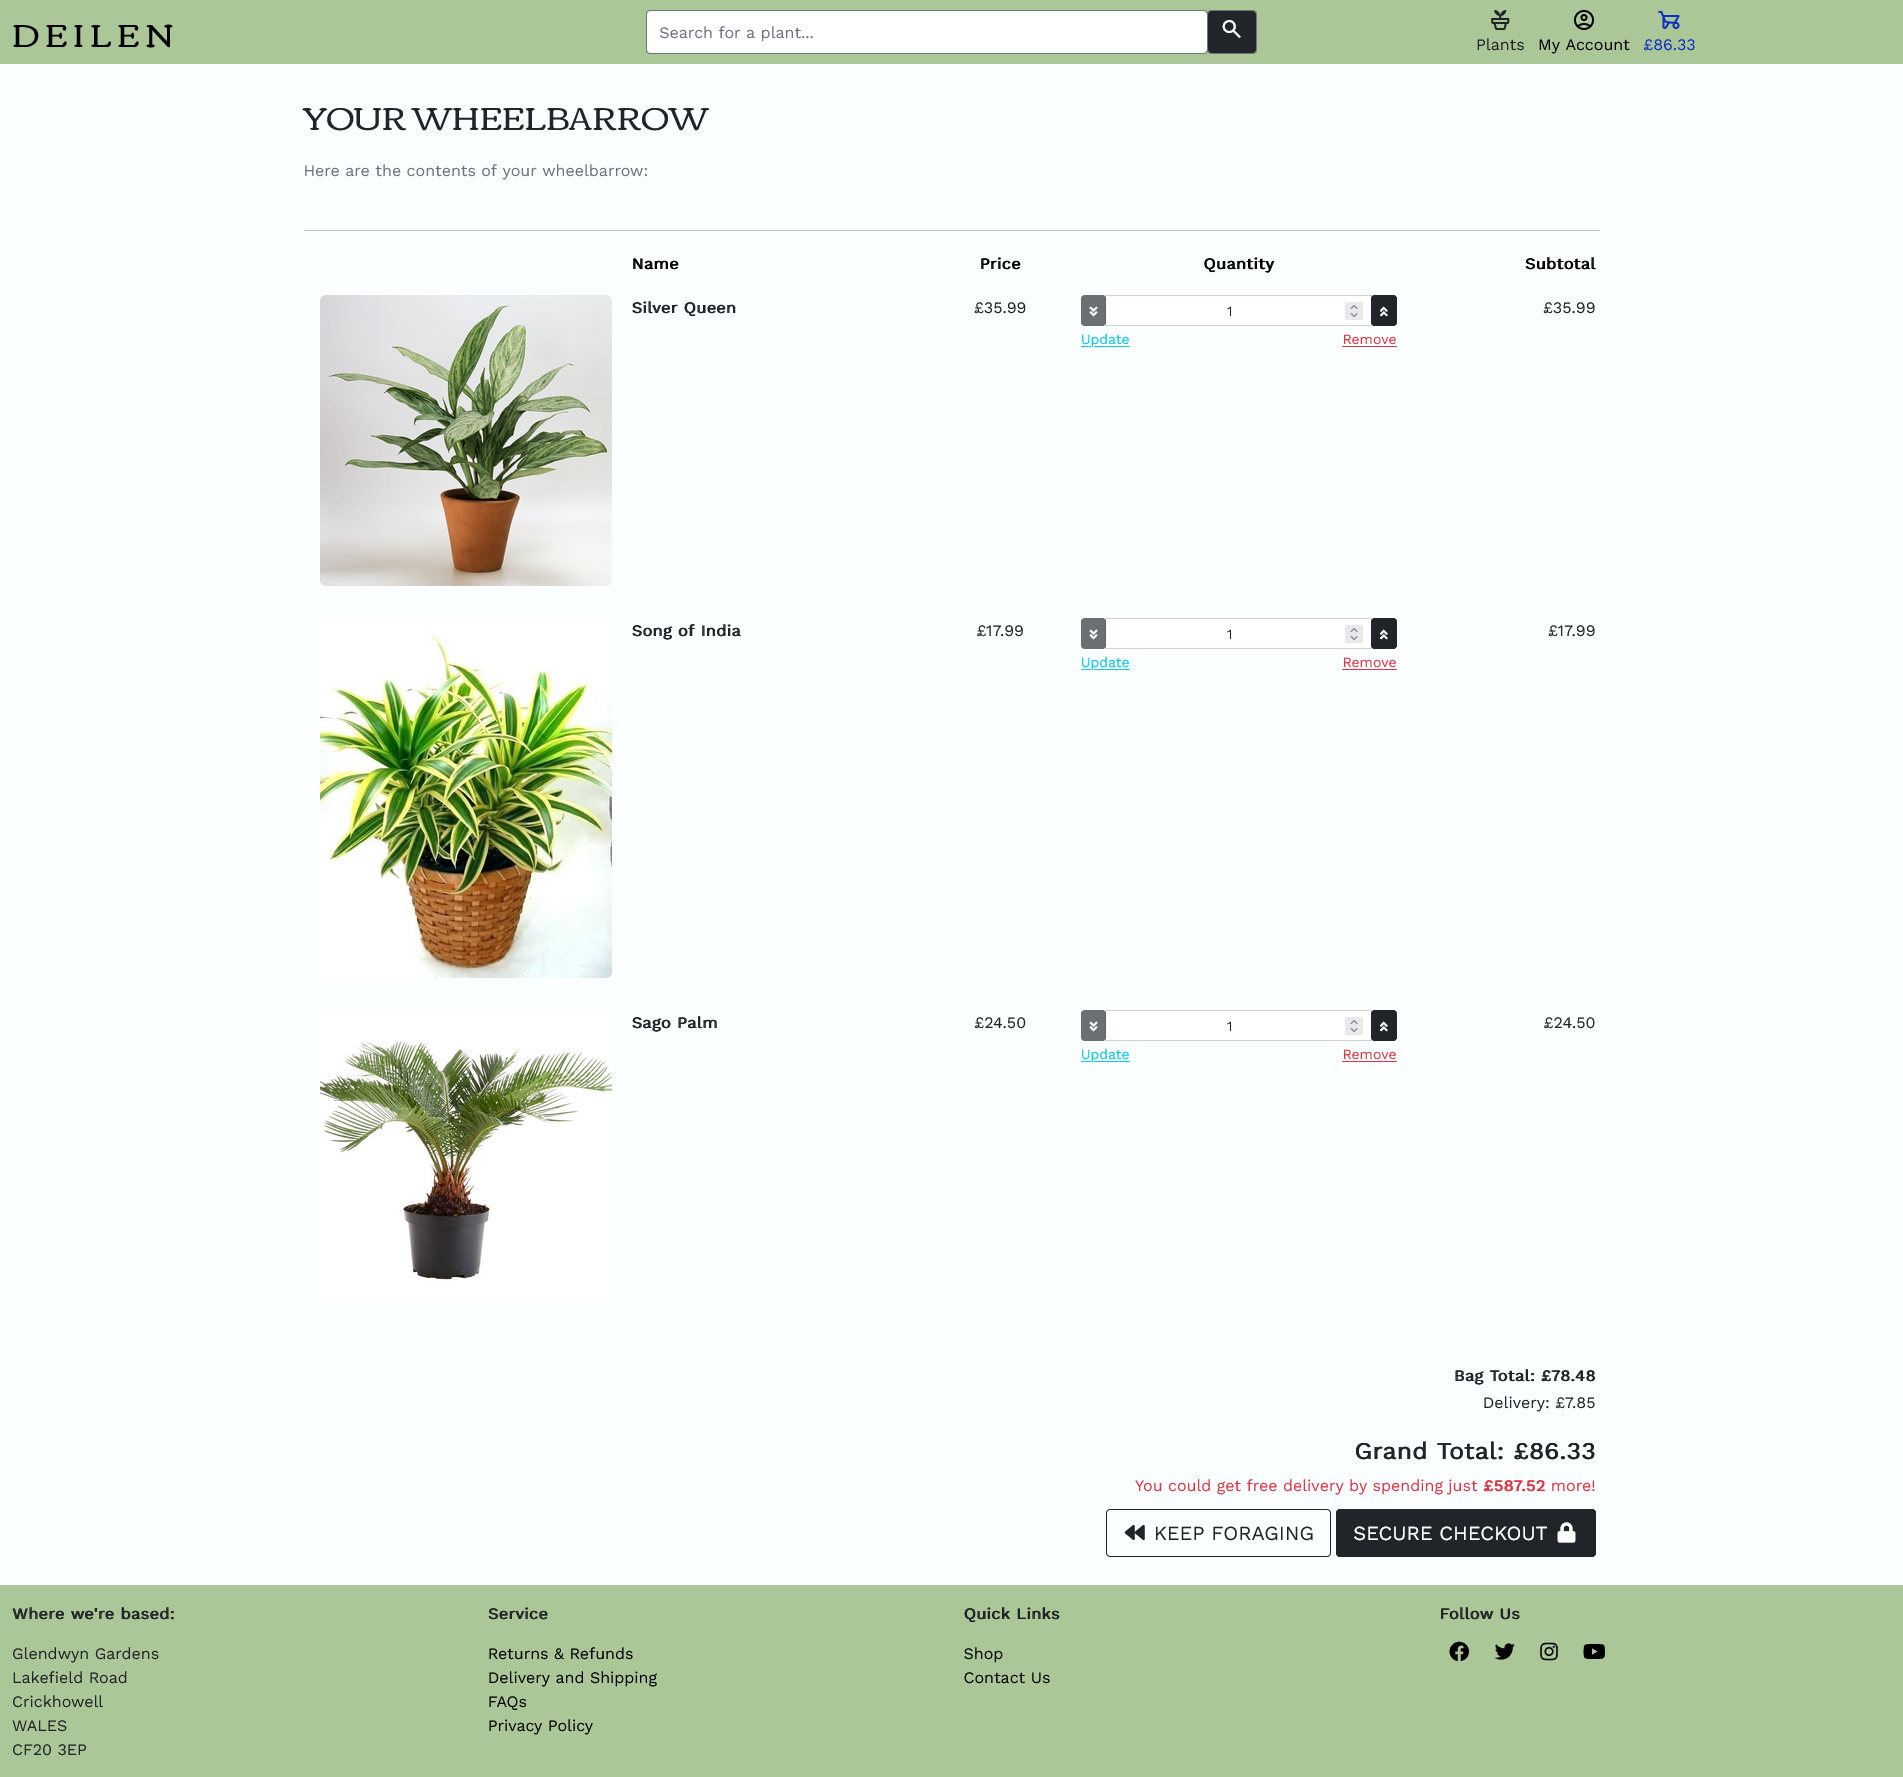
- The wheelbarrow is always accessible to users, even when empty. The wheelbarrow allows users to view what is currently in their bag for purchase. From here, a user can amend their order, continue shopping or proceed to checkout.
Checkout
- Once item(s) have been added to the wheelbarrow the user will then be able to checkout. Upon checkout there is a brief review of the users basket i.e., what they intend to purchase. The user will then be required to fill out their delivery information and then proceed to fill out their payment information. Once payment is completed the order is made.
- A user will also be prompted to make an account at Deilen in order to store their delivery information to speed up future checkouts.

Order Confirmation
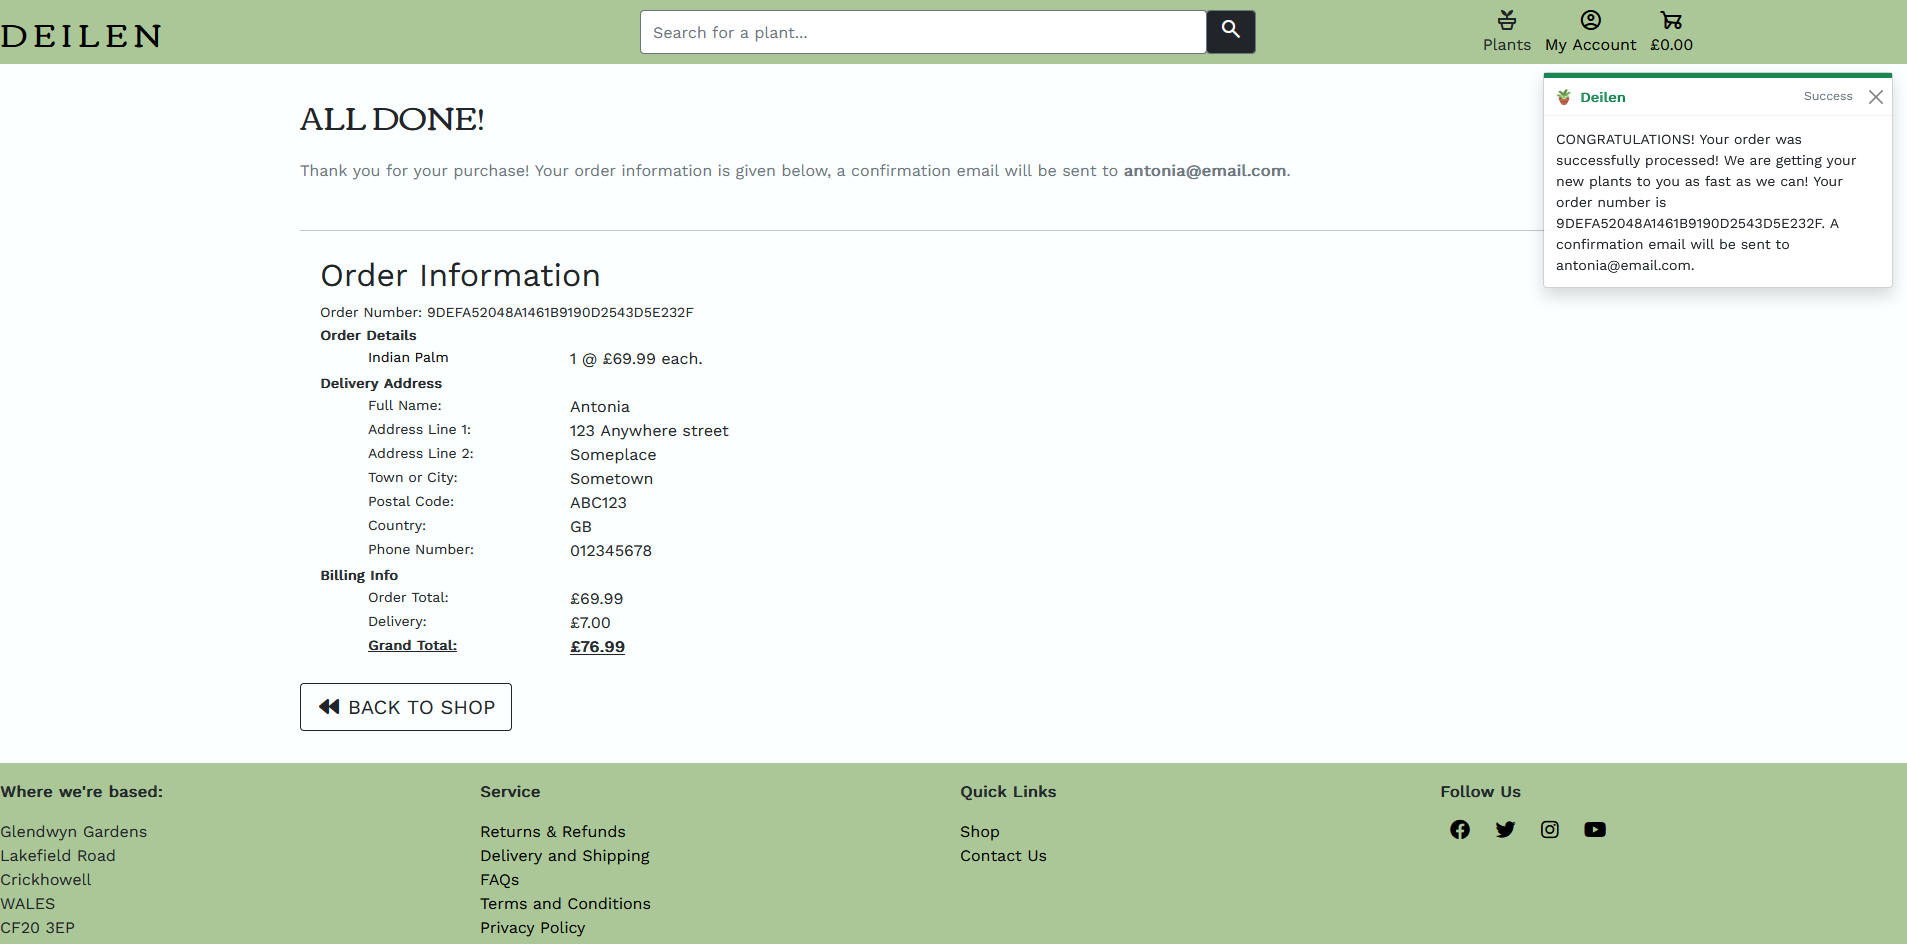
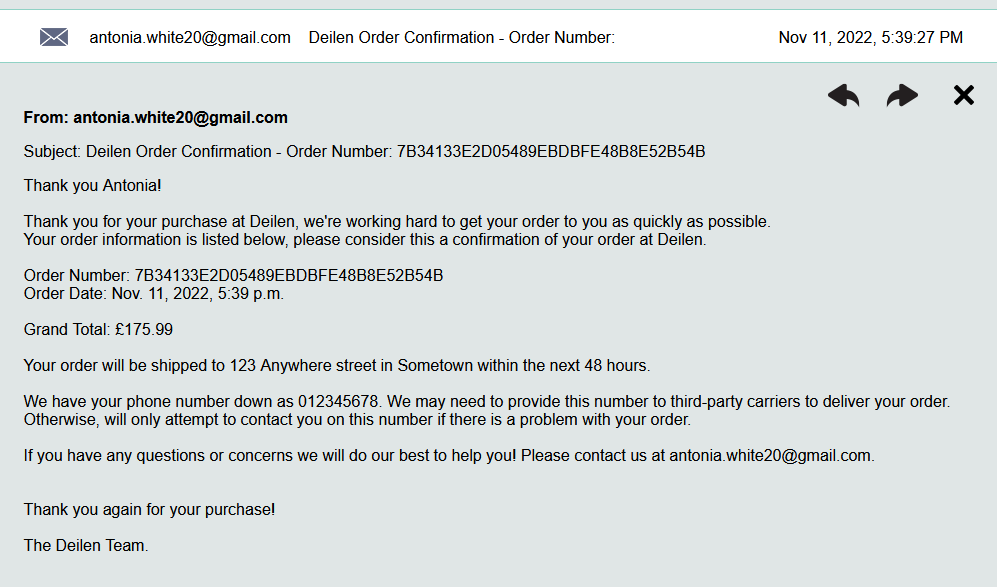
- One payment has been processed and an order created, a user will be directed to an order confirmation page listing their order details and a button to redirect back to the store. Additionally, there will be a toast alerting the user of their order success and a confirmation email will be sent to the email adress the customer provided.
Contact Us
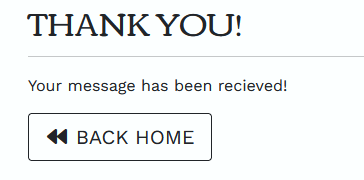
- If a user wants to contact Deilen, they can do so by filling out the form on the Contact Us page. Once the user has submitted this form they will be redirected to a success page to inform them that their message has been received and the company will be in touch shortly. An admin can see submitted contact forms in the django admin for the site.

Account Management
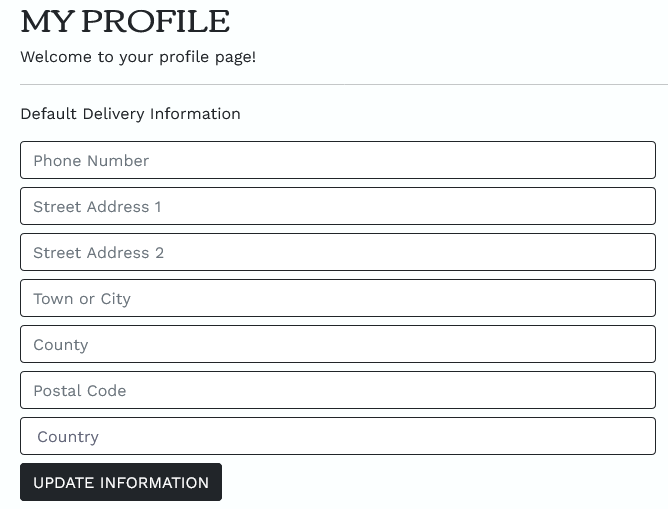
- A user is able to create a profile by registering an account. Having an account allows users to save delivery details for faster checkout and to view past order history.
- A user can navigate and manage their account by using the button dropdown in the navbar.
- A user can sign in and out of their account, they are also able to reset their password via email verification. The back-end functionality of accounts is handled by django-allauth.

Profile
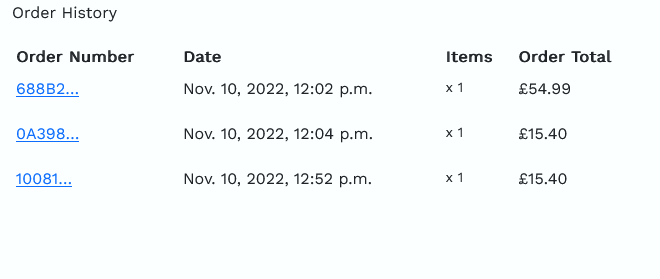
- A user's profile displays the user's past order confirmations alongside their default delivery information. Delivery information can be edited and saved in their profile to ensure their account details are always accurate.
Only admins have access to product management and only admins can view all orders, products, product categories, and customer messages. Please see TESTING.md's defensive programming section to see how I prevented general site users from accessing admin features.
Adding Plants
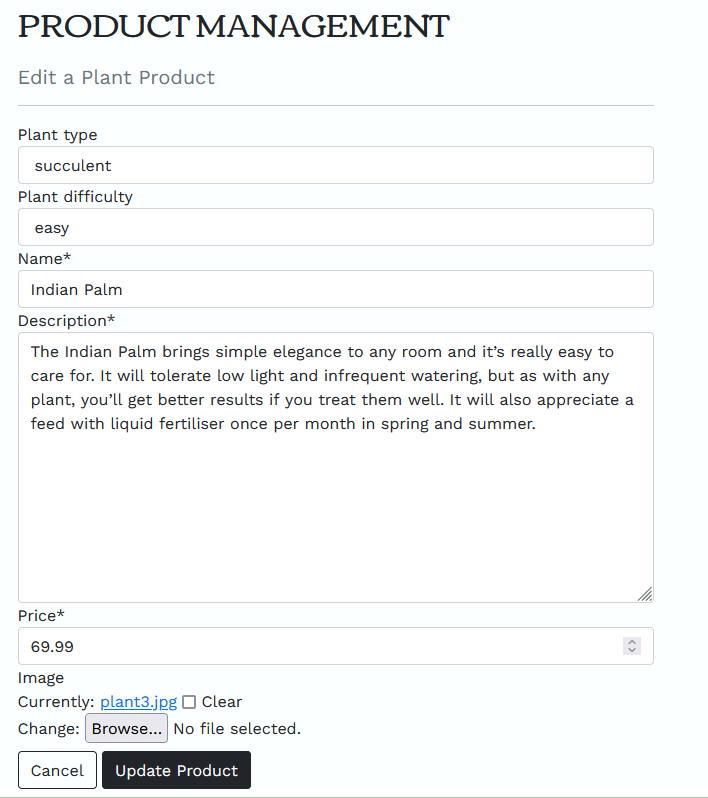
- An admin has the ability to add new products by navigating to the product management section under their account, which of course requires an admin signin. Completing and submitting the add plant form will result in a new product being displayed on the site. This will create a permanent object in the database which will remain until updated or deleted. Users will now be able to purchase this product.
Editing Plants
- From a plant's details page, an admin can easily update the details of said product. Clicking update opens a form, once completed and saved the data on this plant will be updated in the database.
- These admin control buttons (update and delete) are only present if the user that is logged in is a superuser i.e., an admin account.
Deleting Plants
- From a plant's details page, an admin can easily delete said product. Before deletion a modal is triggered to ensure no accidental deletion.
- Once deleted this plant product will be permenantly deleted from the database.
- Admin control buttons (update and delete) are only present if the user that is logged in is a superuser i.e., an admin account.
Django Admin
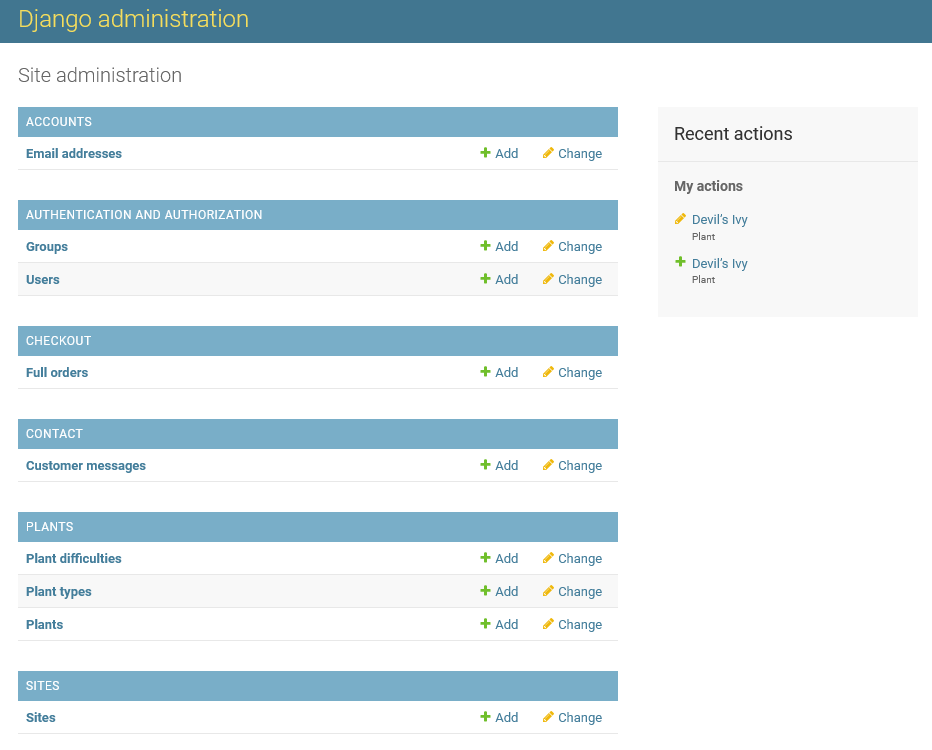
- All site information can be viewed when an admin logs into the customised django admin. This includes full orders, customer messages and ability to manage plant categories and products. Django provides a built in admin interface which acts as a internal management tool. More information can be read about Django admin here. Deilen's django admin can be accessed here (please note, admin login is required).
Admin accounts are defined as superusers and have to be made a specific way, different to a normal Deilen customer account.
To make an admin account for your local workspace:
- In the CLI run
python3 manage.py createsuperuserthen provide an admin username and password. - You can then login to your admin account with this username and password to get admin privileges.
To make an admin account for a deployed Heroku site:
- Ensure your git repository is connected to the Heroku app.
- Make sure a remote has been established for the Heroku app (you can check this by running
git remote -vin your terminal). - You will now need to login to your Heroku account in the CLI, to do this run
heroku login -iand provide your Heroku email address associated with your account and account password. - Ensure all migrations have been made to the Heroku app.
- Create a superuser by running
heroku run python3 manage.py createsuperuser. - You can then login to your admin account with this username and password to get admin privileges.
-
Update preloader to be more themed to the site.
- This has not yet been done due to time constraints, so Bootstrap's spinners have been used as an interim.
- In the future, I will work to replace the Bootstrap spinner with either this potted-plant or plant in sunshine preloader.
-
Add digital wallets for easier checkout.
- This would make checkout simpler and faster for the user by paying with the click of a button rather than filling out their card details into the Stripe input.
- However, Stripe's documentation warns that the integration of digital wallets are "currently only available in the U.S., and not yet available in the UK and euro area." Therefore, this would need to change or I would need to change online payment provider before this could be implemented.
- Please see the Stripe Docs explaining how digital wallets can be intergrated into Stripe in the US.
-
Auto populate countries field with the value 'United Kingdom' as Deilen are currently unable to ship abroad.
- This would be useful to prevent users having to needlessly scroll through the country input to select the UK - as this is currently the only shipping destination.
- I intend to implement this feature by following this documentation and discourse on this stackoverflow thread.
-
Checkout Webhooks
- Adds redundancy to the order payment in case the browser is closed after the payment is confirmed but before the order form has been submitted. This would stop the chance of payment going through without the order having been created.
- I would follow the Stripe documentation on webhooks and follow Code Institute's walkthrough project in order to implement webhooks in my site.
- GitPod was used as a cloud based iDE
- GitHub was used to manage the Git repository
- Heroku was used for deployment
- Git was used for version control
- Django used as the project's web framework
- Pip3 was the package manager used to install the dependencies
- Bootstrap was used for website layout and responsive components
- AWS S3 Buckets was used to provide storage of static and media files for the deployed site.
- Gmail was used for an STMP server to send company emails
- PostgreSQL was used as the project's database management system
- Google Fonts was used to provide website fonts and icons
- Am I Responsive was used to generate a mock-up image
- Dev Tools was used for testing and responsiveness
- Wireframe.cc was used for creating wireframes
- DrawSQL was used for creating the database schema
- W3C HTML Validator and W3C CSS Validator were used to check HTML and CSS files for errors
- pep8ish is Code Institute's Python Linter and was used to check Python files for errors
- HTML was used as the markup language
- CSS was used for custom styling
- JavaScript was used for custom website interactivity
- Python was used for the backend functionality of the site
To view all testing documentation, refer to TESTING.md.
The site was deployed to Heroku. The live link can be found here
The steps to deploy a Heroku app are as follows:
- Log in to Heroku or create an account if required.
- Create a Heroku app - select 'New', from the drop-down menu select Create New App. The app name provided must be unique.
- Select a region.
- Create.
- Navigate to the Resources tab and add a Heroku PostgreSQL database.
- Access the Settings Tab and find the Config Vars. For this project you will need the following config vars:
- DATABASE_URL = the url of your heroku postgres database.
- SECRET_KEY = a secret key for your app.
- PORT = 5000
- DEBUG = set to 'True' during development and 'False' upon deployment.
- IP = Your IP address.
- USE_AWS = set to 'True'.
- AWS_ACCESS_KEY_ID = amazon web services publishable API key.
- AWS_SECRET_ACCESS_KEY = amazon web services secret API key, must be stored securly.
- STRIPE_PUBLIC_KEY = stripes publishable API key.
- STRIPE_SECRET_KEY = stripes secret API key, must be stored securly.
- EMAIL_HOST_PASS = 16 character password given once SMTP server setup in mail account settings.
- EMAIL_HOST_USER = the active email address that site emails will be sent from.
Please see this official documentation on Heroku configuration for more details.
- Navigate to the Deploy tab.
- Select Github as the deployment method.
- Follow steps to link to the appropriate GitHub account.
- If you wish, enable Automatic Deploys for automatic deployment when you push updates to Github. Or alternatively, select the correct branch for deployment from the drop-down menu and click Deploy Branch for manual deployment.
Final steps:
- Create a Procfile in your repository containing
web: gunicorn deilen.wsgi:applicationso that Heroku will identify that Gunicorn is acting as the webserver and run using the projects wsgi module. - Create an untracked file called env.py in your repo and input the config vars you previously established in Heroku.
- Create a requirements.txt file
- If you want to freeze your own packages into this file, run
pip3 freeze --local > requirements.txtin the console. - To install only the packages that are already listed in the Deilen repo requirements (if making a local copy/clone) run
pip3 install -r requirements.txtin the console.
- If you want to freeze your own packages into this file, run
For instruction to set upstripe payments, please visit the Stripe documentation. Provided below is a brief explanation of Stripe setup:
- Create a stripe account at stripe.com
- In the terminal, install Stripe:
pip3 install stripe
- In the project settings file, ensure
STRIPE_CURRENCYis set to 'gbp' andSTRIPE_PUBLIC_KEYandSTRIPE_SECRET_KEYare retirived from the environment, with a default empty value, e.g.:
STRIPE_PUBLIC_KEY = os.environ.get('STRIPE_PUBLIC_KEY', '')
STRIPE_SECRET_KEY = os.environ.get('STRIPE_SECRET_KEY', '')
- These API keys are avliable to you from the home page of your Stripe account, under a section titled "for developers". Copy the Publishable key and assign it to a new Heroku config var called
STRIPE_PUBLIC_KEY. Then do the same for the Secret key, assigning it to a config var calledSTRIPE_SECRET_KEY.
The deployed site uses AWS S3 Buckets to store the webpages static and media files. More information on how you can set up an AWS S3 Bucket can be found below:
- Create an AWS account here.
- Login and locate S3 buckets and create a new bucket.
- Underneath Object Ownership select ACLs enabled.
- Uncheck Block Public Access to make the bucket public, then finally Create Bucket.
- Inside your new bucket navigate to the Properties tab. Within Static Website Hosting click Edit and edit the Static website hosting to Enabled. Copy the default values for the index and error documents and click Save Changes.
- Navigate to the Permissions tab, within Cross-origin Resource Sharing (CORS), click Edit and then paste in the following:
  [
      {
          "AllowedHeaders": [
          "Authorization"
          ],
          "AllowedMethods": [
          "GET"
          ],
          "AllowedOrigins": [
          "*"
          ],
          "ExposeHeaders": []
      }
  ]
- In the Bucket Policy section click Edit and then Policy Generator. Open the Select Type of Policy dropdown, select S3 Bucket Policy and within Principle allow all principals by typing *.
- Open up Actions dropdown menu, now select Get Object and in the previous tab copy the Bucket ARN number. Paste this in the policy generator in the Amazon Resource Name (ARN) field.
- Add statement > Generate Policy and copy the generated policy, paste this into the Bucket Policy Editor.
- Before saving, add /* at the end of your Resource Key, this will allow access to all resources within the bucket. Save.
- Find Access Control List (ACL) and Edit.
- Next to Everyone (public access), check the list checkbox and save your changes.
- Within IAM, in the sidebar select User Groups and then Create group, name the group.
- In Policies, Create policy.
- Navigate to the JSON tab and select Import Managed Policy, search for S3 and select AmazonS3FullAccess followed by Import.
- Navigate back to your S3 bucket and copy the ARN Number. Return to This Policy and update the Resource Key including your ARN Number . Copy this line to include all files by adding /* at the end. This code section should look like the following:
"Resource": [
    "YOUR-ARN-NUMBER-HERE",
    "YOUR-ARN-NUMBER-HERE/*"
]
- Ensure the policy is named and has a description, then Create Policy.
- Within the group created earlier, under permissions click Add Permission and select Attach Policies.
- In the sidebar find Users and Add User.
- Provide a username and check Programmatic Access, then click 'Next'.
- Ensure the new policy is selected and navigate through until you click Add User.
- VERY IMPORTANT: Download the CSV file, this contains the user's AWS access key and AWS secret access key.
- In the terminal:
  pip3 install boto3
  pip3 install django-storages
- Add storages to your installed apps within your settings.py file.
- In settings.py file add:
if 'USE_AWS' in os.environ:
    AWS_STORAGE_BUCKET_NAME = 'your-bucket-name-here'
    AWS_S3_REGION_NAME = 'your-region-here'
    AWS_ACCESS_KEY_ID = os.environ.get('AWS_ACCESS_KEY_ID')
    AWS_SECRET_ACCESS_KEY = os.environ.get('AWS_SECRET_ACCESS_KEY')
- Add
AWS_ACCESS_KEY_IDandAWS_SECRET_ACCESS_KEYto Heroku config vars. These can be found in the CSV file downloaded when setting up AWS. - Add
USE_AWSto Heroku config vars with value set to 'True'. - Remove the
DISABLE_COLLECTSTAICvariable. - Within your settings.py add:
AWS_S3_CUSTOM_DOMAIN = f'{AWS_STORAGE_BUCKET_NAME}.s3.amazonaws.com'
- Within the bucket config in settings.py, add:
STATICFILES_STORAGE = 'custom_storages.StaticStorage'
STATICFILES_LOCATION = 'static'
DEFAULT_FILE_STORAGE = 'custom_storages.MediaStorage'
MEDIAFILES_LOCATION = 'media'

STATIC_URL = f'https://{AWS_S3_CUSTOM_DOMAIN}/{STATICFILES_LOCATION}/'
MEDIA_URL = f'https://{AWS_S3_CUSTOM_DOMAIN}/{MEDIAFILES_LOCATION}/'

AWS_S3_OBJECT_PARAMETERS = {
    'Expires': 'Thu, 31 Dec 2099 20:00:00 GMT',
    'CacheControl': 'max-age=94608000',
}
- In the root directory of your project create custom_storages.py. Include the following:
  from django.conf import settings
  from storages.backends.s3boto3 import S3Boto3Storage

  class StaticStorage(S3Boto3Storage):
    location = settings.STATICFILES_LOCATION

  class MediaStorage(S3Boto3Storage):
    location = settings.MEDIAFILES_LOCATION
- Navigate back to you AWS S3 Bucket and Create Folder called media, you can then Upload > Add Files all media files needed for the site.
- Under Permissions select the option Grant public-read access and click Upload.
The following steps are for Gmail and may differ to other providers.
- Navigate to settings, access the Accounts and Import tab and scroll to other Google account settings.
- In the security tab and turn on 2-Step Verification. Once completed access App passwords, select Mail for the app dropdown and select Other for the device type dropdown and type in "Django".
- A 16 character password will be generated, copy this and enter as a Heroku config variable named
EMAIL_HOST_PASSalongside your email address forEMAIL_HOST_USERvariable. - In your project's settings.py file add the folloeing:
if 'DEVELOPMENT' in os.environ:
    EMAIL_BACKEND = 'django.core.mail.backends.console.EmailBackend'
    DEFAULT_FROM_EMAIL = 'deilen.example@gmail.com'
else:
    EMAIL_BACKEND = 'django.core.mail.backends.smtp.EmailBackend'
    EMAIL_USE_TLS = True
    EMAIL_PORT = 587
    EMAIL_HOST = 'smtp.gmail.com'
    EMAIL_HOST_USER = os.environ.get('EMAIL_HOST_USER')
    EMAIL_HOST_PASSWORD = os.environ.get('EMAIL_HOST_PASS')
    DEFAULT_FROM_EMAIL = os.environ.get('EMAIL_HOST_USER')
Cloning a repository makes it easier to contribute, fix merge conflicts, add or remove files, and push larger commits. To clone this repository from GitHub to a local computer use the following steps:
-
On GitHub, navigate to the main page of the repository.
-
Above the list of files, click Code.
-
Click Use GitHub CLI, then the copy icon.
-
Open Git Bash and change the current working directory to the location where you want the cloned directory.
-
Type git clone, and then paste the URL that was copied from step 3 above - i.e.,
git clone https://github.com/antonia-white/deilen.git -
Press Enter to create the local clone.
A fork is a copy of a repository. Forking a repository allows you to freely experiment with changes without affecting the original project.
To fork this project go to the top left of the repository, where you see the Fork Icon and click Fork. This will create a copy of the repository for you.
- The Returns Policy was generated with Termly's Return and Refund Policy Generator.
- The Shipping and Delivery Policy was generated with Termly's Shipping Policy Generator and adapted.
- Frequently asked questions and answers content was sampled from the houseplant shop Bloombox Club.
- Plant descriptions were adapted from the plant identifier app PictureThis' plant descriptions.
- Icons were taken from both Google Font Icons and FontAwesome.
- The favicon was generated with favicon.io using Twitter emojis.
- The all site images were taken from the open source site Unsplash.
- The product images were taken from Kaggle, a website for dataset downloads. Specifically, images were taken from the Healthy and Wilted Houseplant Images dataset. Only healthy houseplant images were used as product images.
- My Code Institute mentor, Tim Nelson
- My friends and family for manually testing the site.
