Using Signals and Slots
cpp-qt-ui-cmake teaches how to create a sample Qt app that does nothing.
The goal of this tutorial is to teach you how to react to events by using the Qt signal and slots system.
Before you start you should get the final files from cpp-qt-ui-cmake.
We will create a window with multiple pages that are shown one at a time, at the full size of the window.
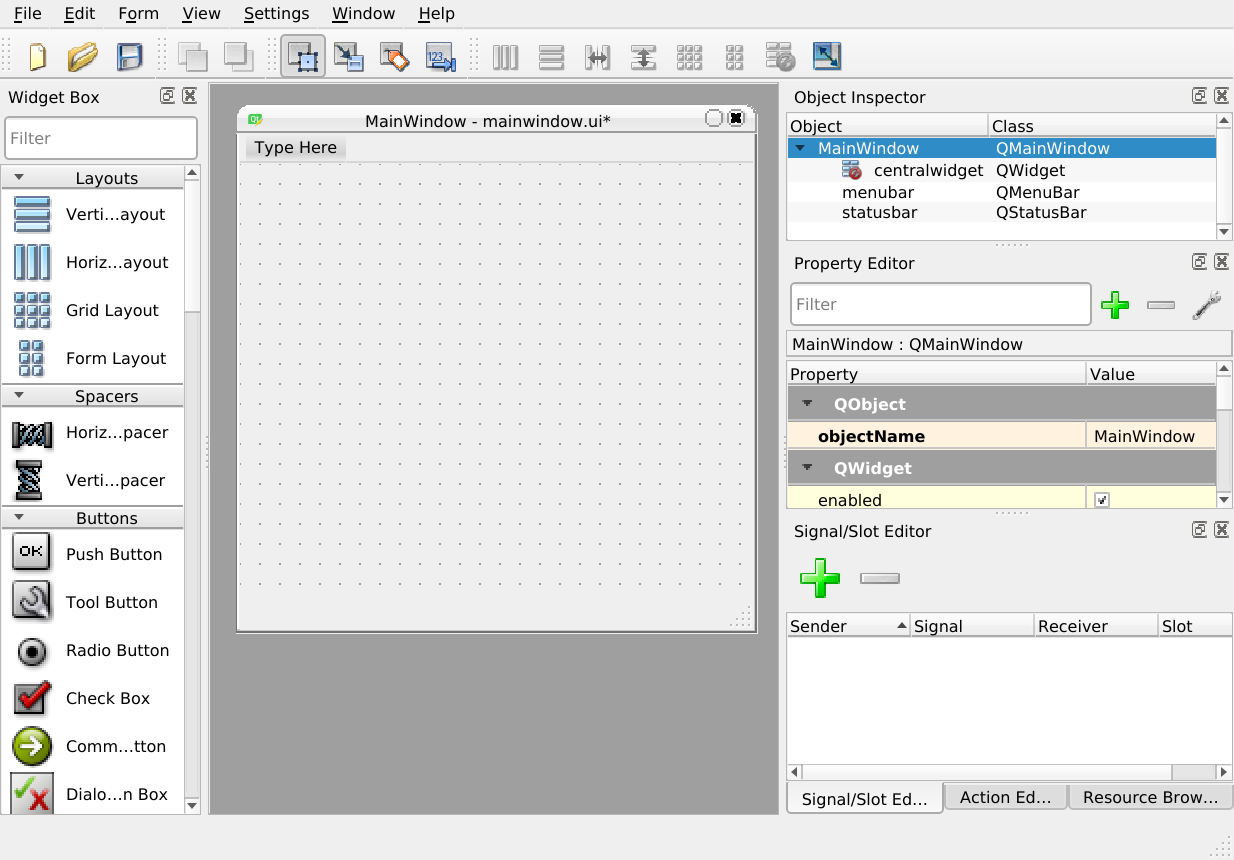
Using Qt Designer
- On the left you see the Widget Box: you can drag the Widgets into the Main Window.
- In the middle, the preview of the Main Window.
- On the right side, the Object Inspector lists all the widgets and layouts in the current Window.
- In the lower part of the right side, the Property Editor, allows to edit the properties of the Widget currently selected.
Adding widgets to the .ui file
Open ui/mainwindow.ui in Qt Designer.
Drop a StackedWidget in the middle of the Main Window.
A stacked widget shows one of multiple pages.
Right click on the background of the Main Window and in the Lay out sub menu pick Layout in a Grid: now the Stacked Widget should be of the same size as the window.
There are two small arrows in the top right corner of the Widget: you can use them to switch between the existing pages.
By default you will have two pages: page and page_2. Click on each of them in the Object Inspector, and use the Property Editor to set the objectName to list for the first to details for the second one.
On each page:
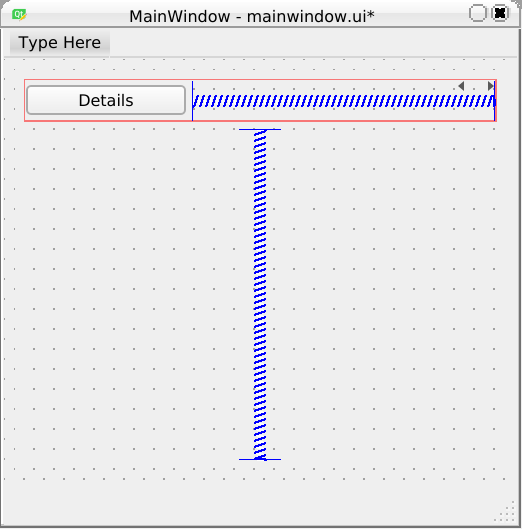
- From the Widget Box, drop an "Horizontal Layout" in the middle of the page.
- With a right click on the page background of the page choose "Layout Vertically".
- From the Widget Box drop a "Push Button" in the middle of the horizontal layout.
- Add an "Horiztonal Spacer" element at the right of the Button to push it to the left (mind where the blue line is).
- Add a "Vertical Spacer" element below the "Horizontal layout" to push it to the top.
If you have issues dropping the widgets, layouts or spacer to the right place, you can drop them into the Object Inspector.
In the Property Editor:
- In the list page, set the button's Text property to "Details".
- In the details page, set the button's Text property to "List" .
Then set the objectName of the buttons to detailsPushButton and listPushButton.
We will use the buttons to move back and forth between the pages.
In Designer you will need to use the small arrows in the top right corner of the StackedWidget (or the Object Inspector), since the buttons are not active.
The result should look like this:
You can now make your project and you will see the "Details" button of the first page.
If you see the "List" button instead, you will have to go back to the Designer and activate the first page, before saving again the .ui file.
Adding actions to the buttons
The actions are added in the MainWindow's constructor defined in src/mainwindow.cpp.
Qt provides a mechanism called "Signal and Slots" that lets you easily react to UI events (at the bases it's an Observer pattern).
We are going to connect the Details button (detailsButtonPushed) to a new function detailsButtonPushed():
connect(ui->detailsPushButton, &QPushButton::clicked,
    this, &MainWindow::detailsButtonPushed);
With connect we define that:
- each time the object
ui->detailsPushButtontriggers signalclicked, - we call the slot
detailsButtonPushedin ourMainWindow.
The signal clicked is defined in the class QPushButton. &QPushButton::clicked means, that the second argument of connect() is a reference to the function QPushButton::clicked, which is defined by Qt in the QPushButton class.
We now have to create the slot MainWindow::detailsButtonPushed:
-
Towards the end of
src/mainwindow.h, add thedetailsButtonPushedfunction:private slots: void detailsButtonPushed();slotsis a macro defined by Qt which will do some magic with thedetailsButtonPushed()and will prepare it, for adding it to the right side of aconnect(). -
In
src/mainwindow.cppadd the mock implementation ofdetailsButtonPushed():void MainWindow::detailsButtonPushed() { qDebug() << "pushed"; }
qDebug()will output in the terminal the message we are piping: you'll need to#include <QDebug>for it.
make it and see if it works by clicking on the button and checking the output in the terminal.
As next we can add the command for switching QStackedWidget's page by replacing the debug output with:
void MainWindow::detailsButtonPushed()
{
    ui->stackedWidget->setCurrentIndex(1);
}
That was simple! make and check if it works.
Finally, we connect the second button, and add the ctrl-Q shortcut for exiting our application.
In the MainWindow's constructor add the two following connects:
connect(ui->listPushButton, &QPushButton::clicked,
    this, &MainWindow::listButtonPushed);

auto quitAction = new QAction();
quitAction->setShortcuts(QKeySequence::Quit);
addAction(quitAction);
connect(quitAction, SIGNAL(triggered()), this, SLOT(close()));
Two remarks:
- You will need to define the
listButtonPushedfunction, in both themainwindow.handmainwindow.cppas you did fordetailsButtonPushed. - Normally, you will attach Quit to a menu or a button. We don't have (yet) and Qt allows us to directly attach it to the
ctrl-Qshortcut.

