This is the Java port of the now discontinued Qt project, XPlotterSVG.
This project is a command line tool to convert SVG files into GCode, specifically for theXPlotter.
To use this tool, you will need to have Java 8 installed. This is the current version of Java.
Usage:
java -jar XPlotterSVG.jar <svgfile> <materialfile> <outputfile>
for instance:
java -jar XPlotterSVG.jar MyDesign.svg laser+card.xml XPLOTTER.G
The above command will convert your SVG design into GCode use the laser+card material file.
Clone and build from this repo, or just download from here
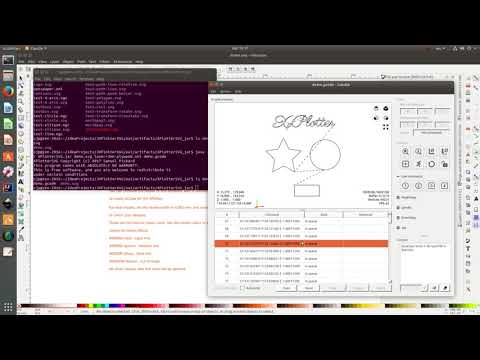
You might already have a design in an editor like Inkscape. To prepare your design for conversion, I recommend that you copy your design into the template I've designed. This template creates a workspace 240x300mm, the working space of the XPlotter.
The XPlotter comes with a variety of tools, and can be used with a variety of media. The tool and the medium you are working with will have an effect on the GCode. For instance, cutting plywood with the laser means a lower feedrate, and for the cuts to be repeated. The same SVG with a pen and paper will mean a faster feed rate, and no repetition.
To specify how you want the tool to behave, you use a material file. There are a few
example files in the project, but these settings are not tried and tested. You should
experiment with the settings and create new material files based on your experience.
If you do create a new material file, share it with me, and I'll add it to this
repository.
The XML file is very simple to read:
<?xml version="1.0" standalone="no"?>
<material name="Laser and 3mm Plywood">
	<Light  	feedrate="800" power="255" repeat="1" hexcode="#ff0000" tool="laser"/>
	<Medium 	feedrate="400" power="255" repeat="1" hexcode="#0000ff" tool="laser"/>
	<Dark 		feedrate="200" power="255" repeat="1" hexcode="#00ff00" tool="laser"/>
	<Cut 		feedrate="100" power="255" repeat="4" hexcode="#000000" tool="laser"/>
	<Raster		feedrate="400" power="255" repeat="1" hexcode="raster"  tool="laser"/>
</material>
You can specify several different tool settings in one material file. In this example, I've created settings for light, medium and dark marks on the medium, plus a setting to cut through the wood.
You can create as many different settings as you need in one file, but ensure that each setting has a unique hexcode.
You can download example material files here.
The exception is handling raster images. You can include raster images (like colour photos) in your SVG and they will be converted. Because you can't set the colour on the raster image then you can just set one specification. The power value will be ignored, it will be calculated by the shade on the pixel of the image that is being drawn. Feedrate and repeat values are used.
In your design you can specify which setting to apply by setting the stroke colour of the line to the hexcode that you've specified in the material file. Lines and marks that don't have a matching hexcode will not be converted, which means that you can put comments and guidelines into your designs that won't be processed.
The XPlotterSVG utility is pretty good with SVG primitives and paths, but some shapes are too complex for it to convert. Text is a good example.
To use text in your design, before you convert, select the text, and the Path, and Object to Path. You wont be able to edit your text now, but it will convert correctly for plotting.
If you find that your XPlotter needs to repeat the same design with different settings to get a good quality cut, then you can use more than one entry for the same hexcode. All the steps will be performed in the order that they appear in the XML
<?xml version="1.0" standalone="no"?>
<material name="Laser and 3mm Plywood">
	<Light  	feedrate="800" power="255" repeat="1" hexcode="#ff0000" tool="laser"/>
	<Medium 	feedrate="400" power="255" repeat="1" hexcode="#0000ff" tool="laser"/>
	<Dark 		feedrate="200" power="255" repeat="1" hexcode="#00ff00" tool="laser"/>
	<Score 		feedrate="800" power="255" repeat="10" hexcode="#000000" dwell="20" tool="laser"/>
	<Burn 		feedrate="100" power="255" repeat="10" hexcode="#000000" dwell="20" tool="laser"/>
	<Finish 	feedrate="400" power="255" repeat="10" hexcode="#000000" dwell="20" tool="laser"/>
	<Raster		feedrate="400" power="255" repeat="1" hexcode="raster"  tool="laser"/>
</material>
Some XPlotter users find that they need to refocus the laser or raise the bed during a cut. You can add a number of seconds to delay after all repetitions to give you a change to make the adjustment by setting the number of seconds in the 'dwell' attribute.
Unlike the software from Pinecode, this program does not disable the 'Pause' button by default. You can create a gcode file with the pause disabled by adding the attribute --nopause as a final command. e.g.
java -jar XPlotterSVG.jar MyDesign.svg laser+card.xml XPLOTTER.G --nopause
- In Inkscape, check that your shapes have the correct hexcode.
- Press CTRL+SHIFT+F to open the Fill & Stroke dialogue boxes
- Select your shapes, and in the Fill tab, set to 'no paint'
- In the Stroke Paint tab, set to 'Flat colour'
- In the Stroke style tab, set the stroke width to 0.001mm Your shape will seem to disappear. Don't worry, it is still there. Zoom and you can see it. Check the places where your shape intersects other shapes to make sure that the lines are the correct length.
- Choose File, Save As... Name the file, and select 'Plain SVG' as the file type