- Collect chargable tokens from users' Card Input and Apple & Google Pay
- For SCA compliant apps, setup payment intents for later confirmation.
- Create a Stripe account and project
- Retrieve a publishable key from the Stripe dashboard
- Requires AndroidX
Include support in android/gradle.properties
android.useAndroidX=true
android.enableJetifier=true- On the Stripe dashboard, go to Settings -> Apple Pay -> Add Application.
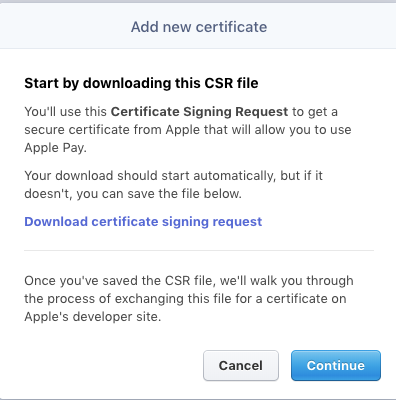
- Follow the instructions that popup to link Stripe with Apple.
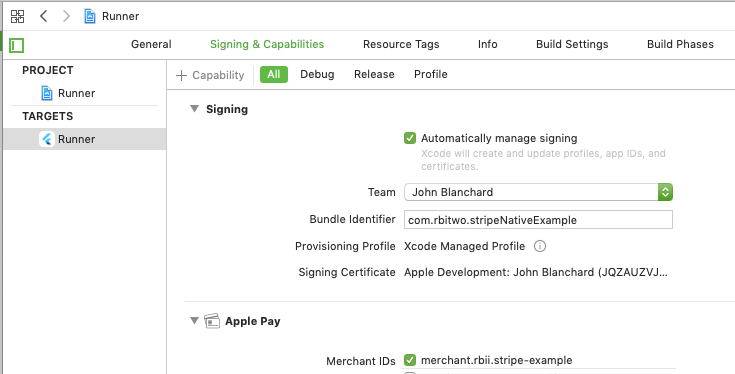
- Take note of your merchant identifier, and open the iOS module in Xcode.
- Navigate the project panel, add Apple Pay under signing capabilites with the merchant identifer created in step 1.
Using publishable key and merchant identifier, ready the app for collecting user payment information. This needs to be done prior to opening card input or a native payment sheet.
var settings = StripeSettings(publishableKey:"pk_test_yZuUz6SqmH4lA7SrlAvYCh003MvJiJlR", merchantIdentifier: "merchant.stripe-example", androidProductionEnvironment: false);
StripePayment.setSettings(settings);Using addSource, collect a chargable token from the user's card information. This token can be used as a source by the Stripe Charge API.
var token = await StripeSource.addSource();Opening Apple & Google pay is done with useNativePay.
var order = Order(20, 1, 1, "EUR");
var token = await StripePayment.useNativePay(order)The Apple Pay sheet spins infront of the user, after using the token, show the user whether the transaction was successful or not.
var chargeSucceeded = AppAPI.charge(token, amount);
StripePayment.confirmNativePay(chargeSucceeded);


