The first rule about the Alvik fight club: Don’t talk about the Alvik fight club.
The project is composed by two components:
- a remote controller
- an Alvik robot
make initto install tools on local pc
- Connect the usb-c to the Alvik and turn on it
make robot-patch-firmware: to upload the patched firmware running on the STM32 (needed to resolve Issue 10)make robot-patch-mpy: to install thedevbranch of the arduino-alvik-mpy code in the robot (needed to resolve Issue 10) and Issue 38.make robot-installto upload theModulinolibmake robot-uploadto upload the code into the alvik- check if the robot is: shows red leds animation on black surface, and steady green leds on white surface.
make robot-get-macto get theMACaddress and print it into the console- Copy the printed MAC address
Wiring
- right motor connected to upper pin
- left motor connected to lower pin
MAC of Robots (Maker Fair Rome 2024):
- Livia robot:
74:4d:bd:a2:08:74previous mac was74:4d:bd:7e:28:70 - Stefano robot
74:4d:bd:a2:1b:bc - Davide robot:
74:4d:bd:a2:27:08 - Alessia robot:
dc:da:0c:22:eb:94
NOTE: the PATCH steps 2 and 3 are no more necessary when the Arduino_AlvikCarrier and the Arduino-Alvik-mpy are merged.
The robot exposes a color calibration mode that can be activated by pressing the ok button.
The robot guides the calibration using different lights code showed on the Modulino Pixels.
The user must move the robot on WHITE and BLACK color surfaces when a specific lights code is shown.
Steps to calibrate the robot 0. Prepare a WHITE and BLACK surface
- Switch on the robot
- Press the
okbutton to enter into thecalibration mode. The mode has the following light codes- WHITE leds countdown: indicate that the robot must be put on WHITE color. At the end of the countdown, the robot calibrates the WHITE color.
- BLUE leds countdown: indicate that the robot must be put on BLACK color. At the end of the countdown, the robot calibrates the BLACK color
- the robot automatically reset itself.
- Connect the controller
- Install Micropython into the controller
- Download the Micropython Installer
- Open the installer and clik
Install Micropythonbutton
make controller-installto install libraries into the controllermake controller-upload robot-mac=<PUT_THE_ALVIK_MAC_HERE>to upload the code and setting the MAC address obtained with themake robot-get-mac(Step 7 of Configure the Alvik robot). Example:make controller-upload robot-mac=74:4d:bd:a0:49:e8
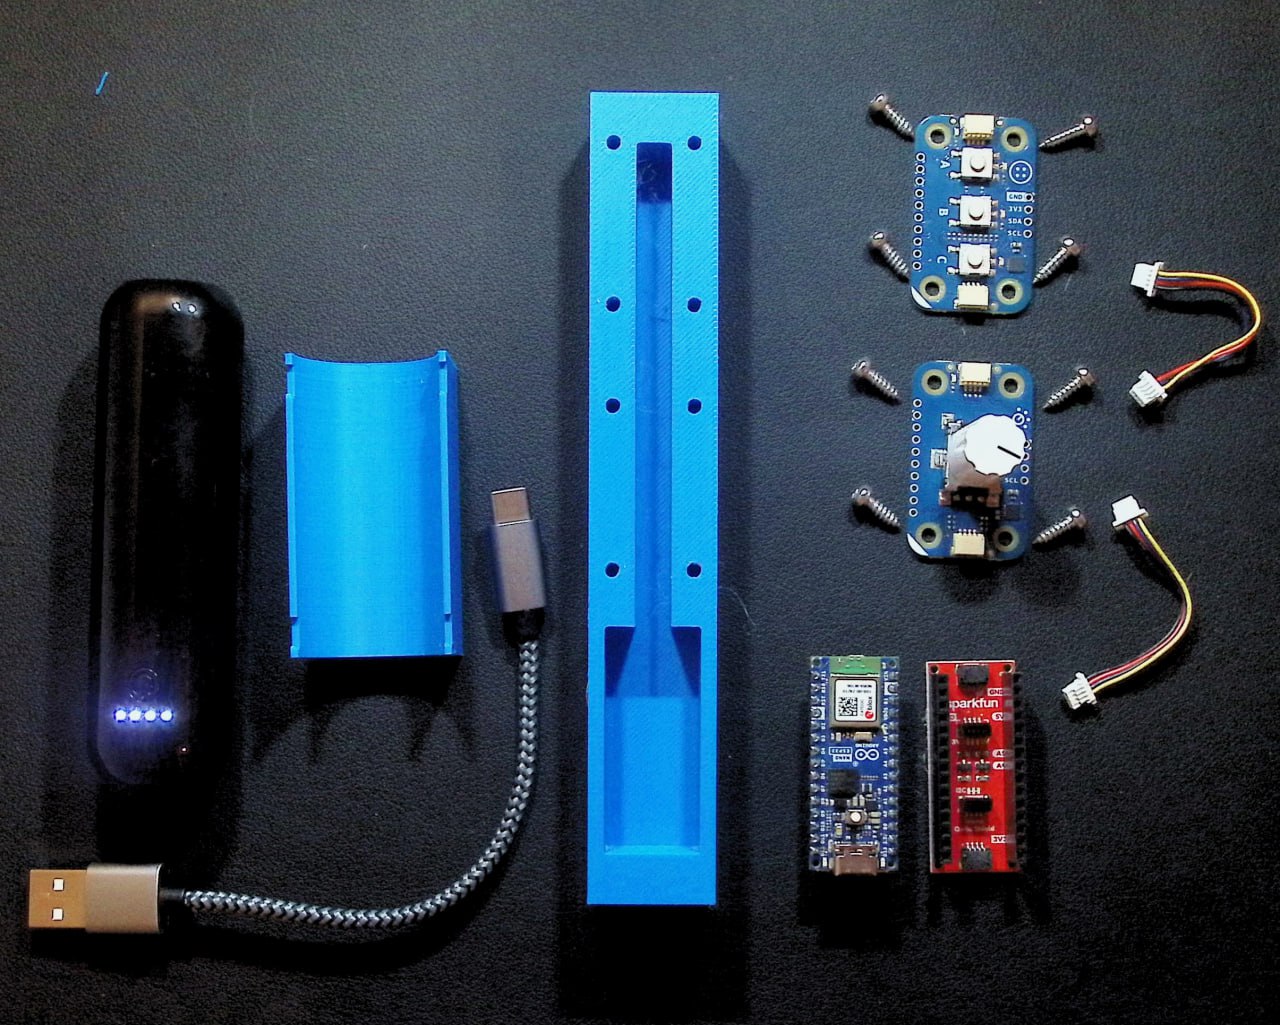
The remove controller is based on Arduino Nano ESP32 and two Modulino (Pixels and Knob).
The remote control consists of the a 3D printed base STL-file and the following components:
| Description | Amount / € | |
|---|---|---|
| 1 | Arduino Nano ESP32 w/ headers | 23,20 € (Arduino) |
| 1 | Modulino buttons | Arduino |
| 1 | Modulino rotary encoder | Arduino |
| 2 | QWICC cables | Arduino |
| 1 | SparkFun Qwiic Shield for Arduino Nano | 2,48 € |
| 8 | M3 x 8 mm cutting screw | 1,20 € |
| 1 | Small USB battery pack | 10€ |
| 1 | 3D printed body |
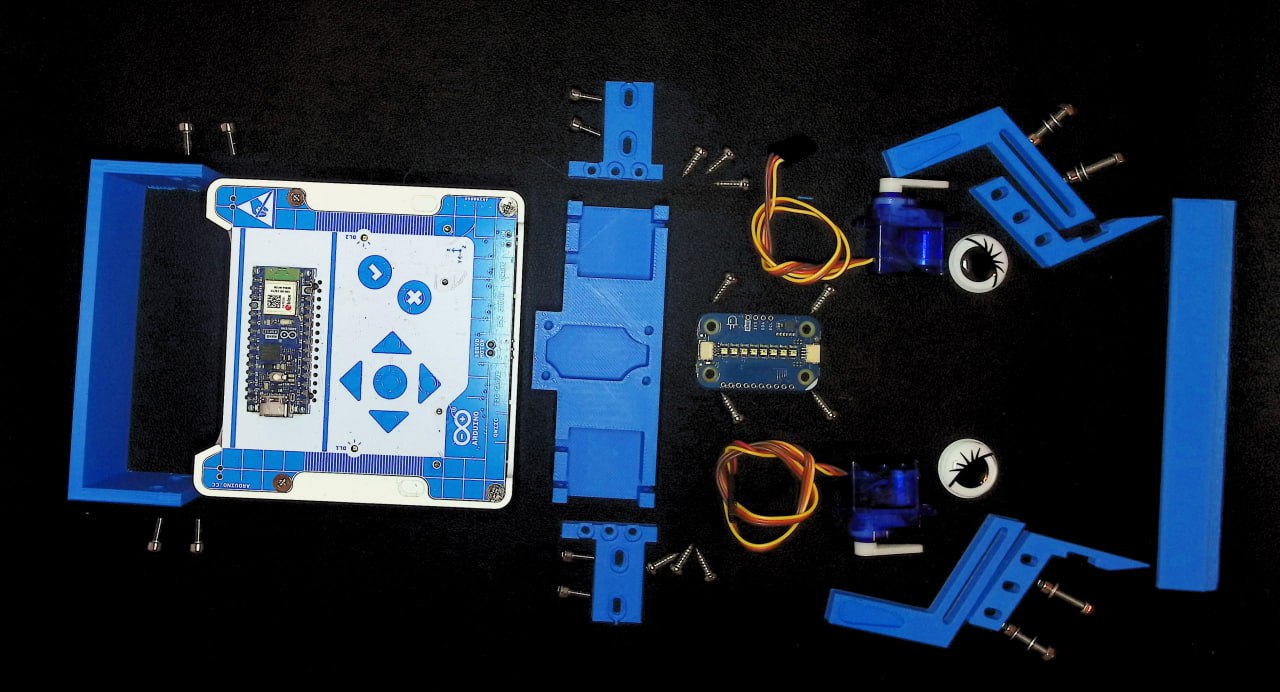
The robot is an Alvik requires the following components:
| Description | Amount / € | |
|---|---|---|
| 1 | Arduino Alvik | 158,60 € (Arduino) |
| 1 | Modulino Pixel | Arduino |
| 1 | QWICC cables | Arduino |
| 2 | Servo motor (180 degree) | ~8€ |
| 2 | Lift arm scoop mount CAD | @aentinger |
| 2 | Lift arm servo mount CAD | @aentinger |
| 1 | Scoop CAD | @aentinger |
| 1 | Cover for actual Alvik front CAD | @aentinger |
| 1 | Top plate for mounting servos and Modulino CAD | @aentinger |
| 2 | Mounting brackets for top plate CAD | @aentinger |
| 1 | Zip ties | @aentinger |
| 2 | Googly eyes | @aentinger |
| 1 | Bumper sticker | @aentinger |
| n | M3 metric and cutting screws | @aentinger |

