Codeblocks in markdown make it very easy for tech people to copy, paste, share code. A good Cloud Engineer uses Codeblocks whenever possible.
Because it allows others to copy and paste their code to replicate or research issues.
- In order to create codeblocks in markdown you need to use three backticks (`)
- Not to be confused with qoutation (')
# Define a Person class
class Person
  # Constructor
  def initialize(name, age)
    @name = name    # Instance variable for the person's name
    @age = age      # Instance variable for the person's age
  end

  # Instance method to return a greeting
  def greeting
    "Hello, my name is #{@name} and I am #{@age} years old."
  end
end
- When you can you should attempt to apply syntax highlighting to your codeblocks
# Define a Person class
class Person
  # Constructor
  def initialize(name, age)
    @name = name    # Instance variable for the person's name
    @age = age      # Instance variable for the person's age
  end

  # Instance method to return a greeting
  def greeting
    "Hello, my name is #{@name} and I am #{@age} years old."
  end
end- Make note of where the backtick keyboard key is located.
- It should appear above the tab key,
- but it may vary based on your keyboard layout.
Good Cloud Engineers use codeblocks for both Code and Errors that appear in the console.
Traceback (most recent call last):
        2: from /usr/bin/irb:23:in `<main>'
        1: from (irb):1
RuntimeError: This is a custom error message
Here is an example of using a codeblock for an error that appears in bash.
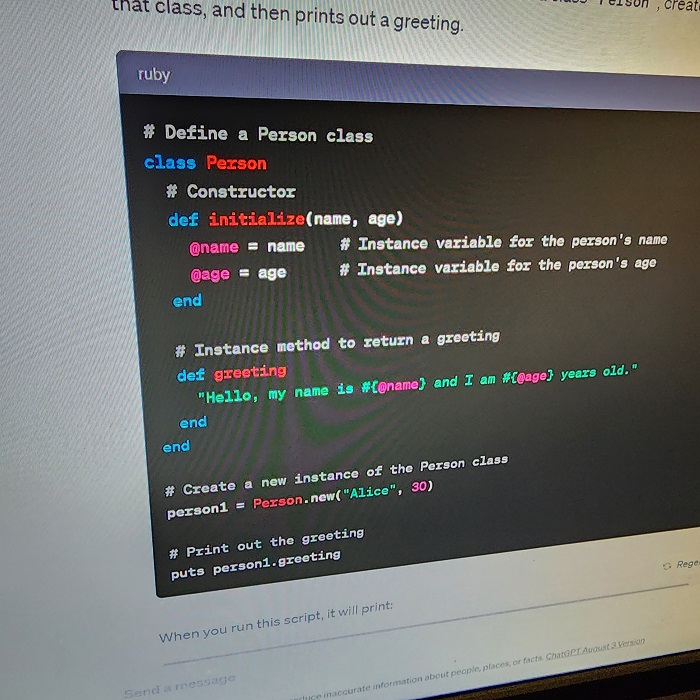
When you can always provide a codeblock instead of a screenshot. If you need to take a screenshot make sure it nots a photo from your phone.
There are certain cases where its okay to take photos with your phone. This is when you are showing something like a keyboard, which does not appear on a computer screen. If it render on your computer screen it should be a screenshot.
A screenshot is when you capture a part of you screen from your laptop, desktop or phone.
This is not be confused with take a photo with your phone.
DON'T DO THIS
This is what a screenshot from your computer should look like
DO THIS INSTEAD
To take screenshots on both macOS and Windows, you can use the following hotkeys:
For macOS:
-
Entire Screen:
- Press
Command (⌘) + Shift + 3 - The screenshot will be saved to your desktop by default.
- Press
-
Selected Portion:
- Press
Command (⌘) + Shift + 4 - Drag to select the area of the screen you want to capture.
- The screenshot will be saved to your desktop by default.
- Press
-
Capture a Window:
- Press
Command (⌘) + Shift + 4, then pressSpacebar. - Click on the window you want to capture.
- The screenshot will be saved to your desktop by default.
- Press
-
Capture Touch Bar (if you have one):
- Press
Command (⌘) + Shift + 6 - The screenshot will be saved to your desktop by default.
- Press
For Windows:
-
Entire Screen:
- Press
PrtScn(Print Screen) key. - The screenshot is copied to the clipboard. You can paste it into an application like Paint or Word.
- Press
-
Active Window:
- Press
Alt + PrtScn - The screenshot of the active window is copied to the clipboard. You can paste it into an application.
- Press
-
Selected Portion using Snip & Sketch (available in recent Windows versions):
- Press
Windows + Shift + S - Your screen will dim, and you can select an area to capture.
- The screenshot is copied to the clipboard. You can paste it into an application.
- Press
-
Using Snipping Tool (available in older Windows versions):
- Search for "Snipping Tool" in the start menu.
- Open the application and click on "New" to take a screenshot.
- Save the screenshot.
For both operating systems, there are also third-party applications available that offer more advanced screenshot functionalities, but the above methods are built-in and don't require additional software.
Github extends Markdown to have a list where you can check off items. [1]
- Finish Step 1
- Finish Step 2
- Finish Step 3
GitHub Flavored Markdown (GFM) supports emoji shortcodes. Here are some examples:
| Name | Shortcode | Emoji |
|---|---|---|
| Cloud | :cloud: |
☁️ |
| Cloud with lighting | :cloud_with_lighting |
🌩️ |
You can use the following markdown format to create tables:
| Name | Shortcode | Emoji |
| --- | --- | --- |
| Cloud | `:cloud:` | :cloud: |
| Cloud with lighting | `:cloud_with_lighting` | 🌩️ |
Github extends the functionality of Markdown tables to provide more alignment and table cell formatting options. [2]
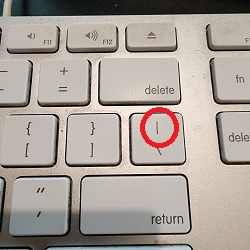
- Make note of where the pipe keyboard key is located.
- It should appear above return or enter key
- but it may vary based on your keyboard layout.


