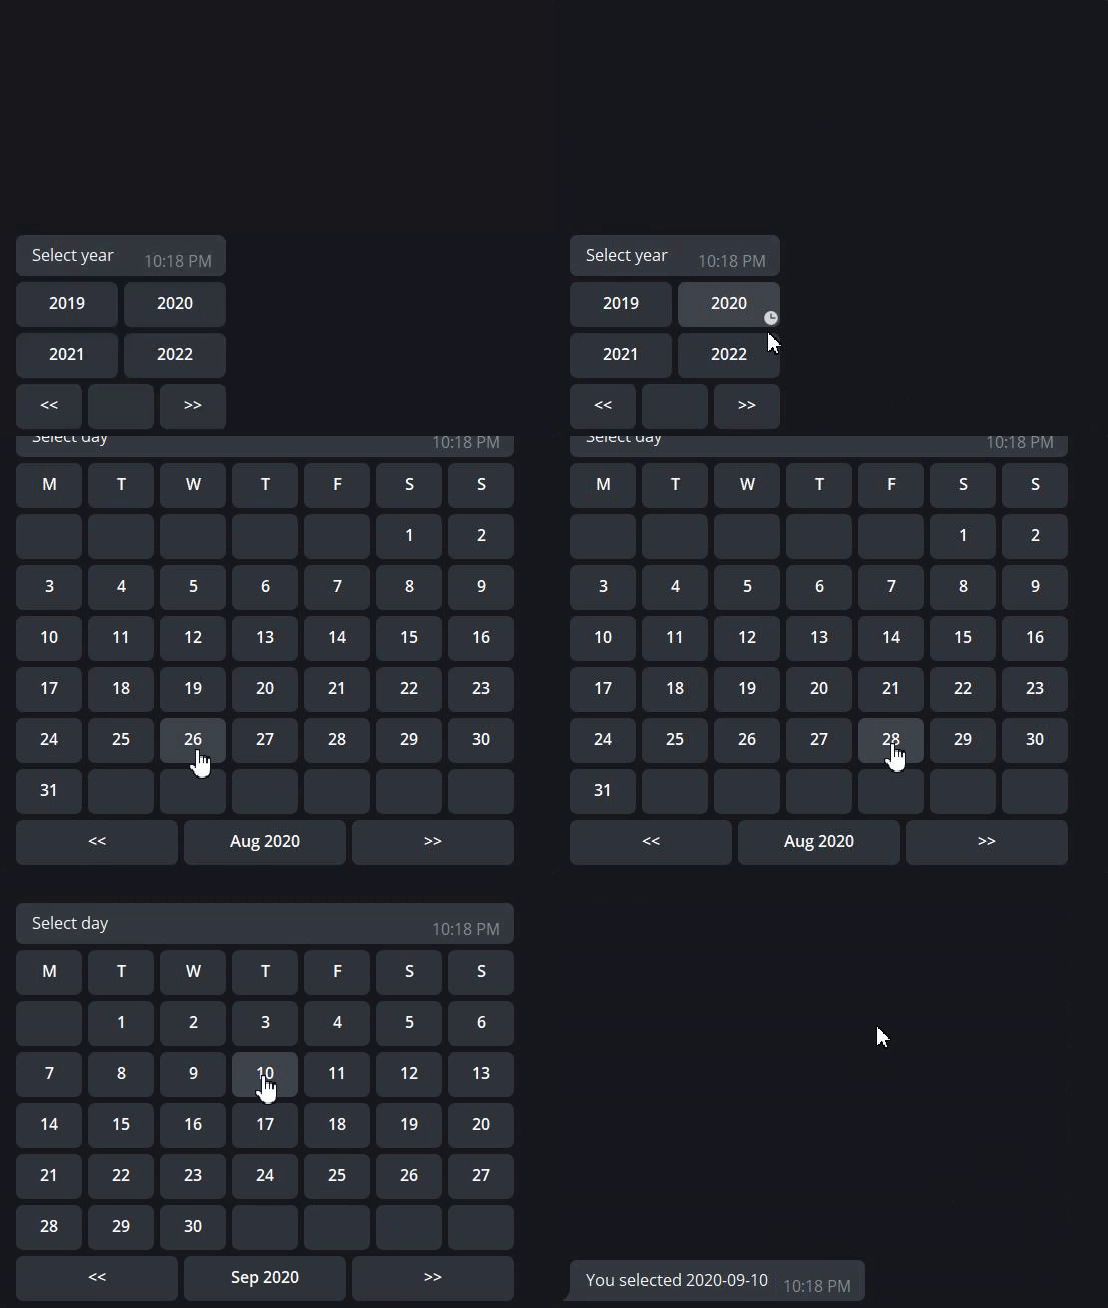
Very simple inline calendar for your bot.
This library is tested on Python 3.6 and 3.7.
pip install python-telegram-bot-calendarThere is one main class - DetailedTelegramCalendar that can be used as follows. This is the example for pyTelegramBotAPI library. Other libraries are also supported.
from telegram_bot_calendar import DetailedTelegramCalendar, LSTEP

...
@bot.message_handler(commands=['start'])
def start(m):
    calendar, step = DetailedTelegramCalendar().build()
    bot.send_message(m.chat.id,
                     f"Select {LSTEP[step]}",
                     reply_markup=calendar)


@bot.callback_query_handler(func=DetailedTelegramCalendar.func())
def cal(c):
    result, key, step = DetailedTelegramCalendar().process(c.data)
    if not result and key:
        bot.edit_message_text(f"Select {LSTEP[step]}",
                              c.message.chat.id,
                              c.message.message_id,
                              reply_markup=key)
    elif result:
        bot.edit_message_text(f"You selected {result}",
                              c.message.chat.id,
                              c.message.message_id)
In start handler the calendar is created. Several arguments can be passed:
calendar_id- small integer or string, used for calendar identification. It used when you need several different calendars (default - 0)current_date-datetime.dateobject, initial date value (default - today date)additional_buttons- 1D list of buttons that will be added to the bottom of the calendarlocale- eitheren,ru, oreo, can be added moremin_dateandmax_date- both are used as min and max values for the calendar
As you can see, special function that is provided should be passed to callback query handler. It will automatically work. The function takes only one argument - calendar_id that is 0 by default.
In the body of the handler function you need to call process function on callback data. WARNING! You need to create the calendar object again if it was not saved before.
The function process return tuple of size 3 - result, keyboard, step.
result-datetime.dateobject if user finished selecting. OtherwiseNonekeyboard- inline keyboard markup if the result is not ready. OtherwiseNonestep-YEAR,MONTH, orDAYif not ready.Noneis also possible if there is no change in keyboard.
You can create as many calendars as you want. However, in order to handle them properly set different calendar_id's when you want to distinguish them. Take a look at examples.
In the class constructor min_date and max_date - both are used as min and max values for the calendar. If you add them, the calendar will not show undesired dates. Example:

You can also write your own code. One of the examples is redefining the steps order.
In the package you can find WMonthTelegramCalendar and WYearTelegramCalendar that start from day and month selecting, not from year.
You can also redefine style parameters. Example:
class MyStyleCalendar(DetailedTelegramCalendar):
    # previous and next buttons style. they are emoji now!
    prev_button = "⬅️"
    next_button = "➡️"
    # you do not want empty cells when month and year are being selected
    empty_month_button = ""
    empty_year_button = ""
You will get:
your_translation_months = list('abcdefghijkl')
your_translation_days_of_week = list('yourtra')

class MyTranslationCalendar(DetailedTelegramCalendar):
    def __init__(self, **kwargs):
        super().__init__(**kwargs)
        self.days_of_week['yourtransl'] = your_translation_days_of_week
self.months['yourtransl'] = your_translation_months- simple_pytelegrambotapi.py - simple example with pyTelegramBotAPI
- simple_aiogram.py - simple example with aiogram
- simple_telethon.py - simple example with telethon
- custom_translation.py - custom translation of calendar
- date_ranges.py - define date ranges for the bot
- redefine_style.py - simple example of redefining styles
- several_calendars.py - several calendars in one bot
Contributions are what make the open source community such an amazing place to be learn, inspire, and create. Any contributions you make are greatly appreciated.
- Fork the Project
- Create your Feature Branch (
git checkout -b feature/yourFeature) - Commit your Changes (
git commit -m 'Add some yourFeature') - Push to the Branch (
git push origin feature/yourFeature) - Open a Pull Request
- Artem Bakhanov - @artembakhanov
This project is licensed under the MIT License - see the LICENSE file for details


