-
This is an example repository for Trading Strategy framework to get started bringing your algorithmic trading strategy to DEXes and DeFi markets
-
This repository contains multiple example backtesting notebooks to get started
-
The examples should get you up to the speed how to backtest your strategies on both DEX and Binance CEX data
Got any questions? Pop into our Discord.
- Trading Strategy community Discord server
- Trading Strategy website
- Blog
- Telegram channel
- Newsletter
In order to get started you need
- Github user account
- Basic Python and data science knowledge
- Python scripting
- Pandas
- Jupyter Notebook
- Basic algorithmic trading knowledge
- Understanding price chart and price action
- Technical indicators
If you use Github Codespaces, no additional software is needed, you can do the first tests in your web browser.
You can either run and edit these examples
- In cloud, in your web browser, using Github Codespaces (very simple, but slower)
- Locally using Visual Studio Code (faster, but more expertise required)
- Any Python editor you wish (super fast, tailored to your flavour, but senior Python expertise required)
You can find these example strategy backtests.
Individual backtests:
- ETH: fast exponential moving average and slow exponential moving average example strategy
- Easy complexity
- 1h timeframe
- One of the simplest technical indicator-based trading strategues there is
- MATIC: An RSI and Bollinger bands breakout strategy for MATIC using Binance CEX data
- Easy complexity
- 1h timeframe
- BTC: An ATR-based breakout strategy for BTC using Binance CEX data
- Average complexity
- 15m timeframe
- Adds a market regime filter based on daily ADX indicator
- BTC: An ATR-based breakout strategy for WBTC on Uniswap v3 and Arbitrum
- Same backtest as above, but using Uniswap price feed instead of a centralised exchange
- Highlights some of the difference in data quality between DEX and CEX
- Multipair 15m: An ATR-based multipair breakout strategy using Binance CEX data
- Same as above
- Trades all BTC, ETH and MATIC in a single strategy
- Multipair 1h: An ATR-based multipair breakout strategy using Binance CEX data
- Same as above
- Instead of trading a 15-minute timeframe, this backtest trades 1h timeframe with a 24-hour point of interest window
- Portfolio construction
- A portfolio construction strategy example
- Trades anything on Polygon DEXes and contains examples of how to filter out for bad trading pair data
- Takes a list of ERC-20 addresses as input, and creates a trading universe based on these
- Constructs a spot market portfolio with daily rebalances
- Average complexity
- Alternative data
- Reads custom signal data (sentiment data) from CSV file and incorporates it as the part of the trading strategy
- Otherwise same as above
- Average complexity
- Liquidity risk analysis
- Same as above
- Includes liquidity risk analysis in the strategy by trading only pairs with minimum liquidity
- Expands dataset to include all Polygon pairs and their liquidity data
- Needs a separate script to prepare the dataset for the backtests
- High complexity
- Volume-based indicators
- An example of using a volume-based indicator, in this case Money Flow Index, to open and close positions
- Uses ETH daily price from Uniswap v3 on Ethereum
- Low complexity
Grid searches run several backtests over multiple strategy parameter combinations. This allows you to "brute force search" better strategies and explore the behavior of a strategy with different parameters.
- Multipair 1h: grid search
- Same as
Multipair 1h: An ATR-based multipair breakout strategy using Binance CEX dataabove - We have converted
Parametersto individual parameter values to searchable option lists - Grid search over parameters and see if it improves the performance
- Same as
In this tutorial, we open a single backtest in Github Codespaces and run it. You can do all in your web browser using your Github account, no software is needed.
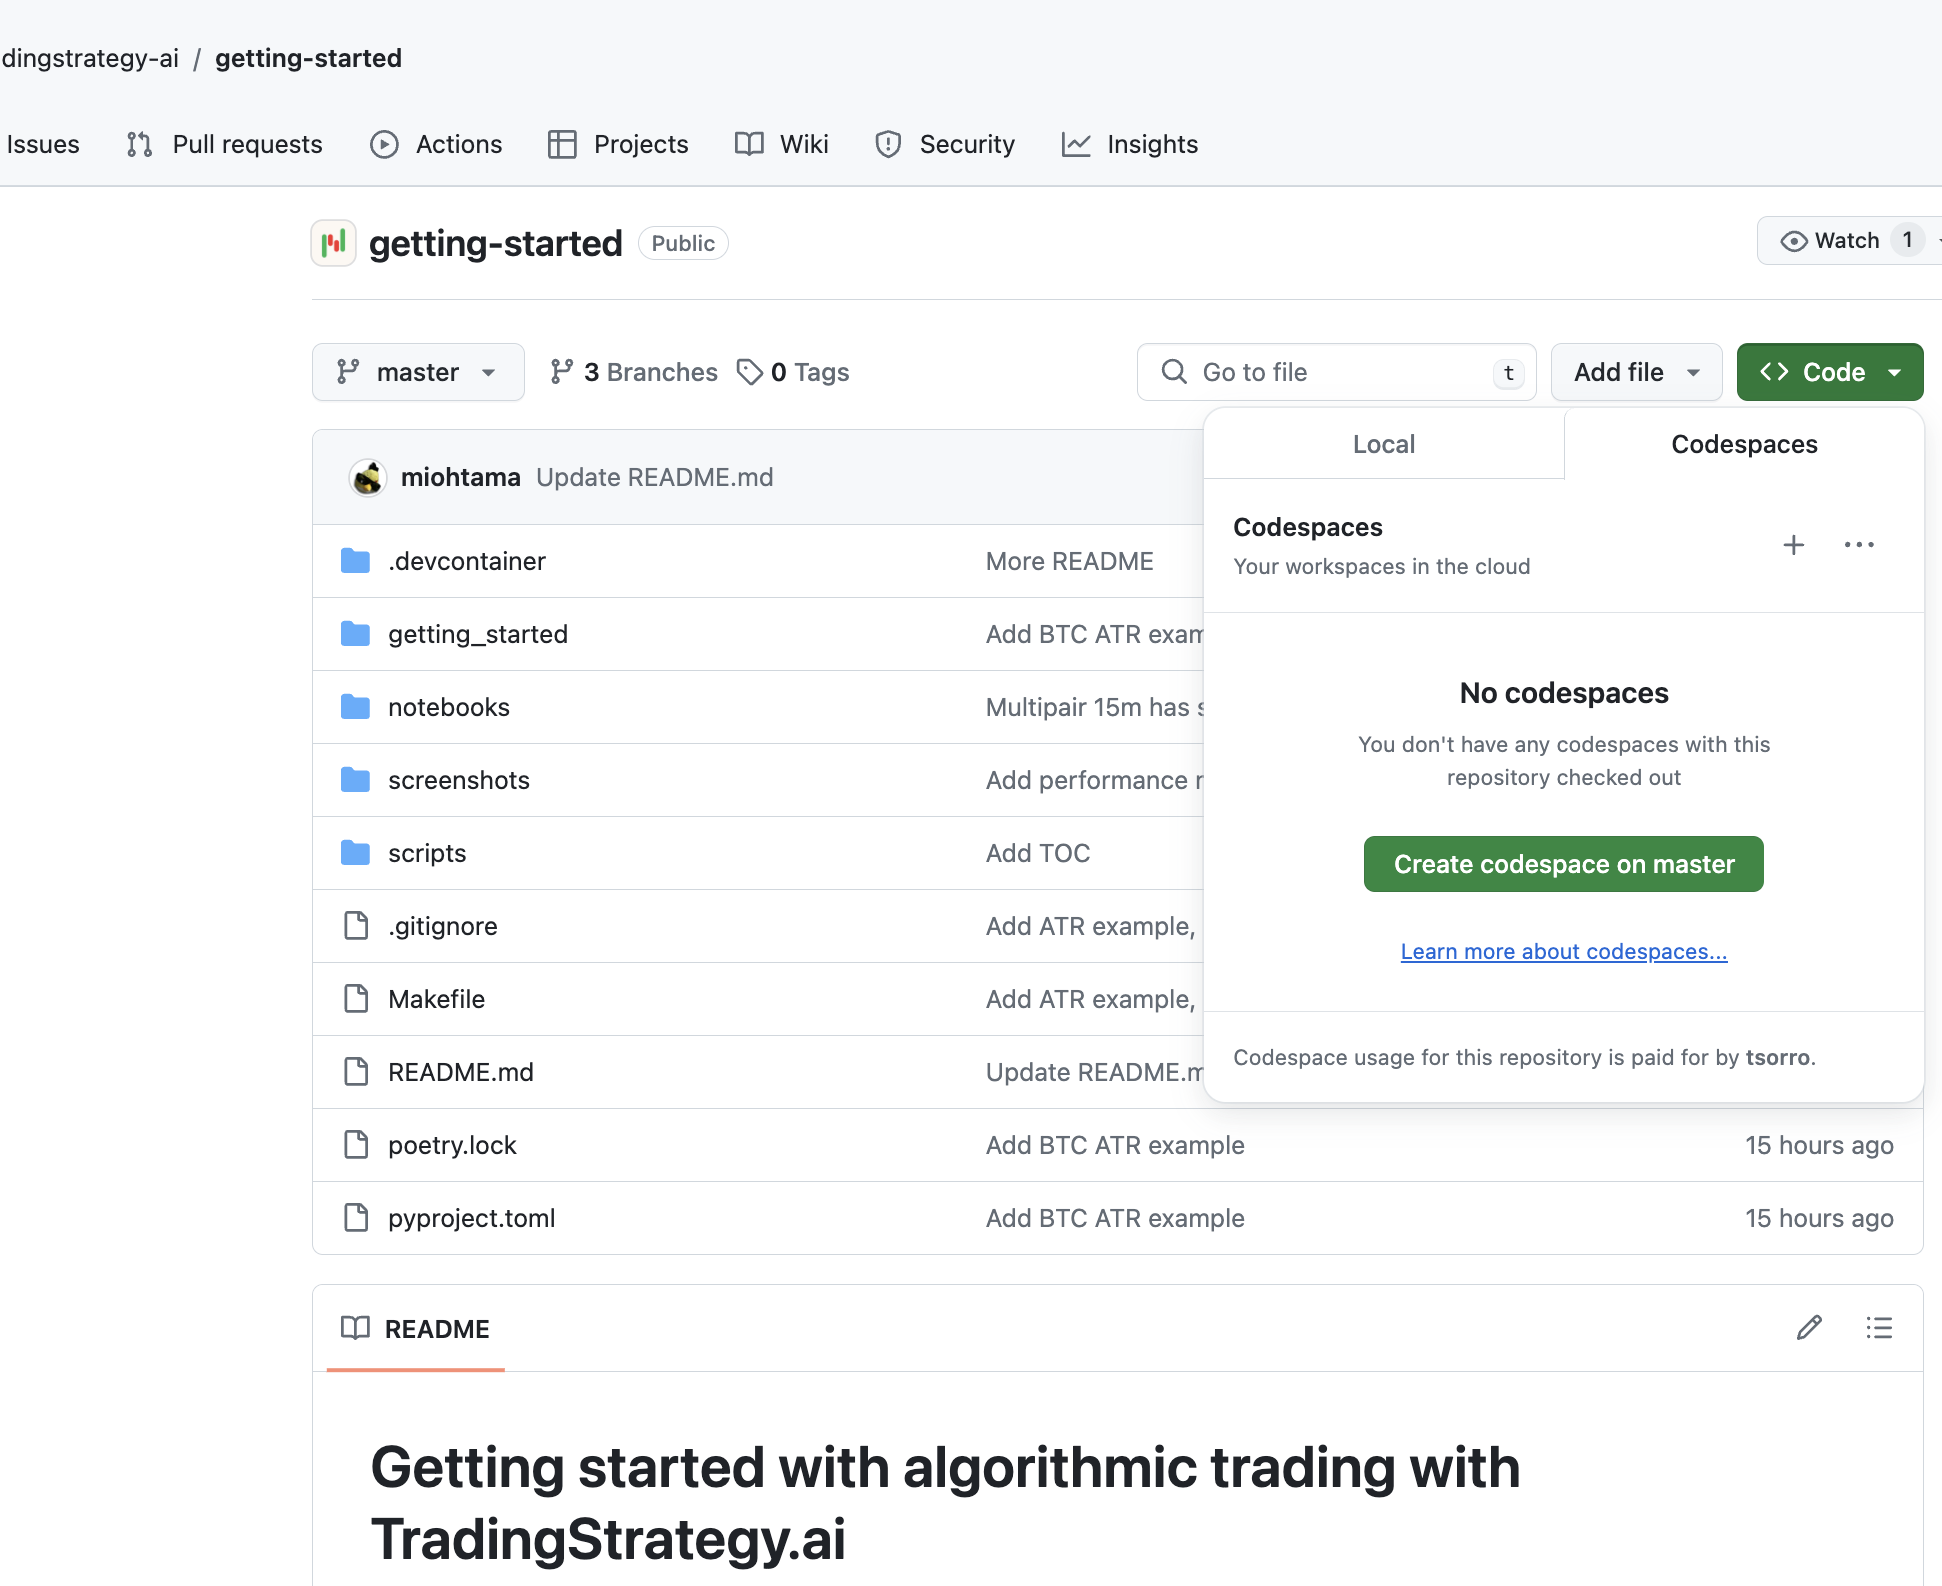
Press Create codespace master on Github repository page (master refers to the primary development branch of Git version control system).
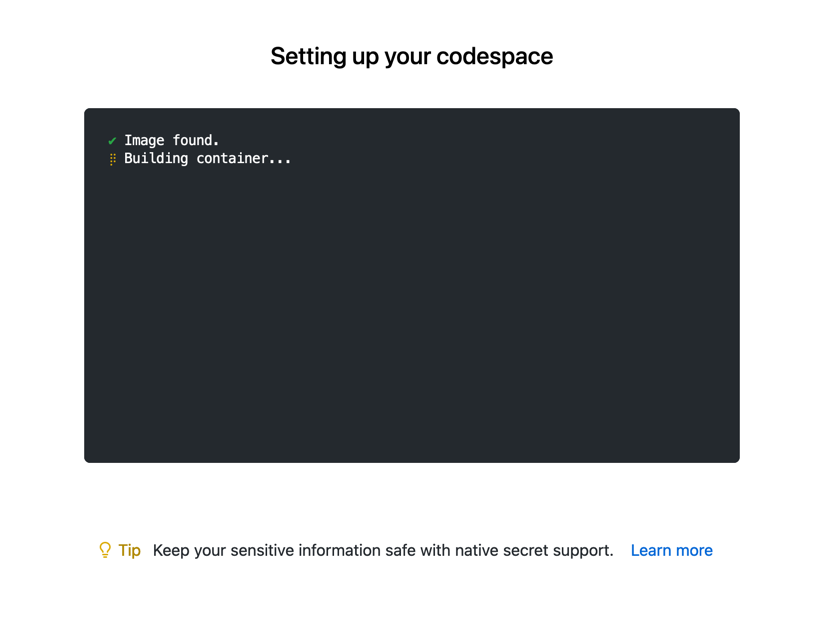
This will give you a page showing your codespace is being launched.
After a while your Github Codespaces cloud environment is set up. The first launch is going to take a minute or two.
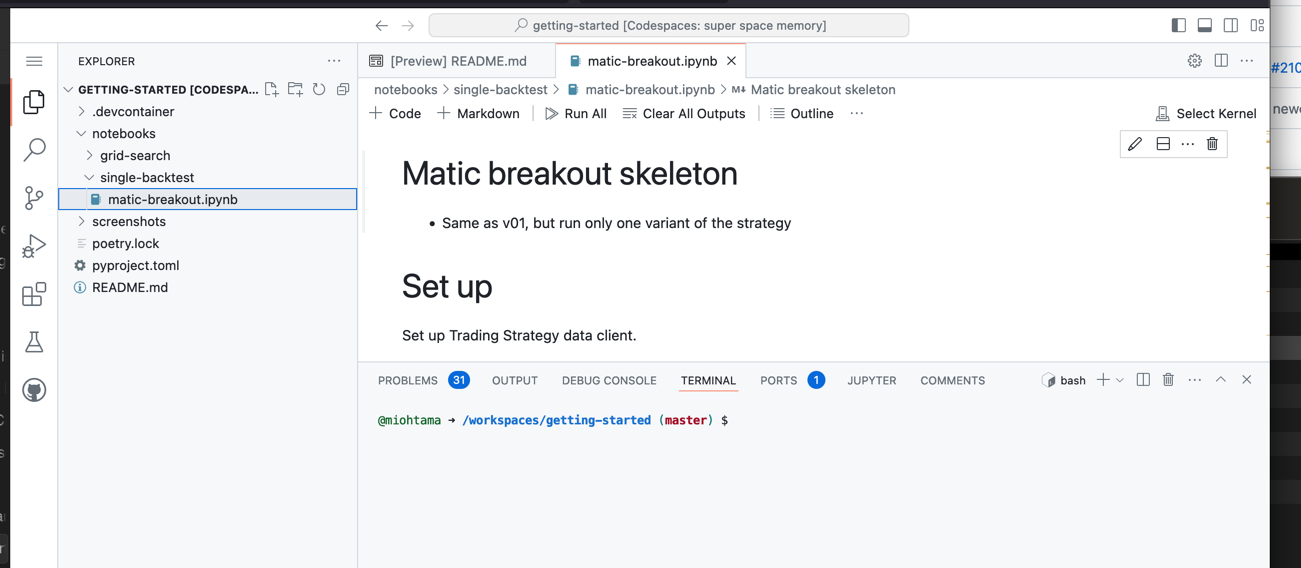
In the file explorer on the left, open a notebook: notebooks/single-backtest/matic-breakout.ipynb.
After opening the notebook click Clear all Outputs and then Run all button Jupyter toolbar.
When you are asked to Select kernel. Choose Python Environments.. and then /usr/local/bin/python.
You should see now notebook running, indicated by the progress indicator and run time count down in each notebook cell.
After the notebook is running successfully, you should be able to press Go to on the toolbar and see the backtesting progress bar going on. You will see a separate progress bar for 1) downloading data (done only once) 2) calculating technical indicators 3) running the backtest.
Note: If you see a text "Error rendering output item using 'jupyter-ipywidget-renderer. this is undefined. it means Visual Studio Code/Github Codespaces has encountered an internal bug.
In this case press Interrupt on a toolbar, close the notebook, open it again and press Run all again. It happens only on the first run.
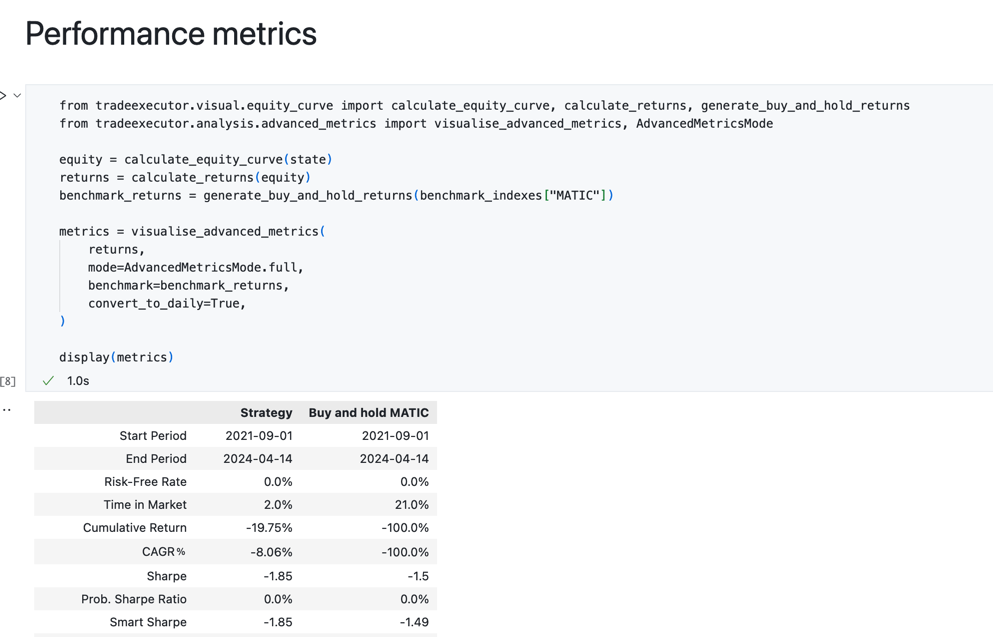
Shortly after this backtests results are available.
You can find them by scrolling down to the different sections
- Equity curve
- Performance metrics
- otehrs
And now you are done with our first backtest! Continue below to learn more how you can get started with your own strategies.
This is an alternative for Github Codespaces that runs on your local computer (fast).
- Check out this Github repository to your local computer
- Open the checked out folder in your Visual Studio Code
- Visual Studio code should prompt you "Do you wish to run this in Dev Container"
- Choose yes
- Follow the same steps as in How to run on Github Codespaces above
Note: If you run on a local sometimes the Jupyter Notebook toolbar does not appear with Run all etc. buttons. Often Visual Studio Code fails to automatically install its extensions on the first run: in this case you need to restart your Visual Studio Code and reopen the notebook.
For seniors, with full source code checkout:
make trade-executor-clone  # Git clone with submodules
poetry shell
poetry installEach strategy backtest notebook will consist of following phases.
- Set up: Create Trading Strategy client that will download and cache any data
- Parameters: Define parameters for your strategy in
ParametersPython class - Trading pairs and market data: Define trading pairs your strategy will use and method to construct a trading universe using
create_trading_universe()Python function. This function will take your trading pairs and additional information (candle time frame, stop loss, needed lending rates) and construct Python dataset suitable for backtesting. See documentation. - Indicators: In this phase, you have
create_indicatorsfunction. You define indicator names, parameters and functions for your strategy. Indicators are defined as a separate step, as indicator calculation is performed only once and cached for the subsequent runs. See documentation. - Trading algorithm. Here you define
decide_tradesfunction that contains the trading strategy logic. It reads price data and indicator values for the currenttimestampof the decision cycle. Then it outputs a list of trades. Trades are generic byPositionManagerof which functionsopen_positionandclose_positionare used to open individual trading positions. - Backtest: This section of the notebook runs the backtest. Here is a progress bar displayed about the current running backtest,
and any errors you may encounter. We use function
run_backtest_inline()that gives us the backtest'sstatePython object, which contains all the information about the backtest execution we can then analyse. - Output: You can have various visualisation and tables about the strategy performance. These include e.g. Equity curve, Performance metrics (max drawdown, Sharpe, etc) and Trading statistics.
This is a rough skeleton. You mix and match can easily add your own trading signals and output charts using with all tools available in Pandas and Jupyter notebook ecosystem. There aren't any limitations on what you can do.
The grid search is the same invididual backtest with very minimal changes
- Parameters class has single parameter values replaced with Python lists to explore all the list combinations in the grid search
- Backtest runs
perform_grid_searchinstead ofrun_backtest_inline - Output shows summaries backtest results and heatmaps
Grid search are taxing on a computer, so we recommend running grid searches only on local powerful computers.
You can edit the backtest notebook
- Edit any changes
- Press Clear output
- Press Run all to rerun everything
Any function will give it's Python documentation as a tooltip on mouse hover.
Some questions on how to get things done.
- Have a trading idea
- Create the first prototype with data sources and indicators using centralised exchange data like Binance
- Decentralised market have often too little history to make any kind of analysis
- You can use streamlined tools like TradingView for the first iterations
- Then convert your strategy skeleton to Python code
- Check the robustness of the strategy
- After you are happy with the initial strategy version you can perform some robustness tests
- Validate your backtest robustness by testing shifting timeframes around
- After happy with the strategy, Change the backtesting to real decentralised data
- Convert the backtest notebook to a Trading Strategy Python module
- Launch the live trading strategy using Trading Strategy oracle on DEXes
- Add a vault like Enzyme so that others can deposit into your strategy
TODO
TODO
- Learn algorithmic trading
- Trading Strategy documentation
- About Github Codespaces
- About Visual Studio Dev Containers
Note to Mac users: The current Docker image is built for Intel platform. If you run Dev Container on your Mac computer with Visual Studio Code, the backtesting speed is slower than you would get otherwise.
- Rebuilding Dev Containers for Github codespaces
- Dev Container CLI
- Microsoft default Dev Container image for Python
- Dev Container Github Action
- Dev Container JSON reference
Testing the Dev Container build:
devcontainer up --workspace-folder . Checking installed packages wihtin Codespaces terminal:
pip listRunning the example notebooks using command line ipython (useful for debugging)
ipython notebooks/single-backtest/bitcoin-breakout-atr.ipynb


